How to Enhance a Kick with Layers of Parallel Processing
02/20/2014

In this song I’ve got a kick and I have an 808, and my goal is to get them working cohesively in the low end. This song is called My Supreme Being, it’s from Pablo Villatoro. I’m going to hit play, and then we’ll dive in to what we’ve got going on.
Actually, I want to skip ahead and give you some of the hook, so from here-ish, right there.
You hear Pro Tools 10 glitch in there on me. If you’re on 10 man I highly recommend 11, a little plug for Avid there. Okay, so before I jump in and show you the low kick and the level and all that, let me first say last night I watched the mixing with compression series from Matthew Weiss and I remembered things that I had forgotten. I learned some new things, and his way, if you haven’t seen it I’m going to give a little spoiler, he blanks out the screen. And he has you listen to what the compressor is doing as he
bypasses it and then brings it in, so that you can get an idea and you can start to hear the sound of the compressor and what it’s doing to the shape of the sound, rather than just filling out some settings and tweaking and going from there.
That’s actually been my approach, after watching it I’ve got a whole new mindset to how I’m going to be using compression, so shout out to him for that, and kudos to them for putting that together.
In this song, the 808, I actually was inspired by a post that Matthew had back in October or November of last year, and it was on how to mix 808s. He had a written blog and he posted about how he used a decapitator to add character and actually help the 808 cut through on smaller speakers, and I actually took that, implemented it, tweaked it to fit this song, and it worked extremely well and I’m pretty stoked about it. Thanks to Matthew and all his hard work paying off, helping us out, and now we’ll get to this.
So we’ve got the low kick, you guys see that here, that’s going out to a kick level. The kick level is an aux, its right down here, it’s receiving the signal kick level. The kick is also being parallel compressed, and that’s right here, you got the 1176 CLA and the SPL transient designer, we’ll get into that in a second, but that’s the parallel compression chain also going out to the kick level.
So I’ve got the dry and then I’ve got the parallel compressed, and they’re meeting at an aux so that I can take that blend that I’m happy with, once I get that blend, I can take that blend and increase the overall volume of the kick there. Excuse me, as well as apply effects that will be consistent with that kick sound, that tone. I can treat it with more compression, some distortion, EQ, EQ those together so that I get a nice sound with it.
All kinds of stuff you can do with it there, so pretty much in this video I want you to get the gist of that first, and then I’ll kind of walk you through and maybe show you a couple things that I’m doing where I’m getting fancy on some stuff, but the overall concept right there is the dry, the parallel compressed, pulling up the parallel compression to give you that blend, and then once you’re happy with that blend, using the aux track kick level as a form of control over all the stuff that I just talked about.
To help you out let’s play the kick by itself with no parallel compression, and let’s actually get rid of all this stuff too. Let’s hear what that kick is doing by itself.
Cool, getting kind of dirty. Let’s bypass and show you what the client sent me.
The reason why I didn’t like that was, I mean I like it, but for this song when the 808 comes in that kick had a tone to it, and I didn’t want it to have a tone; I wanted it to be more of a felt kick-you-in-the-butt-when- you’re-driving-down-the-road-and-the-subs-are-hitting-you-in-the-rear. I didn’t want the tone of the 808 and the key of that and the pitch of this kick to be colliding or clashing, and I definitely didn’t want to have to tune them together because I already did tune the 808 in Melodyne. Listening a little bit closer, the sample that I chose, let me pull this up, I think it was an EDM sample.
It looks like I’m sucking out some of the sustain and release to try and tighten that sound up, and then even further with the transient designer, adding some attack, pulling a little sustain out. That sound, as we showed, is getting sent to the parallel compression, now let’s pull that in, hear what that’s doing, bypass some of this.
Sounds kind of crazy. In this song I didn’t want any top end in that kick. Excuse me, I just wanted it to be, like I said, that low end that just kind of kicks you in the rear while you’re driving down the road.
So the Pultec and these EQs, more than likely if I pull them up I’m boosting the junk out of the 20 Hz there, attenuating everything at eight, and then probably if I pull up the fab filter, yeah, so you see I’m pulling out pretty much everything, just low end, and then I even got kind of crazy with it. Don’t copy those settings, there’s nothing there to see, and then ignore the clipping, I like the distortion; I wanted this to be aggressive, I wanted this to have clipping, I wanted it to distort, and maybe I got a little carried away with it, but I love what it did. This song was released already, so don’t judge me. Let’s listen one more time to what we’ve got going on there with everything in the chain.
I still have the kick loud there, but I’ll pull that back down and we’ll listen one more time.
So that’s the kick, and if you guys have seen the vocal tutorial or the snare drum tutorial you know that’s the same technique with just a little bit different twist on it.
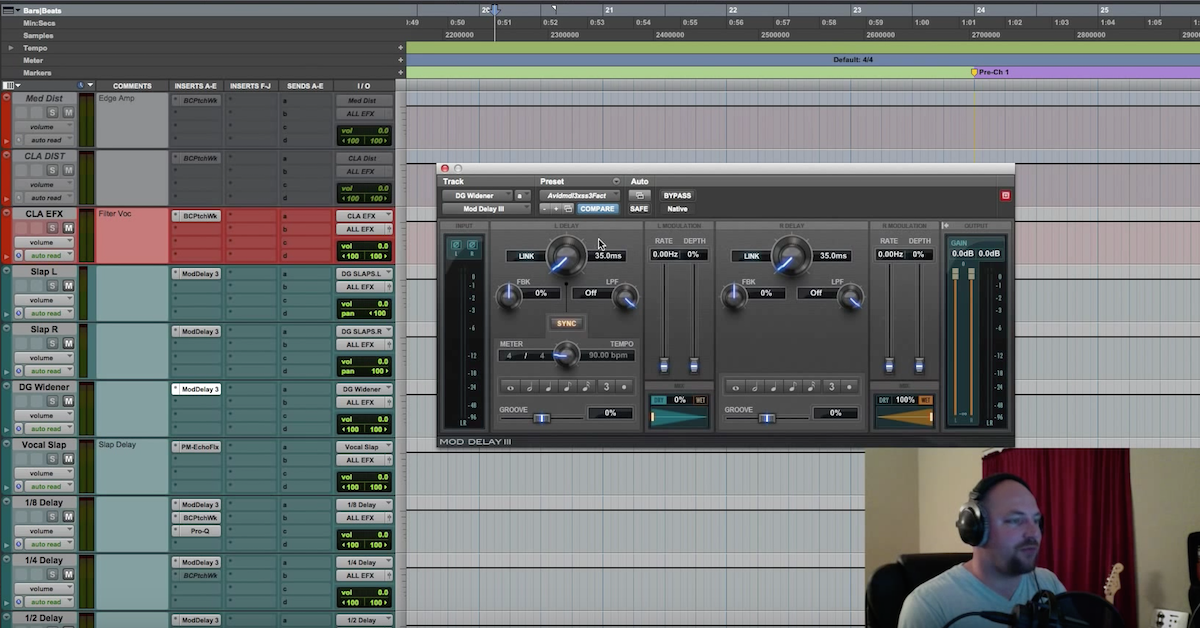
I do want to talk about the 808, this wasn’t meant to be an 808 video but let’s go ahead and jump in. Something that I did that I liked and I showed you with the snare tutorial is I used the widener. The widener technique is a stereo imaging trick with delay. If you look here I’ve got 18.79 milliseconds on the left, 21 on the right, and that’s keeping within the haas effect and I’ve got 0% mix on the left and 100% on the right. Let’s show you a before and after of the 808 here, and let’s solo this guy right here. The before and after, this is with no widener.
Now I’m going to add the widener.
So you can hear that that’s given it a nice effect. Something you may try, this is what I do a lot, is I will actually automate that widener to be on at the hook, so the song gets bigger, wider, taller, fuller, all that good stuff. I tend to prefer my low end to be central so the kick and the bass and all of that to be mono and to be right down the middle and give room for the other elements, but sometimes it’s just awesome to fill the low end and just kind of push it and do something different.
One more time with this, let’s show the… Actually, something else to show you guys would be the kick is side chaining the 808. I don’t know if many people do that, but I do it and when I mix a lot of rock and gospel and other things where I’ve got the kick and the bass competing and I do the whole side chain approach, but that’s now what I want, what do I want? I want this, the C6 side chain right here. So this kick level, remember we’ve got the blend, the kick level is sending out to the kick SC, for side chain. That’s being triggered right here on the C6, and that is going to be pushing down on this compressor 35 Hz with kind of a wide band there, just going crazy with the settings on this song, and let’s take a listen at what it’s doing. Let’s solo the 808 and the kick together.
Essentially what I’m trying to do there is give the kick the dominance on the low end for the punch. When it first comes in and it hits it hard I want the kick to be what you feel when you’re driving or when you’ve got your big system going, I want the kick to be dominant there. So let me bypass that side chaining so you guys hear what it’s doing.
So if you’re on a bigger system you’re going to hear that the low end from the 808 is just overbearing, it’s dominating that kick, and when I engage it.
It’s essentially got some of that EDM feel where there’s that pumping going on, where it’s pulling back up and it’s coming after the kick hits, which is something that I really liked on this song, I thought it worked, and it’s a technique I want.
I hope you guys are learning something from these, next up is bass, and I’m going to pull up in a rock tune, maybe a gospel track, some incredible musicians I’ve been blessed to work with.
Shoot me a message, you guys have been messaging me at david[at]davidglennrecording.com, I love reading them and I’m listening, I love how you guys are asking about my template, my stereo bus, what I’m doing with automation, and trust me, all those videos are coming. You keep tuning in and that content is going to be coming to you shortly. So once again davidglennrecording.com, theproaudiofiles.com, and we’ll catch you on the next one.
Elevate Your Ears