7 Advanced Mixing Techniques That Can Get You in Trouble
05/7/2013
Article Content
This article is about some techniques that can really take your sound up a notch or totally screw up your mix. These aren’t techniques I use all the time, but enough to warrant a mention.
If you’ve got some experience under your belt, here’s a few things you can do when the situation warrants it.
1. Multiple Outputs for Group Sends
This is useful if you know you’re going to be doing some parallel processing. Most commonly I’ll use this approach on the drum bus.
Why? Well, if you use a single output into two send channels you get the same levels going to both. If you have independent control, you can set them evenly to begin with and then apply your compression to the parallel track. From there, you have finer control over how much of each element is going into the compressor. Once you blend your parallel compression in, you might find that while your cymbals may start to fluff up nicely, your snare and kick are starting to “pancake” out. By individually controlling the output levels you can fine tune the compressor’s reaction. Why not do this from auxiliary sends? Because DAW aux sends tend to be glitchy enough that there can sometimes be a delay on the return. It doesn’t help you out if you’re comb filtering your return when the goal is to get a fuller sound.
2. Leaving the Midrange Bump in Vocals
Four out of five times I find myself cutting some kind of bulky tone between 350-600hz in vocal tracks. This usually leads to a cleaner sound.
However, in the mix you may find the solid midrange to be very helpful, especially once you’ve added some treble. One way to control this range but not remove it is to use a compressor with a customizable sidechain circuit.
Triggering the compression without the lows, upper-mids and treble of the vocal opposed to regular compression will open up the presence of the vocals like an EQ would, but without losing that dead center midrange. If you have a knee control you can make the compression very transparent even without the upper and lower ranges in the detector circuit.
Conveniently, the stock compressor in Pro Tools will let you do all of this.
3. Overdrive for Compression
I discovered this while tracking vocals through my 1176. The transformer will actually apply its own compression when driven into.
If I set the attack on bypass and really fine tune the input, I can get a very subtle compression that brings up sustain without compromising any attack. The “drawback” here is that the process generates distortion. If I can find that sweet spot, the distortion will excite the sound coming in. I’ve done this on vocals, guitars and bass guitar very successfully – compressing without compression engaged!
The way this works will vary from each piece of gear but you might just find something new about one of your favorite (or least favorite) pieces of gear.
4. Clipping Instead of Limiting
Taking that idea a step further: one of the riskiest but potentially coolest approaches is to square off a signal instead of limiting.
Clipping is essentially limiting with a zero attack and release time. Limiting is far more transparent in terms of frequency control, but often comes at the price of punch. Likewise, clipping is not transparent in terms of tone, but leaves the dynamics outside of the peak signal completely intact.
Now, this usually sounds terrible. But over very short spans of time, particularly on sources that have broad frequency content, it can actually sound fairly transparent or even good (snare drums anyone?).
Now a lot of audio guys will jump down my throat for this one, but remember, we soft clip things all the time. Hard clipping your converters is really not so different than overdriving the outputs of an MPC, which hip-hop producers have been doing for years.
5. Adding a “Note” to Kicks
You’ve probably triggered a sine wave from a kick drum to add weight to it. It’s one of many helpful ways of getting a beefier kick sound. This one will actually help glue the kick into the track.
Use a square wave and a low pass filter with the corner frequency set to the fundamental tone. Because slight overtones will still remain, you will get a “note” rather than just weight. This can really help the kick “belong” in the record. The pitfall is that you have to be careful what note you are choosing.

Ready to elevate your ears?
It doesn’t have to take years to train your ears.
Get started today — and you’ll be amazed at how quickly using Quiztones for just a few minutes a day will improve your mixes, recordings, and productions!
There’s only so much range in that sub area, so you have to be pretty careful about your tuning. Stay with the bass and/or the chord, whichever modulates the least, or stay a fifth down and away from those notes. Once your square is at about 65 Hz, you’re probably going to get too much tone.
6. Parallel Distortion
A cool way to excite something is to create a mult, filter it, and add a touch of distortion. Then blend that mult under the original signal. Hi-passing everything under 1k can be a great exciter for vocals. Hi passing 100hz and low passing 1k can be cool on rhythm guitars or bass to add body. It’s like EQ, but creates a harmonic signature that helps give things a lot of depth.
Now, normally I prefer to do this with linear phase EQs because it gives me exactly what I’m going for without any kind of phase cancellation between the dry and parallel signal. However, sometimes that cancellation can be useful. If you set your corner frequency and slope just right you can gently ease off any frequency ranges you might not want too much of — so with a discerning ear, minimum phase can be the way to go.
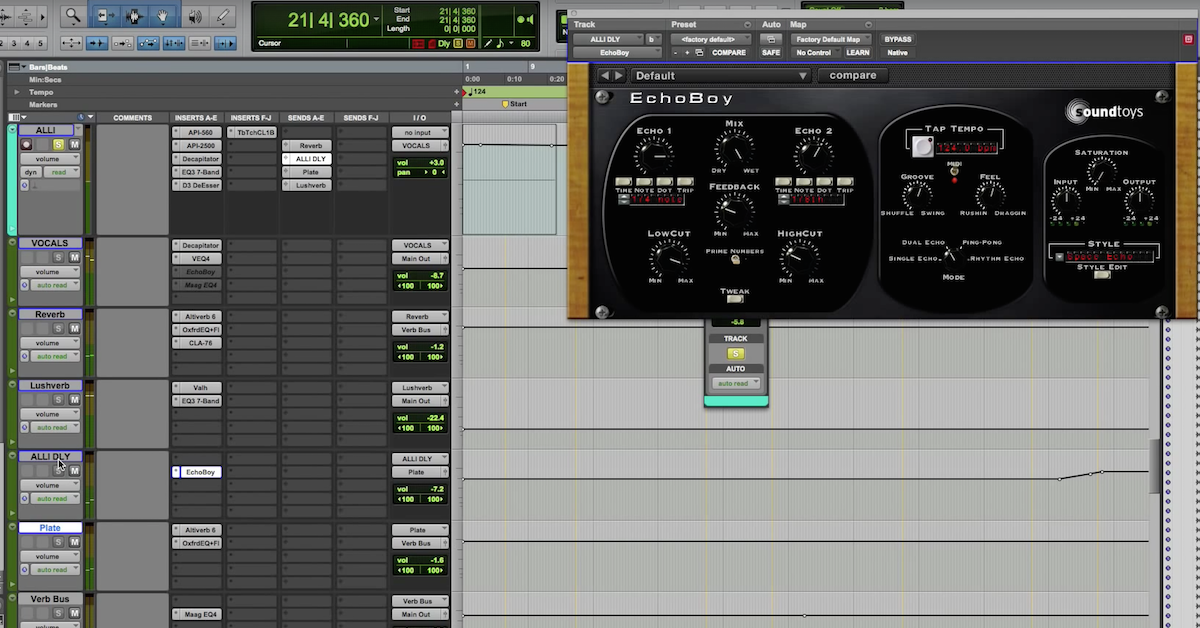
7. Delay the Room
Often times I get tracks to mix that were recorded with nice equipment but not in the most brilliant space. Often the space is either too tight or two loose. Loose can be ok, a little dynamics processing can help it out. Too tight it almost doesn’t sound like a room capture — and what do you do with it then? Turn it into the coolest delay ever!
If you have a tight room sound, instead of simply blending it up -20 dB below the close sound, strap a delay on there with some feedback and turn it to 100% wet return. Now you’ve got an echo that sounds exactly like the room it was tracked in — perfectly realistic and immediately blends with everything else. If the room is loose you might be able to sneak a little more room in there by adding a slight delay (20-50ms) with no feedback — essentially acting as a pre-delay. This way you can get a little more of it in there without losing the forwardness of your close capture.
The last thing you can try is this: if you want something to feel far way you can nudge the room capture forward in time. Instant “back wall” if you need it!
—
So remember the key here is discretion! These techniques can be great, but they can also destroy what’s there.
If 66% of the song is the performance, 20% is the tracking, 10% is the basic mixing, then the last 4% is this kind of stuff. Level, Pan, and basic signal processing (in that order) are far more useful and important in getting right. But every now and then you need a little extra somethin’ somethin’.
Eleveate Your Ears