Tips for Creating Rock Snare Drum Reverb
02/27/2015

Today, I figured it would be fun to walk you through me adding a snare reverb to a rock song. I’ve got an EMT 140 plate pulled open, and we’re going to add some processing on the backend of it, and show how I can kind of sculpt the reverb to fit within the tone that I’m looking for.
I’ve also got D-verb open, so we’ll show how we can do something really similar with that, stock Pro Tools reverb, so that if you don’t have the Universal Audio EMT 140, no worries. We’re going to have you covered as well.
Before we get going, I want to note that if you go to davidglennrecording.com, right now, I have a free mixing/training bundle for you. It’s got two sets of multi-tracks, two video series, a huge library of impulse responses, thanks to our buddy Joe Salyers over in the Pensado Students Facebook group. I’ll give a shoutout to him for that.
There’s more. I can’t remember off the top of my head. But go check it out. Davidglennrecording.com, and subscribe for instant updates, and that free mix training bundle.
Moving on to the song, I’m going to hit play and show you how I’ve got the drums working together before the verb, and then I’m going to reference, and we’re going to aim for a snare reverb.
So here’s the track before snare reverb.
[song plays]
Okay. So, I tend to like drier snares with most of the stuff that I mix. I’m not a huge reverb guy, but I think that we could definitely add to the tone and add to the sound by using it in this song. Particularly in the breakdown here where it’s dry.
[song plays at breakdown]
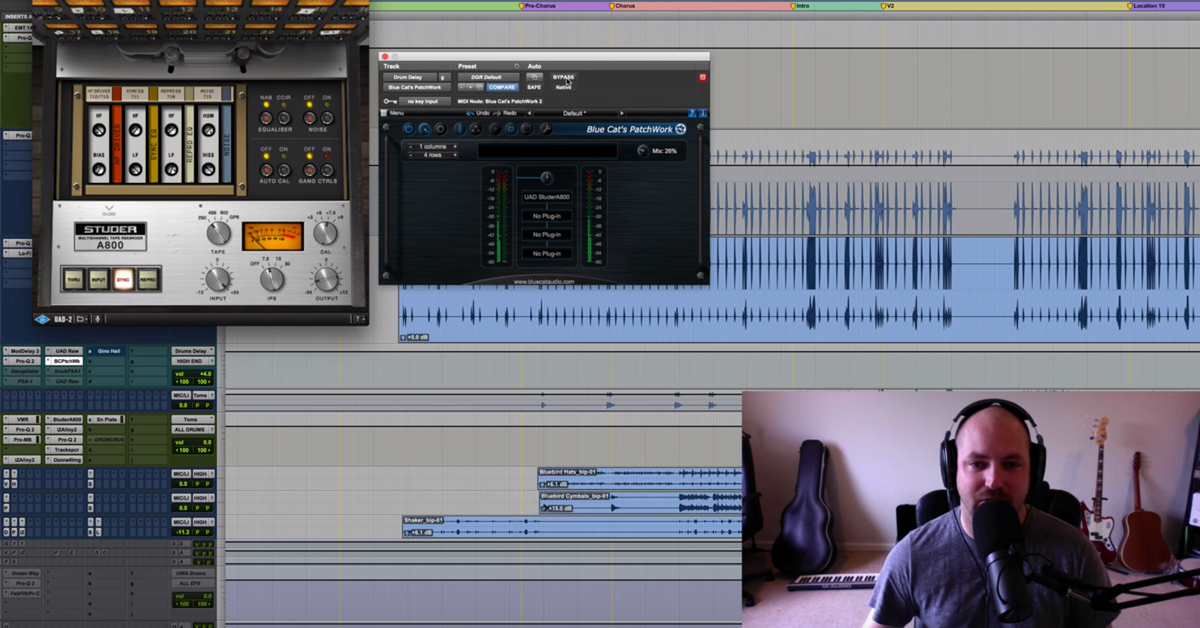
It’s pretty lifeless, right? So, we’re going to get to work and start adding some stuff here. Here is this snare plate, and I have this in my template when I get going with a mix, and I’ll pull it in, and I’ve already got a lot of the processing we’re going to talk about here today in, but kicking it off, I’ve got the EMT 140. Let’s hear that with nothing on the back-end, just sending the snare into the verb.
Let’s hear what that sounds like in the mix.
[song plays, snare with verb]
Okay, so it’s a bit much. Kind of a midrange thing going on that I’m not digging. I feel like it stands out too much as it’s own thing. It’s not really fitting with the kit or the song. It’s more of a distraction than it is helping the vibe.
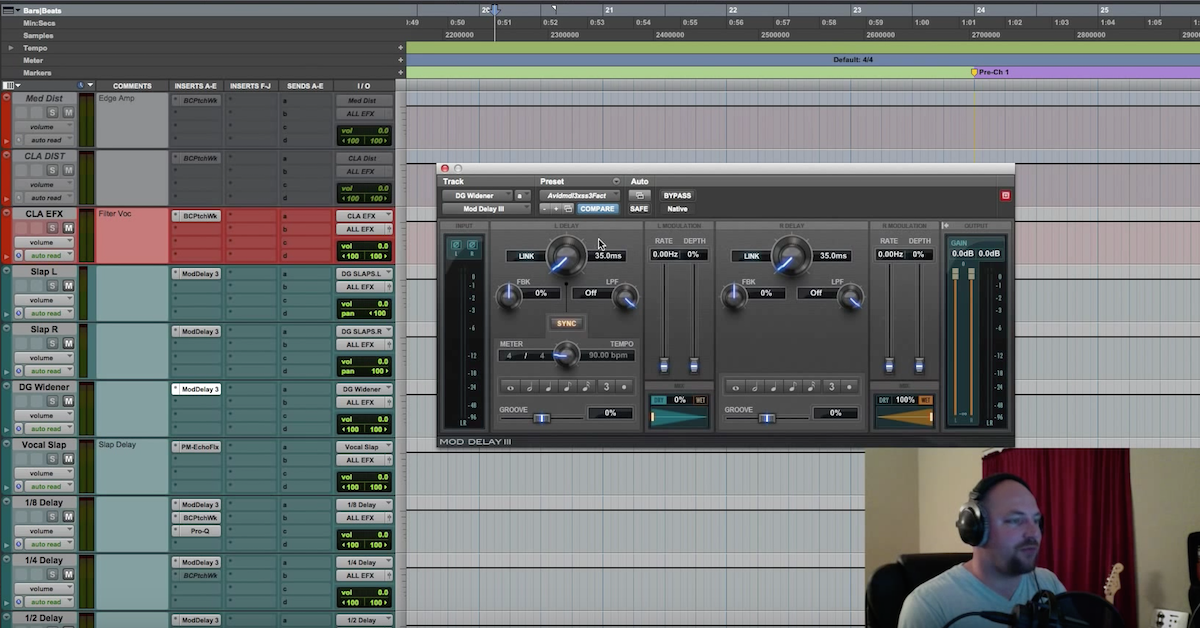
So, the first thing I’m going to do, more often than not, is go on the back-end of my reverb and add an EQ. I prefer the FabFilter Pro-Q2 for most of my surgical-type EQs. I’m going to come in here, and I’ll have a 6 dB/octave slope for a low-cut/high-pass filter. Slide that up a little bit, and then I’ll come over here to the top end and do the same thing. Change the slope to a 6 dB slope, and pull that up anywhere from 6kHz and above is gone, and anything from 300, 400, 500 Hz, it just depends on the song or what I’m shaping, but this is already going to help me take this snare verb to the next level.
Let me hear just what this is doing with my standard EQ setting for reverb.
[snare plays with reverb]
Okay. So, this is kind of my starting point for most songs, but I feel like I could use a little bit more of the meat, so I’m going to back this down, and then maybe increase the dB slope here to 12, and cut a little bit more of the sub stuff out, so that it starts dipping around 200, 220, and then I don’t necessarily want as much top-end. I want this to be a warmer verb. I want this to be more of a room sound, so I’m going to pull this back, and then get even a little more aggressive with the high-cut.
[snare plays with reverb]
Pull it back…
Okay. So, now that I’ve got these two high and low-pass filters established to kind of get a starting point, I’m going to go hunting for some of those frequencies that I also want to remove. So, I hear something a little bit more in the crack zone.
[snare plays with reverb, adjusting EQ]
Yeah, stuff all up in there. I don’t really need that. I want this to be warmer, so instead of boosting lows, I’m going to cut some highs.
[snare plays with reverb, adjusting EQ]
And here’s what we started with.
[snare plays, reverb with no EQ]
Okay. And then, I’m hearing a little bit of that boxy thing going on.
[snare drum with reverb, adjusting EQ]
Okay. And, now I’m going to check it in the mix and see what we’ve got.
[song plays]
Okay. And I think I forgot to show you guys what I had going on with EMT, so real quick, you’ll see I’ve got even under a one second decay time/reverb time. A lot of times for me, that’s about one second, but in this case, I have it a little bit down, and you’ll see why in a second.
The other thing to note is that I have the width – where is that at – I pulled the width in from being way out wide to being a little bit more controlled.
Here’s that.
[snare with reverb, adjusting width]
And back out wide.
Okay. So, what I’m feeling from bringing the width in is just to try to control the snare, and be a little bit more focused and a little bit more central. I’ve got the guitars, I’ve got all kinds of stuff out wide. I don’t really want this snare sound to sound like it’s bouncing off a left and right wall. I want it to be a little bit more focused, a little bit more central so that width is helping me to accomplish that.
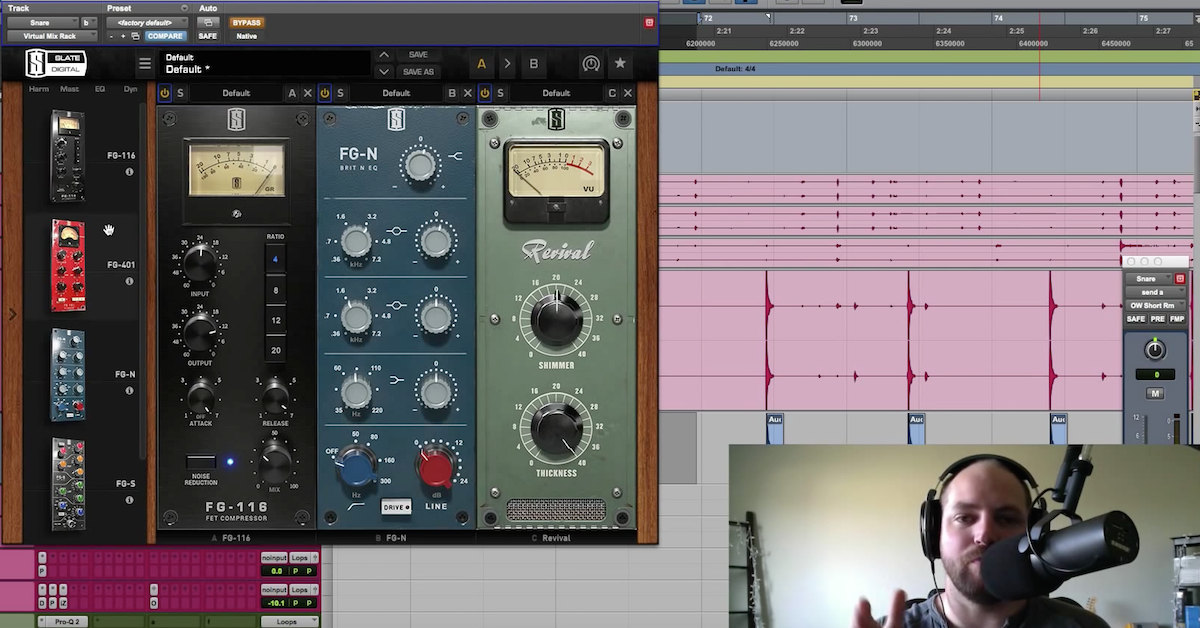
No predelay I don’t think on this one, which is sometimes weird. I typically use a predelay, but moving on, the EQ’s a little bit closer. I still feel like there’s some work to be done, but before we get too much further, I’m going to add the beautiful Virtual Mix Rack from Slate, and come down here and grab an 1176, slow attack, fast release, and then I’ll time the release here in a minute.
Let’s see what we get here driving it.
[snare plays with reverb, adjusting 1176 compressor]
Okay, here’s without it.
[snare drum with reverb, no compression, and re-enabling compression]
Okay. I can slow that release down just a little bit.
[snare drum with reverb, adjusting release]
Okay. Now, I mentioned that I had a little bit shorter decay time. I’ve got that under one second.
If I would’ve had this at about a one second, which I know CLA has been quoted as saying is kind of a starting point for him. Listen to now what the decay time is with that compression on it.
[snare plays with reverb]
Right? So we’re compressing it, and we’re increasing the sustain, which ultimately gets a little bit washy, so I’ve already timed this to be a little bit more of what I want.
[snare drum plays with reverb]
I want the decay time to end before the next snare hit comes in. That’s just my preference on the song, get it in tempo a little bit better. Moving on from that, I still feel like it needs some EQ, but I like how the compression has kind of leveled it out and smoothed the tone of it a little bit.
And now, I just want to tweak that EQ to taste within the contents of the mix – the context of the mix, excuse me.
So, back over here, I probably don’t need that, we’ve already got one on. I’m just going to listen and see what it sounds like in the mix, boost some frequencies, and try to get something more.
[music, adjusting reverb EQ]
Okay. Let’s hear before and after those, just trial-and-error. I’m doing this quickly for you guys, but you get the point.
[song plays, before and after EQ adjustments]
You know, there’s still kind of a high frequency thing. Let’s find it.
[song, adjusting EQ]
Okay, so I felt like it’s a little bit closer to what I’m going for. The only thing that I would say is that when the drums are by themselves there with the bass, I may come in here to the snare plate and automate that to be maybe a little bit lower, a couple dB, drop that down, but leave it where it was when the guitars and everything are in.
Let’s check that out and see what the volume automation does for it.
[song plays]
Versus this…
[song continues, removes automation]
Okay, so like most of what I teach, it’s a taste thing. I hope you guys see how beneficial it can be to add EQ on the back-end. Don’t be afraid to stack your EQs. Some guys will sit there and use the same EQ and just keep dialing in, and if you like that great, I hate looking at the spaghetti mess of the visual, and I just like to use my ears, so I’ll just pull open another one and shape it a little bit more. We had some compression, some EQ, hopefully you guys dig that.
Don’t forget to check out davidglennrecording.com for your free mix training bundle. We’ve got Mixing Drums, very soon. March 5th will be released, so if you’re watching this after March 5th 2015, Mixing Drums is available. The Mix Academy for month to month recurring membership on mixing, all things mixing. The Pro Audio Files for all the incredible content there, and we will catch you guys on the next video. Thanks, guys.
Elevate Your Ears