Mix Template Series — Utility Plugins (Part 1)
03/16/2017
Now, sounds kind of boring, right? Well, Mix Template. Could be a ten minute video to just kind of show you an overview, and this is that, and this is this, and whatever, but I’m going to try to create something a little more in depth, a little more involved with mixing tips, and strategies, and techniques, and lots of cool things along the way.
I’m going to try to make it a little more interactive than any of my former tutorials, and to do that, I’ve got a couple of logistics to get out of the way, and then we’re going to jump in in this first video, and we’re going to look at the stereo buss, the master fader, and some utility plugins, but before we do that, if you haven’t already, subscribe to The Pro Audio Files, make sure you get all of the latest notifications for the new videos when they come out.
Second, go to facebook.com/davidglennrecording. Run a search if you have to, but facebook.com/davidglennrecording. I’m going to be hosting some live Q&A, and posting some exclusive videos for this series over on my Facebook page. So make sure you do that, and then third and final logistic, go to davidglennrecording.com.
On the home page, there’s going to be a banner, and you’ll see it’ll say “The Mix Template series.” It’ll come up with some fancy graphics or something. Click on that banner, and it’ll take you to a page that’s setup exclusive for this series. I’m going to be giving you free mix templates, I’m going to have Pro Tools, my exact template available for you to download, I’m going to have a stock plugins version of my template for you, and then I’m going to be working really hard, very quickly, as soon as possible, if you haven’t — if it’s not there already when you’re watching this, to get as many DAWs as possible covered.
Logic, Studio One, Cubase, Sonar, I’m going to try to go through as many as possible and get you templates setup so that you can download mine, get a lot of the work already out of the way, the routing, the signal flow and all of that stuff, and you can just kind of tweak to taste, and drag what your favorite plugins are, what you use, etcetera, but I’m going to do that over at davidglennrecording.com, and then I’m going to host some free multitracks for you.
So I’m going to throw some multitracks in with this series. You’ll get to download those. Mix a song, add it to your resume. Next month, I’m going to be mixing that song for you guys again free here on The Pro Audio Files, and that’ll be a part of a new series that we’ll call, “The Mixing Checklist Series.” I’ve released a PDF called “The Ultimate Mixing Checklist.” This month, we’re going to do the template, next month, we’re going to mix a song and go through the entire process together.
So enough of that. I think I’ve got all of the logistics out of the way. Don’t forget to subscribe, like, share, if you like it, if you dig it, I would love for you to share it with as many people as possible, it helps me help you bring you more free content.
Phew! All of that out of the way. I tried to record this video like, ten times, so I’m glad that we got through that. Next up, we’re going to move on and I’m going to talk about the master fader.
Alright, so moving right along, we’re going to take a look. A kind of top down approach. We’re going to go from the master fader and work our way back. On the master fader, I put what I call the utility plugins. We’ll go through them here.
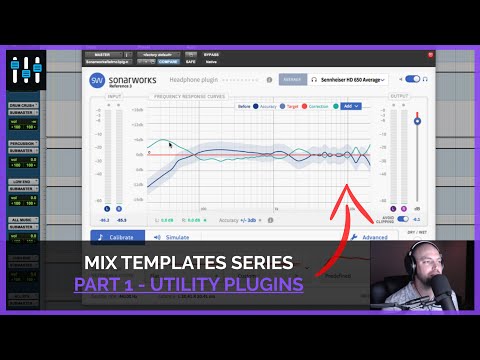
The first one is Sonarworks. I know a lot of you guys have already heard of this, but if you have not heard of Sonarworks — actually, if you have, skip forward a couple of minutes, because I’m going to brag on these guys for a couple of minutes.
If you haven’t heard of Sonarworks, man, go to sonarworks.com and check it out. They’re going to explain it way better on their website than I ever could in a couple of minutes of rambling, but basically, the gist is I’d like to — I’m weird, I mix on headphones, I’ve got the Sennheiser HD 650s. About the time I transitioned from producing and engineering into mixing, I left the studio and started working from home, and you know, laptop producer superstar, right?
But anyways, my wife and I had just had a baby, and so working late at night, you know, studio musician hours, and the baby being asleep, not so good for mixing on loud monitoring or whatever. So I got — I just listen to music forever on headphones, and I was very comfortable working on headphones, so I started that, and the only thing that really killed me about mixing on headphones, or even in a home studio or project studio environment without an incredible room was accurate representation of what I’m hearing.
So I would mix on the cans, and then I would go out to the car. You probably can relate. I would go bounce CDs before Dropbox and all of that, but then when Dropbox and aux — auxiliary or whatever in the car was there, go to the car and then back to the studio.
Oh, the bass isn’t right. I’ve got to boost it a couple of dB. Then boost the bass and then come back in, then check the subs and the kick. Oh, the kick sounds great at 100Hz or whatever, but there’s no bottom to it. No sub. So we’ve got to go back to the — oh, it was hours of going back and forth. It sounds like a commercial for these guys, but I promise you, the struggle is real, and I know a lot of you guys can relate.
But Sonarworks solves that problem. So basically, I use the Sennheiser HD 650 headphones. Amazing cans, I love what they do, but you can see there’s barely any sub frequency response down here with these cans.
Well, Sonarworks solves that. They go in and they compensate. I’ve got the average pro file, but they have an average, and then they also offer a custom pro file, where they’ll take your exact headphones and run the whatever it is that they do. The science and the good stuff.
But basically, this compensates. You can see, the blue line is the natural response of these cans, and then the green here is the correction curve. So the subs now, if I’m working on sub drop, a kick, and the bass, trying to get that low end right, and I don’t have Sonarworks, I’m going to be boosting for days to try to feel or hear some sub frequencies in these headphones, and then I’m going to go hear that in the car or on a system where the subs are reproduced, and I’m going to distort or blow the speakers, because I haven’t heard that accurately.
So a lot of you guys, it’s not that you need a new EQ or compressor plugin, it’s that you need to be able to hear what’s coming out of the system accurately. You need a sub or you need something like this with Sonarworks so you can reproduce and make informed decisions. But you can see the curve there, it goes on. The low mids, the mids, kind of janky, and this compensates for that.
So Sonarworks, right out of the gate, that right there is the most important — my mixes, night and day from before whenever I had to use the go back and forth from the car to the studio back and forth all the time. Night and day between that and then shout out to my man Joey Fernandez for hooking me up with the knowledge of Sonarworks early days before anyone started covering it.
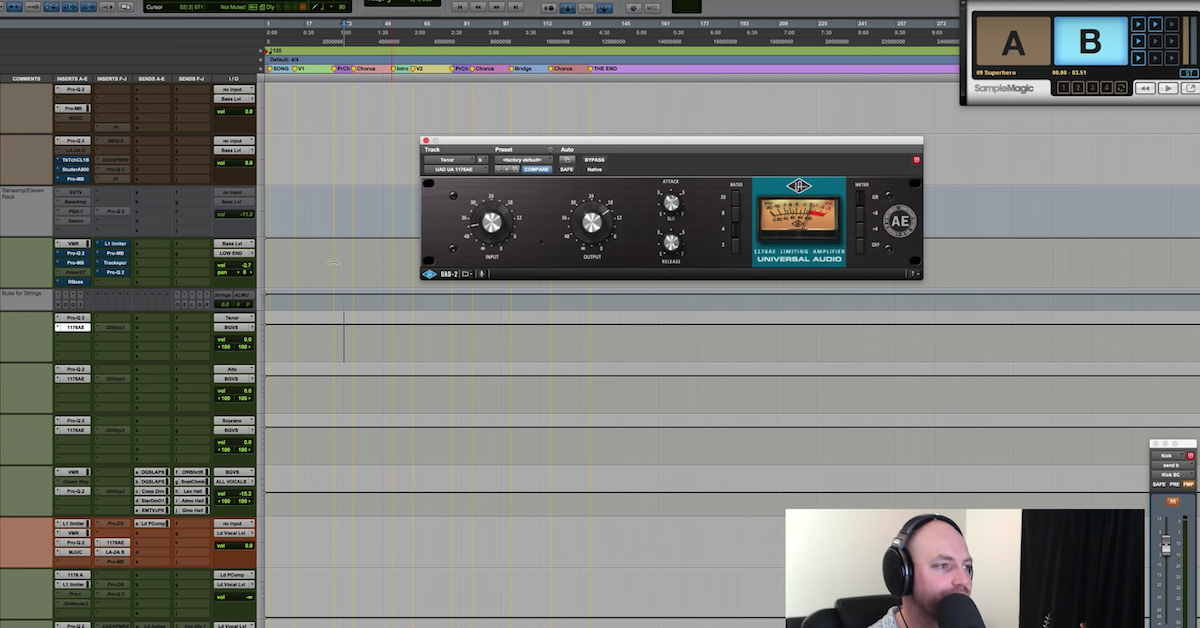
That is that. So Sonarworks gets the — it’s the last thing in my chain there. Next up, we’ve got a metering plugin. I like to keep an eye on where we’re at, as you’ll see in future videos, I like to mix through the buss processing, and mix through my limiter. I like to have it on from the very beginning, push up a rough mix, kind of evaluate where things are at, check the gain staging, and then move on and mix into the limiter.
For me, I like to have my eye on where I’m at ballpark LUFS or RMS while I’m mixing, and so, you’ll see me kind of peak at that as I mix a song. My members at The Mix Academy know I’m always looking over to my second screen here, because this lives in the corner of there. I won’t get into what I’m looking for, but anywhere from minus 10, minus 9, minus 8, what have you.
So that’s my metering plugin. We’ve got that up on the screen. There’s a couple of new ones. I should probably look up — you know, let’s do it together real quick. What’s that new plugin — it’s called Levels Mixing Meter. I don’t know. We’ll type something in here. Levels.
Mastering the mix, Levels. Is that it? Look at this, we’ve found it. So masteringthemix.com. I want to give a shoutout to these guys, because while it’s not in my template yet, I’ve been using it, I’ve just been lazy and forget to open up the template and save it in. This is ridiculous, and they just dropped the price, so show some love for him. Go check out masteringthemix.com, and all of the awesome stuff this can do. Very affordable. Izotope advanced is incredible, but it comes at a price tag, and so there you go. Izotope Levels Insight.
Next up, I have an EQ. Now, I’m going to do a little video on this separate from this one, where I’m going to mention the technique that I use this EQ for, but basically — I’ll tell you what, let’s come back to that plugin.
Here’s Audrio. Audrio is a plugin that I use for two things. Number one, Audrio will allow me to stream out of Pro Tools — you can see it’s going to scan for devices, but I don’t have them connected. It’s going to allow me to send a stream of my Pro Tools mix, right out of here, Pro Tools. I think it’s any DAW. I can’t remember which DAWs it supports, but to my phone, my iPad Pro, it’s going to allow me to send a signal to those devices, and I can reference without having to bounce, put it in Dropbox, then upload it, then click over and hit play. It saves a little bit of time.
So Audrio is first and foremost for that, and then secondly, a little bit pricy for what it is, if I’m honest, but Audrio is also an incredible way to stream right out of your Pro Tools session to a client. You can send it to their mobile device, or their computer, and they can click a link, and they can listen in while you mix, so if you have a remote client, someone maybe lives in wherever. China. And you’re mixing a song for them, you can Skype or video chat, and then send them an Audrio link, so you have the face-to-face connection kind of, and then you can send them the stream and they can make changes.
Hey, turn the background — I want the ladies — I want the girls up, turn the men down. Kick is a little bit too loud, let’s turn that down. They can hear a live stream full — I think it’s 320kbps quality. But anyways, it sounds great, it works great, that’s Audrio.
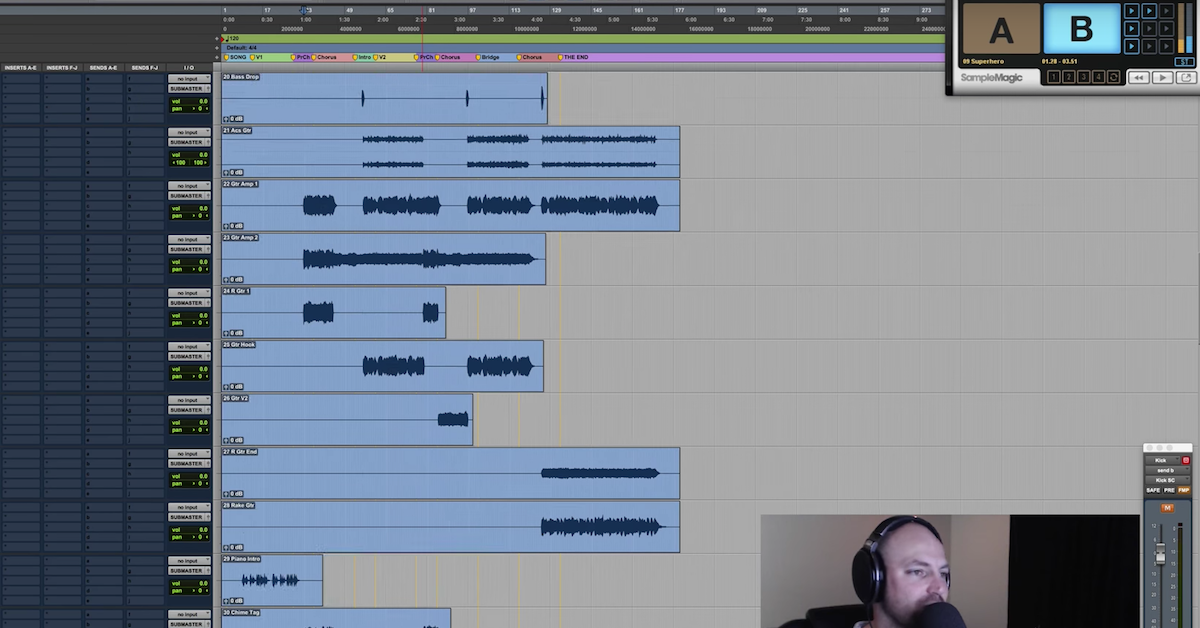
Alright, next up, we’re going to take a look at the — actually, you know what, let’s wait on Ozone, same as the Pro-Q 2 there. Let’s look at Magic A/B first. This is made by the guys at sample magic, and this just lives, the entire mix process for me, in the top right hand corner of the screen for me in the mini-mode, but you can import reference tracks, click play, and you can adjust the volume from track to track. All kinds of little things you can do here.
Go to samplemagic.com and check it out. I will pull in my client’s rough mix to the top here, and then I’ll have the reference tracks that they suggest here below that, and then I’ll have my references off to the left. Like I said, I put it in mini-mode and throw that to the top right corner of the screen, it just kind of lives up there while I’m mixing, and you can click A would be your output from Pro Tools, B would be the reference tracks, and you can click back and forth and do that.
Now, with that being said, let’s go back and talk about the Pro-Q 2. So I’m going to leave Magic A/B up there. That’s where it lives.
The Pro-Q for me, this is going to be where I’ll take and just suck out all of the top end, and I’ll start down here at 20 or 30Hz, and I’ll click over to a reference track and I’ll click play. And I’ll listen, and I’ll say, “Okay, what’s going on.” The client’s reference, the mix has got a great low end with the kick at 20, 30Hz. They let the kick win the battle down there and I hear kick drum pulsing.
I’m going to click over to mine, okay, cool, it’s pulsing right there with the reference track. Pull it open a little bit, kind of listen to 40, 50Hz. Click over to the reference track. Alright, so the bass is coming in. Starting to feel that, then I’ll click to mine, oh, not feeling the bass so much.
Then I know, hey, red flag, let me go work on my kick and bass, and I’ll kind of mix with this on. Maybe sometimes leave it at 50, 40, 50Hz, then kind of bring it up, and this would be similar to mixing with only the sub on. A lot of guys do that. It’s a pretty popular technique to turn off your mains and only mix with a sub, or filter out the top end and hear what’s going on down there.
So great way to eliminate the distraction of the mid-range and the top and just make sure that the bottom end is working great together, and I throw this on the master fader so that it impacts both the reference track and my mix.
So another thing to look out for, with the Pro-Q 2, a cool thing that I discovered early on when mixing, especially for more modern Pop mixes, I would leave 80, 90, 100, 150, 200Hz pretty full on a Pop vocal, until I started doing this referencing technique where I’d listen to the track and then come through here, and I would notice that a lot of Pop — not all, but a lot of Pop vocals, they don’t really have too much going on in the lowest of the low mids.
They suck all of that out and it’s got a nice mid-rangey quality to it, but doing this allowed me to hear, “Oh, wow, my vocal is starting to really — it’s got some oomph and some fullness in it,” which you may dig. I like a little more lows in my vocals than most, but this will allow you to hear that more zoned in to what you’re looking at and just kind of open it up and get through the frequency range. You can kind of get the gist now.
So that’s the Pro-Q. Let me turn that off. I pull that open from time to time, but it’s mostly off, and then here, we’re going to look at the Ozone 7 Matching EQ, and I’m using this for the Matching Feature and that’s it. You can — I’ve got a couple of videos out, if you — I think you search David Glenn Mix Critique, there’s definitely a couple of videos where I showcase this plugin and this practice of Matching EQ, but the short of it is, you click on the reference audio, you hit capture, you set Magic A/B over here, and you hit play, and it will capture the frequency response of your reference track.
Once that’s done, you stop it, you come over here to your target audio, which would be your mix, hit capture, make sure this is set to A for your mix, hit play, and then it’s got a match curve over here. So if you have it engaged, it’s turned on, you can see whatever I had as my mix and whatever the reference was, the reference had less bottom end, and less top end.
So the curve is telling me, hey, pull out top and pull out bottom.
Now there are two ways you can use this information. Or two ways you can use this plugin. I will — a lot of times, just leave it on. I’ll do the Matching EQ, I’ll say, “Eh, you know, I kind of like the reduced bottom and the reduced top and the cleaned up low mids,” or whatever it is, and I’ll just click from here and drag it below my processing, but pre-master fader. Excuse me, mastering limiter, and I’ll leave it there.
Or, that’s kind of the lazy way. I like to do it, but it’s kind of the lazy way. Or you can come over here and say, “Okay, this curve, based on the reference, if I really want to go that way,” I may just be kind of using the reference as a guide and not be super tight to it. This is telling me that I’ve got a bottom heavy mix compared to the reference, and I’ve got a top heavy mix compared to the reference. The mids, everything is decent. A little bit of low mid maybe there to check out.
But then I can go back to the Pro-Q, pull this open, and go back and get back to the drawing board of my low end. Pull open the kick, pull open the bass, listen for any sub drops, anything that’s going on down there, and see if I want to do any more work to that or not, and then the top end, the same thing. So I click over and I see, wow, 4kHz and above, it’s just got this crazy curve there.
Granted, I’m using a high percentage, but for a quick example, say I just wanted to kind of share, then you can go back and work on your top end, and then make it inactive, tweak your mix, helps you to kind of pinpoint areas where you may have a weakness, or it could just be that your mix is different.
But anyways, those are the utility plugins. You know what, for the sake of breaking this up, this whole series into sections where you can go and find things in reference and not be just one, big, two hour video, let’s go ahead and we’ll end this video, and we’re going to move into a new video where the mix buss, the mix A, B, and C is going to be covered. All of these busses up here are going to be covered, and then we’re going to work our way backwards into the live drums, beat production, bass, low end, the instrument tracks, the vocals, all of the effects sends, tons of stuff to cover in the mix template series.
If you liked the video, please hit like, please subscribe if you haven’t already. Go to facebook.com/davidglennrecording, like the Facebook page and post your questions there. I’m going to be doing live Q&A every week. I’m going to be hopping on, answering your questions, and then I’m going to be posting exclusive videos over there as well based around the series.
Then of course, don’t forget to download the free mix template. I’m giving you my template. Take it, tweak it to taste, or copy everything I do. Who cares, right? Do your own thing with it, swap out the plugins that you do have and make it your own.
But we’re going to cover more in the next video. We’ll see you guys there, thanks again for watching, please like, subscribe, share, and we’ll see you in many more videos to come.
Elevate Your Ears