Mix Template Series — Vocals (Part 6)
03/17/2017

Pretty straight forward video, nothing too crazy, but nonetheless, we’re going to go through it and show you a look at my template, give you some thoughts, some ideas for creating your own templates to help it just kind of be there when you pull open a mix, you already have everything that you need.
Before we get going, if you haven’t already, please subscribe to the channel. We’d love to have you subscribe so we can get you more free content. Also, the Facebook page, facebook.com/davidglennrecording. I’m going to be doing some live Q&A and uploading some exclusive videos there, and then if you want to download this mix template, I’ve got free downloads of my mix template, the exact template I used for every song, every genre, and then a stock plugins version, and then I’m working on, if not already, at getting the rest of the DAWs out there — Studio One, Logic, Cubase, etcetera, templates for all of the different DAWs uploaded, and you can get that at davidglennrecording.com.
So moving right along, we’ve got vocals, and we’re just going to focus in on these three tracks right here. We’ve got tenor, alto, and soprano. Now, I mix a lot of live Gospel, live CCM type stuff, and that’s where this comes from for the Tenor, Alto, and Soprano. I break those up into the different sections, and I — really straight forward, I have an EQ and a compressor on each of those, because ultimately, those three tracks will go to the BGVs buss right here.
Now, if I have a song where — excuse me — where it’s not tenor, alto, soprano parts, then I will rename those and call it gang vocals. Men, women, whatever it is, and I’d have those already setup, ready to go. It’s a pretty straight forward process. I’ll EQ, notch out some of the bottom, shape it a little bit, drive whatever I want to drive into the compressor, and I love the 1176 for this, and then I’m moving right along. Those go to the BGVs where I’ll globally affect the backgrounds as a whole.
Now, if I have a bunch of backgrounds, different parts throughout a Pop song, modern Pop track, the backgrounds in the verse may need to be very different than the backgrounds in the chorus. I’ll break all of those up and organize them, but ultimately, they’re going to hit a BGVs buss like this.
Here, I’ve got the Virtual Channel on my template, and then an EQ. Pretty straight forward. Now, I may throw in CLA effects, or Nectar 2 from iZotope, or something and click through and just kind of create something larger than life, but for background vocals, I tend to rely heavily on just getting them squashed, getting them compressed really good, and then shaping the tone, filtering them out.
Sometimes they have practically no top end, sometimes they have, you know, only top end and no bottom. Just depends on the track and what I’m going for, but I’ll shape it with EQ. Then I rely on effects sends.
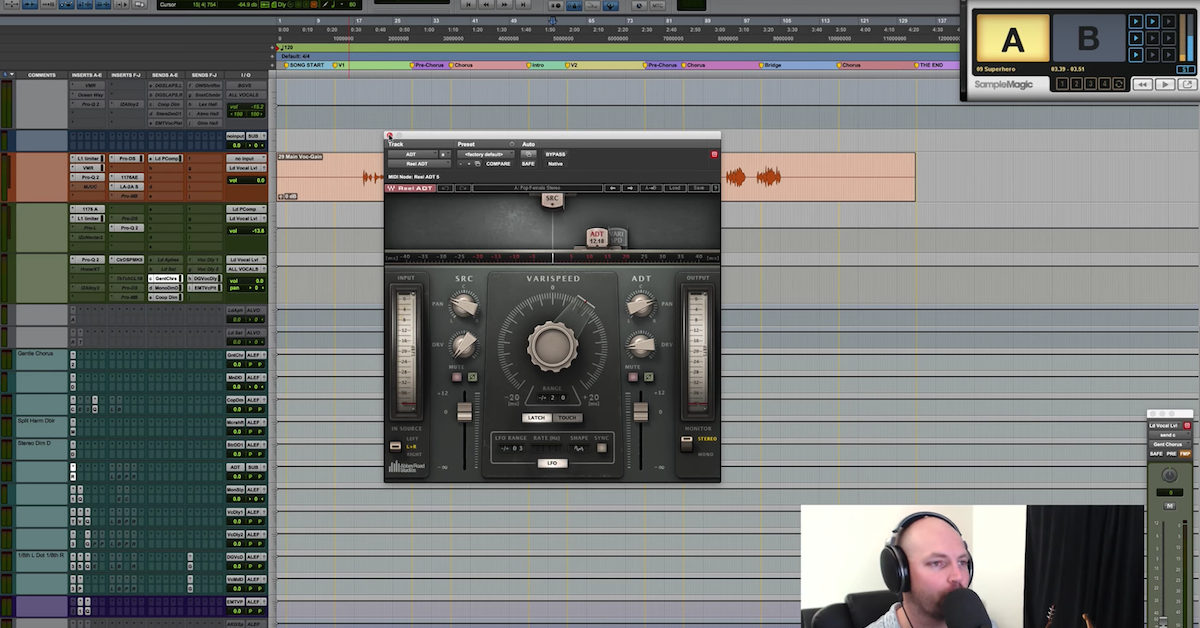
So I’ve got all of these setup over here. We’re going to get to effects in the next video, but I want to kind of show you real quick, I’ve got a couple of slap delays, which are going to be for creating a kind of an impression of more singers. If I’ve got background vocals and I want it to sound like a little bit more people were involved in the background recording, then slap delays, left and right, offset slightly different times can help sound like a little more people. Little larger group.
I’ve got a vocal dimension preset from the Cooper Time Cube. Again, we’ll look at that in the video next when we talk about the effects sends, but the Cooper Time Cube has a vocal dimension preset that I love. It sounds great. I’ve got that in there as a send. I’ve also got this Stereo Dimension D widening effect. Chorusing.
Next up, we’ve got a vocal plate. Got the EMT from UAD is in here. I’ve got a short room, a chamber, a hall, an atmospheric hall, and then a Gino Hall. So they’re all in there, they’re ready to go. Very straight forward, those are the background vocals.
Next up, we’re going to look at the lead vocal, and it’s important to note, I don’t always — I should say it like this, I always start with my lead vocal in this chain here, I’m going to break it down for you, but there are many times when I ditch this, especially if I’m dealing with a home studio, kind of closet vocal sound.
This is my chain for parallel compression. I like to hit the vocal, knock down some of the transients, get it under control here on the lead vocal audio track. Then I send into the P-Comp here for parallel compression. I hit that with an 1176 pretty hard, squash it ten, twenty dB of reduction. It depends — this is all buttons in mode. That sometimes I change.
But then I follow it up with a limiter. I mean, I’m squashing this thing. And then I blend that in to taste. Depends on the song. I’ll automate that between sections, but this is my standard kind of go-to vocal chain, and then I follow by sending the lead vocal — you know, it’s compressed here, but it’s not squashed to death.
Then the squashed to death lead parallel compression track, those meet at the lead vocal level. You can see, they’re going out to lead vocal level. This is the parallel chain going out to lead vocal level. So these two blend and meet at this buss, where I’ve got EQ ready to go to dial that in, shape it to the tone of the track, and miscellaneous plugins here.
Some EQ, I’ve got Alloy 2 is a great one, Nectar 2 is really great for kind of once you get it compressed and sitting a certain way, presets can be fun. Kind of go through, reverse engineer what they’re doing, tweak to taste, that can be cool there, but then Clariphonic for the top end in the vocal. I’ll show you that. You guys probably already know what the Kush Clariphonic is. The hardware unit is amazing. This is the Mark II, the second version of the plugin, the first version of the plugin was great, this one is even better. Love that.
But whatever EQ you want there, whatever compressor or limiter you want here, for the stock plugins version, I’ve got the stock Avid limiter. For the EQ, I think I just have a standard EQ.
So you can go through and you kind of build your chain similar to this. I’ve got a standard 1176 into an LA2, then that sends into the parallel compression, so we’ve got mono audio track, mono auxiliary input, or aux buss, and then we have another aux, mono, for the lead vocal level there.
So Clariphonic with top end, I’ve got another compressor if I want to go even further after I’ve kind of got it there. Maybe I want it to just sit, glue the vocal together a little bit more, help the dynamics, and I’ll hit it with another compressor.
I de-ess in stages, so I typically de-ess at the track level with clip gain. So I’ll go through and manually clip gain the track. Then I’ve got a first stage de-esser here on the audio track. I’ve got a de-esser set on the parallel chain, just in case it’s a little bit much, and then on the lead vocal level, I’ve got another de-esser right here towards the end of the track for just kind of emergencies if I need it. Throw it on, de-essing slightly, 2, 3, 4dB in stages tends to go a little bit more smoothly than trying to hit it 7, 8, 10dB in one go.
So de-essing in stages along the way. Then on this lead vocal level, we’ve got the sends. So we’ll definitely cover that in the next video, and then even more so in the video coming up in the next series, we’re going to actually mix a song together. I’m going to show you how I use all of these effects, but we’ll show some examples in the next video when we look at the effects sends.
So I mention that I don’t always use this chain, and really, the reason for me to walk away from this chain would be if — I mentioned, if I get a closet vocal sound. You get that dreaded comb filtering, or just nasty room ambience in a vocal, those types of recording don’t do well with smashed hard parallel compression, so I’ll typically just ix-nay all this, ignore it, create a new track, and just go to work and see if I can maybe ride the vocal in a little bit more as opposed to smashing it with compression.
So moving on from there, I’ve got a couple of vocal sends here, the lead Aphex is the Aural Exciter from Waves. Shoutout to Andrew Scheps for that one, I really like what that does. Don’t use it too often, but it’s there for me if I want to. Then a lead saturation, but again, I’ve mentioned Bluecats Pathwork a couple of times. I really enjoy using that, I come over here, grab Bluecats Patchwork, load it up, put a couple of plugins in there, saturation, you know, distortion, delay effects, you can just kind of chain it all in there, and just kind of use this as a mix knob to just blend to taste or automate the mix knob between sections.
It could be a lot of fun, so just kind of make up stuff as we go, but anyways, looking at the vocals, it was fairly straight forward, we move down to the all vocals buss, that’s where all the vocals go, I don’t care if it’s a background, a lead, a oh, an ah, they all end up here at all vocals, and sometimes, I’ll hit it with Saturation Knob, I’ll maybe add a little more top end globally if I add some top end to the drums and the music and whatever, sometimes I’ll add just a little gentle kiss of it from here on the buss, but it’s rare. I usually handle that at the track level.
And that’s it. So pretty straight forward again with the vocals, but I hope you dig that. Please feel free to comment below, like, subscribe, and we’re going to move in to kind of the good stuff of this whole series is going to be in the effects sends, so I’ve got an effects send section for vocals, and then I have an effects send section for the instrument tracks, and then of course, I’ve got the — all the good stuff at the bottom of the template with the reverbs and whatnot.
So we will look at effects in the next video. I’ll give some audio examples and we’ll have some fun on that. Moving on to the next video, and I’ll see you guys there.
Elevate Your Ears