Mix Template Series — Bass Guitar (Part 4)
03/17/2017

This is The Mix Template Series, and we’re on video number four. We’re looking at the bass guitar today. If you haven’t seen the first three videos, go check those out. Super important, lots of great information in those, but a couple of things to get out of the way first, if you haven’t done so yet, please subscribe to the channel so we can get you the future videos.
If you go to David Glenn Recording on Facebook, that’s facebook.com/davidglennrecording, then we’re going to be doing live Q&A, go ahead and post your comments, we’re going to do exclusive videos over there on my Facebook page.
Then lastly, if you want to get your hands on my template, my mix template, I’m giving it away for free on davidglennrecording.com. Right on the homepage, you’ll see a big banner for The Mix Template Series. Click on that, you’re going to download the mix template. I’ve got a stock plugins version, then I’m also throwing in some multitracks for you guys who want to mix a song, you can add it to your resume. Mix it, do your thing, and I hope that it helps you guys out there.
So looking at the bass guitar, I pulled in a track from The Mix Academy here. Just the bass guitar. Not important, but just to have as a reference here. Very straight forward in my template. No matter the genre, I pretty much will always break apart the bass subs from the rest of it, so this is a — just a bass DI. I’m going to copy that down to the bass DI tracks.
So we’ve got bass subs, bass DI, and then sometimes, quite a bit, actually, I’ll create a bass amp tone, and so then in the template, I have all three of these tracks setup and ready to go. This could be the UAD SVT, it’s not an active track. Let me go ahead and make that active for the sake of being thorough here, but the SVT, incredible sounding bass amp. I’ve got that from UAD. Sometimes it’s a bass amp.
Pull that one open, show you guys what we’ve got here. Clicking through the different presets is great. SansAmp, absolutely incredible. Free with Pro Tools. Pretty much every DAW is going to come with an amp simulation plugin you can click through, but Saturn is actually — FabFilter Saturn is actually a great one as well.
So I have those options there, already in the template ready to go, and that’s that. So the bass amp tone, that would be if I’m creating an amp sound. Sometimes, I will go with just the DI and the bass subs, or just the amp and the bass subs, but almost always, the bass subs is going to be in here, and that track is really straight forward. I’ve got an EQ, I use the Pro-Q 2. This could be your stock EQ, and I just take out the top. Sometimes, it sits around 200, 250. Sometimes I’ll pull that all the way down to 100. Sometimes it’s just 70, 40, 50Hz and below. It all depends on the tune and what I’m going for, what I want the kick and the bass to be doing independently and how I get them working together.
So a good starting point is to have that around 200, 250, and then depending on the song or what you’re going for, you can trim that up, but let me show you.
So basically, these were the same track. We just copied them down. We’ll bypass the processing, and you can hear the bass subs.
[bass]
With no processing, it’s just the bass DI. Throw on the EQ. I could see this one being around 90Hz or so, just from me remembering the tune.
Then I’m going to throw this compressor on, crank that threshold, and just make it sit.
So now I’ve got my low end sitting nice and steady, 200Hz and below. It’s a nice starting place. The bass is all the way down at minus 20, so yeah, you guys probably didn’t hear that.
So without the compressor and with no EQ, again, we just have a basic bass DI.
[bass DI]
Throw the EQ on…
[bass DI with EQ]
Kind of feel out where we want that to live. Okay. Then we move on, I take a look at this compressor, and I’m just compressing the snot out of this track to get it to sit nice and steady. You can hear it lift up there. Let me go back without talking over it. Here’s no compressor.
[bass DI, filtered, no compressor]
You may like that. You may like a more open bottom end. I like a little more squishy, flat, nice and chill. Then obviously, it’s going to matter. Feels great.
So then we can dial that in to taste, depending on the song we’re working on. We’ll move on over here to the DI in my template. Very straight forward. I’ve got an EQ that takes out bottom end. I’m already relying on the bass subs track for the subs. I’m just going to come over here and feel that out, depending on what I’m going for, I may bring in a little more 100, 150, but a lot of the times, it’s going to sit up here around 170, 200 or so, and then I’ll look to this to boost the mid in the bass that I want, the way that I want it to fit in the track.
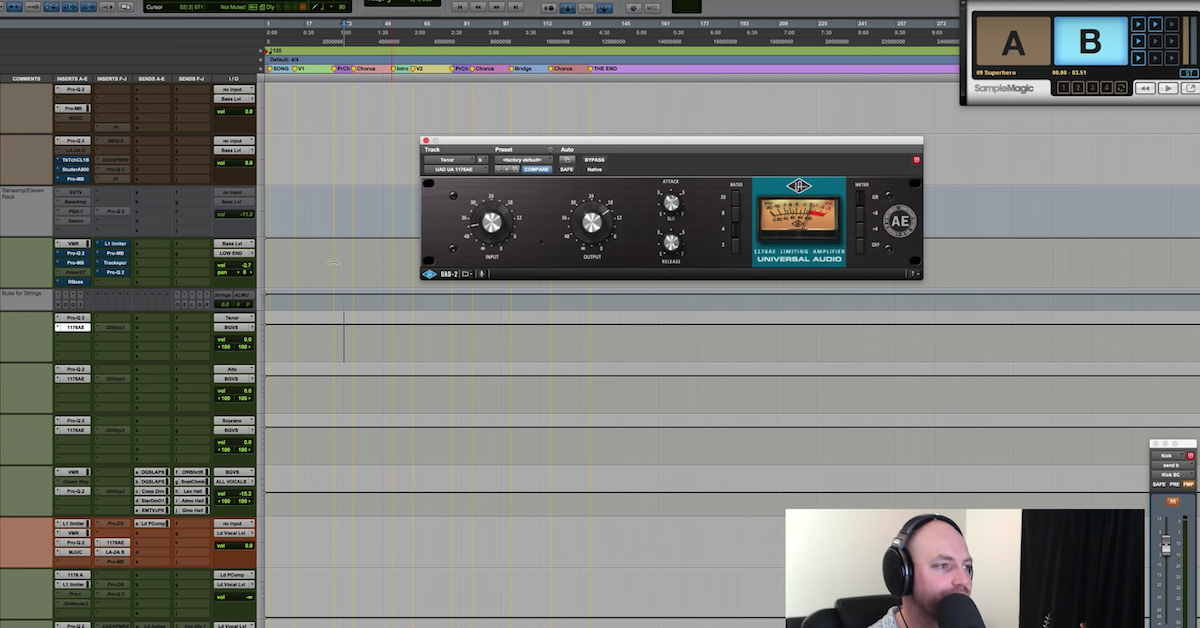
That’s what that band right there was. Alright, starting to lose my voice a little bit, forgive me guys. Moving on from there, I’ve got compressors setup in the bass DI track, LA2A, can’t go wrong with that. I’ve got this that I absolutely love. The Tube Tech from Softube, the CL-1B. Makes a great compressor for bass.
I have the Studer giving a little bit of character to the bass DI. I love this. Love what it does to the mid-range. Can drive the snot out of it. Sometimes, I’ll swap over and pull in the Bluecat Patchwork and use a 50% blend of the Studer, drive it first and get some grit and distortion. Decapitator is another one I’ll go to, but this is just in the template for me if I want it.
Then I’ve got the Pro-MB for more low end. If I want more compression on the low end, if I want it, then sometimes the top gets a little bit out of control. I do a lot of live gospel stuff, and the slap bass or anything like that can get kind of tricky and get out of hand, so I have that up here and I can move the band around and dial in some compression to control the string noise or the slappage.
The MEQ-5, I haven’t used this in a long time, but this is a great EQ. Love the mid-range. Just pick a band, throw it up to taste instead of just using the Pro-Q 2 all the time. Sometimes it gets boring and I want to use something else. So that’s there.
Believe it or not, the Clariphonic, even though it’s higher frequency points, this sounds incredible on bass guitar, and I use this a lot where I just crank it. You’ve got to be careful because of the hiss, so a lot of times I’ll have to come in here and throw a Pro-Q 2 on and dial back the super top end stuff. Almost offsetting a little bit of what the Clariphonic is doing, but that one is a lot of fun to use as well on the bass.
These are just in there from my template. If I have multiple bass amps — so if I have the same signal, usually I don’t have this problem with phase, but if I have a sub track that was recorded, got an engineer who gave me a bass sub track, a bass DI, and a bass amp, all different sources, I will use Sound Radix Pi, and I’ll see, sometimes it works great, and sometimes it does very little, so I just move on, but this is in here in the template, ready to go.
If you’re not familiar with this, go check it out. Phase interactions, mixer, I’m not going to claim to be smart enough to explain the science behind it, but basically this will help you with the phase relationship between the multiple mics or the multiple sources. It could be great on drums as well. I use that sometimes if I’m having some trouble with the phase relationship.
Post-plugin inserts. You can go check it out, read the manual, they’ll tell you all about it, but anyways, bass amp, we talked about that. Those three tracks will feed the bass level. So we’ve got these three tracks, they all go out to the bass level, I treat that then as one bass guitar track. VMR, part of the template, consistent with the rest of the template, virtual channel is there, then I’ve got a Pro-Q 2 depending on what I want to do with the low end, I may filter out a little bit more and let the kick win down there, I may delete this and leave it alone.
It’s just there as a starting place. The band right here is for whether or not I’m going to boost or feel out what works well with the kick drum. I’ll solo the kick and solo the bass a lot of times, and then just mess with this band, see what it feels like to boost some 100, some 70, some 50, some 20, whatever, or cut, and I’ll just massage the bass and the kick with this one band like that. Once I have the blend.
Then I’ve got another instance of this Pro-MB, because I love to just lock in my lows, and that’s there if I want to use it. Sometimes I do, sometimes I don’t.
The Hoser is inactive. Haven’t used that in quite awhile. Moving on quickly to the Waves R-Bass. This could be a lot of fun, but it shifts the frequency response, it shifts the tone quite a bit, and it just depends on what you’re going for. This is great for getting some lows into the smaller speakers. Throw this on your bass guitar, blend that up to taste, and you’ve got a really good thing going for your smaller speakers.
You may not need or want that necessarily for every track, but this is there for me to go to to dial in. You just got to be careful, because it will absolutely shift what you hear in the super sub stuff, 20, 30, 40Hz, versus what you get in 150, 200, whatever. The upper — this creates upper harmonics, and so it just creates that shift and you’ve got to be careful. You may do more harm than good if you use too much of it.
After R-Bass, I’ve got L1. Love to just knock down some peaks if I’ve got a little bit of extra stuff going on to kind of keep the bass to sit in place, so I just drag this link button, and it will pull the threshold and the output ceiling together to keep it nice in check. Very straight forward there.
Another Pro-MB, just in case I want to do some sidechain compression. This Pro-MB is setup with a band down here at just 100Hz and below, and I’ve got a keyed input for sidechain compression, already ready to go. That kick SC for kick side chain comes from the kick track up here. You can see that send is bypassed, but I almost always will use this.
I’ve also got, on the bass level track, Track Spacer from Waves Factory. This is what I use. I use it a lot for managing low end. A couple of videos on YouTube already for — search David Glenn Managing Low End. You’ll see me using this a ton across multiple low end elements where I want to control them and keep them from overdriving the 2buss, or keep them from creating any distortion. Kind of keep the low end in check. I use this a lot for Pop, EDM, Hip Hop kicks. I love what this can do.
Not usually this exaggerated. I started out with a high ratio. 100%. I’ll leave it full open, and I’ll solo the kick and the bass, and I will get the settings set correctly to what feels good in that tempo. You can click this little miniature button there, a little tiny thing right there, and it opens up the advanced panel for your left/right, your mid/side mode, your attack and release settings.
Almost always leave the attack where it is, but then the release I’ll dial it in, solo it, by having this ratio open 100%, I can really hear it — how it’s impacting the bass, opening and closing based on the kick drum.
Once I dial in the release, I’ll then back this range up to whatever I want, 150, 200, usually it’s super low. It’s like, 70 or below, and then I’ll dial back the ratio to something subtle. A little more 20%, 15%, 20%, 25%, 40% maybe sometimes, but it’s very rarely above 40%.
That’s how I use Track Spacer. The Pro-MB is a little bit more — I feel like, at least, it’s a little more of a gluing effect for the kick and the bass, so depending upon what I’m going for, I’ve got each of those in there with the key already setup to receive from the kick, and you can see those settings there.
So that’s my sidechain compression. Last is an EQ, final kind of EQ to determine sometimes I just — I’ve had that in, I just end up leaving it to determine the final tone of the bass. I may come in and do a final lift in the mids, or high cut, low pass and move on from there.
So the only other thing I wanted to talk about with the bass was my referencing technique. I mentioned it in the master fader utilities plugin video, but if I come here to the master fader, go ahead and pull open Magic A/B, and we’ll also pull open the Pro-Q 2. I want to show this off for you guys.
So let’s say we’ve got the rough mixes going, the drums and the bass, we’re working on the low end, trying to get the kick and the bass right. A lot of times, I have a pretty good reference, if not from the client, something that I’ve gone and I’ve found to reference against for the song, and the tone, and the character.
I also have references for — just for low end. Just the way that I like the low end in these mixes, and so Beautiful, Super Hero by Chris August, Beautiful by Dan Bremnas, a couple of others. Taylor Swift, there’s a couple of other tracks, and I’ve got a whole library on my hard drive.
I’ll go and buy the song on iTunes, import it in here, and pretty straight forward. I’ll click over and I’ll listen to their low end, and I’ll have this Pro-Q 2 setup on the master fader to just listen to 100Hz and below, 20Hz and below, 30, 40, whatever it is that I’m trying to figure out, and I’ll listen to the reference, then I’ll click over and listen to mine.
Let’s give an example of that. Let’s get this bass somewhere out here, and remember, this Pro-Q 2 is on the master fader. Let’s use Beautiful as a reference here. I’ll click out somewhere in there. Let’s hit play on B.
[mix, filtered]
Cool. So there’s…
[mix, adjusting filter]
I’ll get down really low.
Okay, so you can hear, 40Hz and below, a lot of kick, but there’s still some sustain from the bass. The bass has got some love down there as well, and so there’s a nice sidechain thing going on to keep those two working well together.
Let’s listen to Super Hero. I have a feeling the kick dominates on this one.
[mix, adjusting filter]
Let’s open it up.
[mix, adjusting filter]
So there’s still some bass 50Hz and below, but the kick is really winning that low end battle there. You just kind of open it up and listen to what’s going on, and then click back over and check out what you’ve got going on.
Obviously, this is not a mix, it’s something we’re working on, but then you can click back and forth to kind of hear what’s going on, right?
So anyways, that’s the technique. I’ll just go through and I’ll do that for the low end. Similar to a lot of guys will mix with just a sub on, just to hear how their kick and bass is working down in the bottom. It kind of takes the distraction of the mid and the top out of your way so you can really focus on what’s going on down there.
Then I’ll not just use this as a low end tip/trick thing, I’ll open it up, check out my mids, check out my mid-range, my upper mids, all the way up to the top. Really helps gain some perspective. Sometimes, you — listening full fledged, your ears may get tired. Put this on, kind of open and close it up, and before you know it, you’re hearing things you didn’t hear before.
Once I get to 100Hz or so, I’ll pull this guy to about the 100Hz point, and then I’ll start listening to my low mids, and just focus on low mids for a little bit. Low mids, smaller speakers, how is the bass translating, the kick translating, you know, 90, 100Hz and above, and just kind of open that up, maybe get to 1kHz or so, then I’ll pretty much just turn it off and work my way through it.
But pretty cool tip. I hope you dig that. Working with low end, trying to get your low end right, this video, excuse me, getting a little tired. I’ve been staying up through the night. It’s 6:30AM. I’m on day 2 of just going straight through the night trying to get some content for you guys and just trying to get some stuff done here for David Glenn Recording and The Pro Audio Files.
But I hope you dig this video. We’re going to move on from bass and we’re going to talk about the instrument tracks, acoustics, electrics, piano, keys, synth, you name it. If it’s not drums, bass, or vocals, it’s going to go in this next section, and we’ll see that in the next video.
Don’t forget, if you like this video, please like, hit the like button, share it, subscribe to the channel if you haven’t already, don’t forget to download the free templates at davidglennrecording.com, like the Facebook page, and we will see you in the next video.
Elevate Your Ears