Mix Template Series — Stereo Buss Processing (Part 2)
03/16/2017

I’ve got to jump around a bit to make sure that we cover everything for the sake of being completely in depth, but before we get into the processing, the plugins, and the template, I want to let you know, if you haven’t done so yet, like and subscribe here at The Pro Audio Files so that we can get you all of the videos in this series for free. I’m also going to be uploading some exclusive videos to my Facebook page at David Glenn Recording. So facebook.com/davidglennrecording. I’m going to be doing live Q&A and answering your questions over there and in the comments below.
And finally, I’m giving away my mix template and a stock plugins version for Pro Tools, and it may already be there, but over time, I’m going to be adding multiple DAWs. So go to davidglennrecording.com for free mix templates and free multitracks as part of The Mix Template series.
We got that stuff out of the way. Let’s go ahead and look at the mix buss. We’ll get to the plugins in a second, but first, there’s a really critical piece of information here for the mix buss versus the master fader. The master fader in Pro Tools, this will be one of the rare situations that I’ll be talking about something that’s exclusive to Pro Tools, but in Pro Tools, you can hit Command+Shift+N to get a new track, then use the keys here. Stereo and then up and down arrows, the stereo master fader. That is what my master fader is in Pro Tools and my template.
But, the mix buss is a stereo aux input, as are the all vocals, all drums, drum crush, all of these up here in blue, and then mix A, B, and C. They’re stereo aux input tracks.
Now, the difference is, the master fader here, the first plugin in the chain here, if I come over here to the volume, and I drop that down minus 9.2, that’s going to be minus 9.2 less signal going into the first plugin. The plugins are post volume fader. Okay?
Now, on the mix buss, it’s not that way. It’s the opposite. So if I drop this down minus 9.2, or minus 9.9, what I just clicked on, that’s not going to be reducing the signal going into, as I’ve got here, the Studer or whatever plugin I have. On a stereo aux track, it’s going to be post-insert. So over here, whatever the last plugin is, that volume is going to be reducing or increasing on the fader post-inserts.
I hope I didn’t explain that too janky. If you want a better explanation, go to YouTube and search David Glenn Recording — or, David Glenn Stereo Buss Master Class, and I talk about it, and I know explained it well there and a lot more in depth.
But that’s the main difference. The master fader there is going to be set, and I pretty much leave that at zero all the time. Sometimes, I’ll drop the master fader for doing video recordings, for the Screenflow recording to make sure I don’t clip that signal, but the mix buss here is a stereo aux input, as is, or are, all of the rest of these on the screen and everything we’re going to talk about right now.
So now let’s look at the plugins. The limiter that I’m using right now is the AOM Invisible Limiter. I’ve tried all the different limiters. There’s a ton of great plugins, guys. When I bring up what I’m using, know that if you’ve got the Slate FG-X, that’s an incredible limiter. If you’ve got the FabFilter Pro-L, that’s an incredible limiter.
Fill in the blank. There’s tons of incredible plugins out there. This just happens to be what I’m using at the moment. I’ve used it for a year or so now, and I really really like what it does.
A couple of things to note, I go and I drive this up 10dB from the very beginning, as you’ll find out next month when I cover actually mixing a song and importing the tracks and all of that. You’ll see that I like to set all of my tracks to minus 15 before I even start the mix process, and then I’ve got 10dB of gain right off the bat that I boost the limiter so that I establish good gain staging from the beginning.
But I’ve got this set the way that you see it there, and that’s the last plugin in the chain, the last plugin that affects the final bounce, and then depending upon if I’m working with a really good mastering engineer or whatnot, I may turn that off, or finagle it a little bit, but anyways, we’ll talk about that next month.
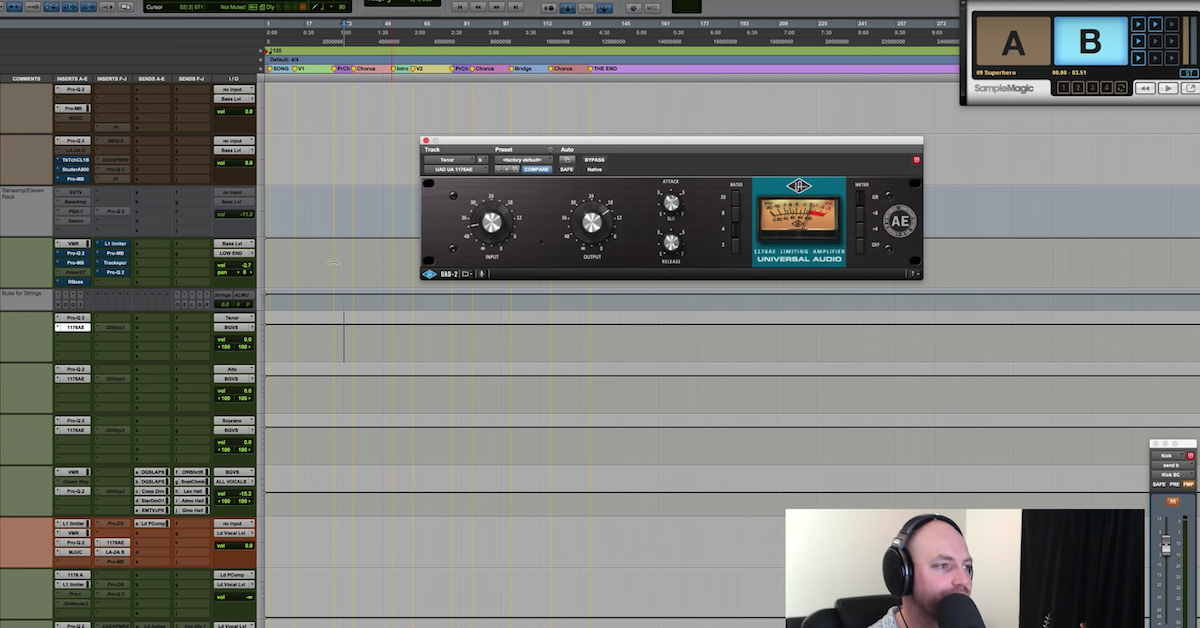
But moving on from the final limiter there, I’ve got the ATR-102 from UAD, and the Studer A-800. I haven’t been going to these as of late, but those are just there for taste, for color, for options. Maybe I want to drive a little bit of that tape sound, and then because I master my own stuff, maybe I want, you know, the ATR-102 on there as well.
I have used both of these in mixes with great success, and then I’ve also not used the Studer, and then used the ATR-102, and like I said, I have been using neither as of late, so those are there in the template as options. You may have the Slate. Tons of different companies now have incredible tape emulators that those just happen to be the two I have. Invested in the UAD system quite awhile ago, so I like to get it on with the UAD stuff there.
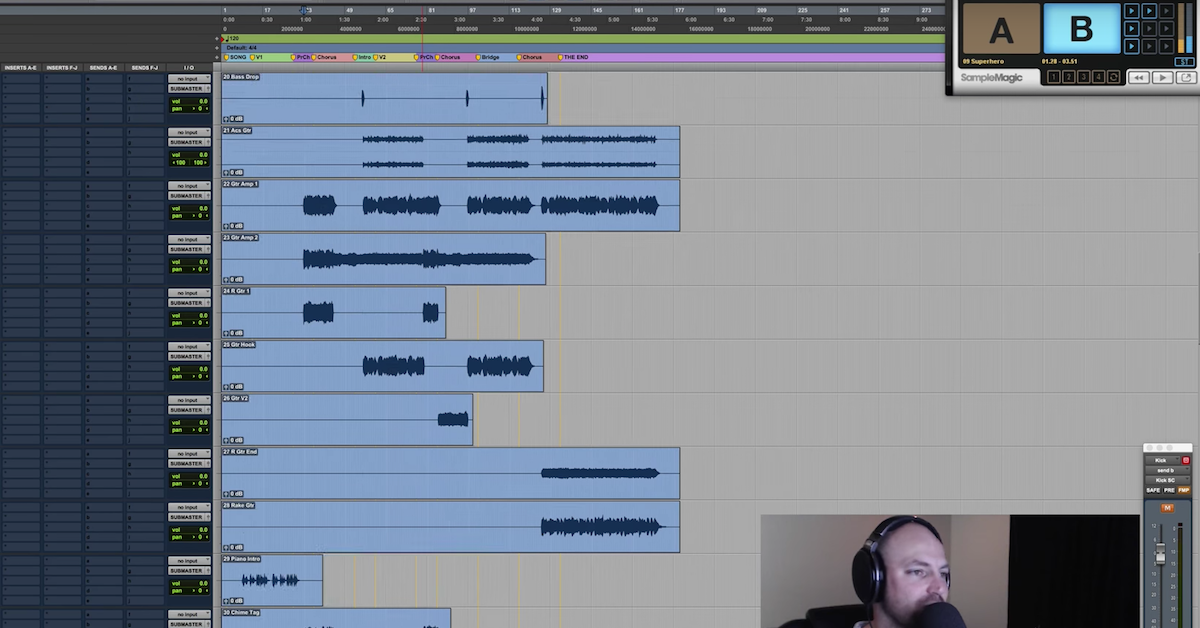
Now we’re going to look — we’re going to jump around a little bit. We’re going to come back to mix B and C. Let’s go ahead and give kind of a quick overview. We scroll up all the way to the top, you can see click track there, I’ll have that in to establish a session tempo and update my tempo from the beginning, because in Pro Tools, you can open up tempo, tap the T key, get a basic tempo going, and then I’ll just make that inactive, but below the click track is where I’ll import all the tracks for the song that I’m going to be mixing, and then I’ll select them all and drop them all to like, minus 20. Just so that they’re in the session.
Then I’ll go through and organize them, and put the drums where the drums go, and the bass, and all of that stuff where they go, but to kind of give you a basic gist of my mix template, I like to see the drums on top, the very top of the session, I like to have live drums, then the room mics, and then after the room mics, I’ll have any beat production or percussion tracks. Sometimes, we get a little bit of both in these 200 track sessions that we’re mixing nowadays.
So now we’ve got drums, percussion, beat production, then it would go to the bass over here in brown. I’ve got where I’ll split the subs out from the DI. We’ll talk about that a little bit later.
After the bass, I’ve got an empty gap here from strings, tenor, alto, soprano, those are vocal busses, but from the bass level just after that, that’s where I’ll drag — I’m a guitar player, I’m a guitarist, so I’ll put the guitars first, acoustic guitars, then electric guitars, and then the main piano or keys sound, followed by synths, finally pads, and then any strings, and that’ll all go there.
Then the vocals will get broken up too. I mix a lot of live Gospel, CCM, Live Church stuff as well. So I’ve got a section for tenor, alto, and soprano in the template with BGVs. If I’m mixing something that’s not that, then I will change the name from tenor, alto, soprano, and just use this buss as men, women, gang vocals, whatever, and I just have a couple of extra busses in the template.
We’ll look at that in a minute as well, followed by the lead vocal. My lead vocal processing. Then the lead vocal effects, and then we get back to the busses, the mix buss, and then below the buss processing, I’ve got the instrument versions of those effects. More delays and we’ll get into all of the modulation and widening. Then my verbs at the very bottom. I’ve got all of those setup in the template, ready to go, and then depending upon the song, genre, session, I may tweak those a little bit, but for the most part, I’ve got what I need in this template.
Now, the reason why I wanted to give a quick look at that in overview is it’s important to know what’s going into these busses right here. I call them the All Busses. All vocals, all drums, then the drum crush, percussion, low end, all music, high end, and all effects.
Pretty self explanatory, but there’s a couple of little things that I want to detail for you. I’ve got to give credit where it’s due. I was first introduced to this system by Dave Pensado, Pensado’s Place, some of his early videos, he talked about his routing and signal flow and kind of demonstrated that. I’ve done what I do, I saw him, tweaked to taste, done some things a little different, taken some things I did before I even saw that, taken things that I’ve learned from other guys like Andrew Scheps, and I could go on and on with all of the mixes that I’ve watched and followed and learned from.
But tweak to taste, right? So I’ve got this system in place, and I’m going to kind of give you the gist. All vocals, lead vocal, background vocal, no matter what it is, if it’s a vocal, it’s going to hit all vocals. Sometimes, I will add a little saturation with the saturation knob, or multiband compression, or something, but for the most part, I’ve got Slate Virtual Mix Buss on all of these busses, and all vocals is no exception.
Then we go to all drums. Now, this is where things get a little bit different. It’s not every drum track. All drums is going to be sent — if I scroll up here, it’s going to get the kick — so it would be kick in, kick out mic, kick sub mic, any kick mic, however it’s bussed here, it’s ultimately going to get sent to all drums. If it’s a kick, same thing for the snare, and the toms. That’s it. The shells of the kit go to All Drums.
Then the hi-hat, the ride mic, the overheads, the room mics, those all go to the high end buss. So if we come down here, you see all drums, and then you see high end.
It’s very rare that I do it differently, but this is the basic setup, because I like to compress the shells of the kit, the kick, snare, toms through all drums, and then go to a parallel compression that I have setup here called drum crush, and that’s where I’ve got again, VMR for the mix buss. This is Slate 1176 there as an option, but it’s turned off, and then you’ll see here, drum crush, I’ve got all of these options here. I’ve got the Vertigo VSC-2. I’ll pull that open and give you a look.
Sometimes, I go to that for drum buss compression. The Neve 1073, sometimes I want a little bit of grit, add a little bit of EQ. This is great. I’ve got the dbx 160 from Waves. I really love their version of this. That’s there as an option.
Then the new UAD API 2500. I’ve got that set to the drum crush preset. I think it was Ryan Hewitt. Yeah, drum crush. I still actually haven’t used this one, but I pulled it in as an option and just threw a template in there.
VMR. This is what I’ve been using since it came out. Since this one came out, I think it was the day it came out, I tried it on the drum buss, I loved it, did a video on it, and yeah. That’s been the one that I’ve been going to.
So that’s in, and then Trimmer for gain staging if I need to back off a little bit. Leave that on, but then I have the FG-Red, an 1176 from UAD, and then I’ve got this Thermionic Culture Vulture, which has been a lot of fun to use on the drum crush here. A little bit of grain, a little bit of hair on the chest of the drums. Sometimes, it can be something where I just go nuts and increase the mix knob here, you know, 60%, 70%. Sometimes it’s 40-50%, somewhere in there, and then others, it’s barely on, sometimes I just turn it off. Especially if I’m doing a Pop/EDM where I need that super clean kick drum, that’s going to be off.
Then finally, the good people at Drum Forge, Joey Sturgis, I can’t remember who all is involved in that, I know Joel, those guys rocking with everything that they’re doing. DF Clip. Love this. This has been a go-to for me in more than just drums. Been using that a lot on some other things as well, but having some fun with that one.
So all drums, kick, snare, toms, I will parallel compress those elements with the drum crush, and then the high end, I mentioned the hat, the ride, and the overheads. The reason why I don’t send those to all drums is I don’t like that parallel compression to affect the metal of the kit. I like it to be something where I’ll treat those on the track level with EQ and compression, so the hi-hat, if I want it compressed, I’ll compress it at the track level. The overheads, I’ll compress it at the track level.
I’ve got a channel strip here, we’ll get to that in the next video, but I’ll treat the overheads — the room mics, I like to squash the room mics sometimes. I like to get a dirty mic in there, get a mono mic, I may create it from bussing tracks, and then throw a SansAmp or something crazy on it, distort it, what’s the one I’m thinking of — Decapitator is the other one I like to go to for that. Parallel saturation — but I like to treat those there, and then leave them a little more open than I do the drum crush.
So that’s the reason I separate the shells of the kit from the overheads and the metal. That goes to high end. High end may also receive things like maybe in an EDM track, if I’ve got some super high end elements, like cymbal, reverse cymbals, transitional elements, swirly super top end type stuff, that’ll go to the high end buss, but pretty straight forward after that.
Percussion is percussion. Bongos, claps, anything I don’t want affected by the main drum buss with go to percussion. Tambourine, shaker, that kind of stuff. Low end, pretty self explanatory. We’ve got the bass guitar, we’ve got the — all the blend of the bass, so the sub tracks of the bass, the DI of the bass, the bass amp, any low end elements, sometimes 808s, they would go to the low end, sometimes they’ll go to drums, but more on that when we actually mix the tune.
All music, the all music buss is going to be again, pretty self explanatory. Guitars, keys, synths, lead guitars, electric guitars, anything that’s a music track, that’s going to come from the tracks that we import in, we’ll look at that in another video, but those are all eventually going to get bussed into all music, where I will — excuse me, have VMR that’s on all of these busses, just set to the standard SSL Brit 4K E, then the FG-Grey. This has been on here for years now, and I just dig it. So sometimes I’ll do a couple of dB of compression here at the all music buss, and then sometimes, I’ll do it at the mix A, which you’ll look at in a minute, but I’ve got an imager.
The All Music Buss, this is a really cool tip, sometimes I will push this out. I’ll just break it down to one band and then push it 15 or 20%, and then other times I may do that, and then I may actually copy this over and have two of them. One where the first one would be like, 15% or 20% wider for the music, but that prevents the stereo image of the drums vocals, percussion, low end, all of that stuff stays in its place, but then the music tracks get expanded outside a little bit so it doesn’t mess with the stereo field. The center, the kick, the bass, the low end, I get to keep that stuff central, but then the music can just expand outside the speakers a little bit.
So that would be the first plugin here. Ozone 7 Imager, 15%-20% there, but then for the duplicate here, I may push it another 15%, 20%, 40%, 100%, I don’t know, whatever, get crazy, right? But then bypass it and then only bring it in at the hook, the chorus, or maybe the bridge, maybe the outros, like this exploding outro, only bring it in there. I’ll automate that, depending upon the song and what it’s calling for, but another way to just kind of create energy, create some excitement, expand things a bit to automate the imaging plugins on the all music buss.
You can see, I’ve got some other plugins here. I’ve got Center, same kind of thing, I haven’t used that in a long time, but Pro-Q, if I want to do any surgical EQ. I’ve got the Clariphonic, I use this quite a bit from Kush. I love what this does to the top end. You can see that there, Focus and the Clarity, basically I just shove that up really high to where it’s just exaggerated, then I’ll pull that all the way down, throw it back up, kind of toy with the balance a little bit until it’s less of a heard effect, and more of a felt top end, if that makes any sense. Maybe just me and my craziness.
But that’s there on just about all of these busses. I do that quite a bit on the drums as well with the Clariphonic, and then the all music buss also has this Bluecats Patchwork. Let’s see if it crashes on me. Nope, we’re good.
Okay, and it’s missing right now, but basically, I’ll throw a saturation plugin — I love the UAD Studer, and I’ll throw the preset effects deck — excuse me, effects cassette deck. Shoutout to Tony Maserati, he mentioned that on a video a long time ago, and I’ve been using that like crazy, and so basically, it gives me a mix knob for plugins that don’t already have a mix knob, and that is an incredible tool for the all music buss. Sometimes on the drums as well, but at least it’s there, and I can copy it over or use that parallel saturation for plugins that don’t already have a mix knob.
Moving on from the all music, I’ve got the all effects down here, and it’s just like it sounds. The vocal effects, the modulation, delay, reverb, saturation effects, any of those setup in the template get bussed to the all effects section, and I rarely touch this. This is almost always for volume where maybe I’ve got a vocal that carries over, some verb splash or something, and I want to shut that off, or I want a little less effects in the verse, maybe a little bit more in the chorus.
I can then control those from a global standpoint here on the all EFX track. So again, ripped that from Dave Pensado years ago, but that is the basic layout of those tracks, so we’ve got the water flowing down hill, the routing and the signal flow from these busses.
It’s also important to note that I can’t remember if Avid fixed this. This is an old glitch that knowing Avid, forgive me, but it probably still exists. There’s a latency problem, or has been in the past, I’m not sure again if it’s fixed or not, if I send, let’s say the kick and the snare and all of that stuff goes to all drums, the bass goes to low end, my music tracks go to all music, but let’s say that I forget a set of guitars, and they just go to the mix buss. They’ve — I forget to put them through to the all music and they go to the mix buss.
There used to be a latency error, or a problem that would happen, and it would cause phase shift, and it would just — it wouldn’t play nice. Things would get nasty. So I would make sure, I still do, that every single track in the mix, whether I buss the kick in, kick out to a kick buss and then it goes to all drums, or the acoustic guitars to an acoustic guitar buss, whatever, they go every track, makes its way to one of these blue all busses.
Every single mix I do. Nothing is ever sent directly to Mix A, and so that’s important to note if you’re on Pro Tools and you do get some phase or latency issues, that could be what’s happening is you have some tracks that are not hitting some stereo auxes, they’re going straight to the aux master, and again, I’m not sure if they’ve fixed that or not.
Okay, so now let’s talk about Mix A. The first plugin is VMR. That’s the Virtual Mix Buss. Again, I don’t touch it. It’s just in there. I’ve just used it for forever now, I love what VMR does — or, excuse me, what the Virtual Mix Buss does, and I don’t touch it. It sits there.
You could experiment. Some of them you get a low end bump from the Brit N, the Neve. I can’t remember, there’s a mid-range thing in the A, a couple of different things. A little more grit maybe from the RC-Tube, etcetera, but that just stays there for me, and then I have this API 2500. I’m excited to use this. I have not used this yet, but I’ve got that in, I’m pretty confident that’s going to be a fun one to experiment with for buss compression, but I’ve been going to, for awhile now, the Plugin Alliance version of the VSC-2 brainworx. Vertigo Sound.
So this one, I’ve got a video online on how to setup a buss compressor. Pretty good video. Go check that out. Kind of walk you through what I’m thinking and why, but go ahead and run a search. David Glenn buss compression, and you can watch that and that’s been my go-to buss compressor.
Moving on from that guy, we’ve got VMR again, because I’ve been using Revival. You probably already know this, but just in case, if you don’t already know, go to slatedigital.com, and as long as you have an iLok, Revival, this guy right here, is free. There’s no good reason that this plugin should be free. It’s one of my favorite plugins. I really, really love what’s going on behind the scenes. Whatever the recipe is that Fabrice and Steven Slate have going on back in the algorithms with this guy, it sounds incredible. I love this.
Vocals, anything that needs to come forward in a mix, the harmonic excitement built in, the Shimmer is absolutely incredible, and I’ve got a little bit of top end and a little bit of bottom boosted from the very beginning. I never touch this. I don’t think I’ve ever touched this on the 2buss, and then I follow it with a high lift, which may be getting replaced. I just picked up the UAD Chandler — what is it, the curve bender you can see here.
It’s all neutral, it’s flat, but I’m pretty sure I’m going to be experimenting and loving what that does. I’m sure this does something just by being on, but literally, just before going live with this video, I added the API 2500 and the Curve Bender to my template.
So moving on from there, we’ve got the Ozone 7 Exciter. Now this guy is something that was a part of my template three or four years ago. Again, shout out to Dave Pensado, he had a preset that he had on his 2buss. It was Hip Hop basic, and it was built into Ozone 5. So if you have Ozone 5, the preset Hip Hop Basic, this is one of the only things remaining for me from that Hip Hop preset that Dave Pensado, shout out, and it does very little. It’s very subtle, but I don’t know, it’s like a comfort thing.
Knowing that it’s there, I’ve had it on for a long time, and it’s there. Bypass that, and it really does not do that much, it’s very subtle, but I have been afraid to take it off. It’s just something that I’ve mixed through these plugins for so long now, I just kind of rock with it. But you may try out — you may have a different plugin, a different exciter you may want to try, just you know, consider 10-15% of that, and move on.
But now, some good stuff here. So we go from the tracks themselves, the drums, the bass, the keys, guitars, etcetera. The vocals, all the way through to these all tracks. All vocals, all drums, right here.
These, you can see feed to what’s called the sub master. Back, Pro Tools version 5, or something, I did the Expert Certification here in Orlando through a little Pro Tools certification class, and the instructor called the stereo buss, or the mix buss, the sub master. So go figure, it stuck with me.
Sub master, stereo buss, mix buss, same thing. But I’ve got — it actually makes even more sense now that I call it the sub master, because these tracks feed the sub master, which is Mix A. Mix A is where all those plugins are we just went over, and then that track feeds what I call the paramix, or parallel mixes. This is a send, you can see it there, pre-fader, it follows the main pan. It’s a copy of this signal coming out of mix A, and it goes into mix B and mix C.
Let’s turn these on. Now, mix B, I didn’t use to call it mix B, but it was a parallel compression buss that I had setup, and then Bob Horn comes along, and his course over at Pro Mix Academy, he talks about his 2buss processing, and he called it mix A, B, and C. A being the main signal. So the clean processing that he would normally do on a stereo buss.
B is parallel compression, and I’ve got the UAD Fairchild. I love this. I typically leave it on time constant 5 or 6. Five gets a little more energetic, if I remember correctly, six is more — ah, I think it’s the other way around. Maybe. I get them confused, but I just switch between these two, five or six, and I’ll hit that really hard.
So basically, I can mute mix A, open up just mix B, crank the fader up, and then my mix is soloed through this mix B here with the compression. I can just hit it hard.
Then, I can get that sounding good, get the compression working the way that I want, and then I can mute it, pull it back down, technically you don’t have to mute it, but then I unmute mix A, and then I’ll blend in that nice, fat parallel compression to taste.
Even further than that, I don’t use this very often, but it’s awesome to have in the template, you’ve got mix C here. Mix C, thanks to Bob Horn, is parallel clipping. So I’ll do the same thing, we’ll unmute that, we’ll snap it to the top, mute mix A and B, so they’re both off, and all you hear is the clipping. I’ve got the T-Racks Classic Clipper. My buddy Neil Devereaux swears by — slurring there — swears by this one. He uses this in his parallel clipping.
But K-Clip, my buddy Joey Fernandez swears by this one. And they have a new version out, I’m a little bit behind, I’ve yet to update it, some more features, which should be pretty cool.
Basically, you just get this right. So this is just for level. It’s going to be just noise. It’s going to be a crushed version of the mix, and that’s going to allow us to just increase the final output. If you want to get hot, you want to get involved in the loudness wars and that debate, have at it, but this is just going to be another option for us, another tool, and I’ll get that sounding pretty good, drop the fader all the way down, unmute mix A and B, get that blend where I had it, and then just blend a little bit of this if I want it.
Again, I very rarely use this, but it’s awesome to have in a template. So mix B and C, there you go. A, B, and C get blended and they go, you can see all of them are — the three of them are routed to the mix buss, which is where we talked about the Studer, the ATR-102. This is where I’d have the Matching EQ when I commit to a curve, I’d drag that up here, then the final limiter.
So that was a mouth full. I feel like I need some throat coat. For you guys out there producing vocals or recording vocals, you’ll know about the throat coat. Some tea with some honey, but I’m going to go get that. We’re going to move on into the next video where we’re going to start looking at the individual tracks.
So I’m going to open up the kick track, I’m going to look at that processing, and kind of explain to you how I set my DAW up like a console, so I’ve got my favorite EQ, gate, dynamics processing for the different tracks and the different styles, and they’re all there ready to go, and I’m going to break down all of those, and then you can just follow along and swap out. So you may have already pulled open your template or the one I’ve provided for free at davidglennrecording.com, and you just swap out these plugins for the ones that you like.
Maybe you’ve got a tape sim from another company, and you throw those in there and just make them inactive, and it’s there and you’re building your template along the way.
So next video, we’re going to take a look at individual tracks and make our way through it. I hope you guys are enjoying this, I hope you’re learning something, feel free to post comments down below, go to David Glenn Recording on Facebook, facebook.com/davidglennrecording, post your questions. I’m going to be doing live Q&A, and then don’t forget to download the free mix template and free multitracks. We’re going to be using those here in a couple of weeks. The series may actually already be online for those of you guys who are a little bit behind, and tons more to come next video.
Thanks again. Like, subscribe, share, all of that good stuff, and we’ll see you breaking down each of the different channels in the next set.
Elevate Your Ears