UAD Empirical Labs EL8 Distressor on Drums, Bass, Vocals & More
11/18/2017

As you probably have seen, Universal Audio has partnered with Empirical Labs to create a plugin emulation of their popular hardware unit, the Distressor. So today, I’d like to show you how I would use the Distressor on a variety of sources, within the context of a mix.
So let’s cut to the chase and take a closer look at this Pro Tools session. One of my favorite applications for the Distressor is drums. In particular, drum rooms. But before I show you my methodology and how I’m using it, let’s just take a quick listen and show you what kind of sounds you can get.
I’m going to bypass the plugin and hit play, and then I will engage it so you can hear the difference.
[drums, with and without Distressor]
So it’s bigger, it’s dirtier, it has more character and vibe. It sounds like the drummer is hitting harder and we hear more of the room. This is just some of the things that the Distressor is known for.
Let’s add in — I’ve got Room Left and Room Right. I also have an overhead mono and a closet microphone that I will add to the signal. And let’s compare how they sound with and without the Distressor.
Again, I will start with the effect bypassed.
[drums, with and without Distressor]
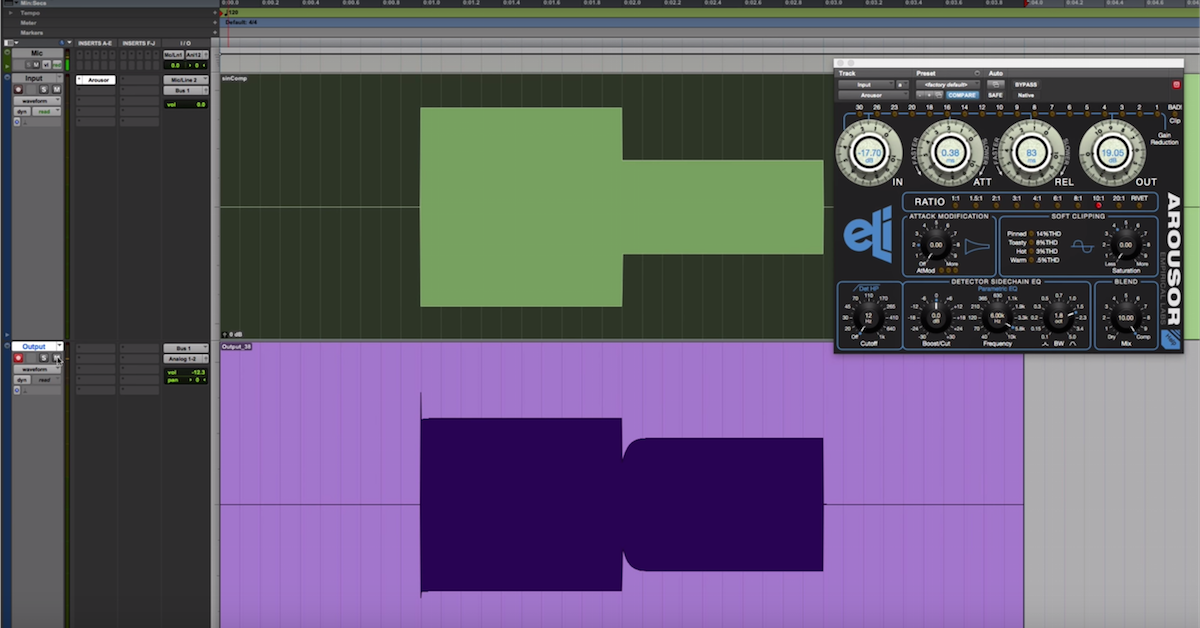
So let’s take a closer look at the controls on a Distressor, and then we will hear it in action more.
We have a variety of different ratios, ranging from subtle 1:1 all the way up to Nuke, which is essentially brick wall limiting. This can be a lot of fun on drums, but there are plenty of applications in which you might use it. This can be changed via this ratio button.
The Detector section is helpful in that it will change the signal feeding into the compressor, therefore making it respond differently. So if you want to avoid unwanted pumping due to excessive low frequencies being fed into the Distressor, you would engage the high pass filter.
You have this bump in the mid-range around 6kHz. This will mean that the Distressor responds more to that frequency, and can help tame things like vocals. We also have this link option, which will allow us to separate or link a stereo version of the Distressor.
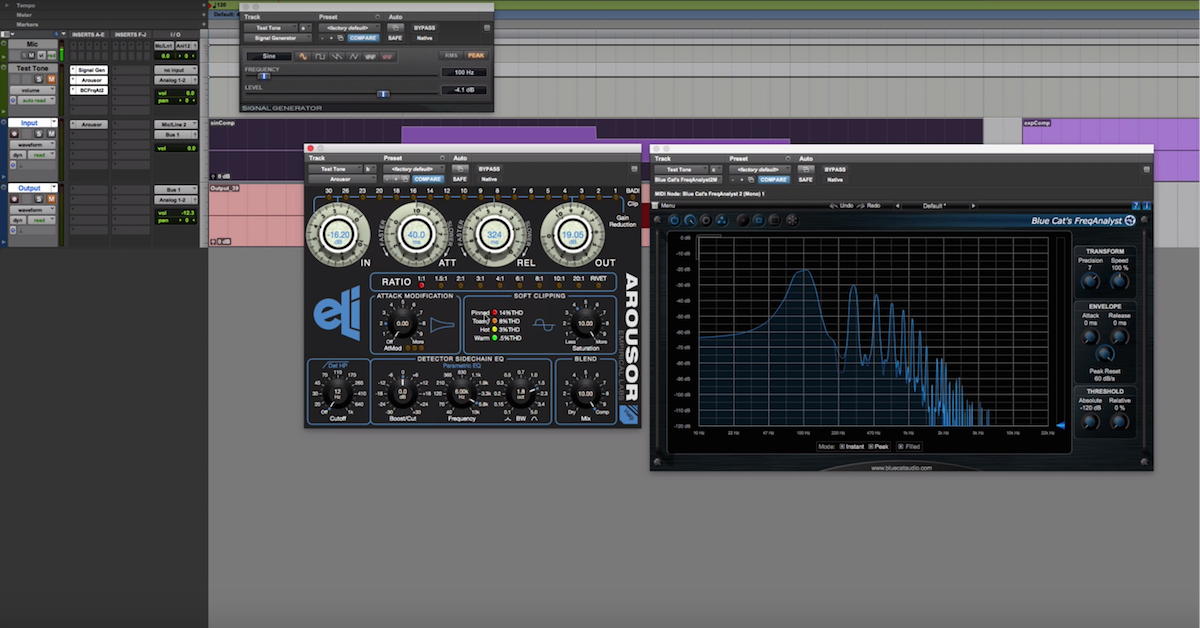
This audio section here, we have a high pass filter coming out of the Distressor, and two types of distortion. Second, and third order harmonic distortion, so tonally speaking, you can really do a lot of fun things to add distortion and saturation to your material.
According to the Distressor manual, both the ratio and threshold are controlled with this ratio setting here, so you will not see a threshold control. We have input — how much we’re feeding into the compressor — attack and release. Zero represents fast, ten represents slow. Output, how much signal is coming out of the compressor. Great for level matching if that’s what you want to do. And this dry/wet mix blend, which essentially allows us to do parallel compression. Love this feature.
We also have a very handy headroom control, and of course, a power switch.
So enough about the controls, I know why you’re here. It’s because you want to hear this thing on a variety of sources. So let’s start with snare drum. I’m going to bypass the effect, and then engage it.
[snare, with and without Distressor]
Alright, so the Distressor adds this nice thwack to it. We hear a little bit more of the room. We do hear some resonance from the other drums, which you can then fix after the fact with an EQ. I am going with the Nuke setting, which is, remember? Essentially brick wall limiting.
So because of that, you have to be pretty careful to choose a slow enough attack to allow some of the transient to get through. Otherwise, it is totally going to crush your drum, and it’s not really going to sound effective and punchy. So again, a slow enough attack to let the transient of the drum through. We have a fast release, I am driving it pretty hard, and for the sake of this tutorial, I mostly level matched it, but in the mix, it’s actually brought up.
We’ve got this detector set to this mid-range boost, so it’s reacting more to some of the harsh frequencies of the snare, and this distortion II setting.
Alright, next up, bass. I’m going to try something a little bit different. We’re going to hear the bass not soloed. So it’s going to be up against the rest of the arrangement. I will start with the plugin bypassed, and on the second loop, I will engage it. What you’re going to hear is a bass that starts out a little bit dull and lifeless, turn into a bass with more growl, and sits amongst the mix in its own space a lot better.
Here we go.
[mix]
Because this part was performed with a pick, again, the attack setting is really important. I want it to be a slow enough attack to where the picky-ness of the bass can get through. I will probably go ahead and either using clip gain or volume automation make it so each and every pick is exactly how I want it to be.
I do want to show you, as I change the attack to be faster, what kinds of distortion can be imparted onto the signal? Maybe something you want, maybe something you don’t want. The key is to know that the Distressor can do it. Here we go.
[bass]
Cool. So next up is guitars. And these were pretty gnarly sounding, to be honest. At least one of them is actually my acoustic guitar with a pickup plugged into my Vox AC30 amplifier, which is already a pretty bright signal. So I wanted to use the Distressor to shape the tone of the guitars, and also flatten them a little bit. So let’s take a listen with the plugin bypassed, and then I will engage it.
[guitar, with and without Distressor]
Let’s hear it in context with the rest of the mix. Again, first bypassed.
[mix]
It’s very subtle, but it really helps level the guitars, and the Distressor, in this case, does this wonderful thing that I like on guitars, where it makes it sound like the guitar, or at least the amp is right there, almost like the amp is your monitor. So I love that sound, and the Distressor is helping me do that.
Next up is lead vocals, and I will admit that I’m using the Distressor in a pretty subtle manner here. I was happy with all of the processing and the overall tone of the vocals, I just wanted to use it for some subtle leveling, and to add a little bit of harmonic saturation. So let’s take a listen with it bypassed, and then bring it in.
[mix]
In fact, I am using the parallel mix blend knob here, which is always a lovely feature.
Okay, I have saved the best for last. We’ve got these crazy background vocals that sound like a chorus of demented muppets. I don’t know, you’ll hear.
So I’m going to bypass the effect, and then play them soloed. Here we go!
[background vocals]
So I wanted them to sound even more insane, if that’s possible. So let’s have a listen to it with the Distressor. I am basically going for a leveling effect, so that the sustain is more prolonged, and that the level just seems a little bit more consistent.
Here we go.
[background vocals]
We also benefit from a little bit of distortion. Let’s hear it in the mix, first bypassed, and then I will engage the effect.
[mix]
Okay, guys. So in summary, this is another wonderful release from Universal Audio, working alongside a hardware manufacturer. The Distressor is a sought after piece of hardware, and now we are very lucky to have it in plugin form. It is versatile, you can go nuts with it, or you can keep it subtle, and this is the first mix on which I have used it, and I already have close to half a dozen instances of it.
So make sure to check out the Distressor, and my band, Ugly, Ugly Words. Have a great day, guys! This has been Ian Vargo with The Pro Audio Files and Mastering in the Box. Bye!
Elevate Your Ears