8 Techniques for Compressing Vocals in a Mix
03/27/2023
Article Content
In any style of music that includes vocals as a featured element, an intelligible vocal — appropriately processed to work alongside the other elements of the arrangement — is key to a successful production. Compression, which can do so much more than control the dynamics of a signal, is one of the essential processors found within an audio engineer’s toolbox.
Before I describe how I use compression when mixing vocals, it’s important to emphasize that compression can’t fix mistakes in performance, recording technique or in any other signal processing. If you’re not comfortable with it, I strongly recommend against using compression on a dynamic singer, as improperly applied compression can squeeze the life out of a performance, resulting in a variety of non-musical artifacts that can’t easily be remedied at the mix stage. If anything, compression can potentially bring out poor acoustics, errors in vocal performance and poor application of equalization, saturation, reverb, etc. Assuming all these are done well, however, compression can bring a production to the next level, and most of the vocals found within the music you hear in popular media have been processed with a liberal amount of compression.
Another point worth mentioning is to be wary of drastic settings on compressors — extremely fast attack and release times, high ratios and dramatic amounts of gain reduction can be fun (and have a place in vocal production), but as a starting point, using more moderate settings usually results in a more natural sound.
With that, here’s how I use compressors when mixing vocals.
1. Level Your Vocals Using Clip Gain Before Applying Any Compression
While leveling of amplitude is one of the most common applications of compressors, by using clip gain to ensure that quiet and loud passages are more even in level, compression will be applied more evenly throughout the song. This will avoid the audible squeezing and pumping that compressors can sometimes impart onto extremely dynamic signals, vocals included.
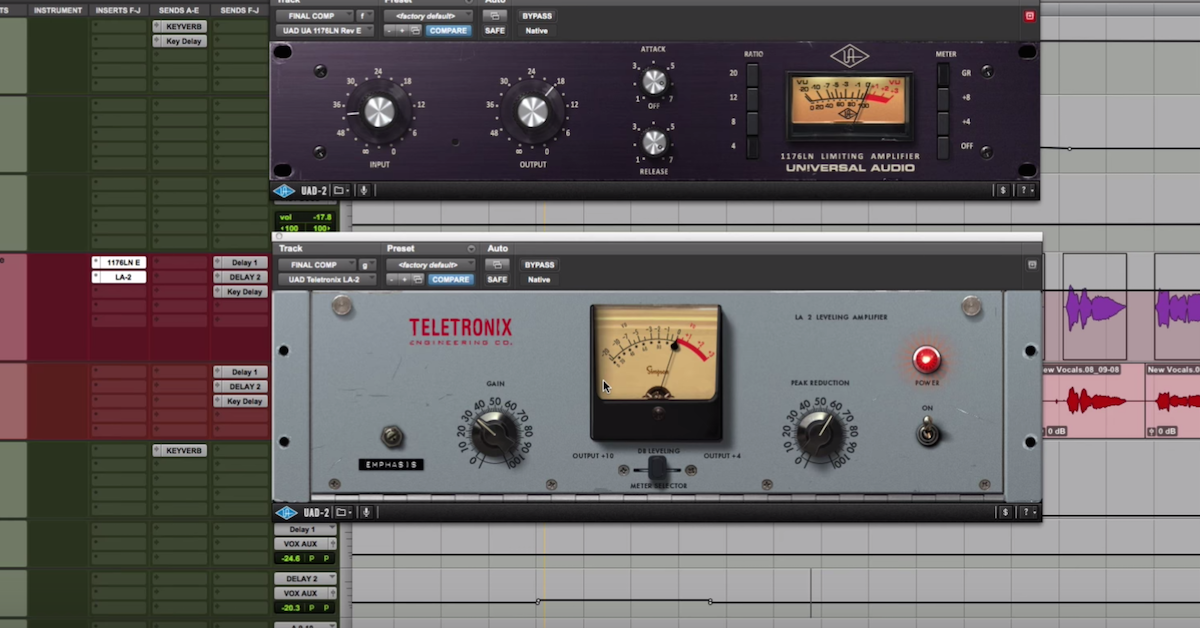
2. Use Multiple Compressors in Series
I suppose that one could use this technique instead of tip number one, although I prefer using both. Take a compressor and adjust the settings so that it’s only applying moderate gain reduction (1-4 dB) on the loudest passages. Then, insert a second compressor later in the signal chain that applies gain reduction more evenly (again, only a couple of dB) across the entire performance.
The point of this all is to avoid the negative artifacts of compression by using two different compressors conservatively — the first compressor only engages on the loudest parts, which then prevents the second compressor from ever having to work too hard. The most common tandem for this application is the tried-and-true 1176 into an LA-2A, but try your own combination of compressors — even stock ones that come with your preferred DAW can work well. Additionally, using multiple compressors in the same chain, perhaps not one right after another as in this example, is encouraged as well.
3. Use Parallel Compression
Blending an unprocessed track alongside a treated one is commonplace in modern music production workflows. Many plugins now include a dry/wet blend feature, allowing users to take advantage of parallel processing. Some of my favorite compressors with this ability include FabFilter Pro-C 2, UAD Empirical Labs Distressor, Soundtoys Devil-Loc Deluxe and more.
On especially dense mixes, a vocal can struggle to cut through. In this situation, I might send an unprocessed (or minimally processed) vocal to one or several auxiliary/return tracks, then inserting a variety of effects on these, including compression. One such track might be affected to have a bright and airy timbre, another with pronounced lower midrange for fullness and warmth. Compression-wise, I can afford to use more pronounced settings because I’ll blend these tracks with the original, which keeps the overall dynamics natural.
4. Beware of Breaths and Sibilance
Compression tends to accentuate the brightness and harshness of sibilant passages, and while de-essers are a useful tool for dealing with this, too much of it results in a ‘lispy’ vocal quality. On some pop mixes that feature accentuated high frequencies and around 10 dB of gain reduction on vocals, things can begin to sound sizzly and harsh. I often hunt down sibilant passages and use clip gain to reduce their level until I’m satisfied with them. Similarly, heavy compression on deep breaths leading up to singing can cause a swelling sound, with the breath sounding as loud or louder than the lyrics. To remedy this, I’ll turn them down with clip gain, or even drag them to their own track.
5. Know the Different Types of Compressors and Consider Them in Context
It’s beneficial to understand the different compressor types (VCA, FET, optical, variable mu) and how they can affect the dynamics of a signal.
Voltage Controlled Amplifier (VCA) compressors are popular for mix buss applications thanks to their ability to glue an entire mix together. They lend a certain attitude to program material, and have a distinct punch that works well on drums. Popular units include the SSL G-series stereo compressor, the API 2500 and one of the two sections of the Shadow Hills Mastering Compressors. Can you use them on vocals? Of course, but the aforementioned units have historically been used more as finishing compressors, and were perhaps seen as overkill when compressors found within console channel strips or other mono hardware units were available.
Field Effect Transistor or FET compressors make up some of the most popular dynamics units of all time, including for vocal applications. They are fast, bright and even aggressive-sounding when pushed hard. Because of this, they are popular for an in-your-face vocal sound. Well known units include Bill Putnam’s original 1176 and the many disciples that followed. Overstayer, manufacturers of one of my favorite hardware units, the MAS, has its own unique take on the FET compressor. It’s been dubbed the stereo field effect, which contains similar controls to an 1176-style unit, but with added features including:

Ready to elevate your ears?
It doesn’t have to take years to train your ears.
Get started today — and you’ll be amazed at how quickly using Quiztones for just a few minutes a day will improve your mixes, recordings, and productions!
- Discrete harmonics circuitry to add rich color and character to the compression. This integration gives you a fluid recording/mix chain.
- Parallel blend control — adjust compression and harmonics as aggressively as needed and balance to taste.
- Multiple ratios allow for subtle control to harder limiting, while the external sidechain loop can be used to shape further or bypass compression altogether, driving only the analog harmonics.
- Nonlinear mode brings creative & extreme punch for energized compression balanced with additional harmonics.

The Overstayer Stereo Field Effect
Another classic compressor design, the optical or opto compressor employs a light element and optical cell to reshape the dynamics of a signal. As the amplitude increases, the element emits more light, thereby causing the optical cell to attenuate the amplitude of the output signal. Optical compressors are known for their relatively slow, smooth dynamics response, making them more useful for when you need a more gentle, detailed vocal sound. That said, have no qualms about treating a screaming vocal track with an opto compressor like the famed LA-2A, a Tube Tech CL 1B or a Manley ELOP. Optical compressors can be found in guitar pedal form, specifically the Mira by Walrus Audio. Featuring all the controls that you’d expect from a studio-grade compression unit, all found within a gorgeous enclosure, the Mira makes a great choice obviously for guitarists, but also for any engineer who reamps their signals, vocals included.
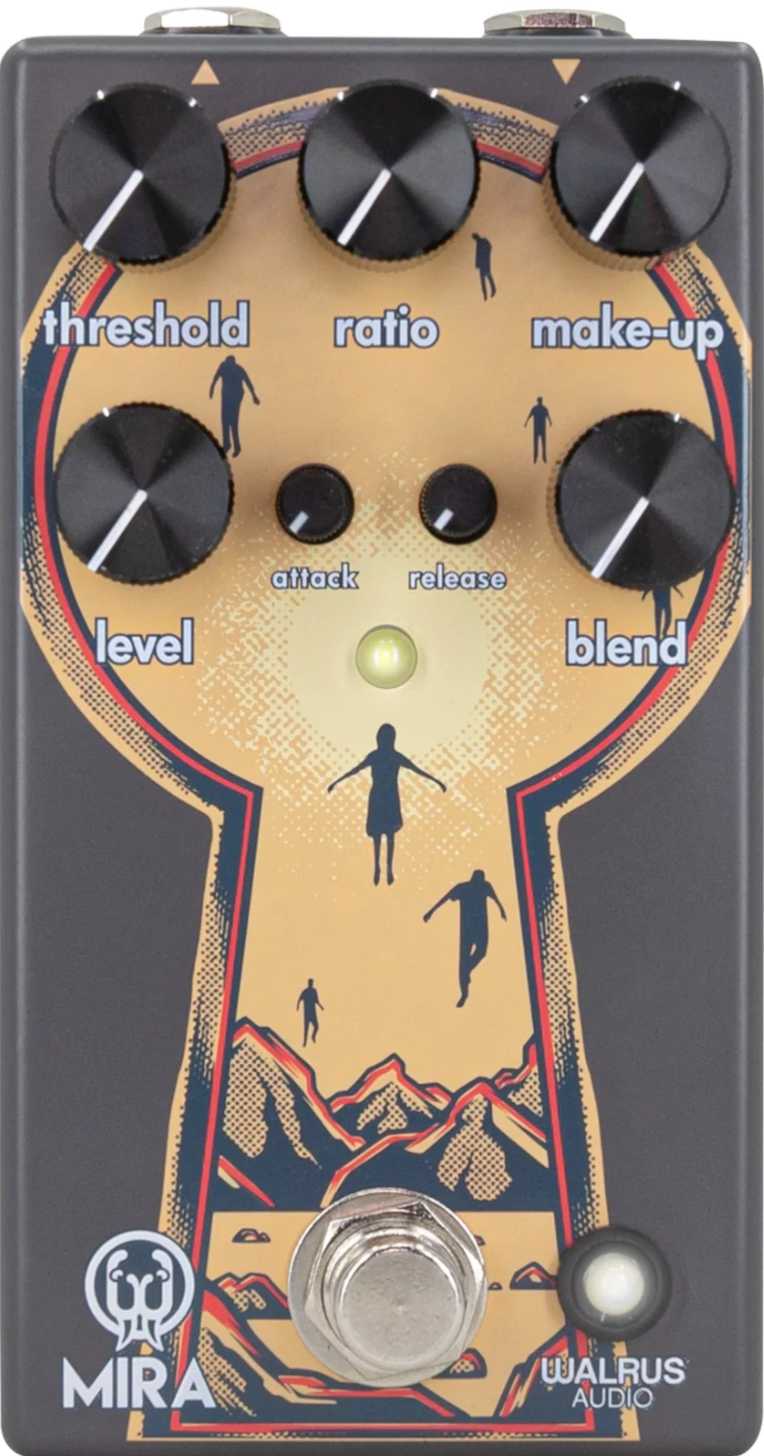
The Mira Optical Compressor
Lastly is the variable mu design, which incorporates tubes to handle attenuation duties. As more signal is fed into the compressor, the current sent to the tube’s grid decreases, resulting in gain reduction. Depending on the performance, of course, variable mu designs generally have a soft knee, resulting in a smooth compression quality. Popular units/plugins include the Fairchild 660/670, the Manley Variable Mu and the Arturia Comp Tube-STA.
6. Use Compressors for Their Tonal Qualities
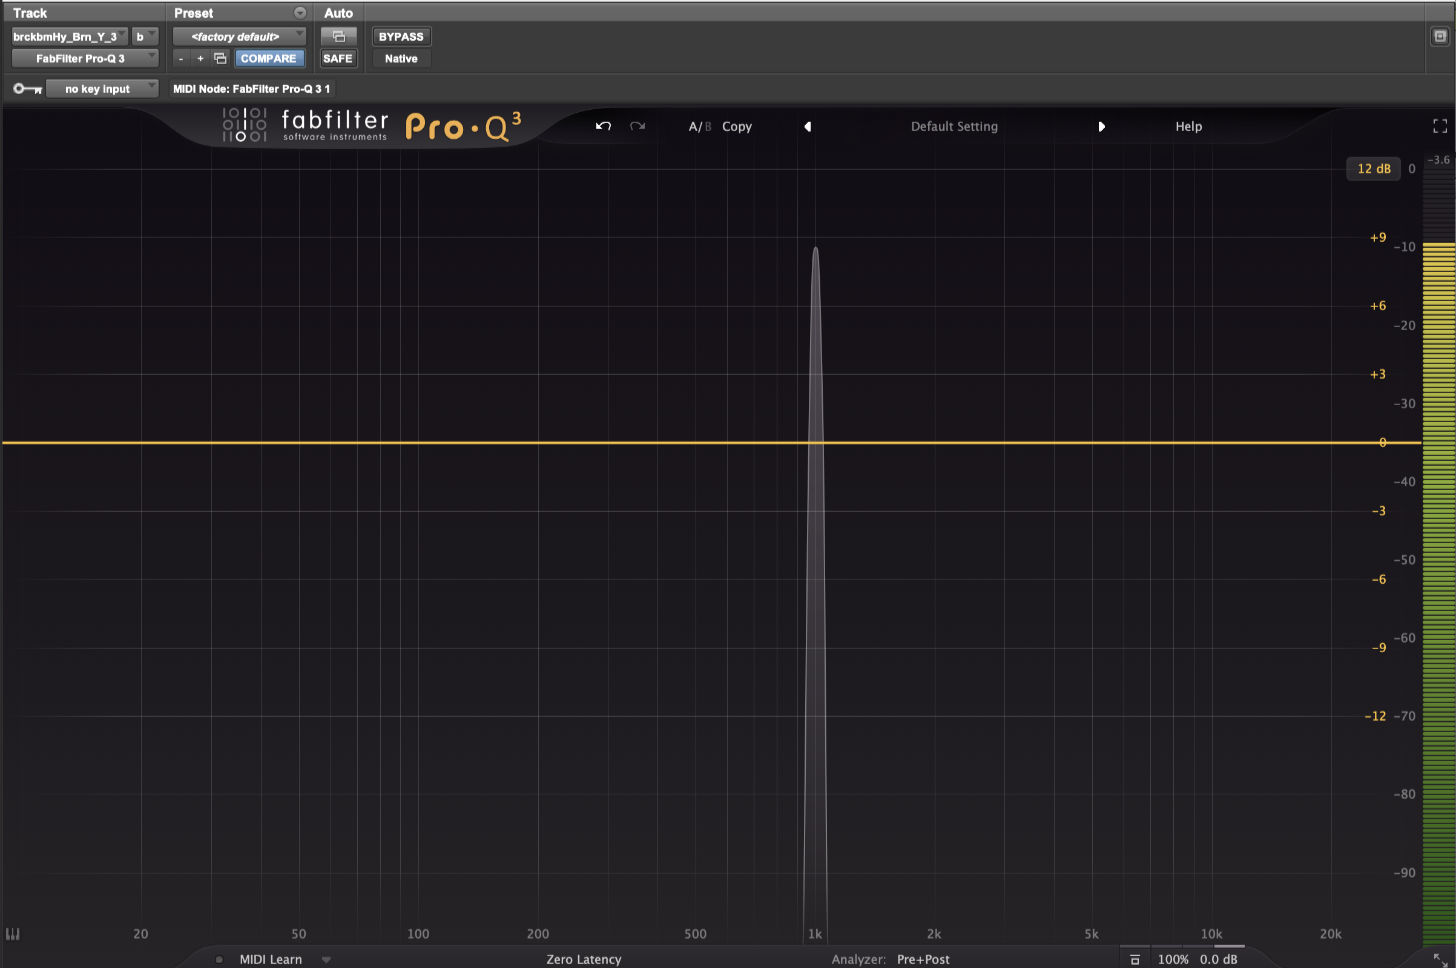
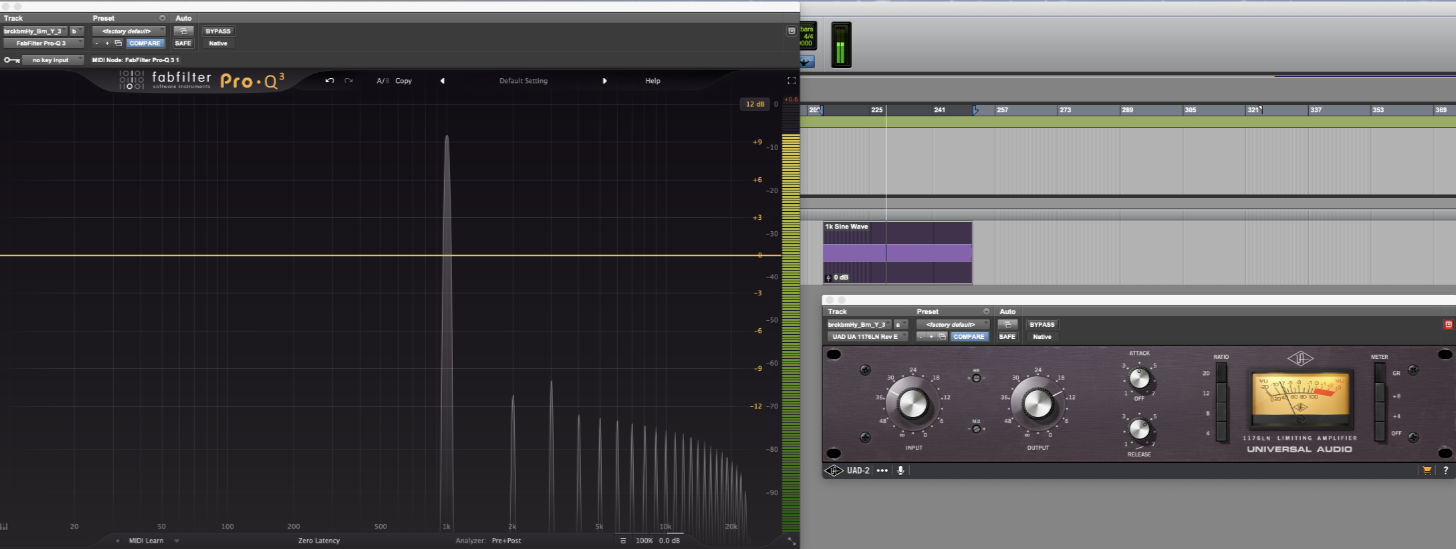
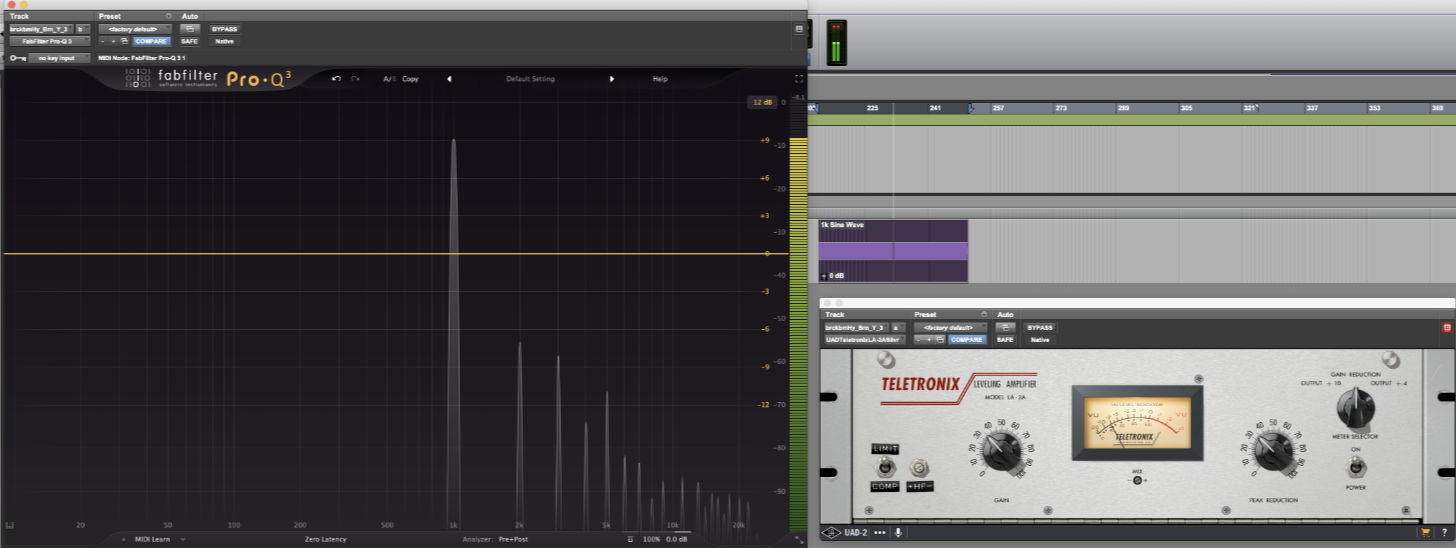
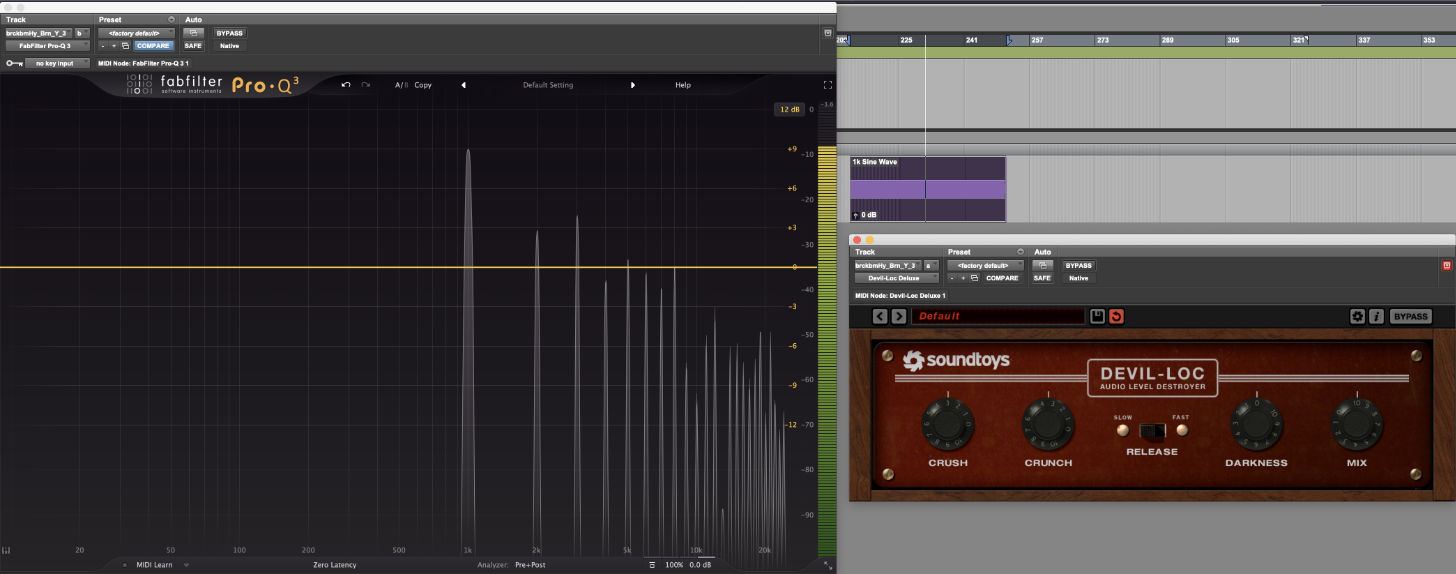
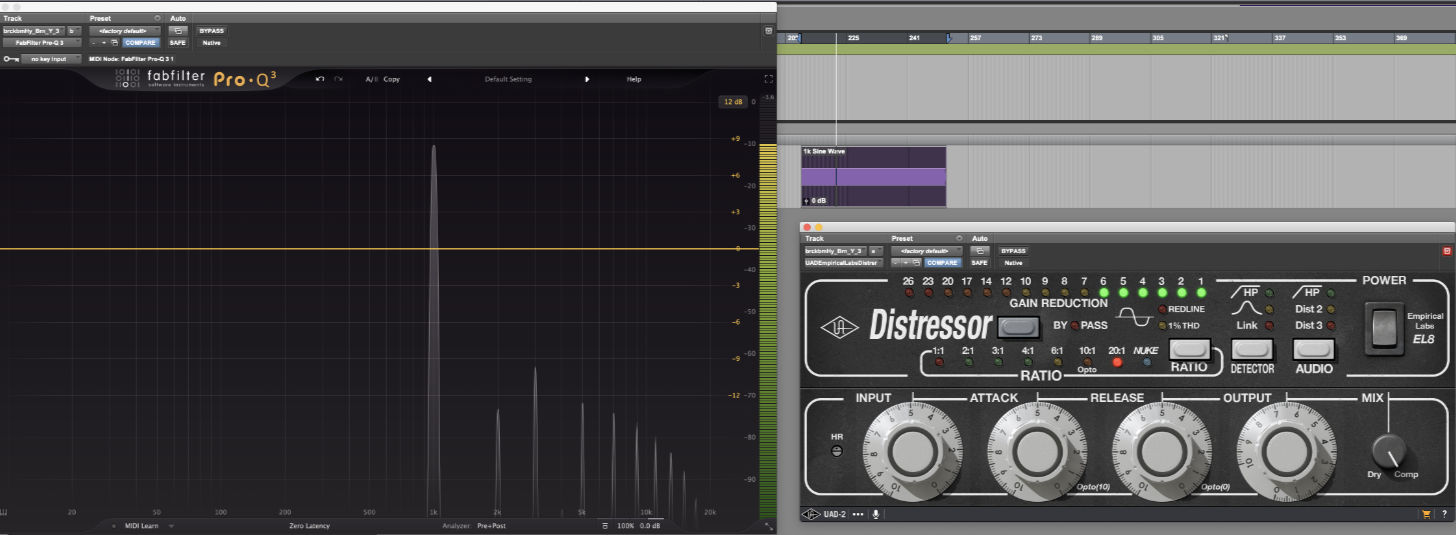
Similar to how the different compression topologies handle dynamics, each compressor will impart harmonics onto program material in a unique and useful way. From the warmth of an opto LA-2A, the emphasized midrange of a FET 1176, the open, tube-infused richness of the variable mu UAD 175b and 176, to the versatility of the VCA Empirical Labs Distressor, every compressor has its own harmonic flavor that can color vocal tracks. Spend time with each compressor, getting to know its tonality in addition to how it treats the dynamics of a signal. See the beneath screenshots that feature a 1 kHz sine wave with a variety of plugin compressors inserted, and note the added harmonics.
7. Use Compression to Bring the Vocal “Closer to the Listener”
Using the appropriate settings, compression can impart an up-front quality onto signals. I often use my parallel multi-buss technique to give an immediacy to the vocals, making them seem like they’re coming right out of the speakers. The trick here is to not over compress every one of the busses. Most of the time, 3-5 dB of gain reduction (and make up gain), with moderate attack and release settings will get vocals sitting right. Perhaps I’ll use more extreme settings on another buss, but compression has a tendency to reduce overall low end response, which makes any signal (including vocals) feel smaller. Once you grasp how to bring vocals closer to the listener, you can then use time-based effects like reverb and delay to impart a sense of space onto the performance. I find that overly dynamic vocals in reverb is a recipe for disaster. The quiet passages won’t sound affected, and loud passages will be swimming in reverb. Use compression for consistency before mixing into other effects.
8. Lastly, Always Consider Context
Compression is simply one of the many tools we use to elevate a vocal production. How you apply compression will affect any equalization, saturation, de-essing, delay, automation, etc. that you may also have on your vocal tracks. Consider how compression is changing these other processes and make adjustments depending on the needs of the song, not what your gain reduction meter is reading.
Eleveate Your Ears