9 Best De-Esser Plugins (+ Mix Tips)
07/20/2019
Article Content
The human voice is a wonderfully complex instrument. A typical sentence — whether its spoken or sung, is actually composed of several sonic components, some generated in the lungs and chest cavity, others a result of the resonance of the larynx (which we also refer to as our “voice box”), and even more that occur higher up in the anatomy (think tongue, lips, etc.)
When recording the human voice, it’s essential to be mindful of how each of these components is working together. Some microphones do a better job of capturing and reproducing the rich, full, low frequencies of a voice, others are airy, silky, and articulate.
Context is everything, of course, and whereas one of my favorite microphones, the AKG C414 XLII works like a dream on certain singers, I’ve found it to be overly “bright” on other performers. When I say bright, I’m referring to how the microphone reproduces high frequencies, specifically, “esses”.
Esses can be generated by a human voice when the tongue is placed on the upper palate, directly behind the top teeth. When air is generated and passes through, the resulting sound consists of mostly high frequencies. Different voices have different tendencies, and combining a vocalist who generates an abundance of high frequencies with a microphone that was designed with an emphasis on capturing these same frequencies can result in a displeasing sound.
Ideally, the recording engineer will get it right at the source, but in some cases, the mix engineer simply has to make do with what they’ve been provided — moreover, with modern music production and mixing aesthetics tending to call for liberal usage of compression, saturation, and additive EQ (especially in the high frequencies), sibilance can quickly become a problem.
There isn’t a singular solution to this issue, but a “de-esser” is one of the most common tools used to tame harshness in vocals. Traditionally, a de-esser works as a compressor that has been fed an EQ boost via a sidechain, making it more responsive to the frequency range at which the EQ boost has been applied. Once the de-esser detects that the amplitude has surpassed a set threshold, attenuation occurs.
Beneath is a breakdown of some of the terminology you’ll typically find on a de-esser and a roundup of my favorite plugins used for de-essing. I want to be careful to clarify that not all of these are designed specifically for the task of de-essing, but plugins have come such a long way in a short time, and several of these handle sibilance brilliantly.
De-Esser Controls and Terminology
Threshold
Much like the threshold control on a compressor, this determines the point at which the processing takes place. Once the amplitude of the signal “crosses” the threshold, de-essing will occur.
Range
This determines how much de-essing will take place once the amplitude crosses the threshold. Lower values may sound more subtle and natural but might not do the job entirely. Higher values can create undesired artifacts and sometimes leave the vocalist sounding “lispy”
Lookahead
This feature allows the de-esser to predict incoming sibilance by “looking ahead” a certain amount of milliseconds. For rapid-fire vocal performances, this might be a useful feature to handle sibilance. I’ve found lookahead to be helpful when mixing several Hip-Hop projects.
Wide vs. Split-band
Wide-band is great for general de-essing tasks and is a great starting point. It will attenuate all areas of the frequency spectrum evenly. Split-band will attenuate a smaller range of the frequency spectrum, generally the high frequencies where sibilance occurs. I suggest experimenting with both when mixing, and discovering which works best for the specific performance.
Some de-essers feature a function that allows you to hear only what the processor is doing, which can be helpful for determining if the de-esser is working at the correct area of the frequency spectrum. This function is sometimes identified as “audition”, “delta”, or “monitor”.
Additionally, certain de-essers allow you to choose at which frequency range the sidechain EQ boost is applied, so keep an eye out for this control, which is sometimes named differently depending on which plugin you’re using.
My Favorite De-Esser Plugins …
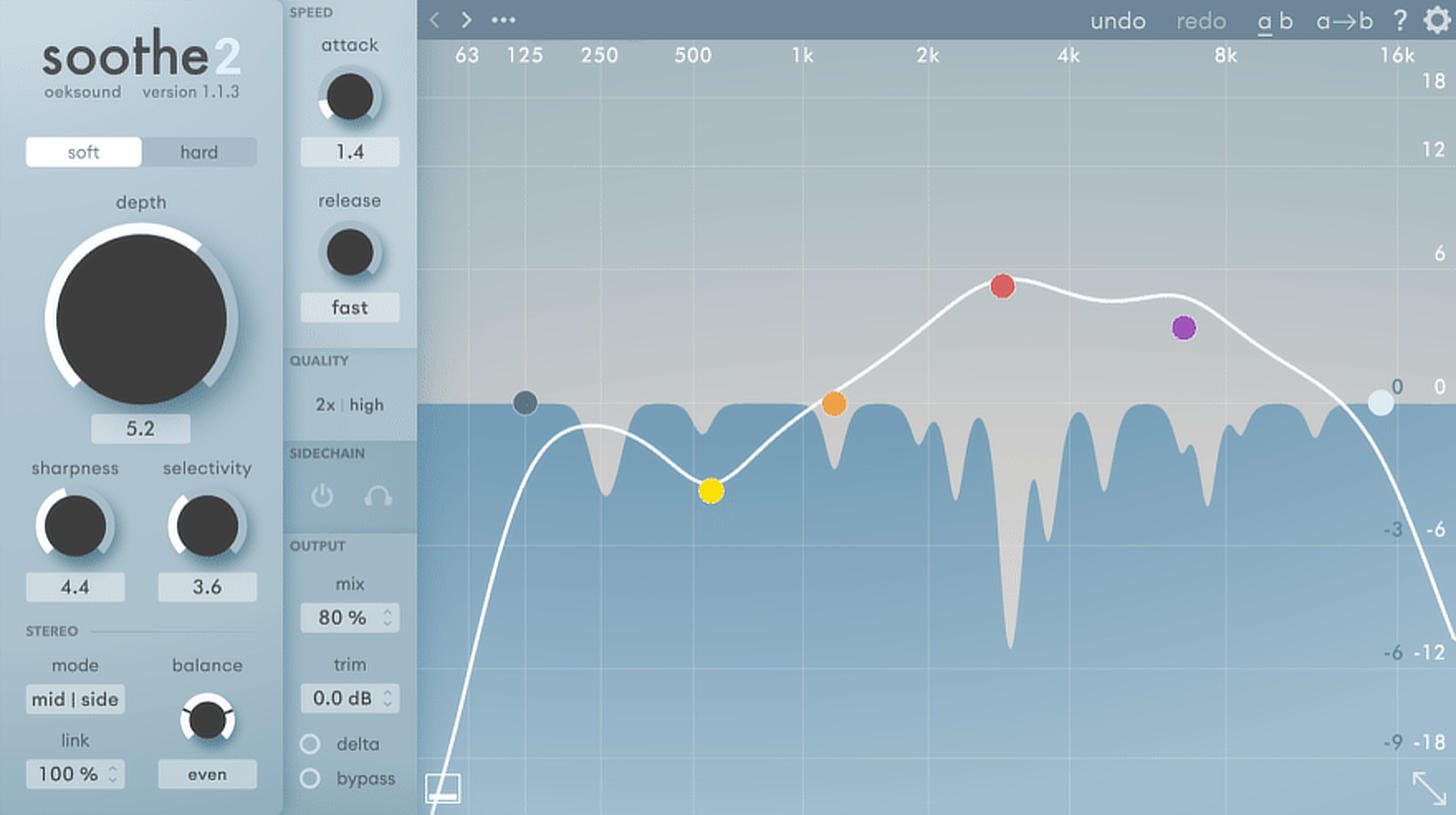
1. oeksound soothe2
The original soothe plugin from oeksound was a subtle game-changer for me. Normally, the plugins that really excite me are the ones that add some unique characteristic — saturators that growl, equalizers with character, or compressors that really smack. But the original soothe (and its recently-released successor) are subtractive by nature, and were designed to remove unwanted frequencies, and not really add anything whatsoever.
Described s a dynamic resonance suppressor, soothe2 will only attenuate unwanted frequencies when it detects an abundance of them. The user places individual bands at the offending frequencies, and then dials in the depth, sharpness, and selectivity controls to transparently attenuate, resulting in a sound that keeps what you want, and removes what you don’t. Soothe was a mainstay for me on mix-buss, sub-groups, and when mixing vocals, and soothe2 is even more powerful. It was re-coded from the ground up and sounds cleaner and more transparent than its predecessor.
soothe 2 is a fantastic update to the original, with new features and capabilities that include:
- The ability to affect the entire human hearing spectrum, rather than just the high-mids and highs
- You can now work in mid/side mode, which is great for mix-buss and mastering duties
- Attack and release parameters, which makes working on material with prominent transients much easier
- A new ‘soft mode’ which allows for more transparent processing
Mix Tip
The new mid-side mode is so useful. I typically use mid-side equalization when processing the mix buss to enhance clarity and space. I now use soothe in this way as well, hunting down harshness that only exists straight up the center of the mix, and attenuating that that frequency range as to not alter the content on the sides. I then find unwanted resonances in the sides, and attenuate there, preserving what is up the middle. It’s a subtle process, but one that truly improves the depth and width of mixes and/or masters.
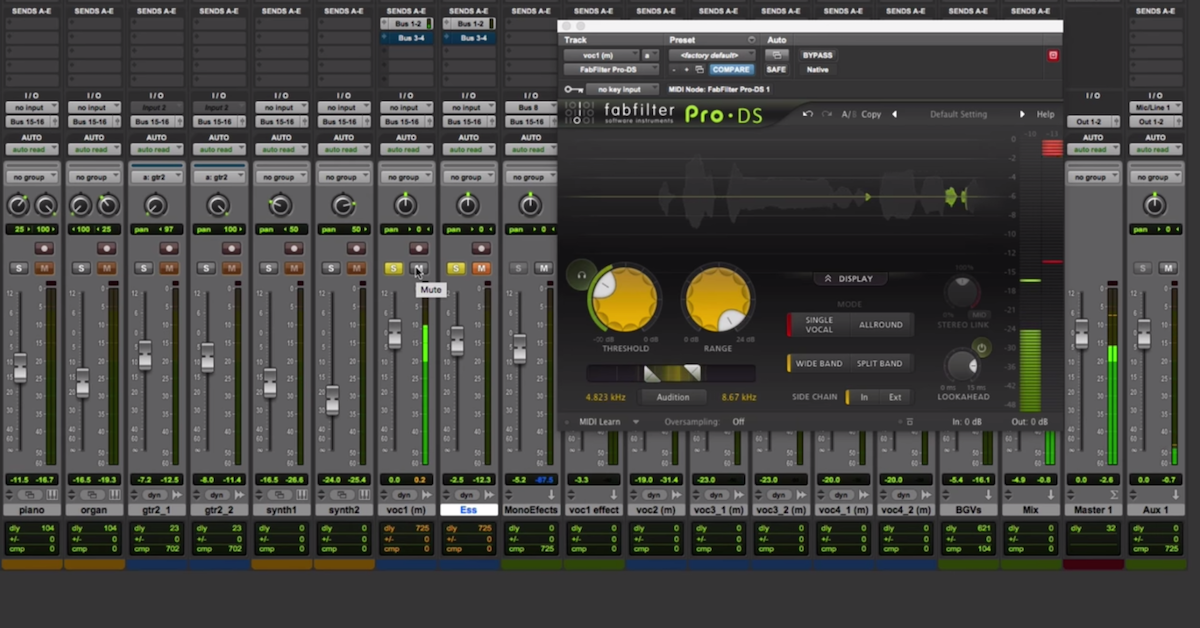
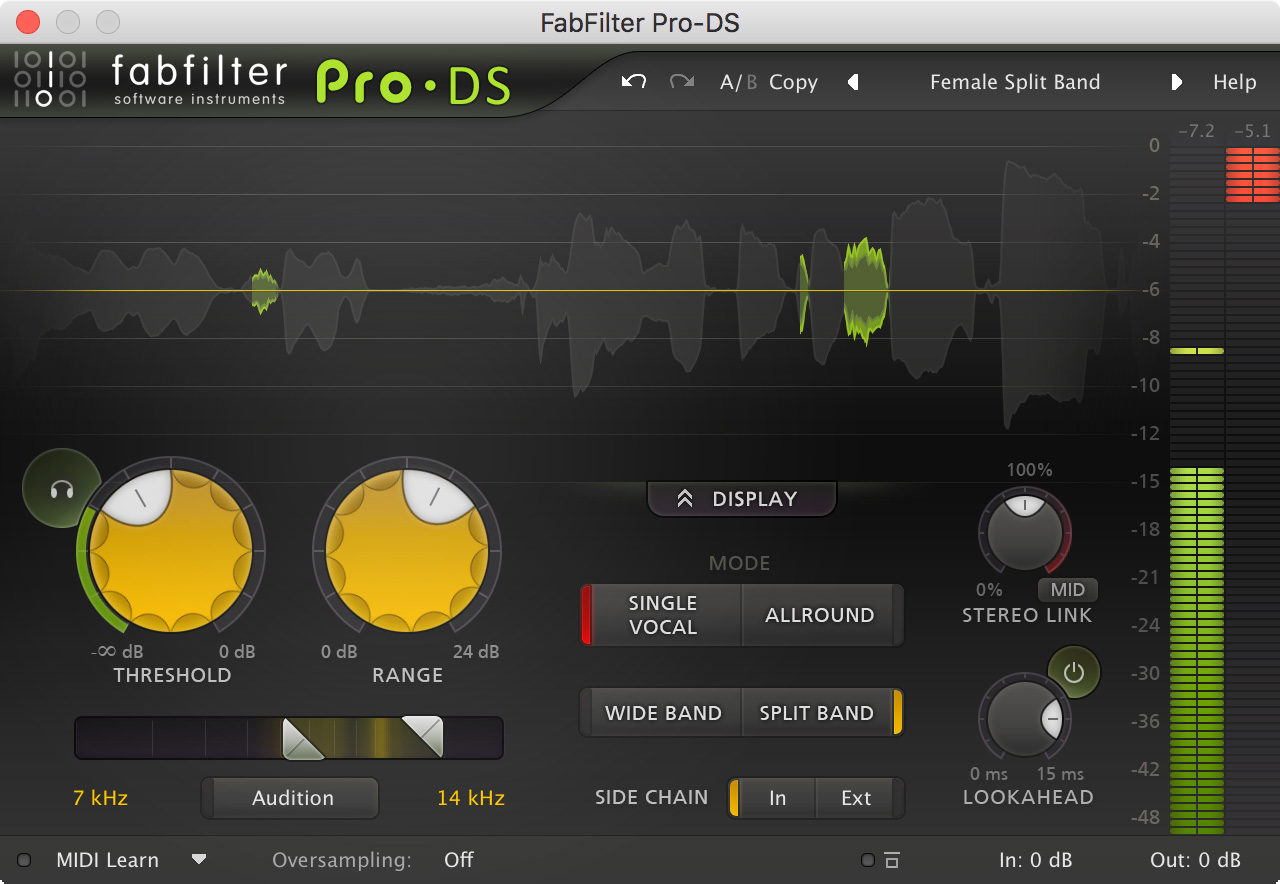
2. FabFilter Pro-DS
The transparent sound quality, helpful visual feedback, and versatility of the controls on FabFilter plugins are virtually unmatched, and the Pro-DS is no exception. Despite being an incredibly deep and detailed plugin, loaded with parameters and unique features, I can fix sibilance with the Pro-DS quickly and easily.
The Pro-DS shows you how it’s working via a scrolling waveform that becomes yellow/green when attenuation is required, and a small strip in the lower left corner that indicates exactly where in the frequency spectrum it detects sibilance. It’s details like this that make FabFilter plugins extremely helpful and educational, visually speaking. The different modes, look-ahead and external sidechain options put it a cut above most other de-esser plugins.
Mix Tip
Try it on non-vocal sources. The “all-around” mode and ability to control the stereo linking make the Pro-DS a great option for taming unwanted harshness on cymbals, acoustic guitars with excessive fret noise, and virtually any source that suffers from unpleasant high-frequency content.
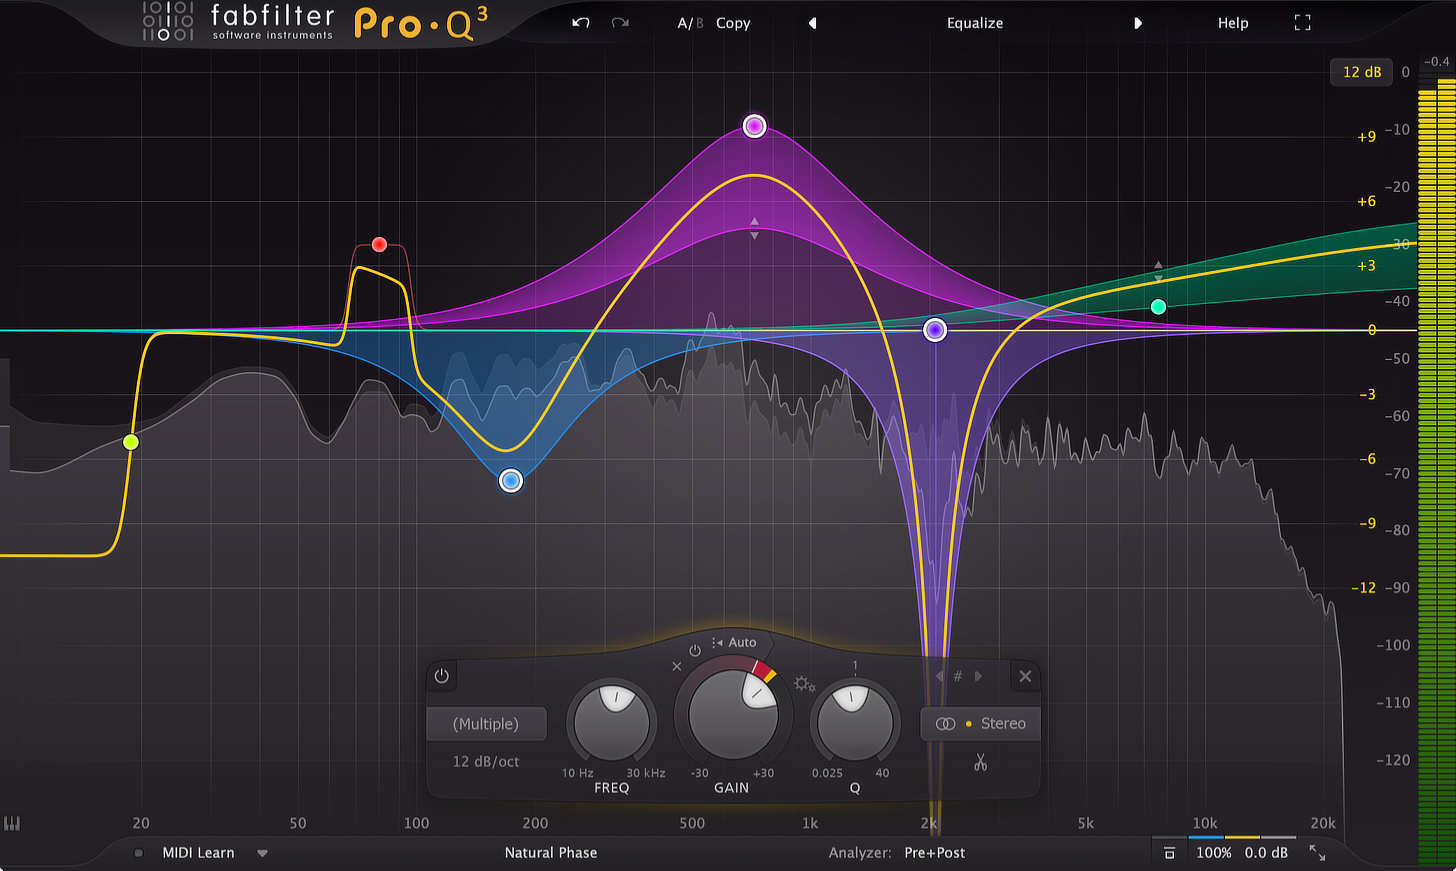
3. FabFilter Pro-Q 3
Not technically a de-esser, but with the addition of the dynamic EQ mode, the Pro-Q 3 makes this flagship equalizer from FabFilter even more versatile. Essentially, when this mode is engaged, the Pro-Q 3 applies attenuation only when the plugin detects amplitude at a specific frequency over a set threshold.
For instance, if you’re hoping to tame sibilance in a vocalist, which let’s say hypothetically is most prominent at roughly 8 kHz, but you don’t want to attenuate at that frequency when the singer isn’t singing sibilant lines, this feature would be perfect, as the attenuation would only occur once the singer vocalizes an ess, ch, etc.
Mix Tip
Try the Pro-Q 3 on a vocal buss, or even the 2-buss. This plugin also features a helpful M/S mode, allowing one to process the sides separate from the center, which makes it great for mix buss processing and even mastering. The spectrum analyzer also detects and displays peaks, giving one valuable visual feedback as to where exactly in the frequency spectrum sibilance is occurring.
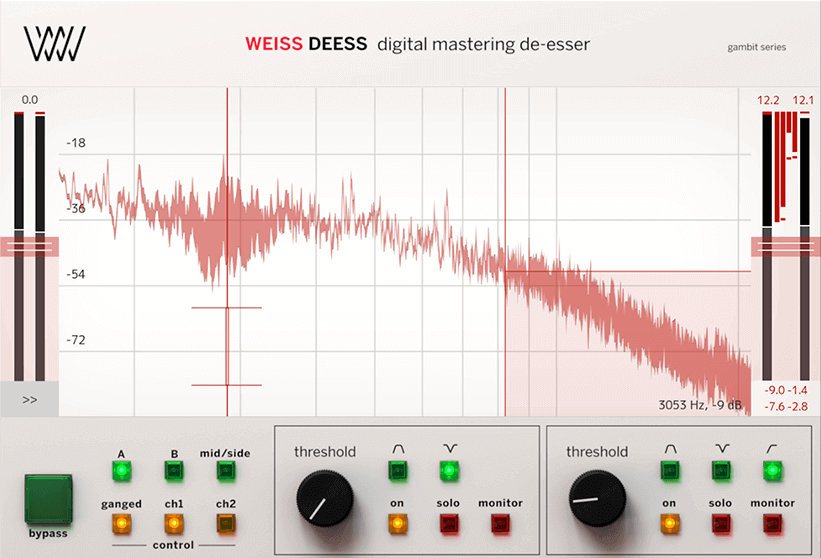
4. Weiss Deees
The Weiss DS1-MK3 bundle from Softube, which is a line-by-line code port from the highly sought after hardware unit, is a fantastic set of mastering tools. Weiss Deees features two independent bands, in case your program material suffers from sibilance at multiple frequency ranges. Add to that, helpful metering and pristine sound quality, making it one of the best plugin de-essers currently available.
Mix Tip
Use on an individual track or during mastering. As advertised, these are mastering grade tools, so it’s common to place across an entire program, but the Weiss definitely excels when placed on a lone vocal, high-hat, or similarly harsh audio track.
5. UAD Manley VOXBOX
The VOXBOX, an emulation of a beautiful boutique hardware unit from Manley Labs, is designed to be an all-in-one solution to vocal recording and processing. The preamp section is rich and full, the Pultec-style EQ is great for broad-stroke tonal sculpting, and the compressor can go from smooth and transparent, to grabby and aggressive.
Additionally, the plugin has a fantastically simple de-ess section. One can choose at which frequency the de-esser is applied, and set the threshold. Interestingly, setting the frequency control to “LIMIT 10:1” turns the section from a de-esser into a colorful-sounding limiter.

Ready to elevate your ears?
It doesn’t have to take years to train your ears.
Get started today — and you’ll be amazed at how quickly using Quiztones for just a few minutes a day will improve your mixes, recordings, and productions!
Mix Tip
With the preamp, EQ, and compression section, it’s certainly the most sonically versatile tool on this list. While obviously designed for work on vocals, the VOXBOX works fantastically on pretty much anything including bass, acoustic guitars, and drums. The de-essing section can actually do wonders on brittle acoustic guitars, or overly-crisp high-hats.

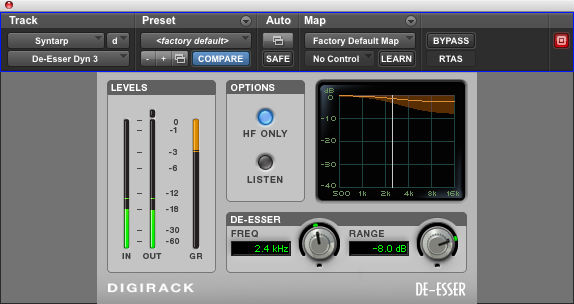
6. Pro Tools Dyn3 De-Esser
Sometimes, this thing just works. The bland, gray user interface and lack of fancy controls don’t really deter me from using the Dyn3 when it sounds right. Of the crop of de-essers that came out before plugins started to get really flexible and impressive, I’d choose the Dyn3 as my go-to.
Mix Tip
Use the “HF ONLY” feature to apply de-essing to frequencies above a certain frequency. I’ve found that the resulting sound (at least on this plugin) is far more natural and transparent.
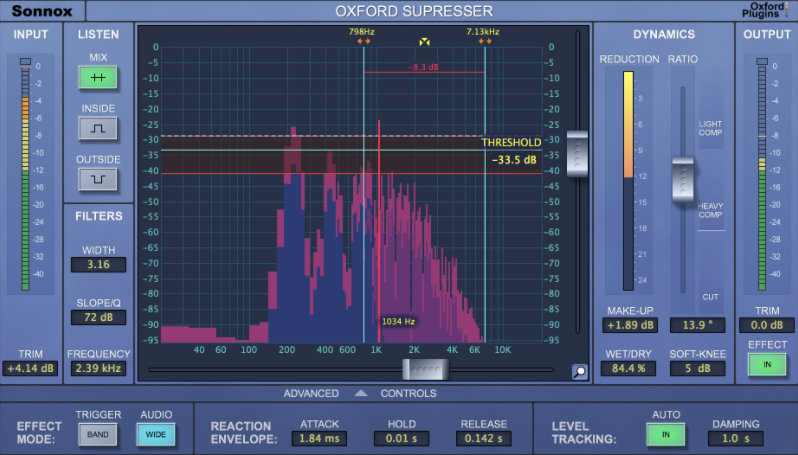
7. Sonnox Oxford Supresser V3
Available both as a native plugin and from Universal Audio, the Oxford Supresser V3 is one of the most feature-laden and precise de-essers that I have ever come across. The Supresser is a dynamic equalizer, meaning that the user has the ability to set a threshold at which the processor will apply attenuation once it detects signal that passes that threshold. It responds to frequency-based content in a way that is similar to a compressor, but performs the function of an equalizer, so if you need surgical control when removing sibilance from a vocal performance, the Supresser is hard to beat. While the learning curve is a tad steep, and it’s not a 5-second ‘set it and forget it’ tool, the resulting sound is transparent and free of sonic artifacts that plague certain de-essers. If I am absolutely committed to preserving the source material with no coloration whatsoever, I’ll reach for the Supresser.
Mix Tip
One of my favorite features of the Oxford Supresser is the ‘listen’ section, which allows you to hear everything within the range that you’re affecting, everything outside the range you’re affecting, as well as the final ‘mix’ of the two. I find toggling through these and critically listening really great for really dialing in the area at which I’ll be applying reduction with intense precision. The Supresser excels on individual sources, but I’ve also obtained quality results when using it on the vocal buss where all of my vocals are summed through.
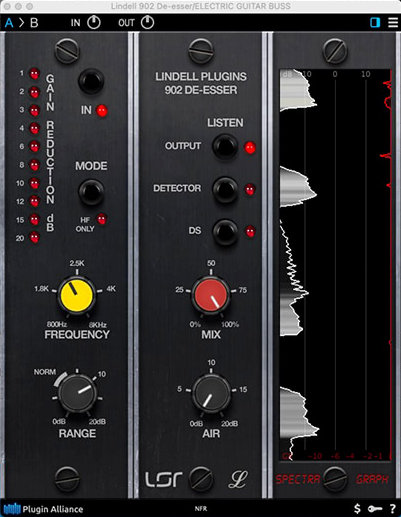
8. Lindell Audio 902
Mix Tip
I’ve found the air control to be an excellent way to bring back clarity and fidelity to signals that needed aggressive de-essing applied in the first place.
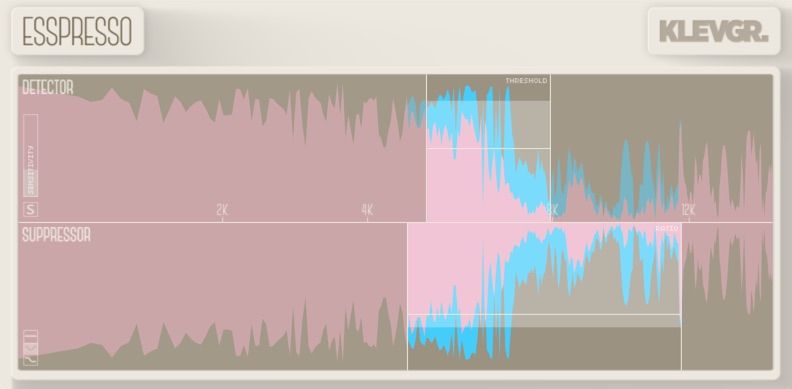
9. Klevgrand Esspresso
Mix Tip
A unique feature of Esspresso is that the detection frequency range isn’t coupled with the suppressor’s frequency range, meaning you can listen to a specific frequency and compress another one. The thing about de-essers is that sometimes they are unpredictable in how they’ll handle the material — I’ll fiddle with one de-esser for 5 minutes and not get the desired effect, only to switch to a different plugin and obtain transparent results almost immediately. This feature removes some of that unpredictability, and helps make Esspresso a workhorse de-esser.
Additional Tips
One of the tools that I often use for manual de-essing is using clip gain. In some cases, sibilant sounds (ss, sh, ch, etc.) can cause compressors, saturators, and exciters to behave erratically, and the resulting sound is even more unpleasant than with no processing applied.
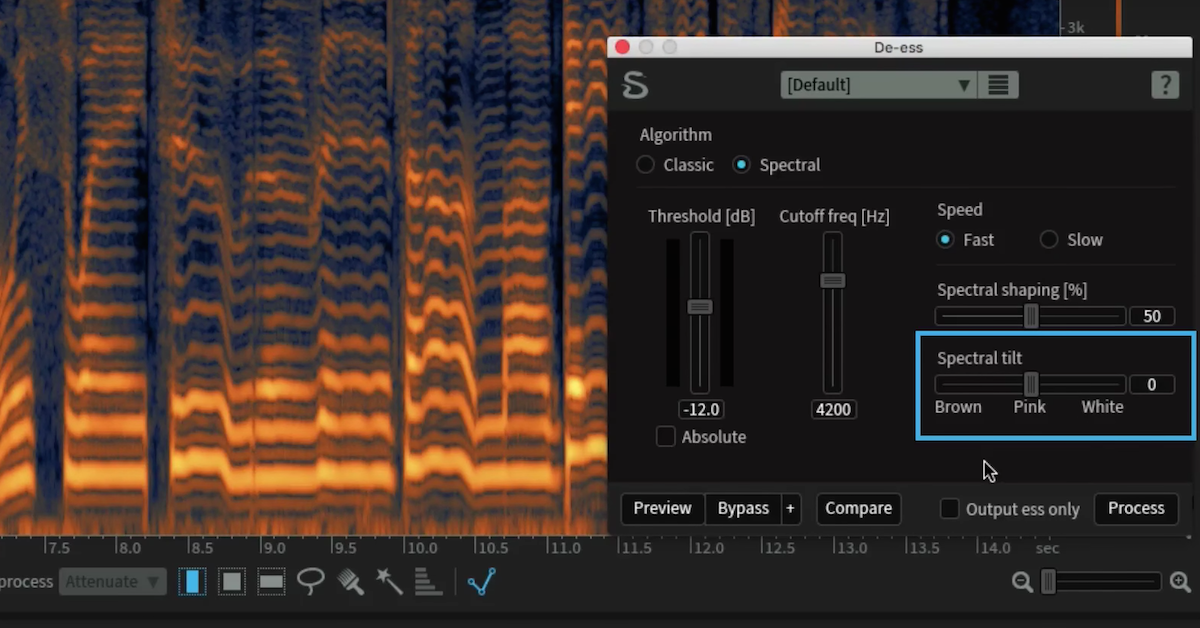
Sometimes I’ll go in and use clip gain to manually de-ess, bringing the sibilant parts of phrases down to taste (generally 1-2 dB). Sibilance is pretty easy to spot in waveforms-due to it being higher in frequency, the waveform for a sibilant passage is”fuzzy” in appearance, (see figures beneath). Because clip gain is pre-any-plugin-processing, I am minimizing a problem before it even starts.
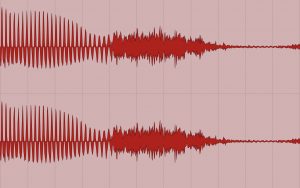
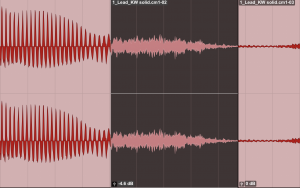
A word with sibilance at the end. Clip gain is used to bring down the sibilance.
I also regularly use parallel processing, especially on vocals. It’s not uncommon for me to have a “smooth” vocal layer with multiple types of processing, a “hot” layer, a “bright” later, etc. To save DSP, I often “commit” these multiple layers to audio. The buildup of sibilance when using this method can be very apparent. When this issue arises, I’ll group the committed audio tracks, make breaks around each sibilant sound, and bring them down to taste by using the clip gain line.
Traditional volume automation, which reduces the track level after any inserts that have been applied is another method I often use to minimize how sibilant lines negatively affect an overall mix. I always perform fader rides when mixing, especially on vocals, so I keep esses in mind, and react accordingly with fader movements when I reach this stage of my mixing process.
To be honest, a mix free of harsh sibilance is a result of a delicate application of several of the aforementioned tools and techniques — careful and deliberate processing with de-essers, subtle use of clip gain and automation, and knowing when you’ve pushed a vocal a bit too far with compression, saturation, etc. are all essential in creating a smooth, intelligible, professional-sounding vocal.
While some may argue that, because of loudness normalization as incorporated by major streaming services, the loudness war has been “won” by those who prefer their music dynamic and natural-sounding, modern productions are still loud and bright compared to musical releases from decades past.
I still serve clients who want their assets delivered in the -8 LUFS range and to be as perceived as louder than the competition. Because of the aggressive compression, high-frequency boosting, and limiting needed to achieve these results, vocals can often become harsh and fatiguing if not treated with extra care, and subsequently, de-essers are arguably more important than they’ve ever been to modern music makers.
Eleveate Your Ears