Tips for Mixing with Multi-Buss Processing feat. UAD EL7 FATSO
This is exciting, because normally the tracks that I use are ones that I’m just mixing, but in this case, I wrote and am producing this one, and I recorded and played most of the parts myself. It’s still a work in progress, but I hope you enjoy it.
Okay, so the story about multi-buss compression. Essentially it begins with Michael Brauer, who as legend has it, was working with Aretha Franklin, and he found when he tried to bring up the bass, everything else became a little bit more quiet, because he was feeding too much signal to the master buss.
However, he came up with the ingenious idea to separate parts of the arrangement like drums, vocals, instruments, to separate busses, such as drums, instruments, and vocals, which would allow him to treat the different parts separately and have them not affect each other negatively.
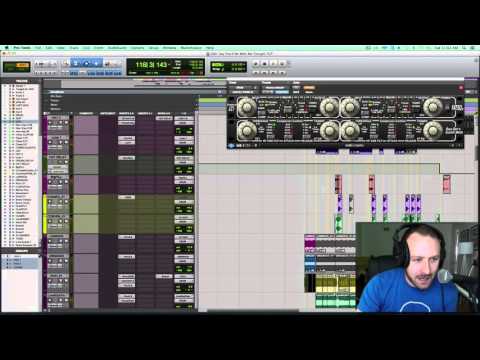
So that’s basically what I’ve done here, which is very helpful when you’re talking about a session like this, where you’ve got a lot of tracks. I’m not sure if I’ve broken a hundred yet, but there are a lot, as you can see.
Okay. So all of my drums — let’s go ahead and mute the instruments — are being fed out of these tracks here via the outputs, hard sent, and arriving at this drum aux, which I can then treat separately from the instruments, which are also sent out hard sent. The audio tracks.
They then are fed to the master fader.
So let’s go ahead and check out just the drums. I’m going to mute the instrument aux, and I’m going to bypass the Fatso here, and let’s take a listen.
[drum mix plays]
Let’s go to the chorus.
[drums — chorus]
Let’s bring in the instruments.
[drums and instrument mix plays]
Okay. Now let’s mute the drums.
[instruments play]
And now we are only hearing the instruments.
Okay, so it is really important, once you have this multi-buss system established, especially when you have tons of tracks like this, is to give the individual busses their own sort of color and character, because things really start to mush together once you have like, 80-100 tracks.
So I’ve found that this Empirical Labs Fatso — I believe Empirical Labs, from my home state of New Jersey — they also make the very popular Distressor hardware unit. I find that the Fatso here does a really great job of giving the drums a character that allows them to cut through everything else without taking up too much space.
So let’s go ahead and listen to just the drums, and I’m going to unbypass the plug-in here.
[compressed drum mix plays]
Let’s bypass it.
[drums, uncompressed]
As you can hear, the transients sound a little bit smoother. It brings things forward a little bit, and let’s go ahead and listen with the instruments.
[drums and instruments]
Let’s turn it off.
[drums, no compression and instruments play]
Big difference.
Really helps things cut through.
Alright, let’s talk a little bit about the controls here. We essentially have an input and an output. We’ve got these settings right here, which are basically — it’s like a saturation tracking — compression, this button right here controls if you want to have the tracking, or compression, or the spank mode engaged.
We can go ahead and listen to the different variations.
[drum mix]
I found this one to crush my transients a little too much for this case.
This is what I ultimately settled on. We also have a warmth control. As you click this, you are going to hear that less and less high end is allowed through.
[drums]
You could see this meter represents the amount of warmth engaged.
Super warm.
[drums and instruments play]
A little bit too much in that case for this mix, considering the amount of things that are going on.
We also — conveniently down here — have compressor control. This is a high-pass, side-chain filter which will allow you to try different things with your low end. If you have too much, you can do variations on this right here. You have an input setting.
In this case, I did not want much compression, so you won’t see a lot of compression being represented on the meter here. We have an attack, which I have set to slow, as I do in most cases when I’m working with drums, because I want most of the transient to be allowed through, and then a fast release, which allows for a certain intensity.
Then you have the tranny level here, which I left at unity gain.
[instruments and drums]
Let’s go to the bridge.
[instrument and drum mix]
Definitely adds a lot of life. I could see myself using this on drums, or even an instrument aux or individual parts.
Alright, so this has been Ian Vargo and Luigi with The Pro Audio Files. If you have any questions, get in touch. Happy Holidays! Bye.Greetings! My name is Ian Vargo, and that’s my assistant Luigi. We are with The Pro Audio Files, and today I am going to be talking about multi-buss compression, and how to use the UAD Fatso to make your drums pop and come to life.
This is exciting, because normally the tracks that I use are ones that I’m just mixing, but in this case, I wrote and am producing this one, and I recorded and played most of the parts myself. It’s still a work in progress, but I hope you enjoy it.
Okay, so the story about multi-buss compression. Essentially it begins with Michael Brauer, who as legend has it, was working with Aretha Franklin, and he found when he tried to bring up the bass, everything else became a little bit more quiet, because he was feeding too much signal to the master buss.
However, he came up with the ingenious idea to separate parts of the arrangement like drums, vocals, instruments, to separate busses, such as drums, instruments, and vocals, which would allow him to treat the different parts separately and have them not affect each other negatively.
So that’s basically what I’ve done here, which is very helpful when you’re talking about a session like this, where you’ve got a lot of tracks. I’m not sure if I’ve broken a hundred yet, but there are a lot, as you can see.
Okay. So all of my drums — let’s go ahead and mute the instruments — are being fed out of these tracks here via the outputs, hard sent, and arriving at this drum aux, which I can then treat separately from the instruments, which are also sent out hard sent. The audio tracks.
They then are fed to the master fader.
So let’s go ahead and check out just the drums. I’m going to mute the instrument aux, and I’m going to bypass the Fatso here, and let’s take a listen.
[drum mix plays]
Let’s go to the chorus.
[drums — chorus]
Let’s bring in the instruments.
[drums and instrument mix plays]
Okay. Now let’s mute the drums.
[instruments play]
And now we are only hearing the instruments.
Okay, so it is really important, once you have this multi-buss system established, especially when you have tons of tracks like this, is to give the individual busses their own sort of color and character, because things really start to mush together once you have like, 80-100 tracks.
So I’ve found that this Empirical Labs Fatso — I believe Empirical Labs, from my home state of New Jersey — they also make the very popular Distressor hardware unit. I find that the Fatso here does a really great job of giving the drums a character that allows them to cut through everything else without taking up too much space.
So let’s go ahead and listen to just the drums, and I’m going to unbypass the plug-in here.
[compressed drum mix plays]
Let’s bypass it.
[drums, uncompressed]
As you can hear, the transients sound a little bit smoother. It brings things forward a little bit, and let’s go ahead and listen with the instruments.
[drums and instruments]
Let’s turn it off.
[drums, no compression and instruments play]
Big difference.
Really helps things cut through.
Alright, let’s talk a little bit about the controls here. We essentially have an input and an output. We’ve got these settings right here, which are basically — it’s like a saturation tracking — compression, this button right here controls if you want to have the tracking, or compression, or the spank mode engaged.
We can go ahead and listen to the different variations.
[drum mix]
I found this one to crush my transients a little too much for this case.
This is what I ultimately settled on. We also have a warmth control. As you click this, you are going to hear that less and less high end is allowed through.
[drums]
You could see this meter represents the amount of warmth engaged.
Super warm.
[drums and instruments play]
A little bit too much in that case for this mix, considering the amount of things that are going on.
We also — conveniently down here — have compressor control. This is a high-pass, side-chain filter which will allow you to try different things with your low end. If you have too much, you can do variations on this right here. You have an input setting.
In this case, I did not want much compression, so you won’t see a lot of compression being represented on the meter here. We have an attack, which I have set to slow, as I do in most cases when I’m working with drums, because I want most of the transient to be allowed through, and then a fast release, which allows for a certain intensity.
Then you have the tranny level here, which I left at unity gain.
[instruments and drums]
Let’s go to the bridge.
[instrument and drum mix]
Definitely adds a lot of life. I could see myself using this on drums, or even an instrument aux or individual parts.
Alright, so this has been Ian Vargo and Luigi with The Pro Audio Files. If you have any questions, get in touch. Happy Holidays! Bye.
Greetings! My name is Ian Vargo, and that’s my assistant Luigi. We are with The Pro Audio Files, and today I am going to be talking about multi-buss compression, and how to use the UAD Fatso to make your drums pop and come to life.
This is exciting, because normally the tracks that I use are ones that I’m just mixing, but in this case, I wrote and am producing this one, and I recorded and played most of the parts myself. It’s still a work in progress, but I hope you enjoy it.
Okay, so the story about multi-buss compression. Essentially it begins with Michael Brauer, who as legend has it, was working with Aretha Franklin, and he found when he tried to bring up the bass, everything else became a little bit more quiet, because he was feeding too much signal to the master buss.
However, he came up with the ingenious idea to separate parts of the arrangement like drums, vocals, instruments, to separate busses, such as drums, instruments, and vocals, which would allow him to treat the different parts separately and have them not affect each other negatively.
So that’s basically what I’ve done here, which is very helpful when you’re talking about a session like this, where you’ve got a lot of tracks. I’m not sure if I’ve broken a hundred yet, but there are a lot, as you can see.
Okay. So all of my drums — let’s go ahead and mute the instruments — are being fed out of these tracks here via the outputs, hard sent, and arriving at this drum aux, which I can then treat separately from the instruments, which are also sent out hard sent. The audio tracks.
They then are fed to the master fader.
So let’s go ahead and check out just the drums. I’m going to mute the instrument aux, and I’m going to bypass the Fatso here, and let’s take a listen.
[drum mix plays]
Let’s go to the chorus.
[drums — chorus]
Let’s bring in the instruments.
[drums and instrument mix plays]
Okay. Now let’s mute the drums.
[instruments play]
And now we are only hearing the instruments.
Okay, so it is really important, once you have this multi-buss system established, especially when you have tons of tracks like this, is to give the individual busses their own sort of color and character, because things really start to mush together once you have like, 80-100 tracks.
So I’ve found that this Empirical Labs Fatso — I believe Empirical Labs, from my home state of New Jersey — they also make the very popular Distressor hardware unit. I find that the Fatso here does a really great job of giving the drums a character that allows them to cut through everything else without taking up too much space.
So let’s go ahead and listen to just the drums, and I’m going to unbypass the plug-in here.
[compressed drum mix plays]
Let’s bypass it.
[drums, uncompressed]
As you can hear, the transients sound a little bit smoother. It brings things forward a little bit, and let’s go ahead and listen with the instruments.
[drums and instruments]
Let’s turn it off.
[drums, no compression and instruments play]
Big difference.
Really helps things cut through.
Alright, let’s talk a little bit about the controls here. We essentially have an input and an output. We’ve got these settings right here, which are basically — it’s like a saturation tracking — compression, this button right here controls if you want to have the tracking, or compression, or the spank mode engaged.
We can go ahead and listen to the different variations.
[drum mix]
I found this one to crush my transients a little too much for this case.
This is what I ultimately settled on. We also have a warmth control. As you click this, you are going to hear that less and less high end is allowed through.
[drums]
You could see this meter represents the amount of warmth engaged.
Super warm.
[drums and instruments play]
A little bit too much in that case for this mix, considering the amount of things that are going on.
We also — conveniently down here — have compressor control. This is a high-pass, side-chain filter which will allow you to try different things with your low end. If you have too much, you can do variations on this right here. You have an input setting.
In this case, I did not want much compression, so you won’t see a lot of compression being represented on the meter here. We have an attack, which I have set to slow, as I do in most cases when I’m working with drums, because I want most of the transient to be allowed through, and then a fast release, which allows for a certain intensity.
Then you have the tranny level here, which I left at unity gain.
[instruments and drums]
Let’s go to the bridge.
[instrument and drum mix]
Definitely adds a lot of life. I could see myself using this on drums, or even an instrument aux or individual parts.
Alright, so this has been Ian Vargo and Luigi with The Pro Audio Files. If you have any questions, get in touch. Happy Holidays! Bye.


