iZotope VocalSynth: Pitch Correction and Presets (Part 1)
05/18/2016

This is my first of a three part video series taking a look at a brand new plug-in released from iZotope called VocalSynth. You’re seeing it right here. This plug-in is a specialized vocal processor. You can certainly use it for all kinds of other creative purposes when you’re mixing, but it’s primary use it to come up with unique and creative vocal effects.
This isn’t the first vocal processor from iZotope. They also have another popular one called Nectar. If I were to compare the two plug-ins, VocalSynth and Nectar, Nectar is more of a traditional kind of comprehensive kind of vocal plug-in.
It has your traditional effects like EQ, de-esser, compressor, that kind of stuff, and it has pages and pages of menus with every single possible parameter you’re ever going to want to tweak when you’re working on vocals.
This plug-in more is a stripped down interface, very simple and easy to use, that allows you to get great sounds very quickly. I saw good results and it focuses more on the creative style effects. You’re not going to find a main EQ page and all of that kind of stuff to do.
This plug-in pretty much assumes a lot of that processing is already done. You’re just after some kind of unique, cool vocal sounds. So what I’m going to do in these three videos, break it down to three parts, this first video we’ll have a look at what I call the input pitch correction section.
Also I’ll allow you to hear a bunch of different presets, so you can get the big picture idea of what this plug-in can really do.
In the second video, we’ll go into detail about kind of the meat of the plug-in. What it does that’s unique here. It’s got some different engines that allow you to do things like harmonize, create a vocoded sound, talkbox, compuvox, whatever that is.
So we’ll look at in detail that section in the second video.
The third video we’ll take a look at the output section, or what I’ll call the output section. The more traditional styles of effects you add on after the fact, from distortion to delay and so on. So you can hear how those get brought in with the overall effect.
Here, I’m going to be demonstrating this plug-in in the videos using a song by a band called Arcane Atlas. They’re based out of Nashville, Tennessee. This track is a very cool kind of pop rock funk sound to it. If you want to check out more information about the band, I’ve got the information down below in the comments.
Before I get to the plug-in, let me give you just a snippet of the song so you can hear how it sounds, and then we’ll get to working with the plug-in.
[mix]
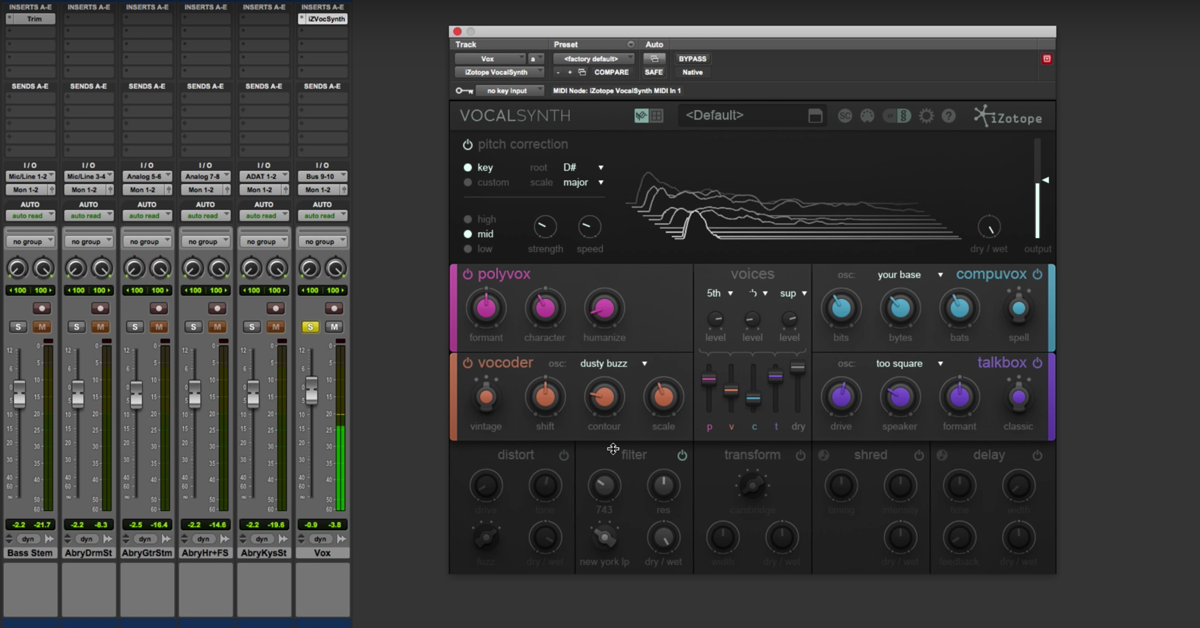
Alright. So let’s start working with the plug-in. I’ve got the default settings pulled up right here.
What I’m going to do is first focus on the pitch correction input section, and then we’ll get into some of the presets.
So with pitch correction, when the signal comes in, it’s going to allow you to do some auto-tune kinds of effects, and you can get into the range of those very extreme, T-Pain kinds of sounds too if that’s what you want to use this plug-in for. You can do that.
You can also do more subtle kinds of inaudible pitch correction if you just need to tighten up the vocal performance a little bit.
So let’s focus here and solo out the vocals and listen to what’s going on. Right off the bat, some parameters you can pick, you can decide whether you want to tune to a specific key of a song, or if you just want to use chromatic tuning.
So I know that this song is in the key of E flat, or in this case, I’ve got to pick D sharp, so I’ll do that here. And it will just tune to the notes in these scales.
Or if you want to do something custom, you can pick out notes and turn these on and off, depending on what notes that you want to use for your song. So you can pick custom if you’d like.
I’m going to go back to set the key here. Now, the pitch correction is going to be applied prior to any of the different presets. So it’ll stay the same even across the presets.
Next up is kind of the section where you can control how much the effect is going on. You’ve got a setting over here, it kind of optimizes the pitch correction that’s happening. Whether you’ve got a very high singer, like a soprano singer, you want to pick this one, if you’ve got a baritone or a bass voice for a male singer, pick this one.
But most vocalists are going to fall in this mid-range. These two knobs over here for strength and speed are going to give you kind of — you know, you can turn them all the way up to get the T-Pain kind of effect, or you can back them off a little bit so it’s not as extreme.
So I’ll let you listen to some of this. Also over here, you have a wet/dry mix, which is basically for the whole plug-in, whether you want to have some of the dry, unprocessed signal blended in, or if you want the wet.
So I’ll use this a little bit when we get into more of the other kinds of effects.
So here’s the pitch correction.
[vocals with pitch correction]
So this plug-in can get you that sound if you’re going for that. The T-Pain sort of auto-tune effect.
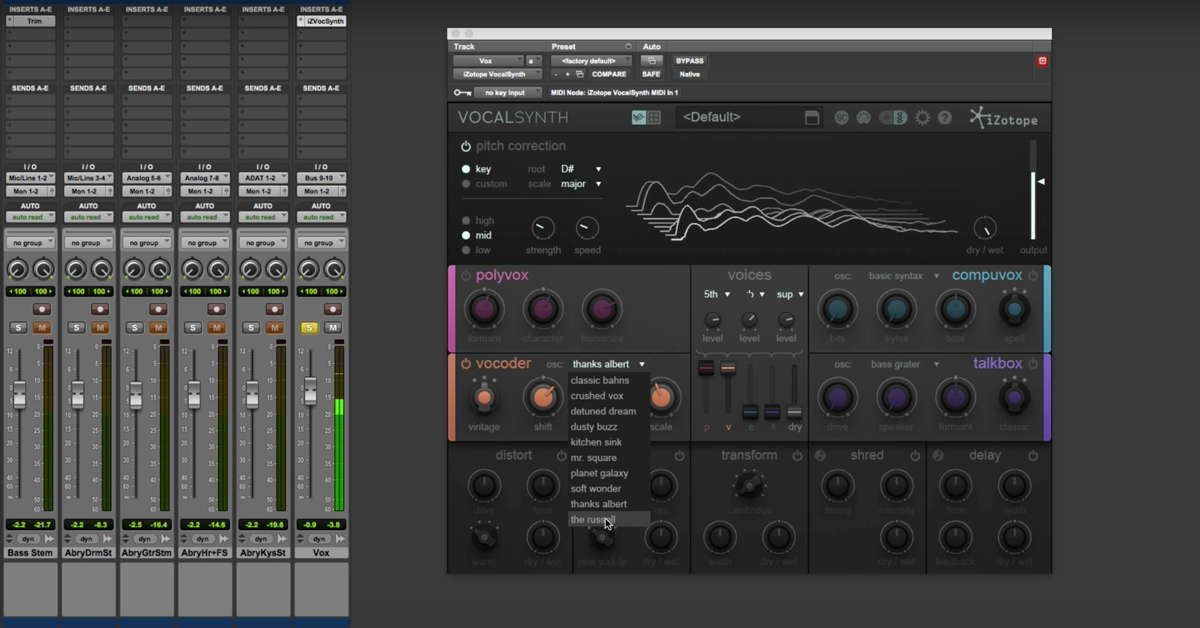
Next, let’s listen to some of the presets. What I’m going to do here is pull up some of the ones — you’ve got several different folders that you can pick from. Avant Garde, which is going to be more extreme sorts of effects, Contemporary, you’ve got even some Monster sounds, and Nostalgic.
So we’ll listen to several examples of these things.
Another thing that I’ll adjust here is the wet/dry mix. Some of these things sound much better if you’re blending it in in parallel with the original vocal.
So let’s bring these up here and go through some menus.
[adjusting VocalSynth]
So you can hear there’s lots of different sounds coming out of this plug-in that you can get.
Whether it’s pop music, rap, EDM, you name it, I could even see this being useful for guys that are working sound for film, trying to come up with unique ways of tweaking, or video games, some kind of sound to warp it and come up with something completely new.
Another thing that I want to show you here before we close this video is there’s also a menu here that gives you some very straight forward, easy parameters to tweak that you know, if you want to do things like change the distortion or that kind of stuff, each preset has it’s own X/Y control here. It’s going to adjust some different parameters.
So I’ll demonstrate this here. I guess with this preset, and even a couple of other ones.
[adjusting VocalSynth X/Y settings]
So what you can hear is by using this X/Y control up here at the top, you almost have four different variations, or morphable variations of each preset.
So if you like how it sounds, but you need to make some minor tweaks to it, this is a good menu to start from. Things are pretty close, you just need to make a few minor adjustments, this is a great way to do those minor tweaks to it.
So that’s all for the first video. In the next section, we’re going to take a closer look at what’s going on here in the specialized processor when we get into creating harmonies and vocoders, if you want to create your own custom sounds besides using the presets.
Until then, take care, guys.
Elevate Your Ears