How to Set up Native Instruments Kontakt 5 to Trigger Drum Samples
12/15/2014

Here, I’m going to be working with the drum samples from the company, “I Want That Sound.” These guys have put together some awesome collections of drum samples in various different styles. I highly recommend checking them out. Stop by their website if you’re looking for top quality samples.
Now, some of their libraries come with instrument presets. For instance, with Dustin Burnett, I can go in here. He has all the wav files included, and you can trigger these if you want, or you can go in to the presets here. For instance, I like to use Kontakt as my sampler, so I could go in and if I’m just looking for an instrument that has a bunch of hi-hats, I can drag and drop this one in, and I can trigger these. They’re already laid out across the keyboard like this.
[samples play]
And I get all the different samples like that. Or, what you can do is also go in, and he’s also got the Kontakt instruments built where you have a kit that has kick drum, snare drum, toms, hi-hat, cymbals, and so on. So you can drag and drop those in the same way.
But not all libraries have those Kontakt instruments built. For instance, the Paul Maybury library, he’s got all of the wav files in here too that you can trigger. He also has some presets for the plug-in from Steven Slate drums, called Trigger. So you can go in here and load up, if you have Trigger, one of these presets in order to trigger the wav files.
However, if you’re the kind of person that prefers to work with MIDI rather than pre-recorded drums, or if you like to work with Kontakt instead of Trigger, then what I’m going to show you how to do is how to create a virtual instrument in Kontakt for triggering these samples.
So, let me get to it. Let’s say I’ve got a snare drum here, and the good thing about these samples that come with the Paul Maybury library is they have multiple velocity levels. That means that they recorded the drum being hit very hard, with a lot of velocity, so it’s going to have one kind of sound and one kind of timbre, and they also have ones that have medium velocity level, and then a quieter one.
So, what you want to do, is setup these instruments so that if your MIDI note is played very loud with a high velocity, it’s going to trigger these samples. The ones as part of the library that were hit hard, but then if your MIDI note is quieter, you want to trigger the ones that have the low velocity level.
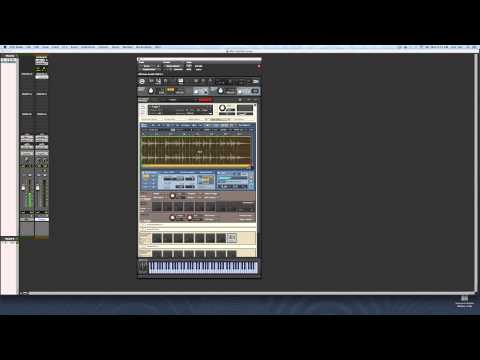
So, what I’m going to do to begin with is go over here to Kontakt. I’m going to open up and start my first instrument. So I’m going to go up here to file, and click on the one that says “New Instrument” right here.
Okay, when that comes up, the next thing you need to do is click on this tool button right here. It’s going to open up the editor. This is going to be where you can setup a lot of different things, and trigger different things, and so on.
So, you have a couple of options here, and I’m going to be primarily working within the group editor and the mapping editor. The mapping editor is where you can drag and drop these samples in and set them up on different keys, and for different velocities.
You also have the group editor, which I’m going to get to later on, that allows you to set them up in round robin, or also in a random order.
So, to begin with, let me go back over here to my instrument. I’ve got the snappy ones here. Let me grab these four that have the high velocity. I’m just going to drag and drop them into Kontakt. For now, you can see that depending on where I lay these out, it’s going to spread them out more or less across the keyboard. I’ll just go with – to make it easier for you to read on the video, I’ll open them up like this.
In the end, I really just want them to be put across one key, so that a single key will trigger this drum. So right now, I’ve got the four velocities, or the four notes that were triggered with the highest velocity. I can play some of these things.
[drum samples play at different pitches]
So, one thing you notice right off the bat, is that as I change the key of it, it’s going to change the pitch of the drum. So that’s the original pitch. Then it goes up until I find the next sample, and then it goes back down. That’s because I’ve got this button here called “tracking.”
If I turn this off, now what’s going to happen is it’s always going to play the original pitch. It’s never going to tune it up.
[drum sample plays at same pitch]
So you can hear, those are the four different samples.
Next thing I want to do is setup just a particular range of velocities where these are going to be triggered.
So what you can do is highlight all of them, shift and click like this. I’ve got all of them setup together. Actually, I need to click them onto yellow like this. Go over here, start dragging it up. As an example, I’m going to just say, let’s have these triggered from 100 up to 127. The loudest velocities. So now, if I start playing these notes, you’ll see down here the red note that’s telling me what my velocity is. You have to hit the key pretty hard until you’re actually going to trigger it like that. Or, if you play the keyboard down here, you see that as you go up the key, it triggers a lower velocity.
Alright, so I’ve got these set for only the loudest velocity. I’ll open them up so that it’s easier for me to trigger on my Yamaha keyboard. So I’m here, 85-127. Let me switch back over.
Here, grab the next set, like this. The medium velocity levels. Drag these in. Let’s get it so that they’re basically going to be over the same range. Alright. Like this.
I just want these four. So, what I need to do to begin with, is make sure they don’t overlap with the other ones. So these ones up here, they’re going from 85-127. I want these middle to maybe just go from below that – 84 to 45 like that. Alright.
So now, I can trigger the high velocity level, and as I trigger the lower ones, now I’m getting into the middle range. I still have room for the lower velocity down here.
So, I’m going to go over here. I’ve got two in here, and what I’m actually going to do, because there’s only two of them, and for reasons you’ll see later on, I’m actually going to duplicate these and create copies of them. I’m going to name this one right here as “3.” You’ll see that later on when I’m triggering round robins and I’m triggering in random order that it actually helps to have the same exact number at the different velocity levels.
So now I’ve got four in here. Let me get rid of the word “copy.” Because of what comes with the library, you just have to do this where you create duplicates of it. So now, I’ve got four here of this soft velocity level. I can drag and drop these in here, spread them out over the keys like this, and click these off.
Alright, so now I need to bring these down so that they do not overlap at all with the other ones. So now I’ve got three different velocity levels I can trigger. A loud one…
[loud drum sample]
A medium one…
[medium drum sample]
And a soft one.
[soft drum sample]
Alright, that’s great. But you’ll see that right now, the way that I’ve got it setup, I’ve got to switch from one key to the next in order to trigger my different samples. What I want to end up doing is have these all spread out over the same single key. Alright? So I’ll click all of these on. What you can do now is set, for instance, the key range to be something like the same exact thing. How about let me go up to C1. Drag this one down to C1 one as well.
Now, there’s just a single key down here that’s going to trigger it. Right? One thing that’s happening though, is it’s triggering all four samples at the same exact time. Whether I’m in the loudest velocity, the middle velocity, or the lowest one. You can see this even better if for instance, I open up the list view right here.
All of these are going to get triggered at the same exact time, and that’s what I want to avoid. What I actually want to do is just trigger one sample out of all of the different ones. So what I need to do here is setup different groups. What a group is going to be is going to allow me just to trigger one thing. So, I’m going to group them together like I have “H1” for the heaviest velocity, or the loudest velocity, then “M” for the medium, and “S” for the soft.
So, I’m going to setup four different groups here. I’ve got group 1, then I’m going to setup another one here, and the way that I like to do this is go in and find, for instance, H2. I just select this one only, right click it, go over here, and say “move zone to new empty group.”
So now I’ve got a new group right here. I’m actually going to go ahead and name this one “group 2.” Any of my samples that have a “2” at the end of it, I’m going to move to this one. So I can go in here, I find the soft one. Soft 2. I can go down to here, it says “move to existing group: group 2.” I can go up and find my Medium 2, and move it to this group as well.
Okay, so I’ve got three in there. Next thing I need to do is find H3 like this. “Move to a new empty group.” Call this one, “group three.” Now I need to move my medium one over to it, and then my soft one over to it.
Alright, the last one. To split the last group, grab my fours, call this one “group four.”
Alright, so you’ll see I’ve got three different individual wav files within each group. I’ve got a heavy, medium, and soft in each one. They all have the same numbers. Okay? This is going to allow me to set things up for group star options right here. You’ll see that it says group stat always. So, I switch back, I switch off the list view. You’ll see that what happens if I trigger this note down here, C1.
[drum sample plays]
It actually triggers all of the different samples in all the different groups. So, group one, two, three, and four.
[drum sample plays]
And that’s not what I want to do. What I want it to do is have it switch between the different groups. So, right now I’ve got “Edit all groups” on. What I can do is go over here and select “cycle random.”
[samples play at different pitches]
It looks like there’s some issues with the tracking being turned on for some of these groups, so I need to go in and make sure all of the groups have tracking turned off.
[samples play]
Alright, so you can see and hear now what’s happening is in a random order. I’m triggering the different groups. It’s going to go maybe group three, then group one, two, and so on. Just each time I trigger the note, it randomly picks one of the other ones. Okay? You can also see now that depending on the velocity level…
[samples play]
Loud velocities, medium… It’s only going to trigger the medium one, and the soft one. So, if you’re the kind of person that likes to use random samples, random sampling order, this is how you can do that.
If, for instance, you want to have them going round robin, where each time it just goes 1, 2, 3, 4, 1, 2, 3, 4 and so on, I’ll show you how to do that. I like to turn off all edit groups so that you’re editing them separately.
Go over here, “cycle round robin.” The first one I’m going to setup to be positioned in the round robin. That means that it’s going to be triggered first.
Go over here to number two, switch this one on round robin. Move this one up to two, over here to three. Cycle on round robin number three.
Over here to four. Round robin number four.
You’ll see what happens now. It goes through the order. Group one, two, three, four. It doesn’t matter if it’s the soft one, the medium one, or the loud one.
[drum samples play]
Alright. So that basically sets up how I want the different ones being triggered. I’ve got the multiple velocity levels setup, I’ve got round robin setup, or random order, and so on.
The last thing that I like to do with setting up these instruments like this, especially with these drum samples, is setup what’s going to be an amplitude – or, the modulator here on these things. So, I’ve got this setup, I can turn off the group editor, I can turn off the mapping editor, I’ve got that basically ready to go.
What I want to do, and I’ll even turn on edit groups here. Make sure I’ve got all of them selected. I want to setup an amplifier. What this is going to allow me to do – I’m going to set it up for the envelope.
What I want to make sure is that the drum samples aren’t getting cut off. So, for instance, if I trigger it fast and then let go…
[drum samples play]
It’s cutting it off too quickly. So, what I want to go in and make sure I’ve got here, it looks like I need to turn one of these off. Oops. I’ll delete this one. I just want one in each thing.
So, for group one, I want to set this up. I like to do it with a curve of zero. Ultra fast attack. Make sure I can turn off the decay time. Sustain is fine. Then I’ll just really lengthen up the release.
So you can see for the group one, this envelope when it comes to it has a nice long sustain, even if I just quickly trigger it. We’ll go over here to group two, make sure I’ve got this modulator going to the envelope. Set it up like this.
I’ve done it before in the past. It seems like some strange thing has happened where – oops, I want the sustain all the way up.
Sometimes it just works where I can just set it up across all of the different groups. Okay, it looks like it worked now on these last ones.
[drum samples]
So, now I’ve got it all setup. I’ve got a long release. I can even bring this down. It doesn’t have to be too long. Make sure this one is working too. I think this one can be deleted.
You can adjust the release then so that it sounds natural. Your release has some tail to it, but you don’t want it to cut off too soon. Okay. So that’s basically taken care of all of the things that I want to show you for setting up your instrument. You can turn the gear off now.
Now I’ve got my snare drum setup with multiple velocity levels in a round robin fashion. I can go in and I can do this whether I want to do this for all of the different snares, and put them on an instrument. You can type it in here called “snares,” or you could do it where you have this kind of kit. Like, this is the “snappy snare.” So you can do this. Type it in like this, go up to “file,” go to “Save As,” “Snappy.”
Now I can go in, for instance, if I wanted to, let me find my samples. I’ve got “That Sound” right here. This is the Paul Maybury. For instance, I might pull up a new folder and call it my “Kontakt presets.” Great. Save it right in here.
It’s got all of those laid out. We’ll go back to my Finder. I’ve got a folder in here now. Kontakt presets in here, I’ve got my .nki that I can use like this. So I’ve got it saved. Go back out here to “snappy,” pull it in, and it’s ready to go.
So now, you’ve saved your own preset of these wav file samples as your own Kontakt virtual instrument. Again, you can build onto this, add other samples in there, other snares, or build up a full kit if you’d like. This is going to allow you to trigger these samples, just with MIDI. If you like working with Kontakt there’s a lot of very nice things about working with it.
What you’ve done is created your own virtual instrument to trigger one shot samples with multiple velocity samples in either round robin or random order.
That takes care of this video where I’m focusing on one shot samples. My next video, I’m going to show you some of the loops from the library put together by “I Want That Sound.” It’s the organic loops library, and what I’m going to do is go through some of those loops, and show you some of the nice features of Kontakt if you’re going to be working with loops. So, stay tuned for that video. If you guys have got questions about this, feel free to post them in the section below and I’ll get back to them.
So, take care guys. I’ll catch you next time.
Elevate Your Ears