How to Record Tempo Changes On-The-Fly in Logic Pro
Article Content
There are several ways to set and alter Tempo in Logic Pro, but it’s not immediately clear how to control and record tempo changes in real time by using a continuous controller. One obvious application for this would be to achieve a rubato effect or a free-flowing tempo as if following the fluid ebb and flow of a conductor’s baton.
First, let’s look at the various ways to alter tempo in Logic in non-real time.
Tempo Display
The simplest method is to change the tempo in the display bar by clicking and dragging or typing in the box.

Tempo Track Automation
You can alter the tempo using the Tempo lane in the Global Tracks display. (Right-click to show or hide the Tempo Track or use [Shift-Command-T]. Here you can set a fixed tempo and add tempo change events, like nodes in an automation lane. Click on the automation line to create a node and drag it to the desired tempo. You can also create exponential or logarithmic transitions between nodes by dragging them around. It’s pretty intuitive.

Tempo Event List
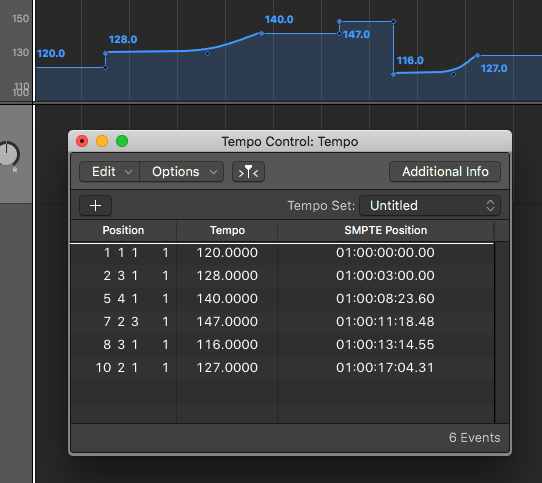
Once you create some nodes in the Tempo Lane, you have also unwittingly created a list of tempo change events that will show up on the right-hand side under the Tempo Tab of the List Editor Window [D]. Or you can open it as a floating window [Opt-Shift-T]. This list shows the location of change events by:
- Position (Bar/Beat/Division/Ticks)
- New Temp o
- SMPTE Position (Hours:Minutes:Seconds:Frames.SubFrames)
When you make a change in the list you will see the change reflected in the Tempo Lane as well…and vice versa. The list, however, does not reflect the transition curve of the change, only the start and end points.
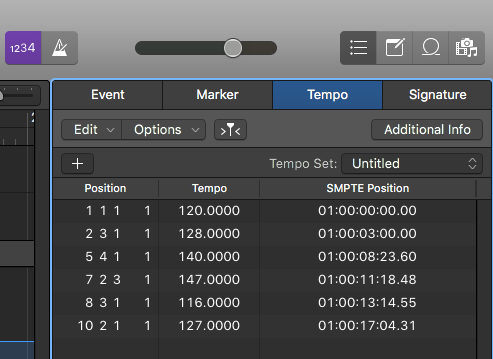
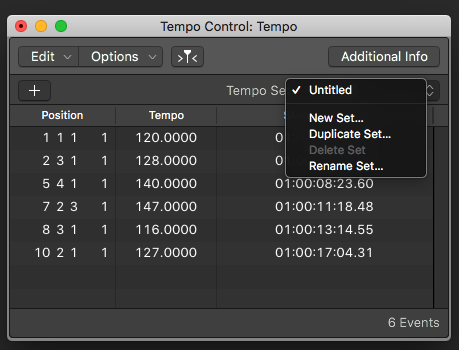
You can also save Tempo sets in the List view, which are basically tempo templates, using the drop-down menu (shown above).
Tempo Operations
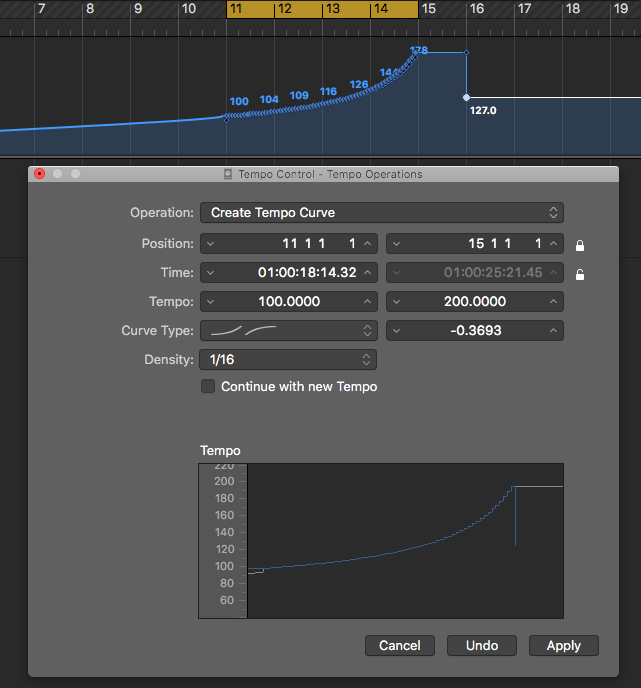
The Tempo Operations box can be opened using the menu: Edit/Tempo/Tempo Operations. Here you can make various sorts of transitions between two tempo values in an area defined by the yellow Cycle area. Transition can be abrupt or smooth based on the density of change events as fast as a 1/32 note division. The change is reflected in the graphic at the bottom. You can even random tempo change events based on a maximum change parameter, or thin out existing data.
Tap Tempo
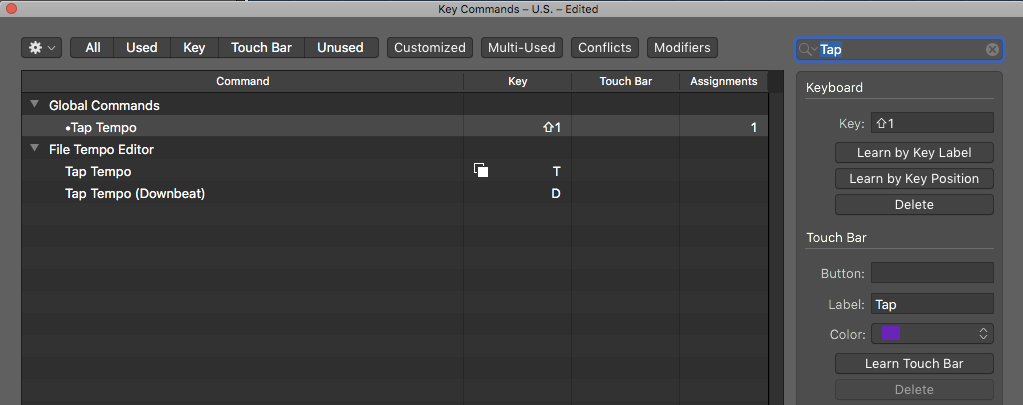
The Tap Tempo process can be used to define a beginning tempo by defining a Key trigger in the Global Key Command Menu. Logic Pro X/Key Commands/Edit/ or [Opt-K]
- Under Global Commands find Tap Tempo (search keyword Tap) and define a key using the Learn By Key Label Button. (Be careful not to overwrite existing key commands)
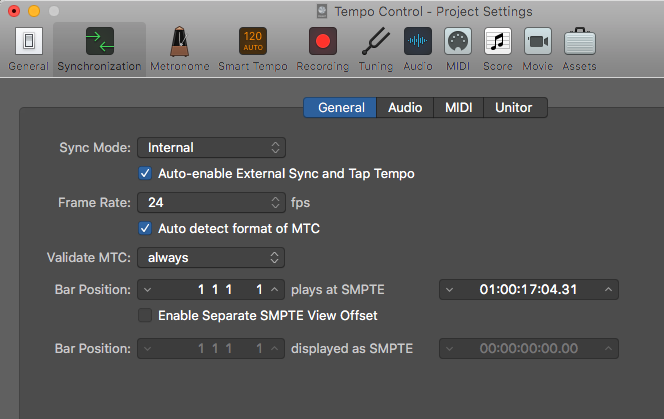
- Go to File/Project Settings/Synchronization and check [Auto-Enable External Sync and Tap Tempo]
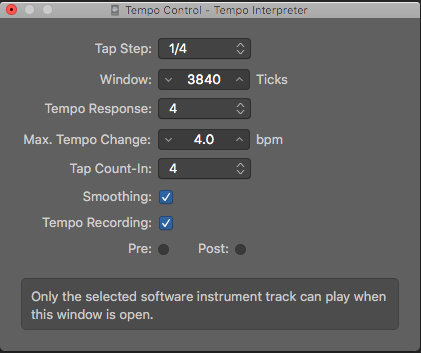
- Go to Edit/Tempo/Tempo Interpreter. Here you can set the parameters of the way Logic interprets your Tap.
Beat Mapping
Beat mapping allows you to change the tempo of the session to match the performance a recording by analyzing and mapping the transients. This could be highly useful getting MIDI tracks to line up with a live performance recorded without a click after the fact. A Beat Mapping Lane can be added to the Global Tracks area by right clicking and choosing it. The process is well-explained in the Logic Manual.
Continuous Control & Recording of Tempo Changes
All the Tempo adjustment techniques above have their place and are appropriate in certain circumstances. But none of them address the idea of changing and recording tempo as the track plays.
Typically, assigning a continuous controller (CC) or a knob or slider on a MIDI controller to a parameter in Logic is fairly painless. Simply move the parameters on screen and click [Command-L] to bring up the controller assignment dialog. The rest is self explanatory. Likewise, automating and recording changes for the assigned parameter happens as you select Latch/Touch or Write under the Automation Mode drop-down menu and play the track.
But recording to the Tempo Track cannot be done in the same way. So here’s the work around step by step:
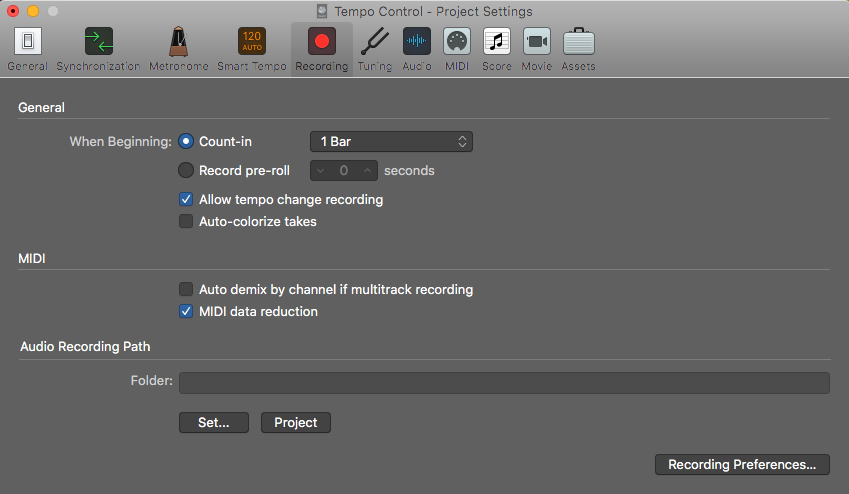
1. Go to File/Project Settings/Recording and Click “Allow tempo change recording”.
2. Go to Window/Open MIDI Environment or [Command 0] — yes, the dreaded Environment Window.
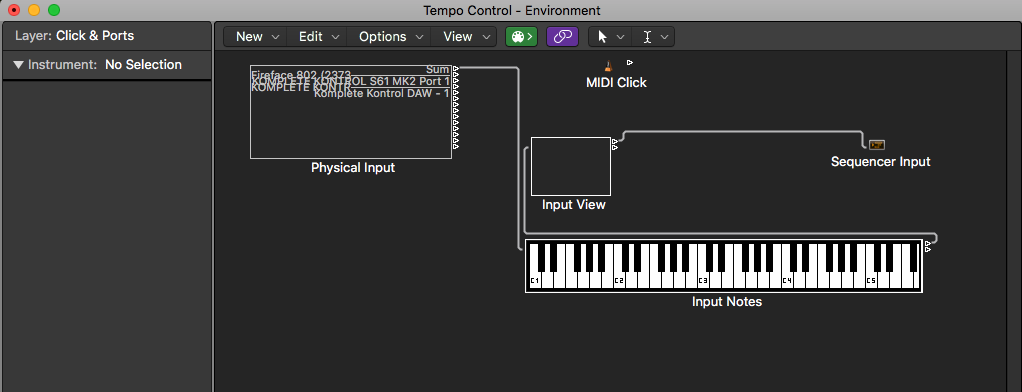
3. Choose Clicks and Ports in the Layer Drop Down menu in the upper right.
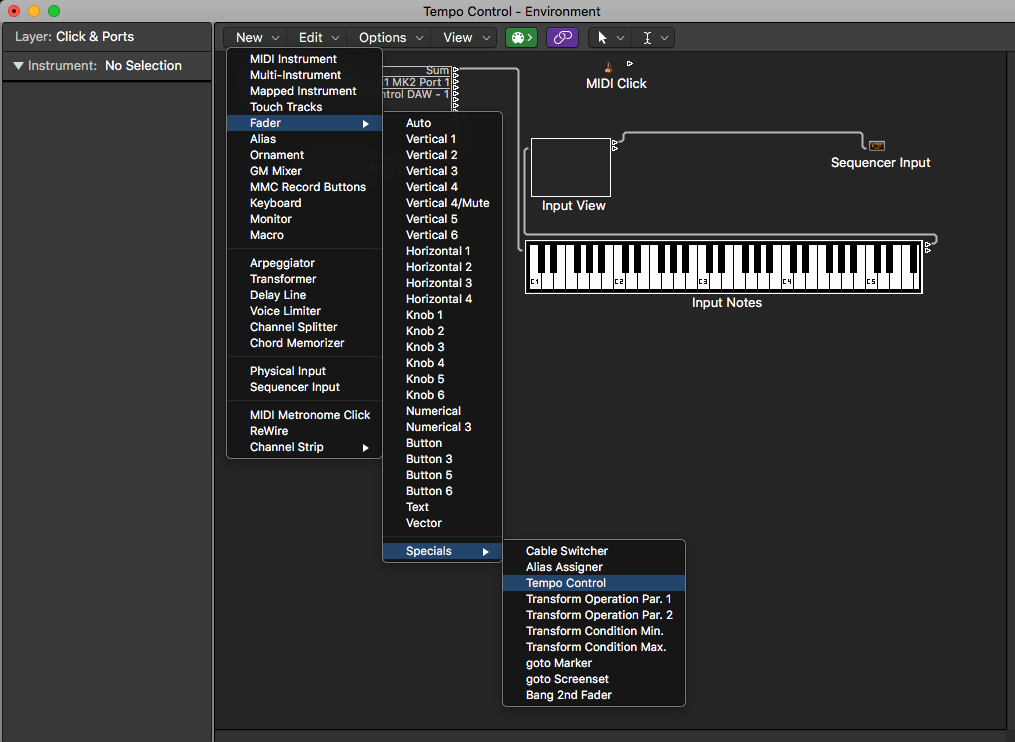
4. Select New/Fader/Specials/Tempo Control to create a new Tempo Fader.
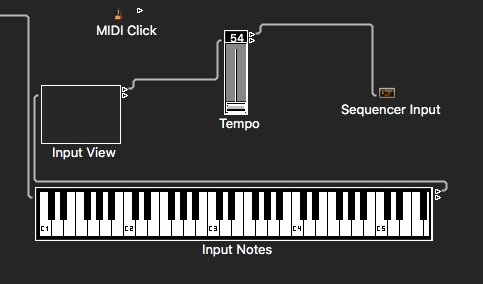
5. Connect the object between the Sequencer Input Object and the Input View Box.
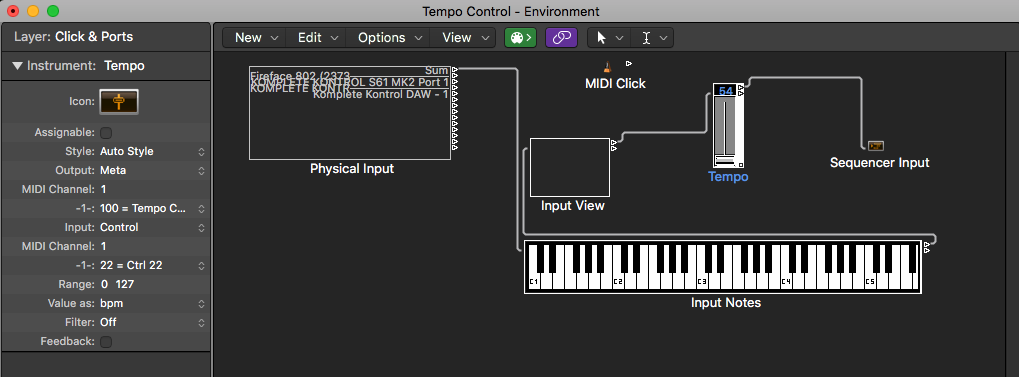
6. Click on the right side of the Fader object to expose the Setting Windows on the Left.
7. Select the MIDI Input which defaults PitchBend. Choose Control and pick a Controller Number that matches the controller number of the knob or slider on your device that you intend to use. Here you can also set the useable range which defaults to MIDI values 0 – 127 being mapped to 50 to 177 BPM.
8. Now when you move you controller you should see the Tempo display change as well.
9. Create a New Instrument Track with any instrument you choose or make it an External MIDI Track. You will only be using this track to receive Controller Data so it doesn’t matter.
10. Record enable the track and hit Record [R]. Adjust the tempo as the session plays.
11. Stop the session and the automation should magically appear in your Tempo Track.
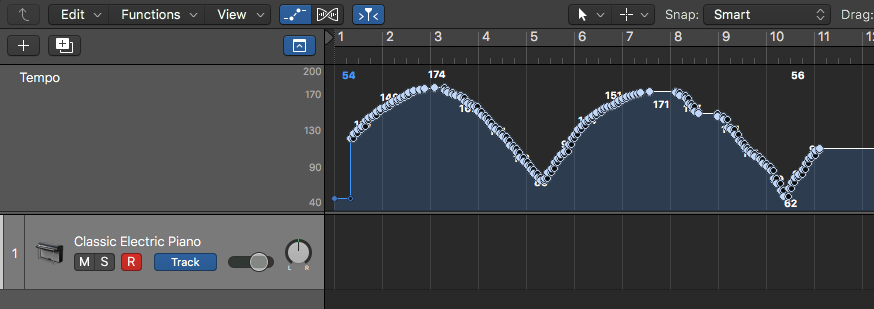
12. Edit, thin or manipulate that automation data to taste.
You are now armed with the necessary Tempo tools to create a more convincing musical simulacrum. Enjoy yourself while you can, because the Singularity is approaching.
=====
Check out my other articles, reviews and interviews
Follow me on Twitter / Instagram / YouTube


