How to Make Your Mixes Sound Gigantic
08/7/2020
Article Content
One of the qualities we use to describe mixes is size. Big, giant, huge, and so on, are all terms used to express the caliber of music productions.
So, what exactly does that mean? How does one make their mixes sound ‘bigger’ in size?
To me, size can mean different things. Some mixes establish a deep and detailed sense of space to create size, using reverb and delay to envelop the listener, while others use proximity, strategically using processing such as compression, equalization, and saturation (and avoiding using excessive reverb and delay) to make the individual parts of the arrangement sound as if they are so close, you can almost touch them.
In this article, I am going to break down how I approach creating size during recording, mixing, and even mastering. Let’s see how many synonyms for ‘big’ I can use.

This article is the equivalent of Brain and Nerve tonic, but for mixing music. It may cause Gigantism. PROCEED WITH CAUTION.
During Tracking
A great recording engineer understands context. What does a particular song need to fulfill its sonic potential, and how do I use microphone choice, placement, and additional processing to reach that potential?
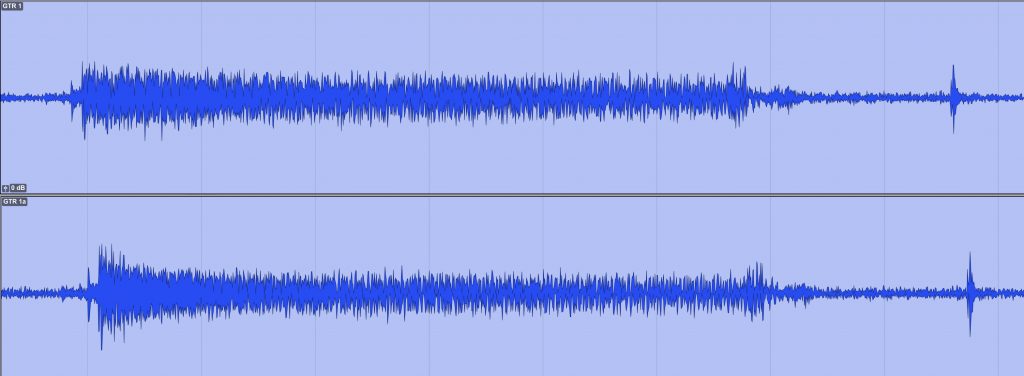
One of the most crucial components to proper recording technique is understanding phase and polarity. Phase has to do with shifting a signal in time. Say you have two microphones placed in front of a guitar amplifier, one is millimeters away from the speaker, another is about three inches away. The sound is going to arrive at those microphones at slightly different times, and the resulting waveforms will look something like the example beneath, with one occurring earlier than the other. This will affect the timbre of the recording.
There are certain instances in which two signals don’t need to be perfectly phase-aligned and sound ‘appropriate’ in context, so be aware of that before using any phase-alignment plugins or simply shifting the audio within a DAW. When recording drums, however, I pay extra close attention to phase, especially between any overhead microphones, and ensure that they are recorded in such a way that the sound arrives at the overheads simultaneously. Failing to do this can cause deficiencies in a variety of ways, negatively affecting how the summed signals behave across the frequency spectrum, how the transients respond, and the sense of space in which the entire drum kit sits. All of these qualities directly correlate to how ‘big’ the drums are perceived, so be very mindful of phase relationships.
Similarly, polarity relationships between tracks affect how they sound when summed and heard together. This is especially prominent in the low end.
Think about it this way — when we record a snare drum, typically we use two microphones, one placed above the drum, close to the skin, which captures the warmth of the shell and impact of the stick against the drum head, and another microphone placed underneath the snare aimed at the series of chains that rest against the bottom of the drum, also known as … a snare.
The snare contributes high-frequency content to the recording, necessary for the sound of the drum to ‘cut through’ in the mix. Think about it though, the snare top microphone is pointed down, perhaps at an angle, and the snare bottom microphone is pointed up. So, to get the respective compressions and rarefactions of the sounds working in tandem, it’s important to invert the polarity of one of those signals. And which one should we choose?
The bottom snare microphone signal, because it’s likely that all of the other microphones (overheads, toms, etc.) will be pointed downwards similar to the snare top mic. Without inverting the polarity, the snare drum will likely be lacking in low-frequency content, and therefore, size. Any time you’re working with two signals of a singular source, and even tracks that occupy similar frequency ranges (such as kick drum and bass guitar), be sure to pay attention to both phase and polarity interactions between the recordings, as symbiotic relationships are essential for a clean low end, and therefore, perceived size.
Not Everything Can Be Big
Before I dive deep into how I use processes such as equalization, compression, saturation, reverb, etc. to make mixes sound ‘big’, it’s important to express that when mixing, no single element exists in a vacuum.
In other words, you need to consider how everything is interacting together, and when working on grand arrangements with 80 or more tracks, not everything can be enormous. In fact, trying to make each and every element larger than life can ultimately result in a muddy and fatiguing listening experience. Also, worth considering is that most modern mixes and masters are pushing the limits of digital audio using compression and, well, limiting.
You can only cram so much signal into a finite amount of digital space before compressors and limiters begin to make your mixes sound small, and so, oxymoronically, in the pursuit of making your mixes IMMENSE, you can do just the opposite.
If you are working on a mix that is meant to feel MASSIVE, my best advice is to pick your battles — if your production was made with the ‘kitchen sink’ mentality, and you’re staring at a session with 150 audio tracks, only a certain number of elements are going to be able to be made to sound COLOSSAL, so choose which elements those are considering the needs of the song and client.
Compress, but Don’t Over-Compress …
Compression is one of the most powerful tools for making elements sound larger than life. There are very few feelings quite like getting kick and snare drum dialed in correctly with compression, but it’s easy to cross the line into over-compression if you aren’t careful and don’t listen critically.
When a source is over-compressed, the low end and the strength of the transient are usually the first two things that are negatively affected, so there are few things that are worse for making your mixes sound HUGE than excessive compression (a high-pass filter on the master buss being one of those things.)
So how do you avoid over-compression?
On close-miked drums such as kick, snare, and toms, I recommend using slower attack times, with release times set dependent on the tempo and groove of your production. Set the ratio and threshold to taste, and while doing so, listen to how any changes alter both the low end, and the impact of the drum. If you’re digging how the transient reacts to the compression, but your low end suffers a bit, place an equalizer with an appropriate low end boost after the compressor, as an equalizer with that very same boost pre-compression will actually force the compressor to (over)react to that specific frequency.
Aside from managing dynamic range, compressors impart a variety of characteristics onto signals. A few of my favorites for subtle thickening in the low end include the UAD Fairchild 660/670 and the Tubetech CL-1B from Softube and UAD, both of which add a very pleasing warmth and heftiness to whatever you run through them, as long as you set the parameters correctly.
As I mentioned, how compressors shape transients can affect perceived size, and my favorite transient shaping compressors include the dbx 160 from UAD and Waves, the Distressor from UAD, and any worthwhile 1176 emulation (and there are a lot of them). Each of these aforementioned tools respond quite differently to material, so be sure to experiment with the different parameters on them and compare to hear which ones work best on any given track.
Compression is something that I apply to individual tracks, groups of tracks, and even the master buss (2-buss). It’s especially important to not over-compress the master buss, as it can result in thin, two-dimensional, flat, and small-sounding mixes. Done correctly, however, compression on the master buss can add unique dynamic and tonal qualities to your productions.
Similar to when compressing drums to preserve transients, I try to use a slow attack time when compressing my 2-buss, and avoid applying more than 2 dB of gain reduction at any given moment. My ultimate goal is to see the GR (gain reduction) meter lightly ‘dance’ with the music, ‘kissing’ the signal ever so slightly. Using this method, and with a specific rotation of hardware and software compressors that have come to be my favorites, I am able to give my mixes more proximity and weight, contributing to the perceived size of the productions.
… Unless Over-Compression Is Done With Intent
Mixing is similar to putting together a puzzle — in a professional-sounding mix, all the pieces fit together just right. That being said, if a certain element needs to be uber-compressed so that it works in context, go for it.
Lots of pop mixes want to achieve that LARGER THAN LIFE thing, and I find myself using liberal amounts of compression on lead vocals when mixing in this style. While compression can eat the low end of a signal, it can also give listeners the perception that sources are closer, so if I am looking for an upfront vocal sound, I will compress and then use additive equalization to boost whatever necessary low frequencies were compromised by the compressor.
Layering Is Your Friend When Done Correctly
When producing and mixing electronic-influenced, synth-heavy music, knowing how to layer is essential.
Let’s say that I am creating a bassline that I want to utilize the full frequency spectrum, I am going to consider the different components to that sound. Synthesizers or virtual instruments that allow you to layer sounds are often helpful in cases such as this. I’ll use one of my favorite pieces of software for creating bass instruments, BASSYNTH. It allows you to layer up to four separate sounds, and has tons of useful features that allow you to dial in bass tones with great detail. It’s also officially named with all caps, which I enjoy too.
When building a bass that covers most of the frequency spectrum, a THICC, sine-wavey bottom ‘JP SINE’ end is a good starting point. I might want to add something in the midrange that growls, so I could layer in a synth brass ‘BRASS TERROR 2’ or something with a lot of information between 500 Hz – 4 kHz.
Next, I want there to be a transient element ‘FREQ STRIKE’ to simulate a pluck, so that the bass has some attack to it. Lastly, I’ll add in some noise ‘FOLEY RAIN’ for good measure. Afterwards, in BASSYNTH, which is endlessly tweakable, I will make adjustments to the attack and release of each for the perfect balance. This is just one example of an approach to creating a full-sounding bass, and there are so many awesome virtual instruments and hardware synths that can be used with this method.
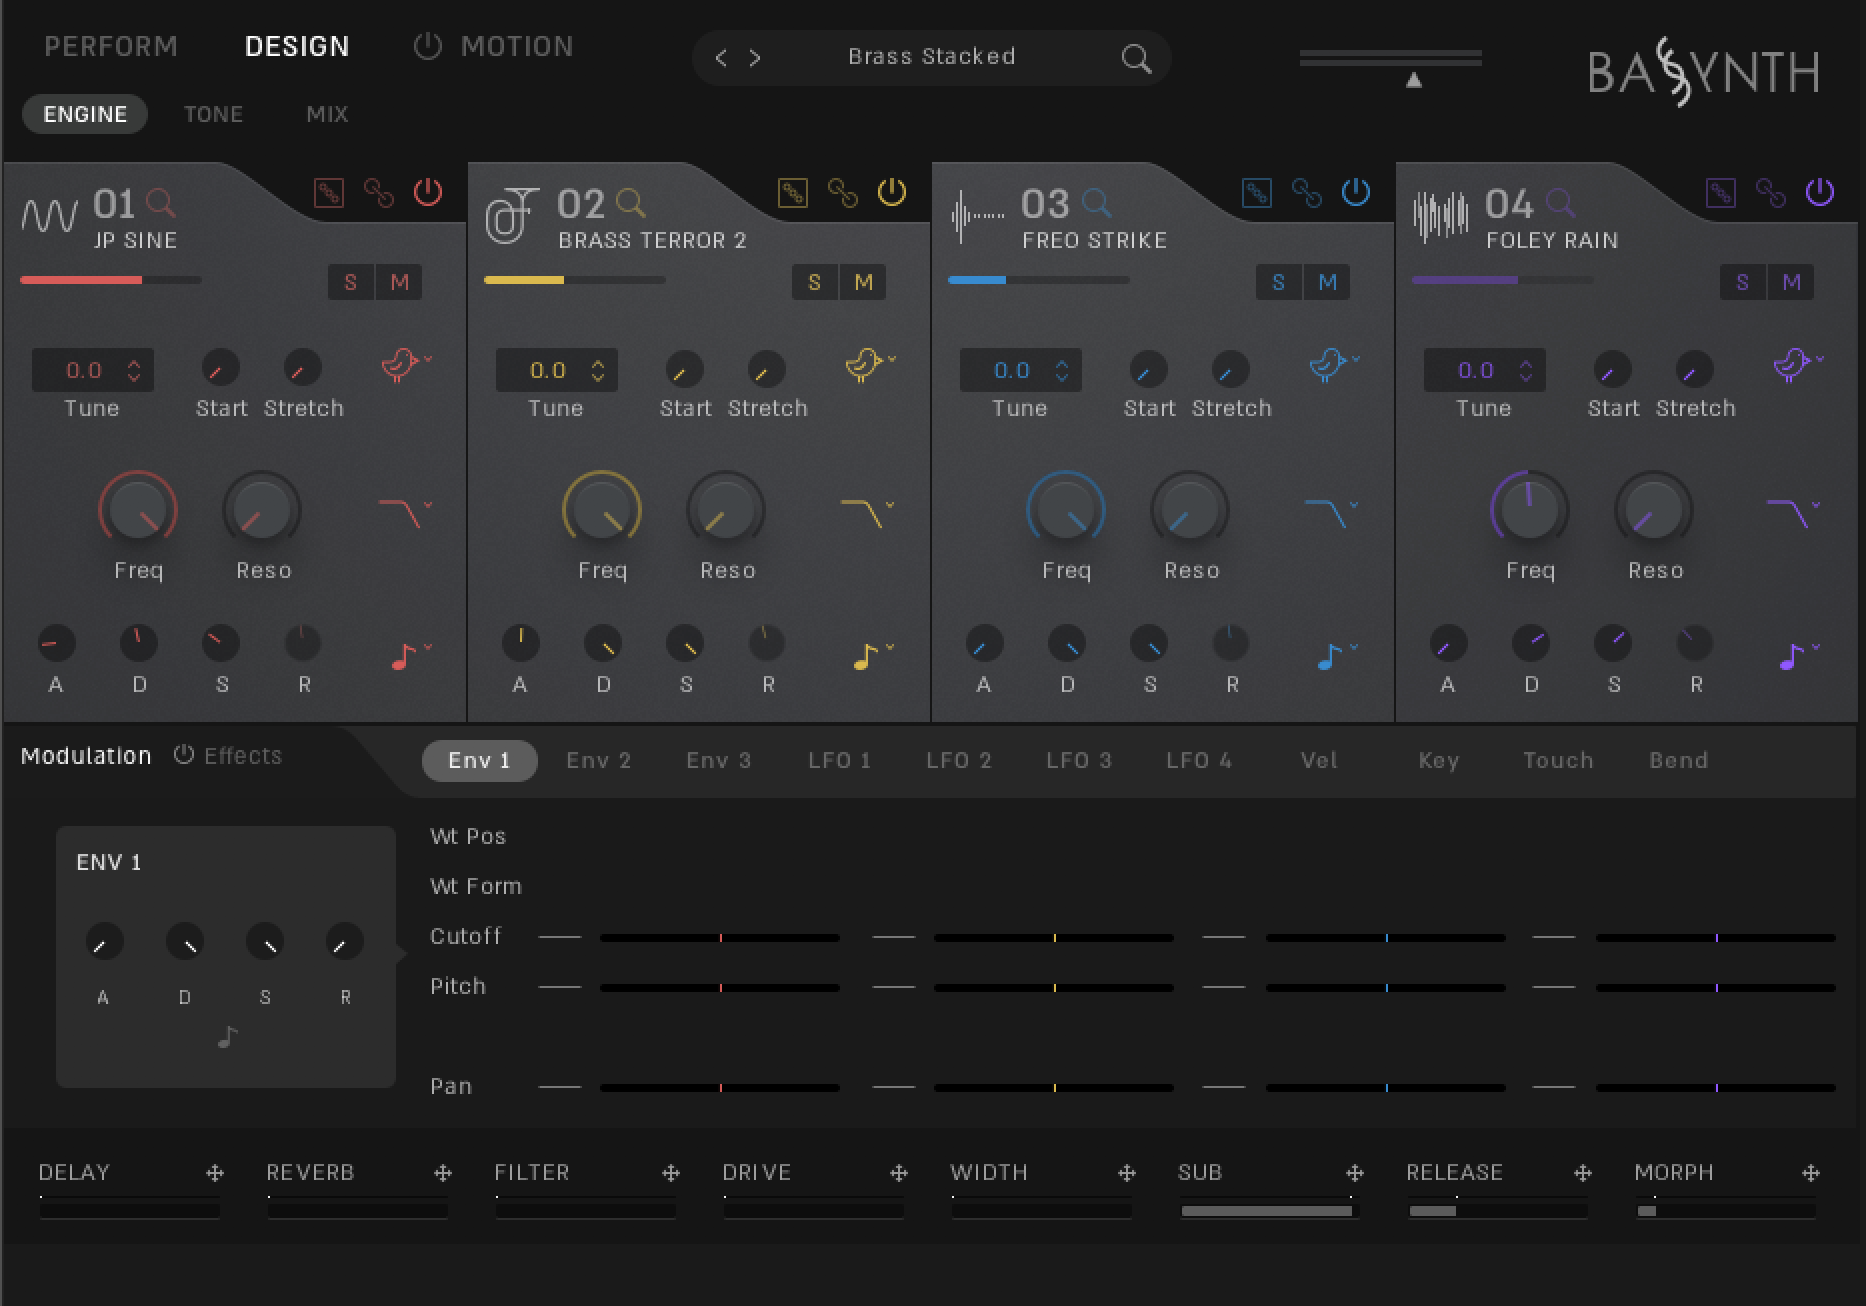
Customizing layers of sounds with BASSYNTH
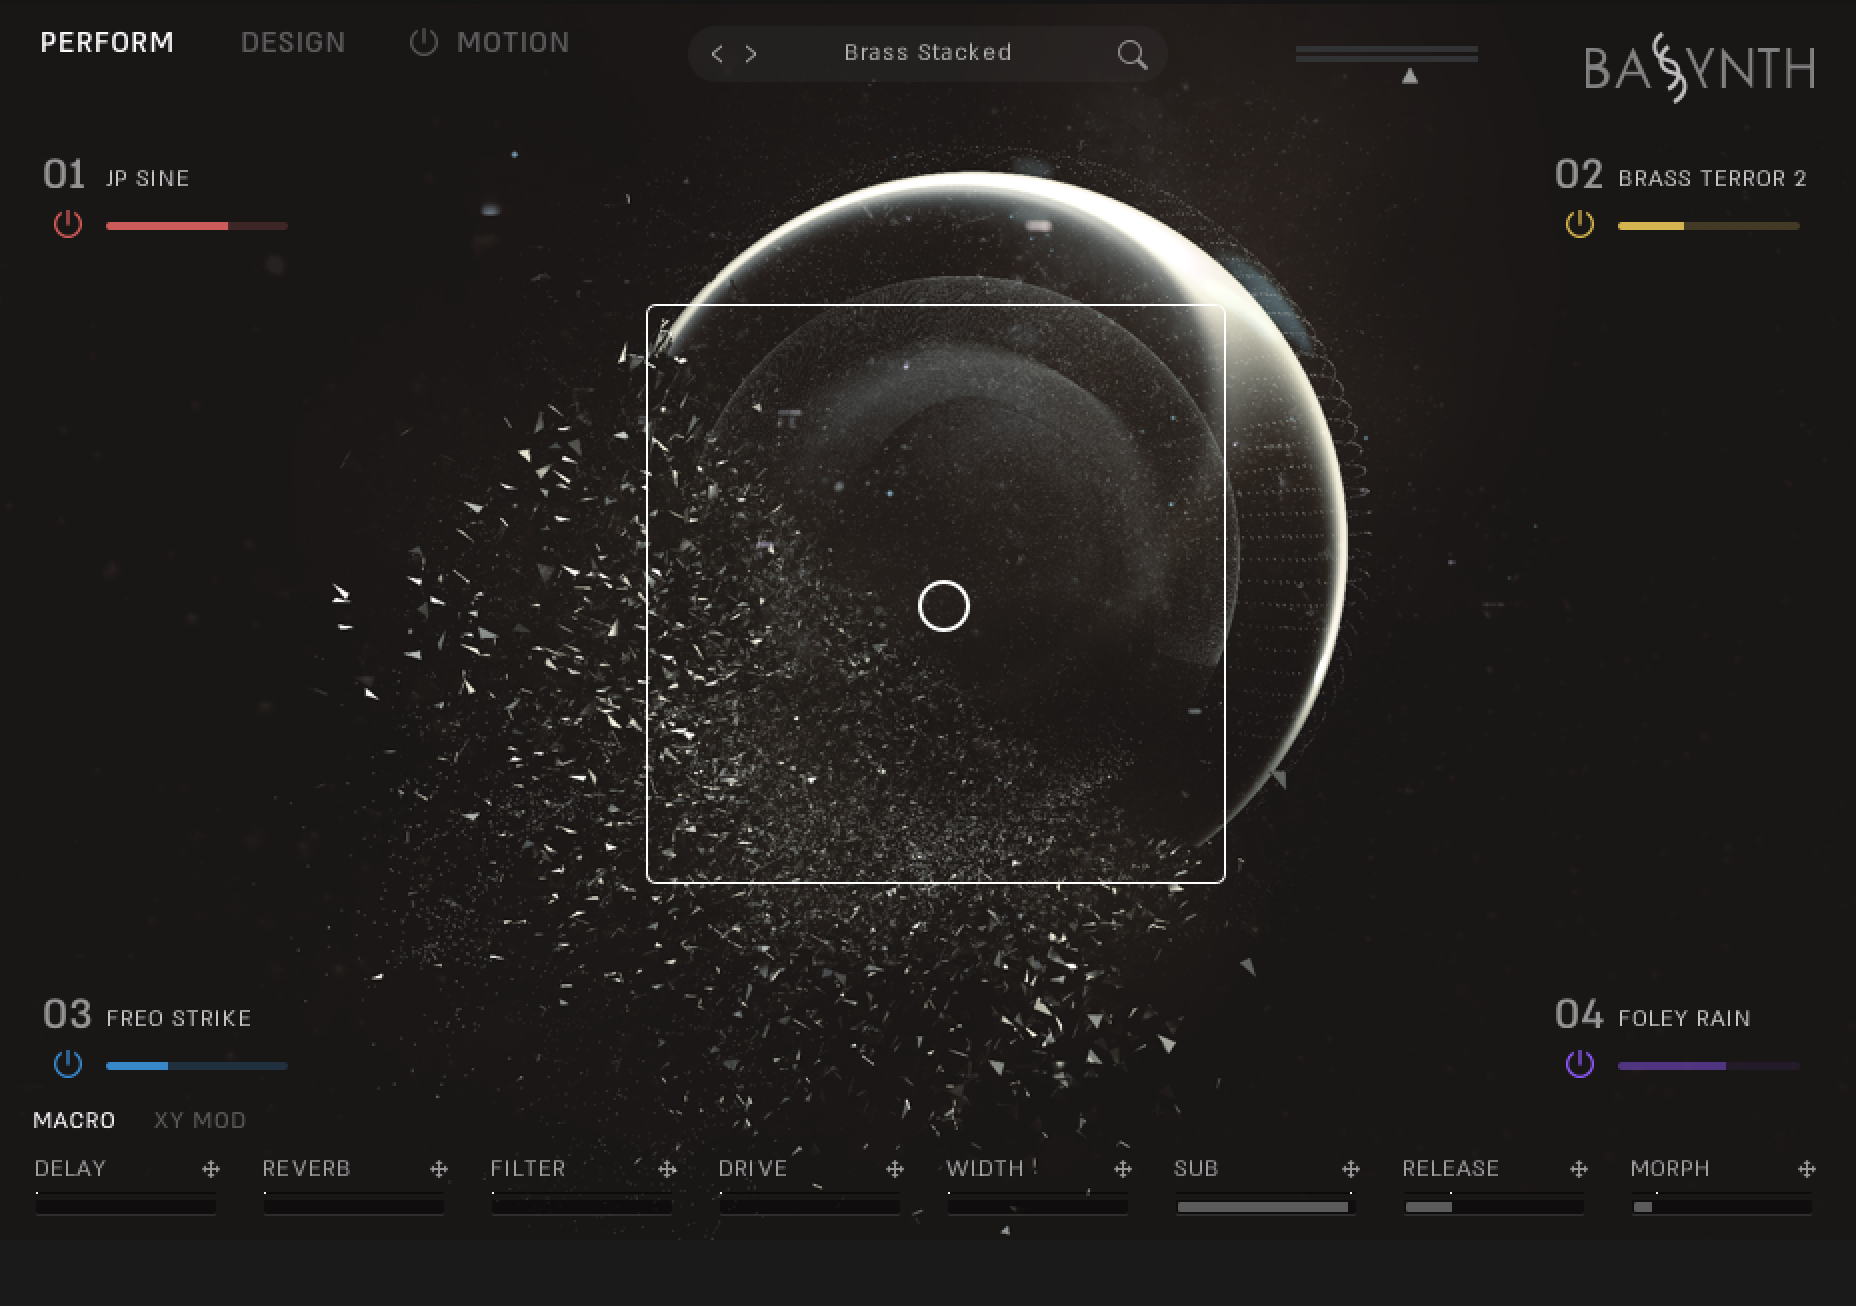
Blending layers with BASSYNTH
I have discussed this in several articles, so I’ll keep it brief here, but I often use the same approach when layering drums. If a client provides me ‘small sounding’ drums, I’ll augment them using samples.
Let’s say what’s making the kick drum sound small is a lack of low end. I will setup a trigger, and then layer in a MAMMOTH-sounding sample to remedy the issue. If the snare I was delivered has a decent attack to it, but its ‘smallness’ is that it has no sense of depth and space, I’ll layer in the sound of a drum in a large room. This can be done a variety of ways, and I personally use a combination of Addictive Trigger, Massey DRT, and my (overwhelmingly) GIGANTIC library of samples.

Ready to elevate your ears?
It doesn’t have to take years to train your ears.
Get started today — and you’ll be amazed at how quickly using Quiztones for just a few minutes a day will improve your mixes, recordings, and productions!
Equalize With Precision
Masking, or when the perception of one sound is negatively affected by others, is one of the most common problems that can make an entire mix sound both muddy and small.
Knowing your way around equalizers is crucially important for solving masking issues. If both my kick drum and bass guitar have an overabundance in the 100-300 Hz range, then they are going to be fighting for the listener’s attention, and neither are going to win. I’ll decide which element should sit ‘beneath’, and then, using an equalizer, remove the conflicting frequencies from the element that I want to sit ‘above’. This is why making informed decisions when tracking is so important. If the engineer decides that the kick drum is going to sit beneath the bass, then the players and engineer can make sonic decisions that allow those two elements to coexist harmoniously.
This principle can be applied to any two signals that are in sonic conflict. Sometimes, backing vocals were tracked identically to lead vocals, and as a result, it’s difficult to determine which are sitting ‘up front’. If I want my lead vocals to have a greater perceived size, I’ll likely attenuate the backup vocals where they are battling the leads.
Both of these aforementioned examples reinforce my point that not everything can be big — sacrifices need to be made.
Saturation Is Fun
Sometimes I’ll reach for a saturation plugin, my favorites of which include Fabfilter Saturn 2, Soundtoys Decapitator, and the UAD Studer A800, before doing any compression or equalization whatsoever. Saturation plugins can add interesting harmonics to material, and while they may not be able to precisely fix frequency and dynamics-based problems, sometimes do just the trick to add the warmth and HEFT that your tracks need.
Reverb and Delay Can Make Your Mixes Humungous (Or Muddy and Unintelligible)
In some ways, it’s easier to make mixes feel GARGANTUAN when they are intentionally dry-sounding. The individual elements are less harmonically complex, the transients are more prominent, and more time can be spent on making the individual parts seem like they are coming right out of the monitors. Not all productions call for this style of mixing though, so one needs to be aware how time-based effects can make or break the GIRTHINESS of a mix.
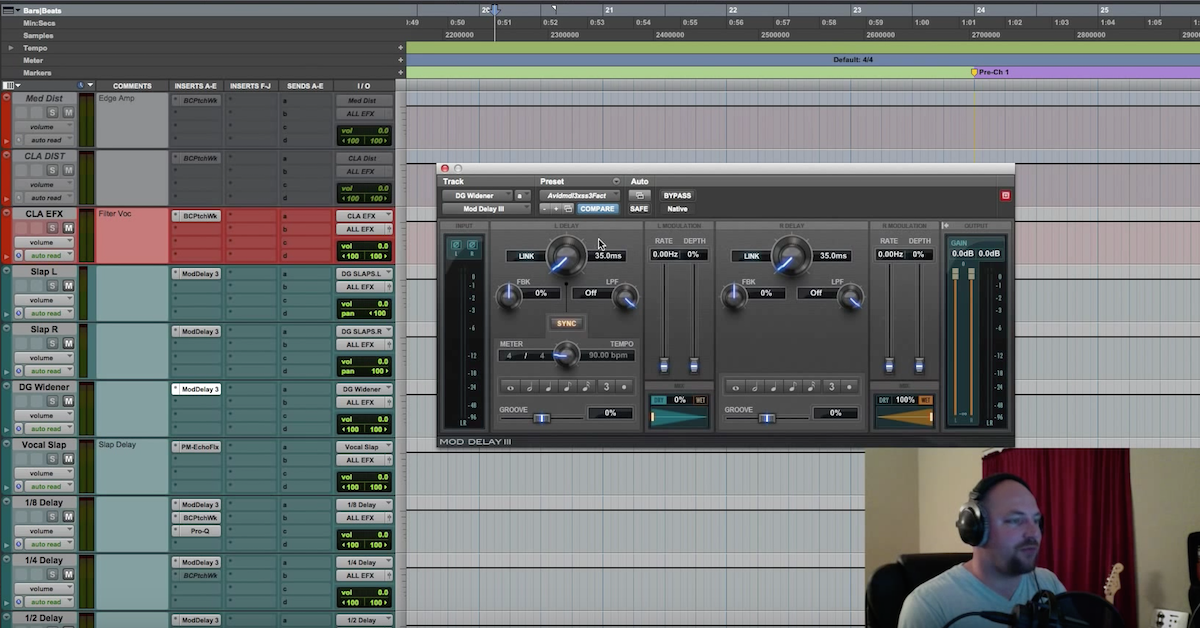
When the production I am working on calls for reverb and delay, it’s never a set-it-and-forget it process. I’ll make meticulous decisions about which types of reverb and delay to use, tweak the settings so that they appropriately enhance the dry signals, and then automate the send levels and levels of the auxiliary tracks upon which the effects are inserted.
Worth considering is that reverb and delay plugins are technically creating repeats of the original signal, so if what you’re processing is inherently small in the first place, these effects may not help.
A few of my favorite reverbs for establishing size are the UAD Capitol Chambers, which creates a gorgeous sense of depth and warmth that very few reverb plugins can, and has a surprisingly powerful low end, and the Soundtoys Little Plate, which really helps an element seem like it is sitting further back in the mix.
It’s hard to beat EchoBoy, the G.O.A.T. delay plugin, for general purpose delay duties. Explore the different echo styles, and experiment with the saturation parameter on this plugin for piercing, warbly, and yes, ALL CAPS BIG-sounding delays.

In Summary
Something to consider is that music occurs over time. I always love listening to mixes that do that thing when it sounds great in the verses, but they really ratchet it up in the choruses. This can be done in a variety of ways — with the arrangement, with processing (perhaps filtering) individual tracks to sound smaller in the verses, or even with treating the 2-buss.
While size is something that clients may be after, don’t lose your sense of what the song and production need. You don’t need to go big for bigness’ sake.
Eleveate Your Ears