The Fundamentals of Waveform Editing
10/15/2017
Article Content
Knowing the basics of waveform editing is essential for sound designers, field recordists, composers and performers that use samplers or loop-based material, dialogue editors, and anyone that’s involved in audio editing in general.
While most DAWs are capable of waveform editing at some level, anyone that wants to get surgical about sound editing will need some sort of dedicated waveform editing application, such as Adobe Audition, Sound Forge Pro, SpectraLayers Pro and iZotope RX 6 to name a few. There are also freeware and shareware choices such as Audacity and Ocenaudio, low cost apps like WavePad and Loop Editor, and even browser-based applications such as Hya-Wave.
If you find yourself editing single sound files on a regular basis, finding the right editor will be time and money well spent.
Difference Between a DAW and a Dedicated Waveform Editor
DAWs like Pro Tools and Logic Pro are intended for multitrack session projects. While you can edit audio files or regions in any standard DAW, dedicated waveform editors are optimized for this purpose.
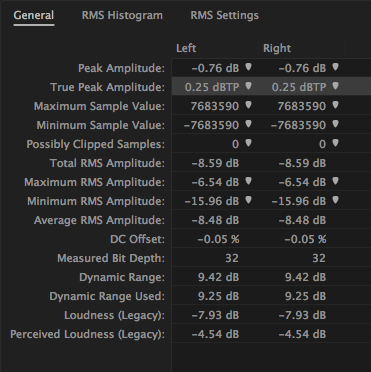
Adobe Audition Amplitude Statistics panel
A feature-rich editor will allow you instant access to amplitude, frequency and phase statistics on a specific file or a selected part a file. This allows you to instantly identify and locate problems with inter-sample peaks, RMS and perceived loudness levels, correlation and phase problems, clipped samples, etc.
In programs like Audition for example, clicking on a True Peak level in the amplitude statistics panel will move the cursor directly to the problem spot on the editing window.
While some editors do have multitrack functionality, I prefer to record and mix in a DAW. The true benefits of the waveform editor lie in their graphic interfaces and their ability to surgically isolate, tweak, repair and polish a single sound or sample. They are often used in conjunction with a DAW.
For example, if you preconfigure your Audio preferences in Logic to use a specific waveform editor, selecting a region and clicking [shift-W] will open the file in the waveform editor, where you can perform destructive editing and directly replace the file in the session.
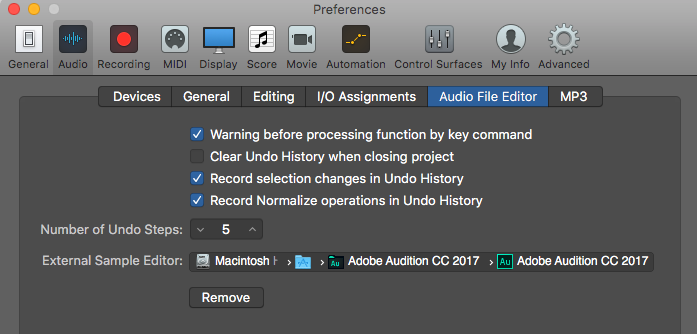
Configuring Logic to open an external Sample Editor
Waveform and Spectral View
There two common ways you can view a waveform in a dedicated editor: The Standard Waveform View common to traditional DAWs which shows a display of time and amplitude, and the Spectral View, which displays sound in terms of time (X-axis), frequency (Y-axis), and amplitude (color — usually brighter meaning louder).
There are some variations such as in SpectraLayers Pro, where a 3D spectrogram can be viewed. These spectral views allow for greater insight in terms of frequency content. Unwanted noises can be visually isolated and easily removed, areas of saturation become immediately apparent, and graphic spectral editing, an area ripe with possibilities, opens the door to new creative choices.
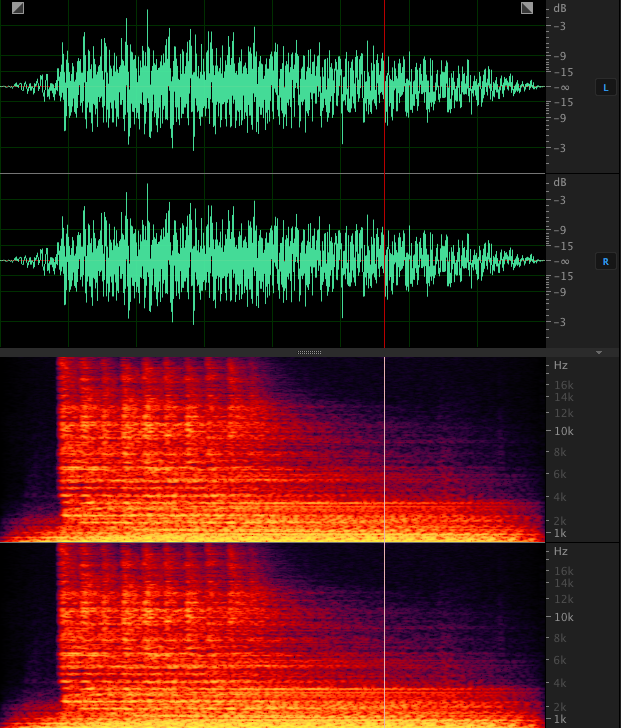
Adobe Audition
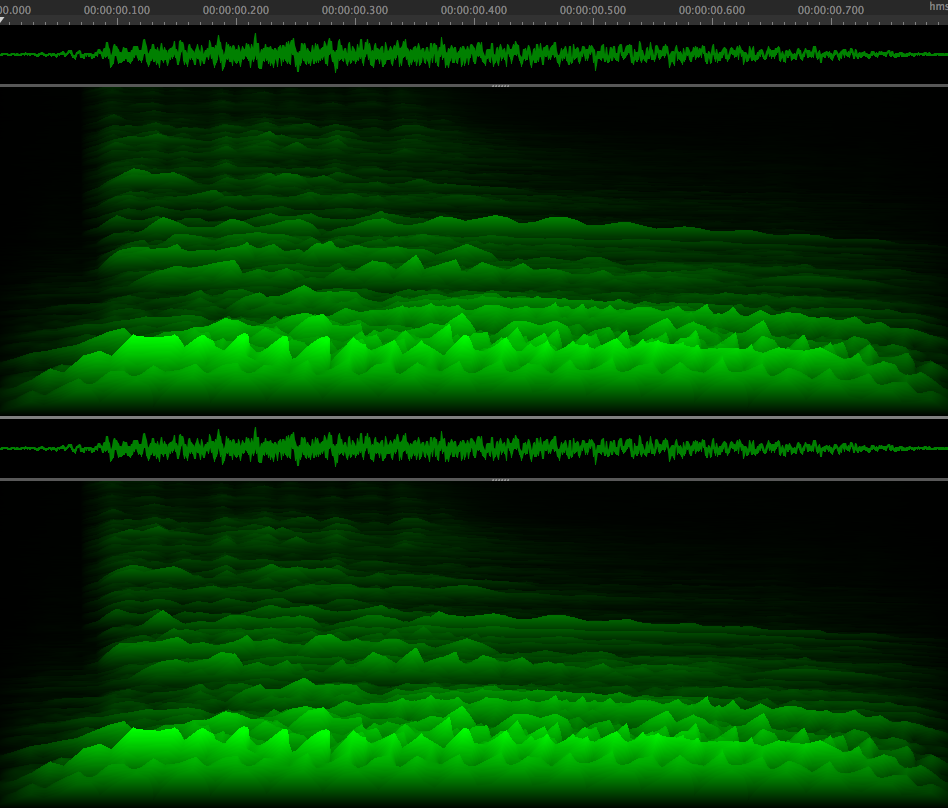
SpectraLayers Pro
Field Recordings and Digital Noise Reduction
A waveform editor is great for cleaning up long field recordings and problematic sound files. Ambient recordings are often plagued with sudden unwanted sounds, or persistent noises such as motors, HVAC noise, electrical noise, etc.
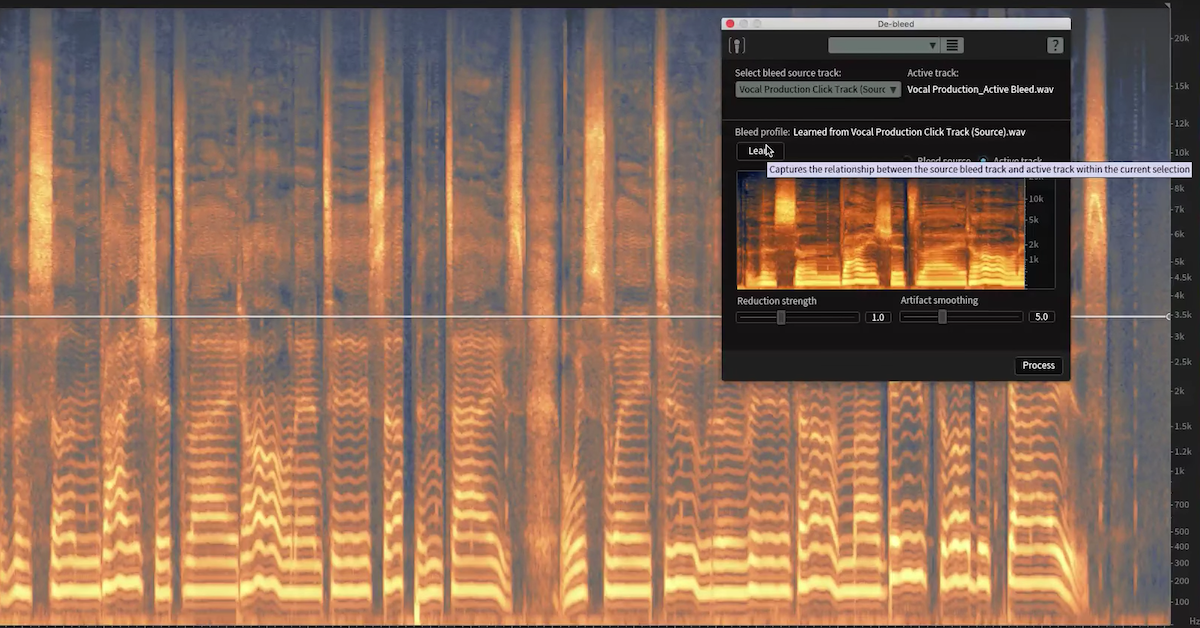
A good waveform editor will offer some flavor of digital noise reduction (DNR). The typical process is to first capture a noise print from the file, which is a small section that you identify as unwanted noise. The selection is analyzed in terms of frequency and amplitude content.
You then select the entire file the instruct the software to remove all similar content throughout. This is typically accomplished via some variation of FFT (Fast Fourier Transform) operation.
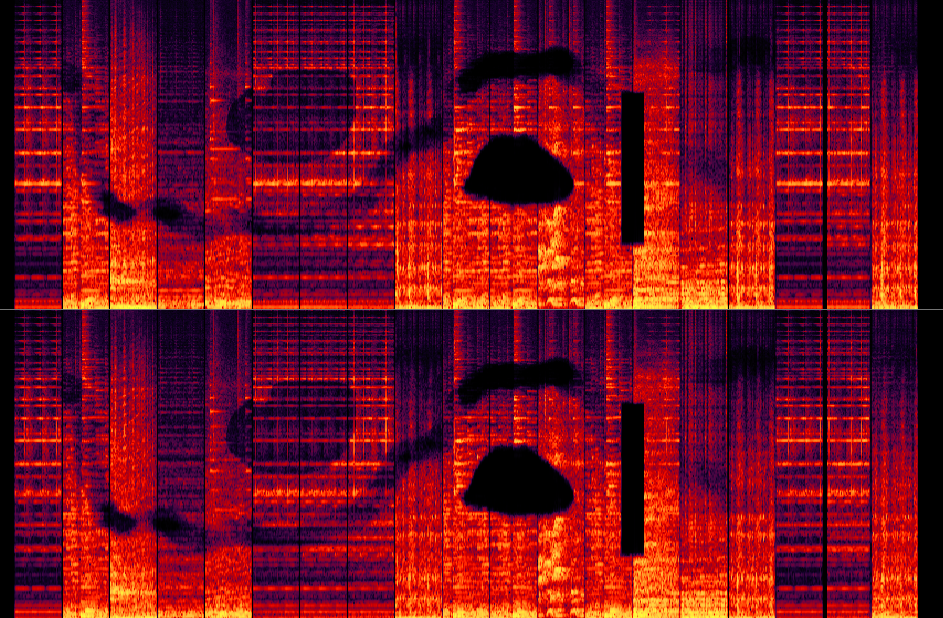
You can usually adjust the parameters of the algorithm, analysis and processing to insure you get the best result without audio artifacts. Below is an extreme example I use in my audio classes to demonstrate the process. The audio is from an old educational film reel.
Unprocessed
De-Noised

It is often a good idea to remove background noise in multiple passes, using a more subtle approach each pass, as opposed to an aggressive one-time pass, which may introduce the notorious and hated gurgling effect.
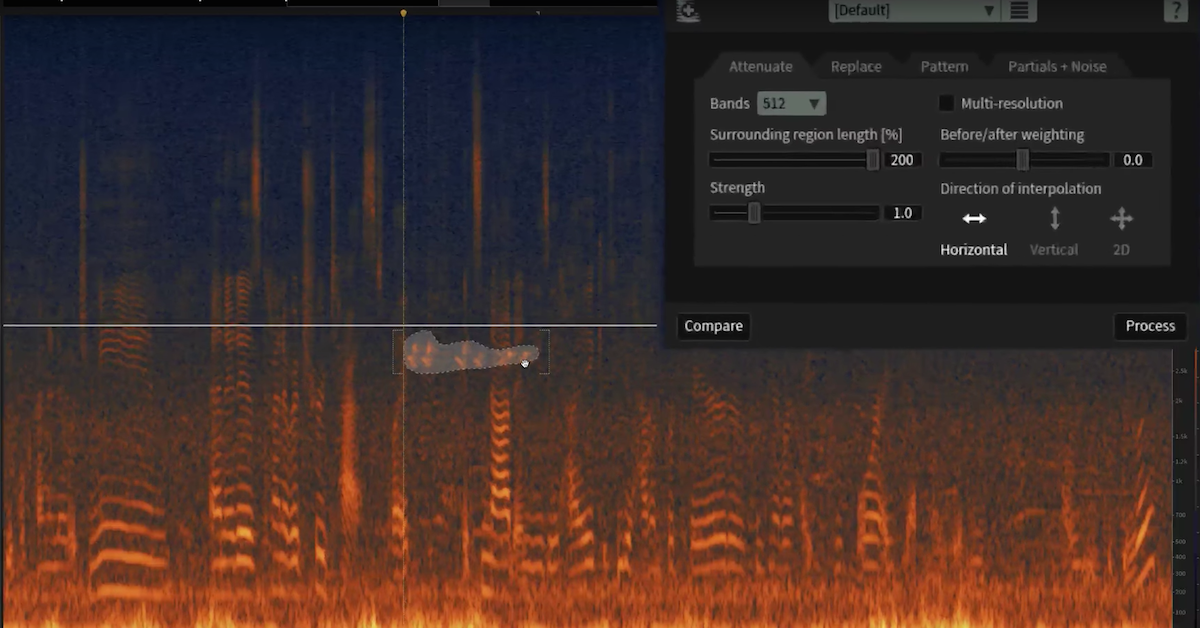
Another benefit of the spectral view is that short transient noises become immediately apparent and can often be easily eliminated like erasing an unwanted splotch in a graphics program like Photoshop. You could simply select the area and delete the content, or reduce the amplitude for a more subtle approach.
Editing Samples and Loops
A major part of my artistic practice as an experimental composer involves isolating fragments of field recordings or improvisations in my studio recorded with synths or guitar. The use of a waveform editor is crucial in this process and part of my preproduction in developing content and material to be used in larger contexts.
Anyone that creates and uses samples (as individual files or in a sampler instrument) or audio loops can reap the benefits of a waveform editor.
They allow ultimate control of every aspect of the sound down to the sample level, allowing you to tweak with ease and well beyond the limits of most DAWs.
Four things to be aware of when editing:
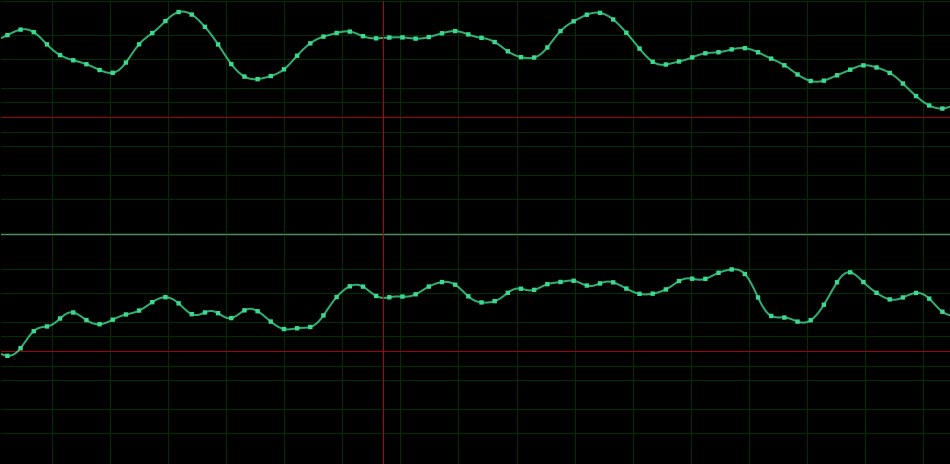
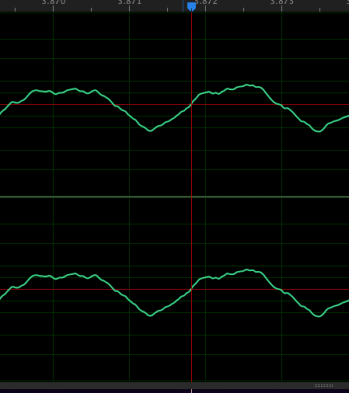 1. Clicks and Zero-Point Crossings:
A zero-point crossing is the place where the amplitude of a sound crosses the zero or center line of a waveform. This is the ideal place to trim a sound file because if you cut it anywhere else, the audio will be forced to jump abruptly to a different value when spliced to another another section, thereby creating an audible click.
1. Clicks and Zero-Point Crossings:
A zero-point crossing is the place where the amplitude of a sound crosses the zero or center line of a waveform. This is the ideal place to trim a sound file because if you cut it anywhere else, the audio will be forced to jump abruptly to a different value when spliced to another another section, thereby creating an audible click.
In some editors you can set the selection function to automatically jump to the nearest zero-point crossing or you can do it manually. Stereo files present an additional challenge because both channels need to be at the zero-point simultaneously.
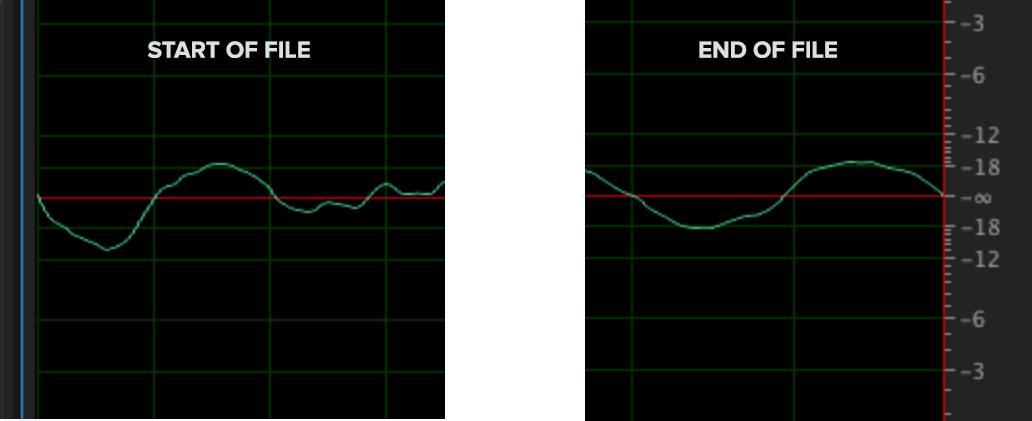
2. Wave direction
When creating loops, it should also be noted that if the end of the loop has a decreasing amplitude, the beginning of the loop should continue in the same direction or that can also create a click.
3. Automatic Click Removal

Ready to elevate your ears?
It doesn’t have to take years to train your ears.
Get started today — and you’ll be amazed at how quickly using Quiztones for just a few minutes a day will improve your mixes, recordings, and productions!
Some applications have automatic features that will scan an entire file for internal clicks and attempt to repair them. Functions like De-Click, De-Clip and Auto Heal use interpolation processes to smooth out abrupt amplitude changes that cause unwanted effects.
4. Fades and Looping Sustained Content
Sometimes a simple short fade in the beginning or end of a file is enough to do the job. The problem with this method would in the context of a looping region, where audible amplitude dips would emphasize the loop point.
If the file is to be used in a sampler instrument, creating seamless looping regions can usually be achieved quite effectively in the plugin itself. If the loop starts with a transient sound intended to repeat, the transient itself can be used to mask the loop point.
The most difficult scenario is in creating a looping region from a sustained sound like a drone, where the goal is to seamlessly connect regions without audible splice points. In this case, it is optimal to use a file that is as long as possible, so that if a loop point is audible, at least it doesn’t occur too frequently.
If you have an evolving drone that you want to make longer, you could duplicate it once and reverse (and perhaps invert) the second iteration. This way the splice points in the center and the end/beginning will be identical in content, thereby creating a smoother connection.
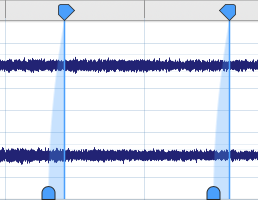
Loop points with crossfade
Of course you could try cross-fading regions using the checkerboard editing approach or automatic crossfade region overlaps. But with certain sustained material this could prove time consuming and frustrating. Programs like Ableton Live offer a fade option for looping audio clips which can solve some problems.
There are also dedicated editors for generating specific file formatted loops like Loop Editor, which can generate Apple Loops and Acid Loops and can convert REX files. These formats include loop points which can be read by the appropriate software.
Dry Processing
It is certainly possible to add effects like reverb and delay in a waveform editor. And most have access to all the plugins you have installed in your computer.
It is sometimes advisable to view the waveform editor as a means of generating clean, raw material which can later be used in the context of a multitrack session, where more extensive processing can take place and a more cohesive result can be achieved.
Some attributes of a clean file might include:
- Peak transient levels between -6dB and -3dB. This allows some headroom when combining the file in the multitrack session. If the file is ambient or sustained material lower levels would be more appropriate.
- File should be free of clicks, extraneous noise or audio artifacts
- File should be loopable without clicks or amplitude dips if possible
- Sweetened with a transient designer where appropriate
- Quasi-mastered in terms of spectral balance, loudness and mono compatibility
Special FX
While is it always good to generate a clean sample, a waveform editor is also a great place for experimentation with processing and fragmentation. Cropping and manipulating chunks of sound from longer samples can often yield fruitful and expected results, a sort of manual granulation process. A waveform editing environment is perfect for applying extreme time compression and expansion processes or drastic pitch alterations.
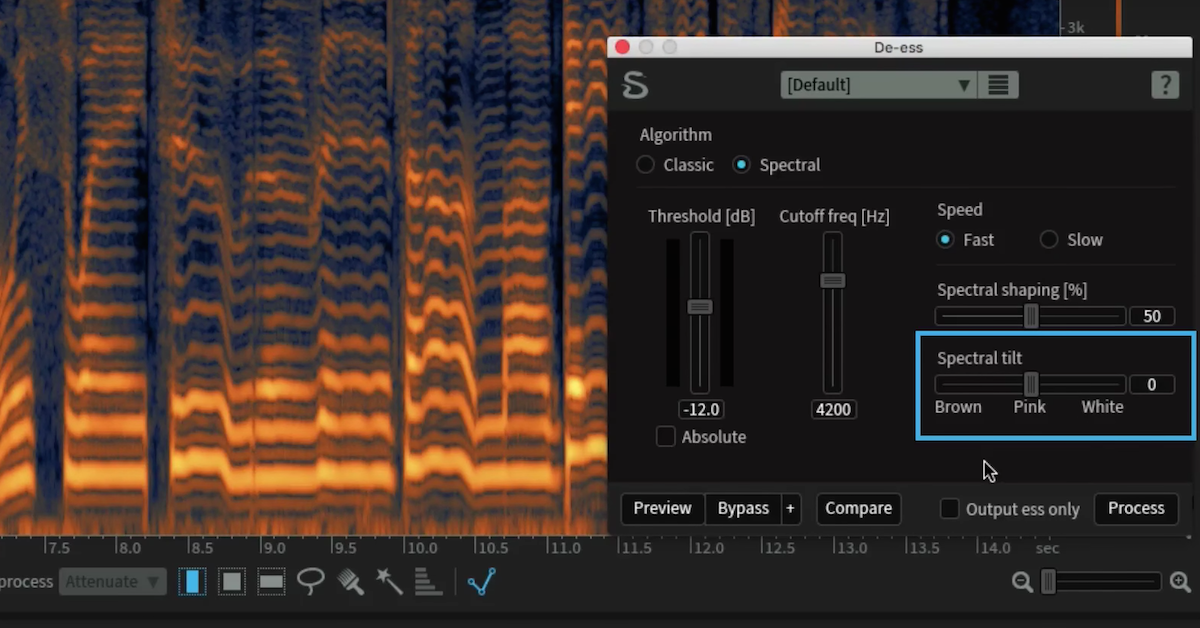
Drawing directly in the spectral display with graphic-like tools allows for frequency manipulation not possible with traditional EQs. You can literally carve out, attenuate or accentuate very specific parts of the spectrum while leaving the surrounding area untouched. You can even copy and paste chunks of the spectrum, a technique that doubles as a noise masking technique.
For example, you could eliminate a transient noise in a field recording by overwriting it with similar ambient material.
Destructive Editing
It is important to note that most waveform editors, if not all, are destructive editors. This means that if you open a file, make alterations and save the file, the original may be gone forever. Now most editors do offer several layers of undo, which can usually be specified in the preferences. But once the file is saved and the application is closed, the history of edits is erased and the original is gone forever.
For this reason I recommend always working on copies of the original files. Or, if you trust yourself, always use the save as command, to create and name a new file. Then close the original without saving.
Batch Processing
Many programs offer Batch Processing which can be an incredible time saver. For instance, you may want to convert the sampling rate of a hundred files, normalize a group of files, or change three hundred .aif files to .wav files.
Match Loudness functions allow you to standardize a large group of files to a user-defined amplitude specification. These processes can be done by simply setting the parameters and dragging and dropping the files in the appropriate window. Files are generated with a user defined prefix or postfix, and placed in their own folder or next to the original.
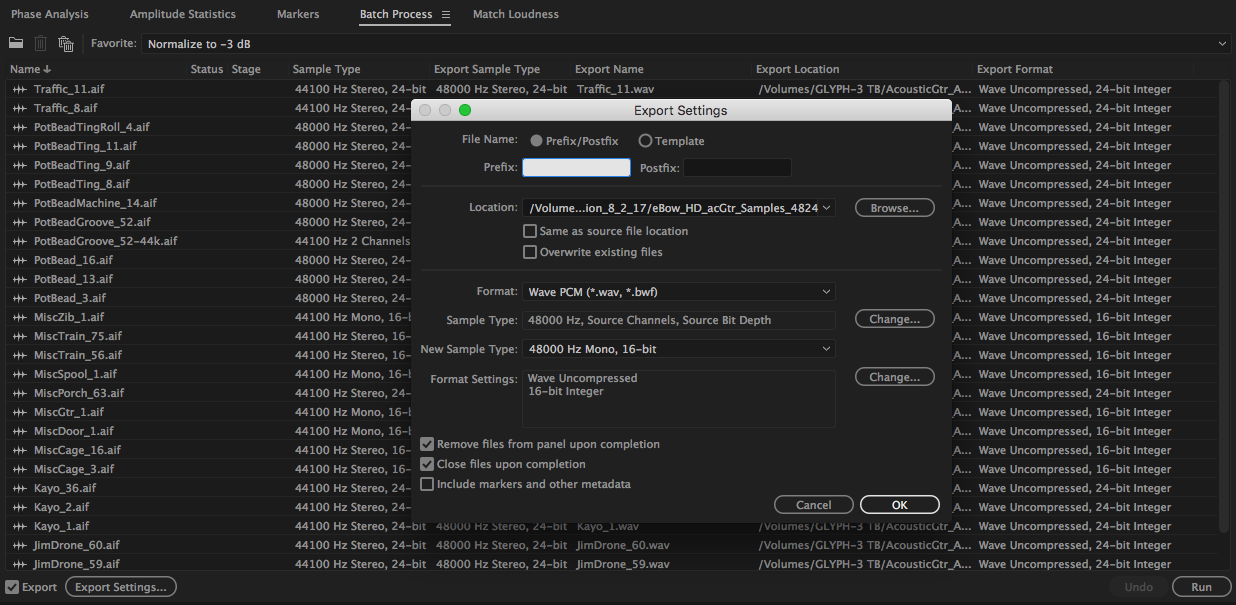
Batch Processing in Adobe Audition
Conclusion
If you do any significant audio editing or have a need for batch processing you should consider adding a Waveform editor to your software arsenal. While freeware and shareware applications may suffice for the occasional user, professionals will definitely want to invest in a feature-rich program. Once you have a dedicated editor, you may find it an essential component of your workflow.
Check out my other articles, reviews and interviews
Follow me on Twitter / Instagram / YouTube
Eleveate Your Ears