Free Vocal Mixing Workshop with David Glenn
02/13/2015

Free Vocal Mixing Workshop with David Glenn
Coming from a little bit of a different setting today. I just got done editing a video that I’m about to play for you. One of my members over at themixacademy.com, Ross Galvin, took advantage of my service where I get on kind of a Skype call, but it’s a thing called Go To Meeting, and we do a one-on-one training session, and he pulled open – actually, he sent me a session, and I opened up his session, and we opened it up, started going through it.
He asked about vocals and the stereo buss, and I went to mixing his song right in front of him for an hour, and we recorded the whole thing. With his permission, he was kind enough to let us share that.
So, I’m sharing it with you for free here on the internet. Davidglennrecording.com, and the YouTube channel for The Pro Audio Files, and I hope that you enjoy it. All kinds of gems in this one. It’s a little bit hit or miss with some stuff. These are not typically the plug-ins that I would use, but I wanted to make sure I used the plug-ins that he had. A couple of paid plug-ins, but mostly stock plug-ins. I think you’re going to get a lot out of this.
It’s free, I think it’s about 45 minutes or so. I hope you enjoy it. Feel free to share this, spread the word. We would love for you to tell your friends if you think that this could bring value to them. Thanks for hooking us up with more eyes on it and more views.
Feel free to leave a comment below. I’d love to hear from you if you dig it, and we will see you in lots more to come, from davidglennrecording.com and theproaudiofiles.com.
Thanks, guys.
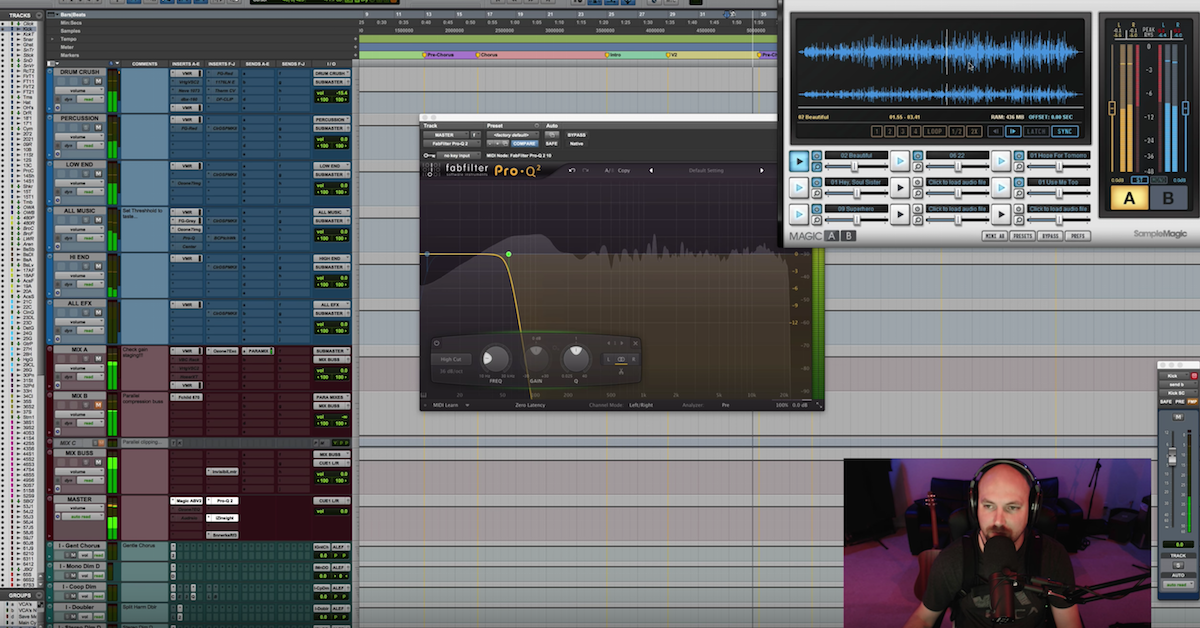
So, the Pro-Q – okay, the first thing you’re looking at here, let me pull in your Pro-Q. This is your stuff here, right? And you pulled open a vocal preset, you’re dipping out a little bit of the lows, you found some harsh stuff you’re getting rid of. You liked something in the 5,400, and you’ve got another one here doing some stuff.
Do you want me to listen to this and mix it and talk to you while I’m hearing it and doing my thing to it? Is that something that might be helpful?
Okay, I’ll try to stick to what you’ve got available. I’m actually going to try to stick to what you’ve got available. So I’m actually going to get rid of these both. I’m going to put this back to the stock preset here. I’m just going to pull out the low kind of like you had.
Okay, I’m going to listen to it and see what we’re working with here.
[song plays]
Okay, so you hear that, right? It sounds good? Okay, cool. I’m going to do my thing, man, and I’ll talk, I’ll stop it, I’ll listen for it to cut out on your end and I’ll talk about what I’m thinking.
The first thing is, I noticed that the vocal sat – did you record this?
Ross: Yeah. It’s not in the best recording environment…
David: Naw, man, I’m not worried about it. We’re going to work with it. This will be super helpful for you. It’s dark, you know, compared to what I hear that it could sound like. It sounds a little dark to me, so my first – the first thing I’m going to do is I’m going to dial in this parallel compression. You saw I kind of did that, just vibing to it. Maybe even step it up a little faster.
I’m just going to listen to that, and then I’m going to make some EQ choices. So I will clean up the low end a lot of times, but with multi-band, I don’t know if you’ve seen me do that, where I compress against the low end, so that if a singer goes to falsetto and is singing high, and I’ve already removed all of the lows, well, they might need those lows when they’re singing high.
So, compressing against them when they’re full and thick will control them, but in this case, I hear that EQ is going to be good, because it sounds pretty consistent.
I’m all over the place a little bit here, but I’m thinking clean up the vocal and try to get it to sound a little bit brighter and a little bit clearer by controlling some of this stuff, and then I’m going to look to see how that sounds.
We’ll go on here. So, I’m just going to try cutting some stuff out, and see what it is that I don’t like and move it.
[song plays]
Okay, so let’s see. Do I still have you? Okay, cool. So the first thing that I’m listening for is just trying to make that microphone sound more like what I want it to on this artist. So, you kind of were on the right track for this, cutting out some of the lows. I wanted to emphasize – this is pretty common for stuff that I do, is I like to find a spot in this mid-range between 800 and 2kHz, and I felt like 1021 sounded pretty good, so I brought that up just a little bit right now. We may boost it more later, and we may even boost some more up here later, but I’m just trying to make it sound a little more classy.
This may or may not be what you want, but what I’m hearing in my head is to clean up the mic, boost a little top end – I’m thinking I mix a lot of Christian, LeCrae type stuff, and people, whenever they come to me with that, they’ll reference stuff like Rick Ross and Drake, and stuff like that, so sometimes, there’s a ton of top end in the mic, and sometimes, there’s practically none. It just depends on taste and style.
So, for me, I’m just trying to clean this up similar to what you’re doing. 1KHz is the sweet spot. I’m going to listen one more time, and I’m going to try to make sure that’s the one I like.
With the Pro-Q, you can hit this.
[song plays
There’s kind of a honky tone right in there, so I’m going to try to pull just a little bit out of some of those so that by dipping a little bit in here, we’re obviously emphasizing the stuff that’s above it.
So, that’s pretty straight-forward there. I think that already sounds a lot better. Let’s bypass it and make sure.
[song plays]
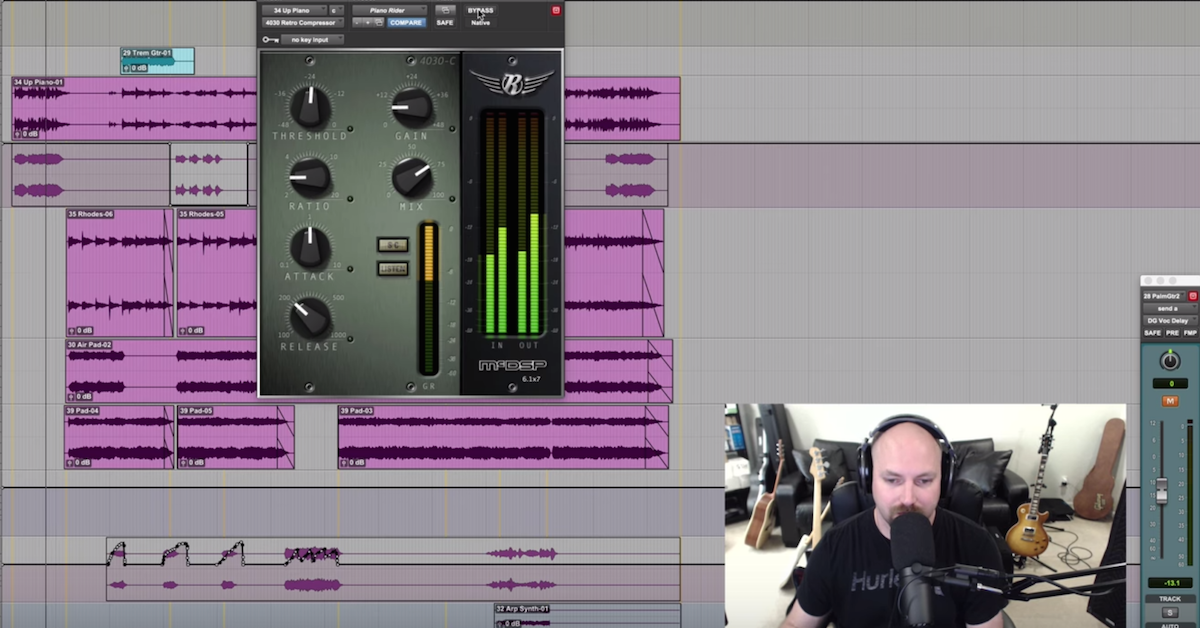
So, pretty straight. Just cleaning it up a little bit, and so we may take out more, but right now, I think that sounds pretty good. This compressor, it’s working. I think that sounds great. I moved it a little bit faster, I may even push it a little harder.
[song plays]
So, what I did there, is I linked the threshold and the ceiling, so it’s like a Waves L1, so as I pull it down, we’re getting gain reduction, but I’m also pulling down the output, so it doesn’t get louder or softer. The character is just changing, we’re just adding compression.
I don’t know how much we have there…
[song plays]
So, it’s not always – it’s just kind of like a last peak limiter. Anything that gets through just a little bit, it’s getting knocked off, two, three, four dB.
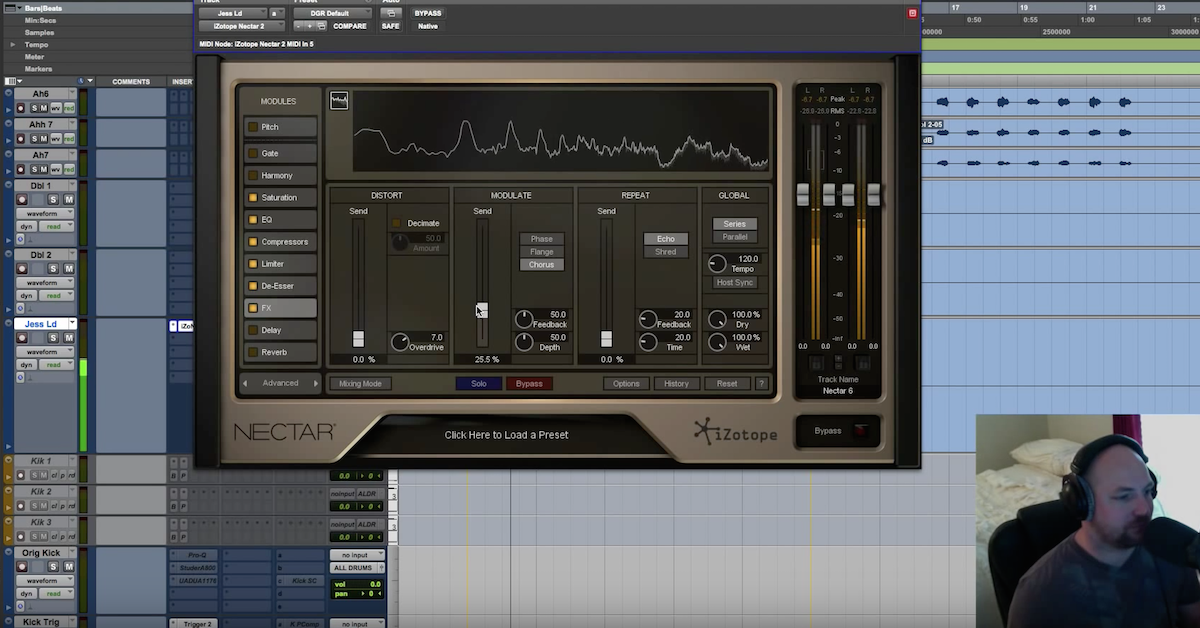
So, that’s cool. Just flatten it out a little bit. Now over here, we’ve got some cleanup EQ. If I heard the esses bothering me, I would pull in a de-ess here. With the stock de-esser, it’s cool. Just a male high frequency, but I won’t just leave it like that. I’m going to go find some esses.
[song plays]
It would help if I bypassed it. I’m going to look for esses.
[vocal plays]
“Sss, sss.” My name’Sss.
[vocal plays]
Make sure Loop playback is on. It is, so I just have to make a longer selection.
[vocal plays]
So really, that “s” is coming in at like, 7kHz. It’s a little bit higher. So I’m trying to find where the harshness is in the “s,” and now I can pull that back out, and I just want to get this a couple. 12 is ridiculous. This is doing nothing now, and I’m going to listen, pull it down, just to where it controls that a little bit.
[vocals play, adjusting de-esser]
So, that’s quite a bit. So maybe even pulling that back, just touching it, and then I can take that same de-esser and duplicate it, and throw it on this back-end here. I’m going to bypass it for now, because I haven’t boosted any more top end to need that necessarily.
Alright, so we’ve got it compressed, we’ve got it up front. The mic actually doesn’t sound too bad, I don’t feel like there’s any crazy room sound. I don’t feel like there’s any crazy room sound, it’s just a little bit honky and muffly in the 500-600 range, so we dipped just a couple dB at that, but opening, this right here, boosting 10kHz was like taking a blanket off of it. It just gives it that classiness, it just gives it that modern sound.
So, I’m going to hit play, and just kind of listen and see what else I hear.
[music plays]
That sounds pretty good! What was the reference that you’re going for with this one?
Ross: To be honest with you, I don’t reference anything on – this is my stuff, this is my music, and to be honest, I don’t reference anything directly, but if I did, it would be something like, you know, like you mentioned, Drake, LeCrae, you know, Little Wayne, all of that sound, you know?
I really like Drake’s mixes. His vocal is just – I don’t know, they stand out like crazy. His vocals are just… That’s really what I’m going for, you know? David: Well, I’ve got Lord Knows, featuring Rick Ross. I think it’s in my system here. I’m going to – if you’re cool with it, I’m going to reference, because I want to know what this sounds like up against this. I usually drag it in, I call it “ref,” and then I stick this bad boy at the top. I make it red and put it up here just above our libs, because we have stuff.
Okay, and then I solo safe it. Are you familiar with Solo Safe-ing? Like I taught you with the Aux tracks? Command+Click, so that even if we have something soloed, it will play. I’m just going to drag it out to the right.
Okay, so I’m going to listen to a couple snippets of this.
[reference plays]
Okay, so now I can hear. We’ve got some more cleaning up to do. His vocal is still much brighter than ours.
Do you have the Virtual Mix Rack? The free one that I told you about?
Ross: Yes, but it’s not working for some reason. I’m on [Pro Tools] 10, I’ve been using 10, Pro Tools 10, and for some reason it’s not. It was working at first. I’ve got it, I can get it, I just have to uninstall and reinstall.
David: Well, here’s what I’d say. I’d say to come in here to the Virtual Mix Rack, and to give that classiness, you’re going to hear it, and then what I’ll do is I’ll show you another option, like a frequency, but this is doing all kinds of stuff behind the scenes that I almost wish I knew, because there’s some secret stuff going on. It’s boosting top end, but then it’s adding analog circuitry, like harmonics and stuff, so I would put this on this vocal. I think it would do big things.
Actually, and I would put it after the compressor, so it’s post-parallel compression. So, we’re sending a really hot signal into it, and then, we’re going to get a nice, forward, Drake type vibe. What I hear from him, I feel like this is a good option, so let’s hear what happens.
[music plays]
Do you hear that? That’s pretty nuts. So, let’s go back to him and let’s hear it.
[reference track]
Okay. So, we’ve got the top end, but now I feel like we could use a little bit – some of the warmer mids that I hear in his voice, so I’m going to go over here to Pro-Q.
Okay, so now, I’m going to try to find those frequencies that I hear in Drake’s voice, and I’m going to try to accentuate those in yours, and see what happens. So, something I like to do, I don’t know if you’ve seen me do this or not, but I’ll come over here, I’ll use the Pro-Q one so it’s the same concept.
So, I’ll pull this up. Have you seen me do this? Pull stuff out. Okay, so, see what I’m doing here? I’m putting filters on both the top, and the bottom. So now, if I hit play, and Drake’s our reference…
[reference track plays, low-passed]
I’m only listening to this frequency range.
[reference plays, band-passed]
So, I can hear his low end, and I can listen to his low end, and then I can listen to my low end.
[low end of songs playing]
And so what I’ll do, is I’ll actually take this sucker, and right now, I have them both selected. I just clicked around them like that. So, you could do it like that, and you can get real detailed. How I start this process, I usually rough mix in the beat, the vocal, I get everything in the mix, and then I leave the low end alone, but this again is on the Master fader here. I’ll pull in – if you double-click on the top, it creates that. The high-cut/low-pass, and I’ll take it all the way down to 15Hz, or 20Hz.
[plays reference track]
See, you feel him just shaking down there. And then, what is yours doing?
[plays song]
Not bad, right? You can hear the kick, but then you can’t feel the low end, so then you just have to think, well, okay, do I have 808s in at that moment, and just kind of think about your song versus theirs, and listen to what the low end is doing, and if you don’t hear enough low in your bass or your 808s, then you know you can go in, and you’ve got work to do. You’ve got to boost it below 25Hz.
The Pro-Q2, they changed the way it looks a little bit but… Okay, so then I’m going to slide this up a little bit.
[song, low-passed]
So, pretty good stuff going on. So, I’m just going to listen, take note, reference, and I’m going to work my way through the frequencies. So, I’m listening for like, the kick. Just the thump and the punch of the kick. Anywhere from that 70, 60, 50, to 120.
[reference track, low-passed]
So, that’s a good spot. I’m going to put a marker there, and then I’m going to come over.
[song plays, low-passed]
I’m going to put a marker on your song too, so I have yours and his.
Something I noticed about our low end versus his, his is all right down the middle. Every frequency in his sub-region is centered, and you have a little bit out of the center. I like it out of the center. I don’t think it always has to be out, just stylistically, they chose to be out.
So, anyways, those are just a couple of things I noticed when doing that.
Well, the cool thing about this is once I work on my low end, I will add this other band here, so now I’m cutting out the lows, and I’m only listening to this frequency range. I’ll select them, and then I’ll move them up above the lows. I’m done working in the low end now. I’m going to listen to mine and his.
[song plays, then reference plays, band-passed]
I can hear he’s got a little more power in the 100-200 range there up against us.
My whole point I’m leading up to is I want to know where his vocal comes in.
[reference plays, band-passed]
There we go. Okay, so let’s move that marker to where Drake’s actually in.
[reference plays, band-passed]
And you’re in there. So now, I’ve got a couple more markers.
[song plays, band-passed]
You hear all the extra lows in our mic? So, we’re a little more muffled than he is, at a frequency somewhere in there.
[song plays, band-passed]
So now, on this EQ on the master level, remember, we’re compressed now, I’m going to clean it up. This is a little more surgery. You can probably see it here.
[song plays, band-passed]
And there we go. So I know I wanted to clean that up.
[song plays, band-passed]
A little bit tighter, right? So, it may be a little bit too much, which is what I was saying about multi-band compression. It’s kind of a hot thing right now for mixers. We’re using that to control it rather than get rid of it. We EQ it out, it’s gone. But, I’m going to just work my way through.
[song plays, band-passed]
And so, I’ve still got some of that which you had cut out in yours, but this stuff down here, you could use a shelf, you could use a filter, chances are, he’s filtering it kind of above 150 or so. There’s probably not much going on for his vocal.
[song and reference play, band-passed]
Cool. But, you may like a little more meat in your vocal than Drake’s, but I think that sounds kind of cool. So, I’m going to fast-forward a little bit, you get the point of what I’m trying to say. Then I’m going to slide this guy up here.
[reference plays, band-passed]
So, it was a little bit of work to do in there. We come over, I’m going to click this little guy so that this EQ is going to stay on top for us now. I’m going to click and add this, so now I can see both. I don’t have to keep going back and forth.
[song plays, band-passed]
Okay, so now I know the second marker is where he’s in with the beat, which is important, because I don’t think I’ve heard a spot where it’s just the vocalist on your track. So now I’m listening for that.
[song, band-passed]
So, we’re getting a little bit closer. It’s not going to be exact. It’s not the same mic, not the same room, not the same gear, but we’re just trying to get the sonics overall to get a little bit tighter.
[music, band-passed]
Okay, so it’s getting a little closer. Probably open it up a little bit.
[song, band-passed]
So that’s kind of the harsh frequency range, that 3-5kHz.
[song, band-passed]
We need a little bit more of that top, so I’m thinking…
[song and reference plays, band-passed]
Okay, so you’re probably hearing it. This is a process that could drive some guys nuts, because you may hear something different than what I’m hearing on my headphones, versus what your speakers are, but you get the point of it.
Ross: No, that’s good, I think it’s right on.
David: Okay, two more clicks here.
[song and reference track, band-passed]
And then I can hear some of his de-essing going on.
So, at that point, I’m going to put this guy away, and I’m going to reference…
[song and reference plays]
And there’s still probably a little bit more of the 10kHz classiness that we could boost in, and OTT is actually a really good multi-band. It sounds like he’s got multi-band compression on his vocal. I’m going to pull this in and see if we can’t get a little bit more energy from the vocal.
[song and reference]
So, now it’s sounding a little bit thin, so I’m going to come back here and just kind of tidy up. Maybe not take out so much. Back up a little bit.
[song and reference plays]
So yeah, there’s definitely frequencies that are not working right, but you get the point of how I would sit here and trial-and-error and go through a vocal. Keeping in mind the whole time that we’re dealing with a different track. The track we’re working with isn’t whatever, but it sounds like there’s some.
[song and reference]
So from there, it’s pretty much taste decisions.
Ross: I hear it man, that’s good stuff. That’s really good. That’s really helpful.
David: Cool, man. Well, I just recorded all of that, so you’ll have that to go back and watch. So, one more time, let’s recap. The first thing was just cutting out some of the lows, finding any of those muddy frequencies that were getting in the way of the vocals sounding clear. The thing that I picture, I don’t know if you’re a visual learner, but for me, there’s a quote. I can’t remember what artist, but he looks at this rock, and he – I wish I could remember how it is, but instead of creating something, he chisels all the parts of the rock that don’t look like an elephant. He wants to make an elephant, so he chisels all the parts that keep it from looking like an elephant, instead of chiseling to make an elephant. That’s the way I think about it with EQ is to find the stuff that – yeah, man, and just kind of shaping and do my thing to it.
1kHz is usually a sweet spot, and then the 2-3kHz is usually a spot where the vocalist is, depending upon who you’re listening to, is the pop, classy. 10KHz is that air. That 10-20kHz is going to be – it’ll take you from using a dynamic mic to a U87. You think classic condenser mic has got more air on the top end.
3-5kHz, you got to be tricky on. I will usually use a multi-band compressor and hit 3-5kHz and hit the lows, to make sure the lows stay where I want them, and to make sure that the 3-5kHz doesn’t get too harsh. But then I’ll also have a de-esser like I showed you.
There’s a couple things in there. I hope you dig that. Do you have any questions on any of that stuff? Ross: Nah, it’s pretty good, man. I’m right on with you on that.
David: Cool, cool. So, you have these effects over here. You have a gentle chorus?
Ross: Yeah, I pulled some stuff up and I ended up just dropping a few of those out, because I didn’t think they were really having–
David: Yeah, hip-hop stuff, a lot of it sounds best dry. The other stuff, like a pop vocalist, I use the gentle chorus a lot and whatnot, but if anything, just a hair of it to give it a little bit of a silky, smoother, modern sound. That’s not necessary. The vocal slap, the same thing.
I like for Hip Hop, I prefer to use slap delays wide, opposed to reverb. I’m not a big reverb guy for Hip Hop, but so you have this D-Verb right here. Were you trying that out a little bit?
Ross: Um, I’m not using that, no. It’s just there. It’s the template. I just didn’t take stuff out.
David: Okay, cool. Well, I don’t think Drake has much reverb. If anything, he has that reflection type stuff, but it sounds pretty dry and in your face, and anything you add effects wise is going to take that away, so you’re on the right track.
Cool, man. What are you thinking? Any question on that? And you have the CLA-3A, you’re going to get more character out of the 3A than over here with like, Maxim and Bomb Factory. The 3A, the 1176, this 1176 that you have on here is gold on – Do you have the L1?
Ross: Yeah, I have the L1 and L2
David: See, what I would put a CLA-76 right here to replace what this is doing, and then these – okay, so two things. First thing, I would put CLA-76 here, followed by either the L1 or L2, and how I use this is exactly how I would use the L2, except the L2 and the L1 have a little thing right here down the middle. If you click it and drag it down, both of these will move together, and you just watch for two or three dB at the peaks to make sure it’s knocking them down and controlling it.
So, CLA-76 into an L1 or an L2. They do the same thing, pretty much. Then, from there, the other thing I want to note about this parallel compression chain – switching between 4, 8, 12 to 1 and 20 to 1, or hitting select and getting “all buttons in,” I think the CLA-76 has an All button, but those become tone knobs. If you listen, you can hear it go from a little more open, to a little bit more in your face, to smashed to death and in your face. Just depending upon your song, click through those and listen for which one you dig character wise.
For whatever reason, I chose the eight, but that’s a good step as far as using the parallel compression chain.
Ross: What would you do, like, so… you’ve got compression, limiter, and then, what’s the third – what’s on the third one? What would you do? Would you just compress and then do some limiting?
David: It depends on the singer, and it depends on how much room sound – if you have a vocalist where they’ve been recorded in a closet, and there’s a lot of reflections and room sound coming up, by parallel compressing the crap out of it, you’re going to increase the sounds of those, so I may throw an EQ on that parallel chain, and hunt down for that resonant frequency, and cut it like crazy in the parallel compression chain, because we’re boosting it with all that compression. So I’ll try to find – I may do some surgical EQ on the parallel compression chain, I may use lo-fi, I may use a guitar amp. It all is up to your taste, and what you’re digging.
But, don’t be afraid to throw all kinds of stuff on here. You could throw effects, and you’ve got a flat-line signal on this, you can send that to effects, and automate them from there. There’s just all kinds of stuff you can do with it.
What I typically do, is get this clean sound like we’re talking about now, where I’ll clean up the vocal, I’ll de-ess it a little bit, smash it with compression, go for the overall sonics that I’m digging, but then at the end of this chain, like we did with OTT, this may end up being a guitar amp, or a phaser, or a flanger. Like, it just depends on the foundational tone.
Clean is fun. Clean and in your face is modern, but this, at the end of this chain is where I would put anything like, aggressive, or something that changed the sound completely.
Ross: In what instance would you use something like modulation? Would you use it on this, or would you use it up here on the lead on the side-chain? And what would you be trying to gain from that?
David: Well, I would use it from here first. Effects for me would go over here, so if I wanted chorus or flange or something, I would do it over here first. For me, if there’s a reverb or something that I know I want to be like, completely compressed and no room for it to breathe, I would send the parallel compression signal into a reverb or something so that I get a consistent level from those effects.
But remember, we’re using a lot of this parallel compression in hip hop and modern music. For me, this is almost always as loud, if not louder than my lead vocal as it is. Like, the vocals are just compressed to death and back. So, the lead vocal level is almost always more than appropriate for effects, or compressing on the actual effect. I think we talked about that a little bit last time.
So, we cleaned it up, compressed it, got the sonics. That filtering technique, man, I cannot recommend – you’re going to learn more by referencing people’s music like that than anything I can tell you in an hour. What their low end is doing, all of that.
Then it just becomes what tools are you going to use to accomplish what you hear different in the two, or if you even want it to be the same.
You have questions on that, man? Ross: No, that sounds pretty good. Could you just quickly touch on the sub-master and master buss? Just kind of look at what I’ve got there, and kind of say what you’d do differently as far as plug-in use? David: Yeah, sure. For me, EQ wise, I would – a lot of times what I do on this band here, is I do a really steep 48 dB/oct low-cut, and then I put it at 25. Nothing really below 25 worth. Anytime I reference, I’ll listen to sometimes 20, but just down here, I’m going to clean up the lows of everything in the mix coming into this right here so that the limiter, none of that is reacting to anything below 25, 30, whatever. It depends on the song.
So, you’re boosting with the Pro-L, going into a Pro-Q where you’ve got a little bit of love, you did a little bit of EQing, and Maxim for your limiter.
I wouldn’t use Maxim, I would use the L1 or L2. I think that was just because I had it in the template, huh? Ross: I think so, and mainly the only thing I’ve noticed, is that plug-in usually when I use it, I don’t add anything, I’m just knocking off maybe 0.1, 0.2, or 0.3, because that seems like it does a pretty good job of knocking things down and not letting things past.
What do you think? I think even on the L2, it seemed like that did better on knocking things down.
David: Yeah, that’s cool. I used Maxim years ago, but I haven’t used it since they updated it. I’m sure it’s better. But yeah, honestly, you can’t get too picky about what’s on here. The only thing that I would recommend about your 2-buss is get Revival on your 2-buss. So, throw this to the – so, yeah, okay. I would have this guy. I would find a way to get it fixed. Call Slate, e-mail them, do what you have to do, because for this being free, man, this is a beast.
I think they might still be doing $149 for everything, so watch the difference in this.
[song plays]
Yeah, so you can hear the difference it’s making to the overall track, and so what I would do in my big template, my main template, I’ve got this dialed in I think to about 16, and it’s there when I start mixing, so I mix into that sound as opposed to boosting at the end, because now, I would say, that’s probably a little bit too bright.
You don’t happen to have –
Ross: I hear that for sure. I hear what you’re saying. So that’s kind of a good question about mixing in. How much do you mix in, too, because I kind of have done it both ways, and I kind of feel like mixing into those plug-ins seems to work pretty well.
David: It definitely works well whenever you’ve got repetition and time, and you kind of know your gain staging. Like, for me, almost all my tracks, I know where the kick is going to end up, because my assistant goes in, and pulls the clip gain up to hit it where I want it, so when I get a session that’s already set up, I’m a little bit spoiled, because I’ve been doing it for awhile, I hired myself an assistant, but the thing that I would recommend for you would be to have this same setting here on. Get rid of the EQs, you don’t need those right away except for this one. This first one is important. Cutting out the subs, because you don’t want that to be triggering your limiter, and have your limiter set here. If you like this, go ahead and pull in your limiter. Get the mix rough mixed and as hot as you can as soon as possible, so that you can then work backwards, as opposed to keep pushing things up, and you’re running out of headroom and all of that. If that’s making sense.
So, what other plug-ins do you have from – do you have any like, character plug-ins, like, FabFilter Saturn?
Ross: Yeah, I’ve got all of the FabFilter stuff, like Volcano.
David: Check this out man. I’ve never done this, but FabFilter Saturn is one of my favorites.
Ross: Yeah, I’ve just been messing with it, because I just got these plug-ins. That plug-in is awesome.
David: This plug-in is ridiculous. I use this on kick drums now. I’m going to show you how I’m using it on kick drums. Like, I’m just going to – this is how I’d typically do it. I had a band here, and I’ll go below 50Hz or so, then I’ll add another band above 110 or so, 115 is cool. Then I’m going to go below 1kHz. Then, I’m going to go up top, and actually, I may even move that other one. I’m going to go above 10kHz, about there.
So, anyways, you get the point. So now, these are individual faders for each of those frequency ranges. It’s nuts.
There’s so much you can do with it. I’m going to put it back to the factory default, and let’s go through – because then you can have different character for different frequency ranges.
See, warm tape, for me, might be a godsend for you, overall on your mixes, and as well as your vocal to give your vocal some character as well. I think Warm Tape is going to be probably the best one for the 2-buss, but they even have presets that might even, like mastering, big bass, clean tape, clean final, hip hop puncher… I mean, some of this stuff is nuts. You can see, that’s pretty insane. I don’t know what that’s going to do to our ears.
[song plays]
I mean… That’s a bit crazy.
Ross: I hear the character that it’s adding to it. Would you –
David: That would be a judgment call. I would work with your output. But, if you like something like that, I would start with that preset and mix into it. This is going to be trial-and-error. I don’t know if I’d do that with a client until I found the one that I like. This just depends. Do you want to boost below 110? Or whatever you want to do to it. This could be cleaning up – there’s some cool stuff here.
So I’m going to show you what I would do right out of the gate for your overall mix, is I would just add Warm Tape, and I would drive some saturation.
So, here’s before.
[song plays]
So, for me, that sounded awesome, and it drove the mix forward, but it pushed distortion into your bottom end. So, what I would do instead of Warm Tape, I would go clean tape, and I would pull the drive down on this one. See this low end? So, below 105, now I’m barely doing anything. Maybe 5-10%. Let’s hear that.
[song]
Ross: Man, the vocals are just 20 billion times more standing out than they were.
David: It’s pretty nasty right now. This, I mean, FabFilter Saturn is a beast. If you have it, I would use this on everything. The Warm Tape sounds incredible. The only thing is to watch out on the low end, you want to make sure that you go clean, unless you’re in like, an indie rock song, or you want it to be nasty and distorted. I mean, use your ears, but the cool thing too is you can solo and only hear the lows.
[song, lows only]
And you can really tell if you’re driving too much distortion into it, you can back it up.
Now, here’s another thing that’s awesome about it. I’m kind of going all over the place with this one, but you have the Mix knob to whether or not you’re going to drive.
You could drive the junk out of this, boost it up, but then pull back the Mix knob for just that band, and you’re only touching the lows. Probably if we took more time, we could dial in a sweet starting point, but overall this plug-in is a beast. I think we’re going to be going a little bit too far. I want you to remember just the basics of it having a little bit of drive, 20% above 105, keeping your low end clean, and having just 20% of the Warm Tape. That’s just emulating an analog tape. That’s it.
It does a darn good job, especially – I would put this up against the Slate and UAD stuff. Saturn is a beast.
Then, you could always use it as an EQ if you wanted to. I would just stick to using it for the Warm Tape and go from there, so.
Anyways, man. That’s my two cents on it. Okay, cool.
So, dude, my bad, I’m all over the place, but we covered vocals, we’ve got your 2-buss with a little bit of character with this Saturn, your limiter, and then we’ve got VMR. Let’s take off Saturn and VMR, I want to hear the difference of those two.
[song plays]
Ross: Yup. Loving the character. Yup.
David: Brings it forward. So, cool man! With free plug-ins for the most part.
Ross: That’s definitely cool. That’s some good stuff there. Alright, bro. Well, I appreciate your time.
Premium Mix Training