How to Become a Pro Tools Vocal Tracking Ninja
06/13/2018
Article Content
If you want to make a career in music production, at some point you are going to need to record vocals. At first glance, vocals seem easy to record. Put mic in front of face, press button. Done.
It’s not that simple.
Vocals are tricky. It’s a very psychological process and it’s impossible to separate the feel of the session from the feel the vocalist is delivering. On top of that, the vocalist isn’t the only one on stage — you are too. Remember, you want to do the gig so well that you create a reputation for yourself and get hired back.
As goofy as it sounds, I think of tracking vocals as performance art. I am consciously affecting the artist’s headspace and there’s a number of really important factors that go into this.
1. Environment
The vibe of the space is very important. I like the lighting to complement the mood of the song or be turned off. As corny as it sounds it helps the singer’s imagination take hold. I also suggest drawing a curtain so the artist can’t be seen. I want the artist to feel uninhibited, and taking your eyes off him/her can help with that. The space also needs to be relatively clean. If there’s physical clutter, it creates emotional clutter.
I also make sure there is room temperature water, tea or whiskey on hand. All of these things can help relax the voice. More importantly, having these things on hand help artists feel like they’re being supported. The more they feel I’m working toward their goals, the better they’ll perform and the more often I’ll get hired.
2. Template
I like to have things ready to go at a moment’s notice. This requires a bit of prep.
First things first, I show up early and set up ahead of time. Mic shootouts are cool and everything, but more often than not people want to get in and get moving.
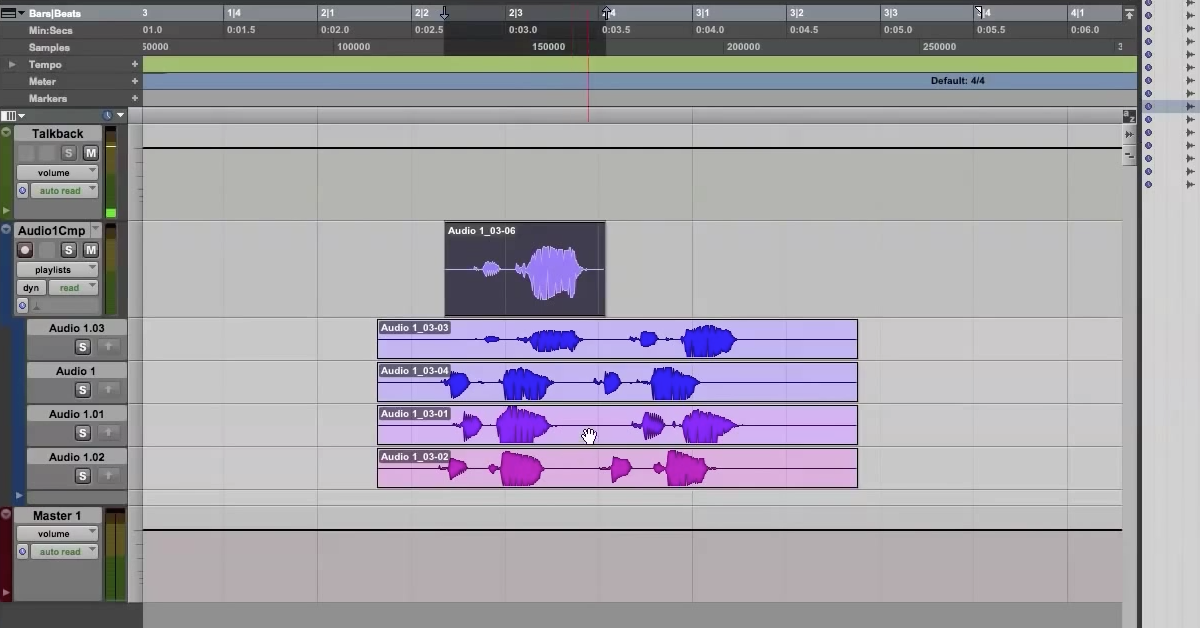
Based on the vocalist and style, I decide what chain will work and I set it up. Inside of Pro Tools, I already have 24 audio tracks armed to my input. Two are labeled Verse LD (lead), two are labeled Chorus LD, one is labeled Verse COMP, one is labeled Chorus COMP, 16 are for vocal stacks and two are kept as blanks for whatever may come up. All of these go down to a subgroup labeled VOX in solo-safe mode.
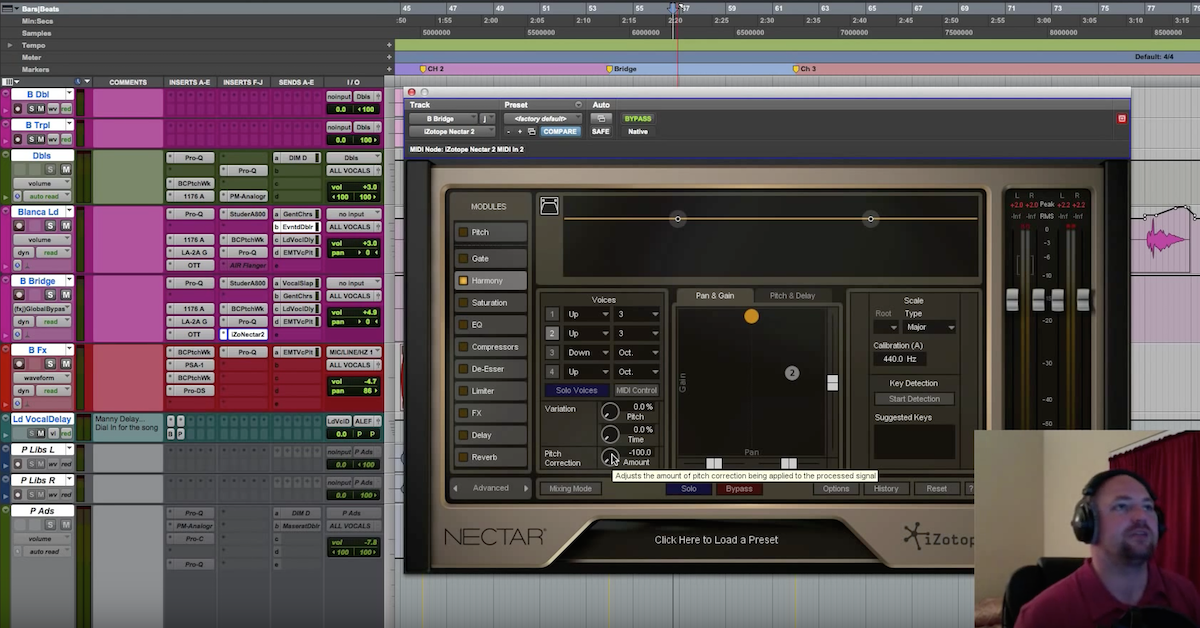
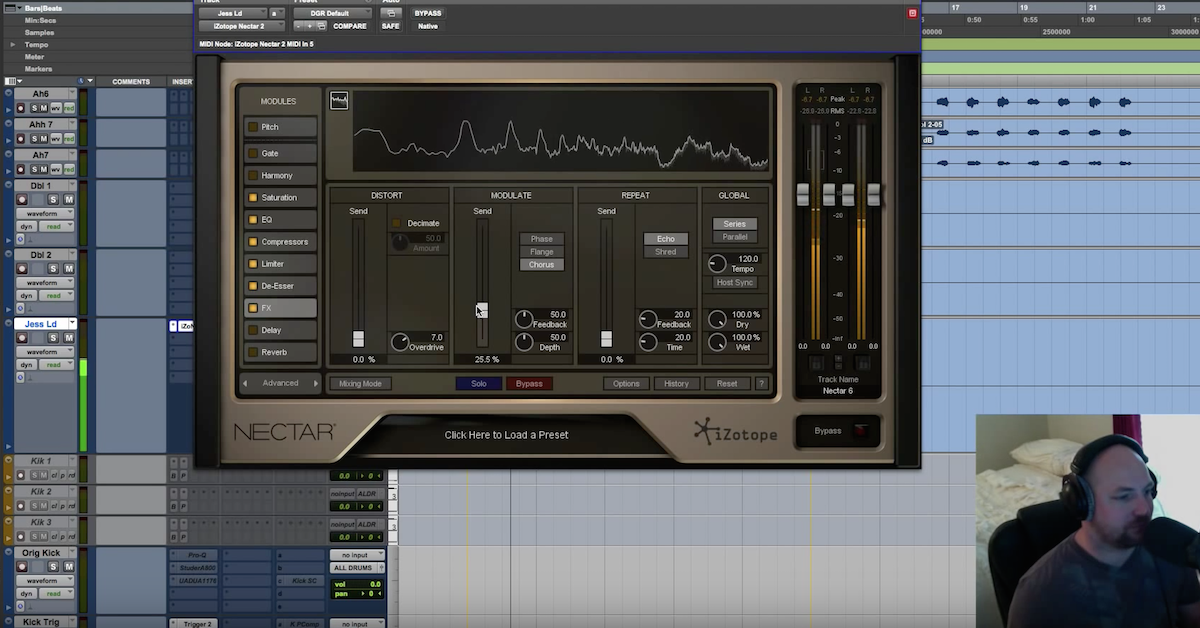
There are two more aux tracks; one called VERB, the other called DLY, which get a good ol’ D-Verb Hall and 1/4 note H-Delay, respectively. The subgroup and the auxes all go out a vocal cue send in pre-fader mode. I have another solo-safe aux with its own cue send, labeled INSTR, which is where the music bed will be going once I have the files. And I have an instrument track with Mini Grand on it.
I also have a bunch of markers already set up: Intro, Verse 1, Pre, Chorus 1, Verse 2, Pre, Chorus 2, Bridge, Chorus 3 and Outro. Not every song follows that format, but this is just a starting place. Once the 2-track/trackouts are in the session I’ll move these markers into place. It’s nice to be able to drag most of them around instead of having to power type them all out.
Once the files are in I get tempo and key. Finding the tempo is easy. Count out two bars, select two bars, choose Identify Beat (command+I), start at bar 1, end at bar 3 — bang — there’s your tempo!
Key can be a little trickier, but that’s why Mini Grand is already up. Just be wary not to fall into any traps — not every song is in a simple major or minor key, and not every song stays in the same key the entire time. You have to keep an ear open, particularly if you are recording through autotune. Be aware that there may be accidental passing tones that may need to be enabled in any kind of pitch correction software.
3. Configuring Pro Tools
In Pro Tools preferences, there are a few important boxes that are checked off.
The first is “Record Loop to New Playlist”. Oftentimes the artist will want to record multiple passes and comp them together in one go. There is a preference that automatically stores each record pass to a playlist. I reckon the worst feeling in the world is being in the studio with an amazing artist and doing ten great loop passes, only to find none of them saved. I have miraculously never made this mistake and I NEVER WILL. I’ve come close and it’s a heart attack and a half.
The second is “Play Start Marker Follows Timeline Selection”. The opposite of this is that play begins wherever you stopped playback. When recording it’s much more common to be going back over phrases and take new takes. I find the workflow is much smoother if the playhead is simply returning to wherever the take was originally cued from. Also, make sure “Timeline Insertion Follows Playback” is unchecked as this function will defeat that purpose.
The third and least important is the clip gain nudge value. I prefer 1 dB. I tend to correct phrases on the fly, so if one comes in a hair low, 1 dB increments generally do the job. It’s just a very quick flick of the mouse to fix up. This is more of a personal preference but I recommend experimenting with it.
The next configuration to check is the session itself. I prefer to record 24-bit, 88.2 kHz if I’m on a system that allows for higher sampling without CPU issues. That said, the difference between 44.1 and 88.2 is so subtle I’m still not convinced it’s not in my imagination. I’ve recorded plenty of huge, platinum-selling artists in 44.1 without concern so when in doubt: Workflow > Sample Rate.
From there I’m going to the buffer size. As low as the system goes! If I’m on a super system, I’m going to 64 samples. 128 works. 256 I find can actually affect a vocalist’s sense of pocket. We also need delay compensation, so make sure any plugins are in low-latency mode (autotune, I’m looking at you).
4. Presetting a Chain
Mic shootouts are kind of a thing of the past. I know that’s painful to hear as an engineer because getting a perfect sound on the way in is super gratifying. Unfortunately, sessions are really more about flow than about perfection. Or put another way, our main priority is enabling great performances, and great sound is a close second to that.
It helps to do a little research on the artist ahead of time. Certain styles just give themselves away. If you’re recording a Jazz-influenced singer like an Adele or Amy Winehouse, U47s are a good pick. If you’re doing Hip-Hop, a lot of the time we want a very snappy mic so a C800-G is a failsafe. If we’re doing lush Pop kind of stuff, C12s are the standard. If we want something that’s just super forward sounding, U67s/U87s work. There are certainly better options possible, but these tried and tested mics won’t let you down for certain applications.
The converse is also true. U47s and 251s are not great for Rap vocals unless you really need to add body or you’re going for a retro-y thing like Jay-Z “99 Problems”. Unless the rapper is incorporating that sound directly into their style, those mics aren’t super snappy and clear.
After that, I lay out a chain that I feel confident with. It varies, and every engineer will have their own thing, but it helps just to have go-to choices that you feel work for the sounds you want to get. Again, I’d rather get something fast and reliable than something super-extra perfect.
5. The Actual Recording Process
I like to start with a headphone check just to make sure all of the cue feeds are the way the artist likes it. Some like loud tracks, some like loud vocals, some like loud fx, some like loud everything (isolating headphones are really important). I ask the artist what fx they want and get rolling.

Ready to elevate your ears?
It doesn’t have to take years to train your ears.
Get started today — and you’ll be amazed at how quickly using Quiztones for just a few minutes a day will improve your mixes, recordings, and productions!
The name of the game is flow. This is something that takes practice and refinement. However, there’s a number of key commands that can make things much easier.
The basic ones you need to know are your Function Keys.
F1-F4 allow you to toggle between Slip, Shuffle, Grid, and Spot mode which is super helpful if you are rearranging instrumental tracks and doing minor vocal edits on the fly.
F6-F8 and Command + 7 are your tool selections. This allows you to go between Trim, Select, Grab, or the Smart Tool setting respectively.
F5 is the zoom tool, but I prefer Command + [ ] to zoom. It’s just easier.
You won’t need the pencil or scrubber tools too often. It’s true we check for clicks and pops with the scrubber and edit them away with pencil drawing, but I find that’s more useful when you’re really in a dedicated editing session rather than a vocal recording session.
The next set of really important shortcuts are Quick Punch (Command+Shift+P) and Loop Record (Option+L). As a default, I always keep my play button in Loop mode and then switch between Punch and Loop for recording. This covers all my bases.
I really don’t bother with destructive recording — it’s 2018, I’m not running out of space in a session. Track Punch is super useful because it records information before the punch point, which can be good for comping — but, not every version of Pro Tools has it. I generally prefer to do punches over two audio tracks anyway, so it’s almost a moot point. The reason I do this is that I want the artist to be able to match their own tone as they record into the punch point. Once that’s done, I just delete the overhang.
The two other shortcuts I use all the time are Create a New Playlist (Control+\) and Copy Takes to a New Playlist (Control+Shift+\). Artists don’t always say “keep that one”, so I find any time I hear something I like or any time I think the takes may be keepers, or any time the artist is doing stacks one at a time, it’s best just to playlist everything.
Basically, with these shortcuts under my fingers, I can keep up with the pace of the artist.
6. Comping On The Fly
Say what you want about Pro Tools, but the editing features are very well thought out. One of the reasons I’m such a fan of playlists is that it becomes very easy to create composite takes (or Comps) on the fly. All I have to do is select my vocal track and click Control+Command+Right Arrow to display playlist view. From there I can highlight whatever I want to fly up to my main track by highlighting the segment and Control+Option+V. Instant comp.
That simple.
Now, outside of the six aspects I’ve listed, there are about a million others. The reality is this is a skill like anything else. And the more you do it, the more second nature all these key commands and best practices become. There’s also a lot of flexibility in terms of recording style — some people prefer unlabeled audio tracks that they can arrange off the cuff. Some people like to record through Aux channels. There’s no one set way to do it. Feel free to copy my approach and then adjust as you see fit!
Eleveate Your Ears