Tips for Enhancing a Drum Loop in the Mix
08/26/2015

So I appreciate you for checking that out, I know you’re going to love it. It’s free, so no excuses, right? Moving into today’s video, we’ve got a drum loop, and I’ve called this “Advanced Drum Loop Mixing.” Not quite sure what to say about it, but I’ve got a process that I went through for this mix that I’m doing for themixacademy.com, and I felt like it was worthy of a specific tutorial video for The Pro Audio Files.
So I’ve got a loop here, and I’m going to play you – maybe I’ll solo the loop, and then I’m going to breakdown and show you what I’ve done. I’ve created a kick from the loop, and then I’ve done a ton of processing to get this to kind of come forward and shine in this particular mix.
So here’s the loop by itself.
[drum loop]
Okay. Here’s what it sounded like before I touched it.
[drum loop]
I’m going to boost the volume…
Okay. So I’ve labeled it DG loop, but that’s kind of selfish of me. This is not my loop. I didn’t record this, I didn’t piece it together, I don’t know where it came from. It came to me from the client.
What I wanted to do was in the mix – let me actually play it for you in the mix and see if you can…
[song plays]
Okay, so obviously, you can’t really hear it. There’s a little bit of the kick thing going on and some ghosting on the snare/hat kind of thing, but it needed to come forward and it needed to shine, and more than just becoming brighter.
So I’m going to walk you through what I did to it, and then what I did to it at the chorus will be kind of a part two, second half of the tutorial.
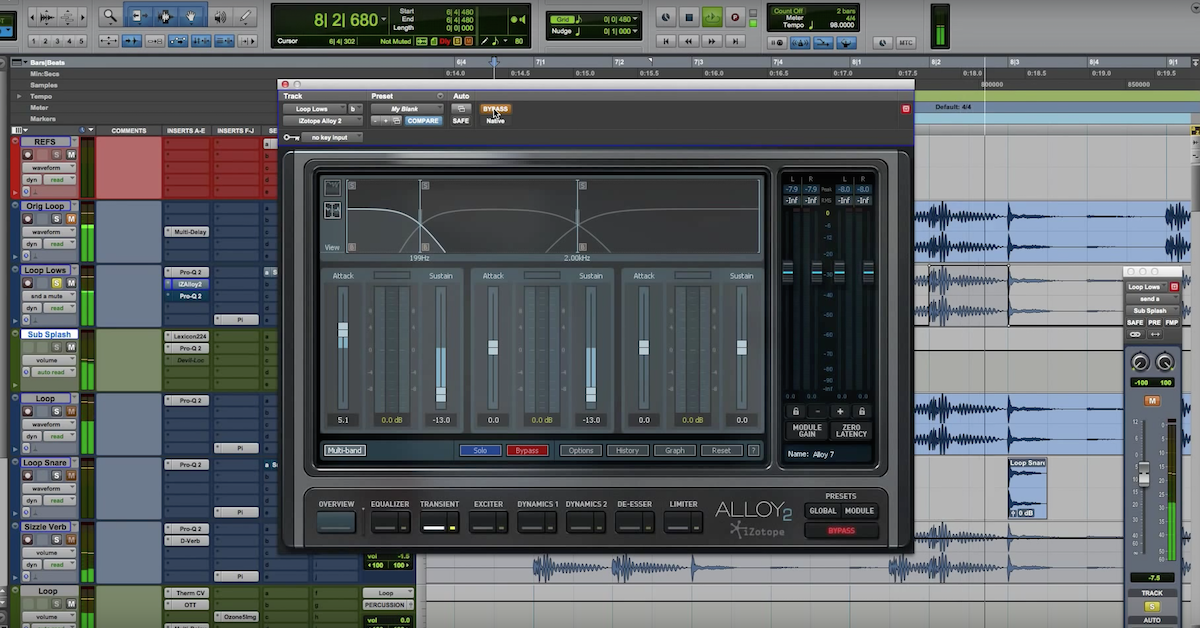
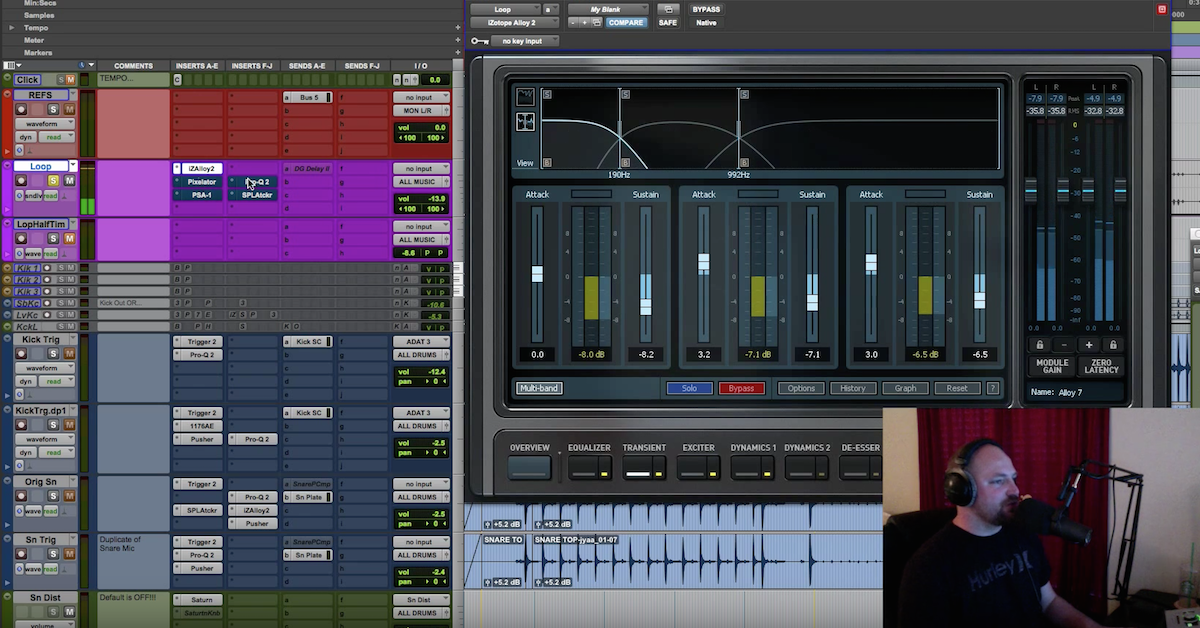
So anyways, first things first. Let me walk you through the plug-ins. Nothing fancy here. All I did with this was we have a kick drum, we have a live drum kit separate from this loop, so what I wanted to do was make sure that none of this kick’s bottom end interfered with the live drum kit whenever that comes in, so I filtered everything out below 85, and that is very basically going to sound like this. There’s another reason why I did this, but I’ll show you in a second.
So here’s before the filter.
[drum loop plays]
After.
[loop, filtered]
Okay. So you can here, we’re just getting rid of the sub in the kick for the most part in the loop.
The second plug-in here in the chain is the Kush Clariphonic, and this is the second revision of it. We’ll call it take two. It’s updated and it sounds incredible – it sounds nasty.
The first one sounded great. This one sounds even better. The first one, it had a glitch where it would crash Pro Tools. I don’t know if that was my fault, an update I missed or something, but the second one sounds ridiculous, so I highly recommend you go check this one out.
I’m just boosting a ton of top end, and you’ll hear that this really comes forward in the mix. Here’s before.
[drum loop]
After.
[drum loop with Clariphonic]
Okay. So, a ton of top end. You can see I’m using the Clarity, the Shimmer setting. Moving on from that, I felt like it just needed to be smashed. I just wanted to smash the loop to my taste. I felt like I wasn’t going to go parallel so much, but I’m going to show you one of my new favorite compressors.
To bring this forward, I smashed it, and then I blended in some dry in parallel.
So let’s check that out. Here’s before and after.
[loop, before and after compression]
Sounds nasty, right? Well, by itself, it may not sound that great, but in the context of the mix, it sounds incredible to my ears. So I’m going to play it again, but before and after – actually, I’ll play before and after for both of these.
[song, before and after plug-ins]
Okay, so you can really hear that loop is a big part of this song, and the reference track he gave me was Love Me Again from Jonathan – I forget the guy’s last name, but it was a great track from like, 2013. I really loved that song. Saturation, everything sounds incredible, but the compression really helped it just pull it forward and did amazing work.
That’s the +10 dB compressor from Boz Digital Labs, and my new friend David Bendeth. Love the work that they’re doing. Lots of great stuff to come from them.
But for me, that wasn’t enough. That wasn’t the end of it for this particular loop, because I felt like it needed to be controlled a little bit more. So the low end for me, if you listen very carefully – let me bypass the Clariphonic for now, just so we can hear the low end. Focus on the lows. If you’re on smaller speakers, a laptop, your phone, you’re probably not going to hear this very well. Put in some buds, some headphones, or a speaker system. Possibly even with a sub.
But listen to the way that the low end just kind of sustains and fills out – it’s almost got a tone to it where it just kind of resonates. Check that out.
[song]
Forgive me, let me solo it.
[loop]
Okay, this is doing something that I don’t really care for, and I want to tighten that up. We’ve got enough washy top end that I wanted the bottom to be a little bit clearer and a little bit clearer, a little more articulate, punchy, whatever the word you want to use is.
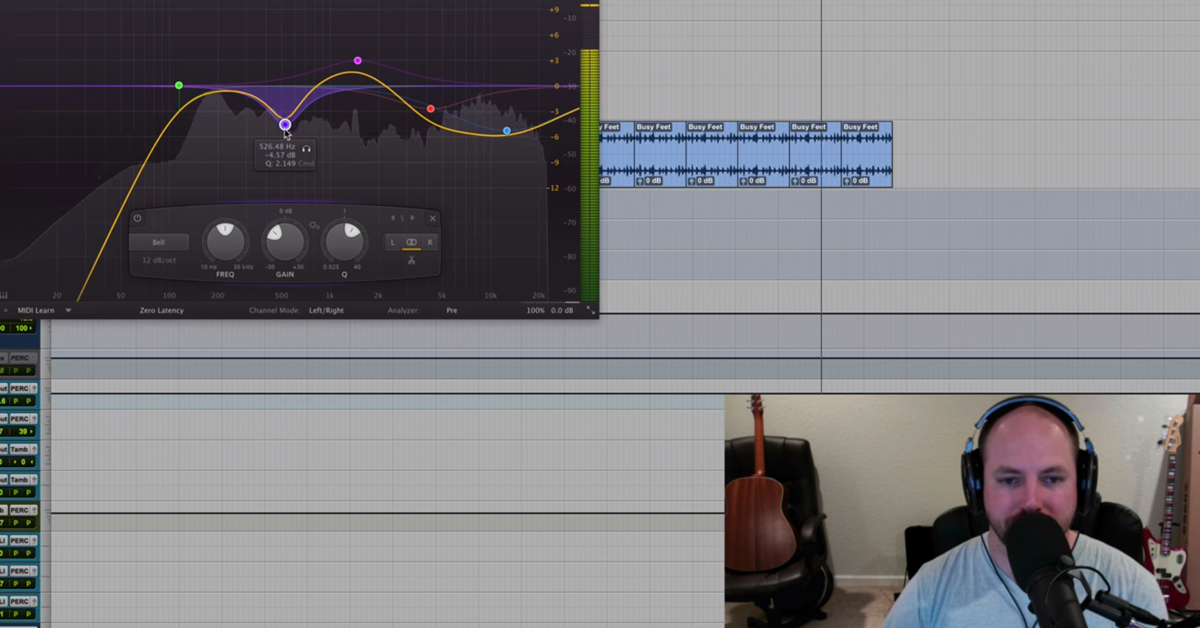
So here’s before and after with the iZotope multi-band transient designer, and I’m just sucking out pretty much all of the low end below 190Hz and give it a little bit of articulation and a little bit of the transient back for the attack, but for the most part, I’m just pulling out that sustain from the bottom end.
Here’s before.
[loop]
After.
[loop after transient designer]
Okay, and again, before, it’s just taking up too much real estate. The dynamics of it are just all of the entire loop to be pumping and sustaining like that. Totally unnecessary to my ear and to my taste.
So I’m going to put the Clariphonic back, and then we’ll get to Pi in a second. If you’re not familiar, I’ve got Sound Radix Pi on here, and the reason is we’ve got this loop – in the chorus, I duplicated the loop, and I wanted to have a little bit more punch, because the kick in that loop pattern complements the live kick.
We’ve got a four-on-the-floor live kick that I’ll play for you here. Let me solo this guy.
So this is the loop and the live kick together. I’m going to go ahead and put Pi in.
[loop and drum plays]
And without the live kick.
[loop plays]
Okay, so the groove lies in the loop. The live drums are really just holding down a straight beat, and they really complement each other well, so what I wanted to do was I wanted to keep the live kick, but I wanted to create a new kick for the loop that was a little bit punchier and fit better with a live kick.
So I’m blabbing, but here’s what I did. I duplicated the loop track, and I took it out at the pre-chorus, but I made it to where it comes in only at the actual chorus. There’s a lot of processing to get this one done.
I probably could’ve just copy and pasted samples throughout the pattern here and been totally fine. You know, a kick sample or something, but I was experimenting and was having some fun, and it might spark some creativity for you, so let’s take a look at what I did.
The first thing I did was I took the loop – just to prove it’s the same loop, let me show you. Here’s bypassed.
[loop]
Here’s everything off.
[loop]
Cool. Same loop, right? And I just took out the top end, so everything above 100-120Hz is gone.
[filtered loop]
Okay, so now I have the sub, and we have just what’s going on with the kick.
After that, I went over to Alloy – I love this thing – the multi-band transient designer and sucked out the sustaining bottom end.
[filtered drum loop with transient designer]
We get the punch and the attack from the kick now.
I’ll bypass it again.
Cool. So, we’ve got a more defined kick. However, obviously that’s not the world’s best kick drum, so I wanted to get a better kick drum for the loop. I’ve got Drum Leveler on here, and what I’ve done is I’ve set a high threshold and a low threshold. I probably need to do a tutorial all about this plug-in, because it’s ridiculous.
I’ve been using this a lot on loops, hi-hat, snare drums, all kinds of stuff. It’s really great.
More on that later, but I’ve set a high threshold and a low threshold. You’ll see the kick kind of coming across the screen here, and if I bypass it…
[loop]
You kind of lose the kick drum, right? So I’m bringing the kick forward, I’m setting the threshold for picking up those subdivided kicks, the pattern in the kick drum, the softer hits and the harder hits, and I’m raising the level and compressing to bring that forward.
Then, I’m taking this kick drum – call it a kick drum sound – and I’m using Trigger for what we’ve done to help Trigger out with identifying what is kick and what isn’t. Lastly, I guess I forgot to mention there’s between 29Hz and 109Hz that I have a side-chain filter here, so this compressor is listening to only those frequencies to determine what I want it to listen to for the compression.
Horrible explanation, forgive me for that. Trigger 2 I’ve got on, and I’ve gone to my friends over at That Sound. Got an incredible ton of kick drum libraries. All kinds of stuff over there, go check those out. Iwantthatsound.com. But kick06 I pulled in from one of the libraries, but let’s take a listen to what that is actually.
I hate that. There’s a glitch that you have to make it inactive and pull it back in, but now you should be able to hear that. The reason why, I have no idea.
It’s still glitching on me. Let me solo it and you can hear it.
[kick drum plays]
So before…
[drum loop kick plays]
After.
[sample]
Okay. So now, that kick, with a little bit of help from our friend Lo-Fi, free with Pro Tools…
[sample with Lo-Fi]
Okay. And Pi to make sure that the low end from this kick, the low end from the loop, and the low end from the original live kick play nicely together. That is helping them with phase coherence, and then that’s not all, but I’m going to hit play for you and show you where we started with these two right here.
[loop]
Forgive me, here’s where we started.
[loop]
And where we ended up.
[loop after processing]
And without the kick we added… I could’ve snuck that in a little bit sooner. Here’s with the kick, then I’ll take it out.
[loop with and without kick]
Cool. I dig it with the kick. You may not, but again, just showing you some of the options. That’s not all I did though. There’s one last step that I felt would help tighten up this kick a little bit.
Let me pull – there we go. Track Spacer. I had Pro Tools there, but…
Track Spacer I’ve pulled open, and lots of plugs in this one, but if you come down here, I’ve got kick side-chain, which is what I use – it’s a send that I use to send into a multi-band compressor I have on my bass on a lot of stuff I mix, and I’ll push the bass down in the sub frequencies with the kick hits, and I’ve taken that same send and I’ve set it up within Track Spacer.
So Track Spacer is going to receive the signal from the kick, and it’s going to push down the frequency range I set here similar to the multi-band compression, except this is like a multi-band volume control. Kind of interesting what’s going on here.
But 20Hz to around 110-112Hz is going to be pushed down every single time this live kick hits. It’s going to push down against the loop kick when they play at the same time. They don’t always play at the same time, which is why I wanted to create that loop kick, but when they do hit at the same time, the low end is going to be given to the kick in the drum kit, not the kick in the loop.
I hope that makes sense. Maybe rewind that and play it back a couple of times if I said that wrong or if you heard it wrong, but anyways, I’m all over the place. I’m still recovering from being sick.
Anyways, here’s what it sounds like. You can see it on the screen. Whenever they hit, you’re going to see this dip.
[drum loop]
And without it.
[drum loop, sans Track Spacer]
Okay. The reason why that’s such a big deal is because when you have so much low end building up, that’s going to be – you got to be careful. That might trigger your buss compression or your pre-stereo buss compression, so that extra build-up is not necessarily a great thing.
So layering kicks can be a great thing if you’re adding sub or want more sub at a certain section, but for me, I wanted to control that sub so that the other kick would dominate and it wouldn’t trigger too much at the same time.
So I rambled quite a bit on this one, but I hope that you dig that. Let me play one more time where we started from and I’ll leave everything in when we go here, and hit play. Let’s check this out. The way it was…
[music]
Okay, and then out here at the actual chorus.
[song]
Okay, then put that back where it goes, then here’s the improvements we made.
Elevate Your Ears