The Basics of Channel Faders in Pro Tools
04/5/2016
Here’s a video for you about understanding how the channel fader works on different types of Pro Tools tracks. I’ve talked with a lot of audio engineers and heard different ideas — even conflicting opinions about how people think channel fader works on different tracks, like the audio track, auxiliary track, and the master track.
What I’m going to do in this video is demonstrate some basic functionality and also talk about how you apply that knowledge to using these things inside of a mix.
So let me begin with by playing the song back, and then we’ll get to looking at specific situations.
[mix]
So the basic purpose, or function of a channel fader, no matter what track it’s on, is to give an engineer the ability to change a signal’s amplitude. It’s a volume control. You can turn the volume up, you can turn the volume down.
After you understand that, the next question to ask is, “Well, where exactly am I changing this volume?” There’s a lot of things going on on any given track.
In the audio track, we can have inserts, we can have sends, we can have panning, we can have all of that kind of stuff. We should understand where we’re actually changing the level of the signal.
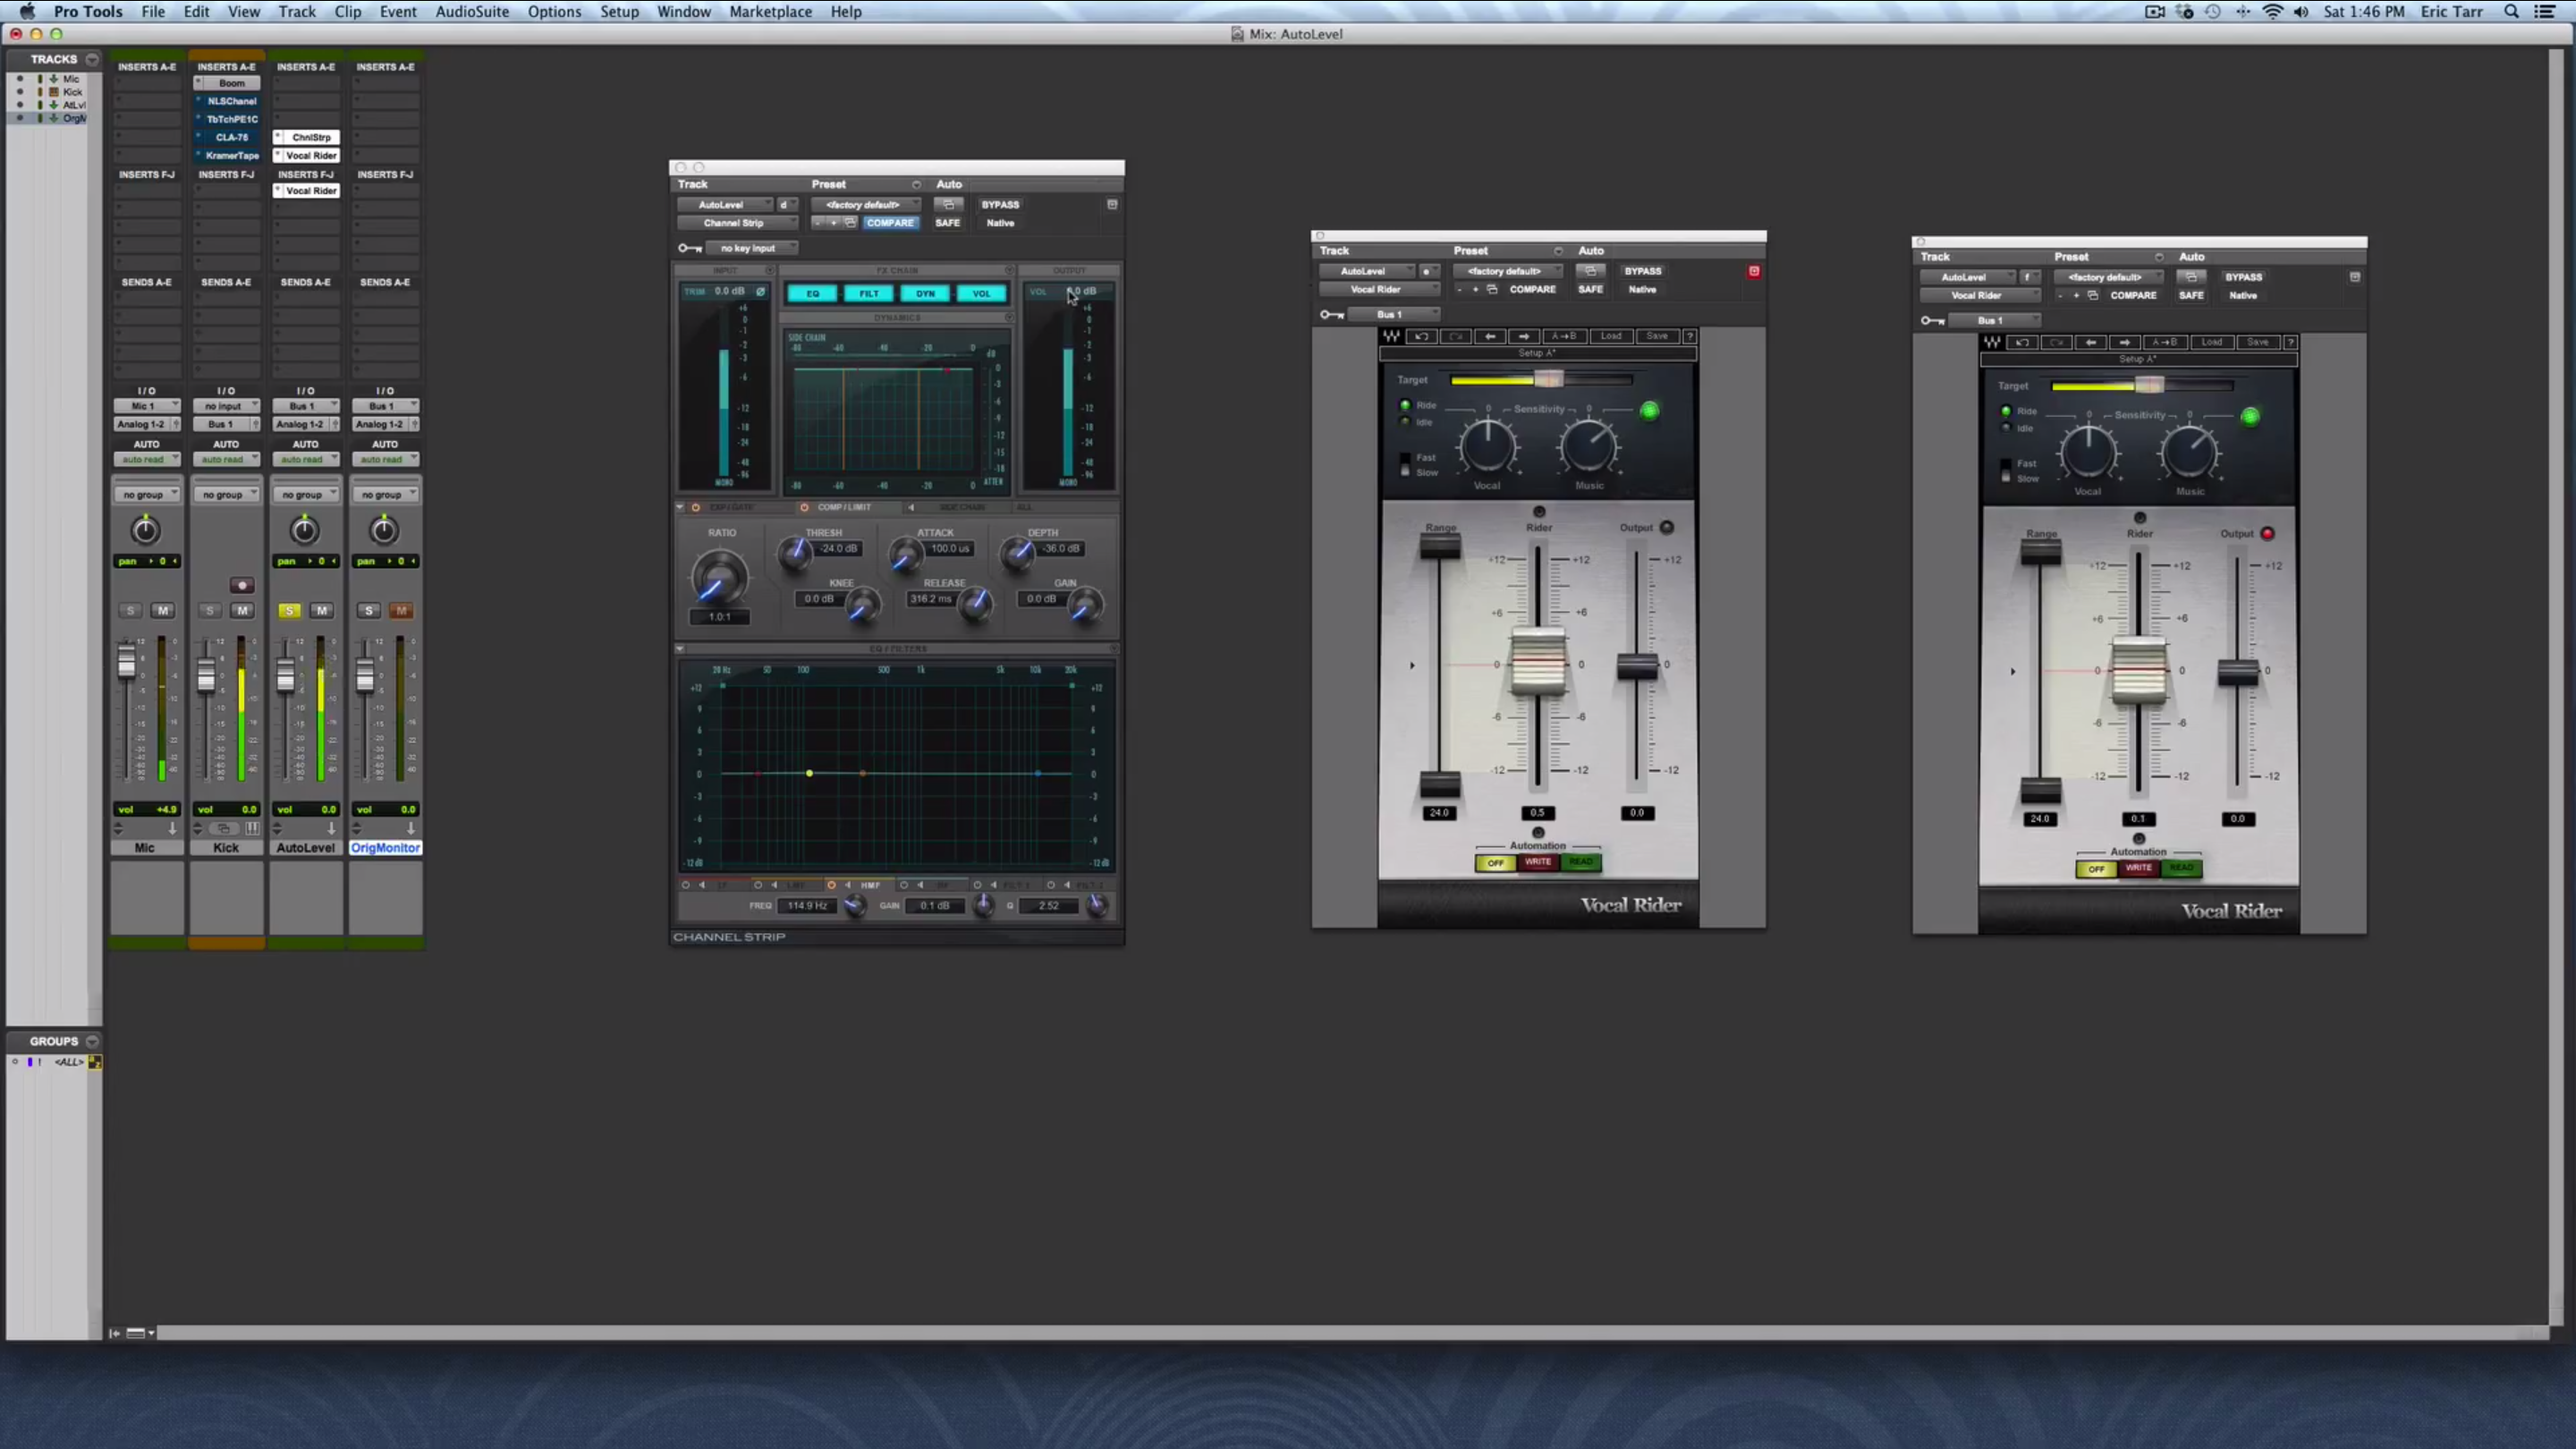
So I’m going to demonstrate here, starting out with this vocal track, is I’m going to play it back, and we’re going to watch where the signal level changes in terms of the metering and all of that kind of stuff through my signal path.
On this lead vocal track — this is a track that stores an audio file — it’s a vocal performance that was recorded, and it stores an audio file, plays it back, and I’m going to also do things like send it through this channel strip, buss it over to reverb, and all of that kinds of stuff.
Eventually, it’s going to end up going through my sub mix here on this auxiliary track — the music mix — and then finally end up at this master fader. So let me play it back, and watch on the metering over here, and over here, what happens to the signal.
We can see the gain and how it’s getting changed.
[vocals]
So you can see, I still had level going through this plug-in up here on my channel strip. I had level going through, even when I turned the fader down. What does that mean?
That means the fader is post-insert in this case. It’s happening after the effects. I also have the signal going over to this reverb. As of right now, when I turn the fader down, it also turns the level down in the reverb.
This means that this fader is happening pre — or before — this send right here. This buss 3-4 send over to my reverb.
Then the output of this track is going over to my music mix. That’s my auxiliary track. So when I turn the level of the signal down over here, it’s happening before the output over here at buss 21-22.
So I’ll play this again, and watch the different metering.
[vocals]
One thing you do have control over as an engineer is whether this channel fader happens before the auxiliary send. Or actually, whether the auxiliary send — you’re moving the place in which this is going to occur. So I can change it to be pre.
Now what happens is as I turn this level down, my auxiliary send is still happening before this channel fader.
[vocals]
So as an audio engineer, you can think about in your mix, whether it’s appropriate to have this fader be before your auxiliary send, or whether it’s better to be afterwards, right?
So I think that demonstrates the basic functionality of the channel fader on an audio track. For the most part, it’s going to be post-insert, and then you have the option whether you want it to be pre- or post-send.
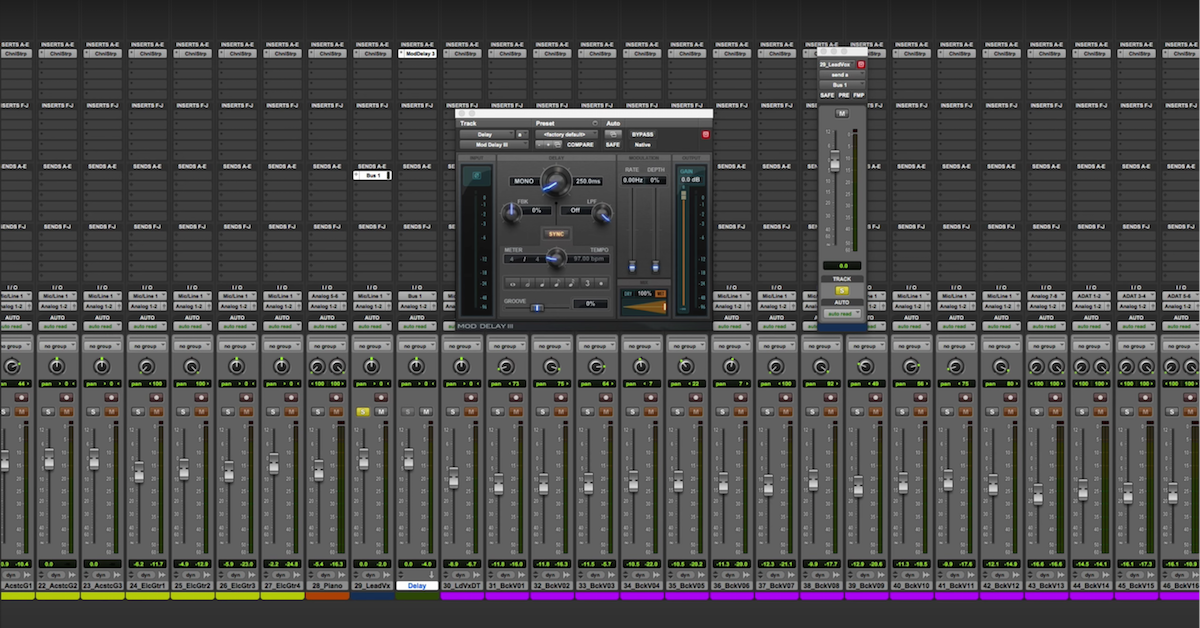
Let’s think about then a different kind of track. I’ve got my signal — all of the signals in my mix going over here to this music mix. This is an auxiliary track. It brings a signal in.
We also have an output. I’m going to use this limiter here as an example where we can watch the metering where what’s going on in here. Let’s say this is just to provide some slight dynamic range control over the total mix.
So I’ll play it back, and then I’ll move this fader up and down.
[mix]
So in this case, when I change the channel fader on an auxiliary track, I still have the signal going through the plug-in. This is suggesting then, that this fader is happening after the insert up here, or after the effects.
Let’s compare that to what would happen if I move this limiter over here to my master fader, and then change the level of this fader right here.
[mix]
So when we compare the auxiliary track over to the master track, one big difference is this channel fader, whether it occurs before or after the inserts. My plug-in is over here on the auxiliary track. This channel fader happens post the inserts on this track.
Over here on the master track, this fader happens before the inserts on this track.
So that’s one thing to understand. Whether it’s pre- or post-, because it’s different across these two kinds of tracks. You might use them for similar purposes, but you need to understand where the gain structure is actually being affected.
So that’s the first thing. The next thing I want to talk about is how you apply this knowledge to your mix. I’ve heard — this is where I get lots of different opinions.
First off, one thing to understand. When you’re working with a channel fader, it’s just changing the signal level. There’s nothing really actually that special about it. When we’re processing a signal, whether it’s on an auxiliary track or a master track, when we actually process it to change the amplitude, we are working at a resolution of audio of 32-bit floating point.
What that can mean for you is you basically have infinite headroom. You really can’t clip the signal when you’re working with it on either of these tracks. You also have a noise floor that’s basically nonexistent. It’s so quiet, we don’t have to worry about it, because we’re at 32-bit floating point.
Therefore, you don’t have to necessarily get too worked up about whether your master fader is up a little bit, or whether it’s down. Same thing over here on your auxiliary track. It’s really just a simple gain control. There’s nothing fancy about it at all.
You just need to understand whether it’s happening before or after your effects.
With that being said, don’t just feel like you’re limited to one kind of track only allowing you to have gain after the effects, or another kind of track where you can only control the gain before the effects.
Your channel fader, you can think of it as nothing more than a trim plug-in. As an example, let’s say on your master fader, you wanted to have pre-effects gain control, like you have with this fader. You also want to have post-effects gain control.
This is a common one that I end up using a lot, where what I like to do is automate like a fade out, and have that automation occur after all of my effects.
Well, all you have to do is go to your final insert slot right here, pull up a multi-mono trim plug-in. This trim plug-in is exactly the same processing as your master fader. Whether it’s happening before the effects or after the effects.
Now I have control. I just put up a trim plug-in, and this gain control right here is identical to the gain control on my master fader. Nothing fancy. If I wanted to, I can automate this, and now my track, I can go in and automate the gain after the fact, or automate the gain ahead of time.
You know, if you’ve got all of these — you know, the gain structure of the song going into your fader and it’s a little bit too hot for the overall mix, just turn your master fader down. It’s not that big of a deal at all.
If it’s too quiet, just turn it up a bit. It’s just a simple gain control. Nothing fancy at all about it.
Same thing on your auxiliary track. You know, if you want to have pre-effects gain control, put a trim plug-in up here. Now you can change the volume going into all of these inserts, and now you can change it going out.
Just think of these things as a trim plug-in. If that’s a simple way to really boil it down to nothing more than a gain control.
So, I think that gives you some demonstrations and some ideas about working with your channel fader. If whenever in doubt, if you’re concerned about automating things or anything like that, pull up a trim plug-in and just use that in the same way.
Or you can even put a trim plug-in at the beginning, put a trim plug-in at the end, and then forget about your channel fader.
Really so many different ways to think about using this. The main thing is to understand the proper way about how they actually work.
I hope that was helpful for you guys. If you’ve got questions, post them below. I’ll try my best to follow up with you.
Take care.
Elevate Your Ears