How to Improve Acoustics in Your Home Studio
Article Content
This article is focused on general positioning and design concepts for a home project studio used for mixing or mastering, although some concepts can be applied to a tracking room as well.
Control rooms or mixing rooms should be symmetrical to ensure reflections are identical on the left and right sides. This is necessary to get an accurate stereo image. Ideally, the room should also not have any parallel walls (or parallel floor and ceiling) that can cause standing waves.
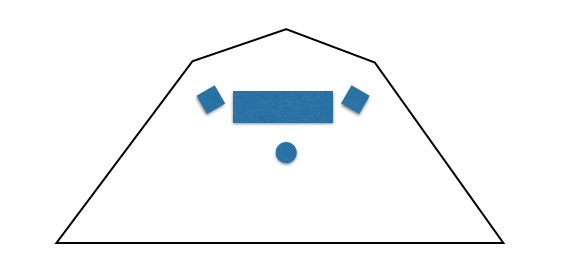
Standing waves occur when certain frequencies with wavelengths proportional to the room dimensions bounce back onto themselves, creating dips and peaks in the amplitudes of these frequencies due to phase cancellation and amplitude summation. So in the worst case scenario, you will not get an accurate representation of the sound because the room will be influencing the frequencies you hear, which could vary greatly based on your physical location in the space. Bass frequencies are usually the biggest problem. But in addition to the lowest standing wave or resonant frequency, the resulting harmonics below will exhibit standing wave behavior.
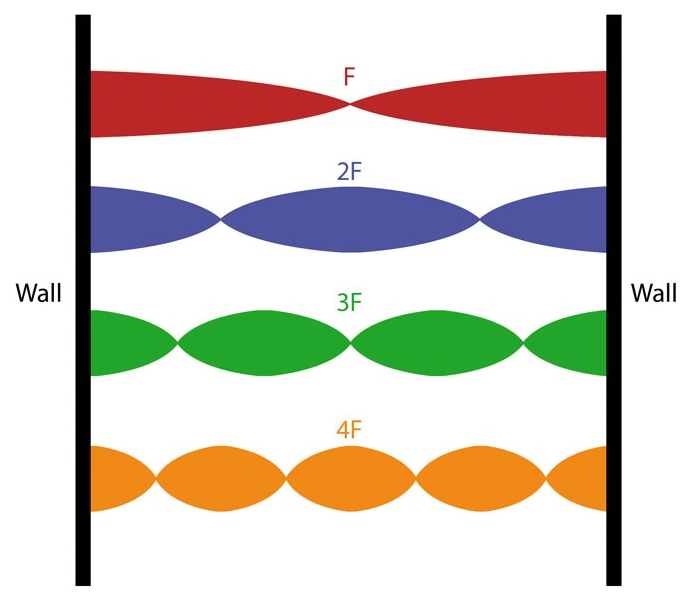
Image Source: http://soundonsound.com/techniques/room-improvement
However, few of us have rooms without parallel walls or the funds to construct modifications. More likely are rectangular situations with doors, windows or closets in troublesome locations. These irregularities need to be minimized as much as possible, perhaps with the use of heavy curtains, or panels that fit on top of the obstruction, etc.
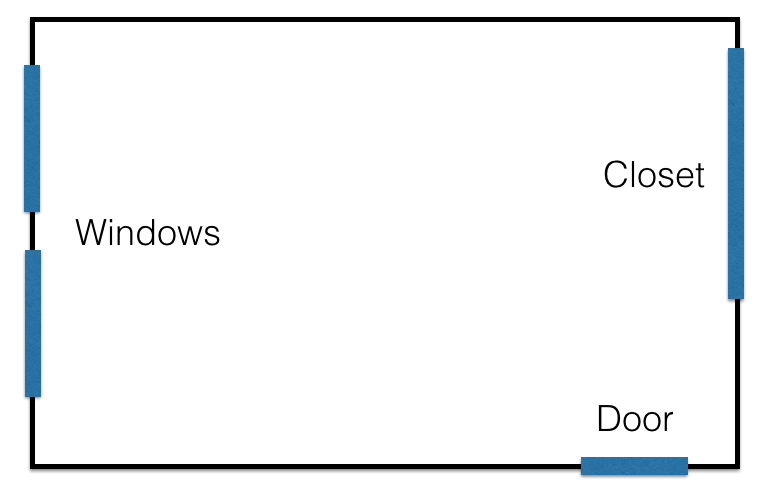
Mixing Desk Position
Rather than addressing the concerns of window and door locations, etc. (which will vary from room to room), let’s talk about how to best mediate acoustical problems in common rectangular shaped rooms.
In any rectangular situation you have a few position choices for your mixing desk as seen below.
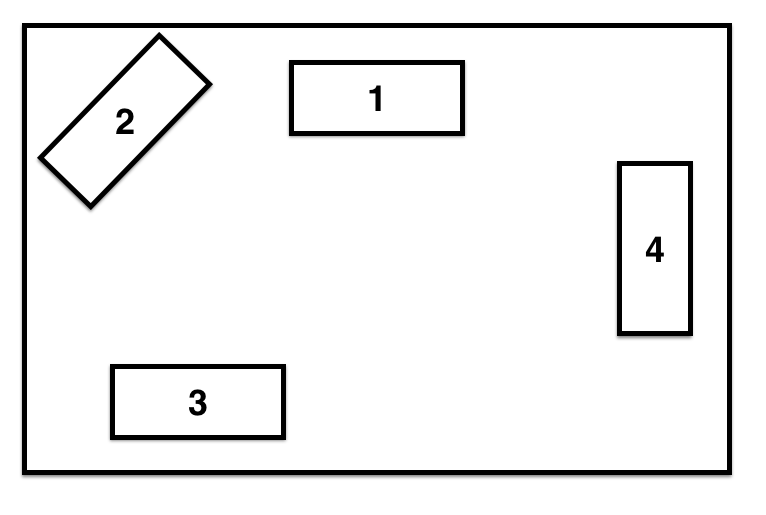
- Choice 1 is problematic because although it is centered in the room, the early reflections will arrive with more delay than is necessary due to an increased distance from the side walls.
- Choice 2 is problematic because placement is not symmetrical in the room and reflections will be unbalanced.
- Choice 3 is also problematic because its placement is not symmetrical in the room and reflections will be unbalanced.
- Choice 4 is optimal placement.
So in a rectangular room, it is advisable to position your mixing desk centered on one of the short walls.
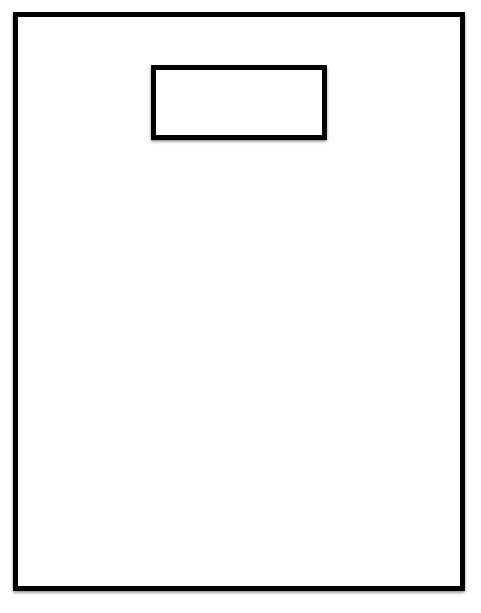
Speaker Position
Leave some space between your speakers and the back wall.
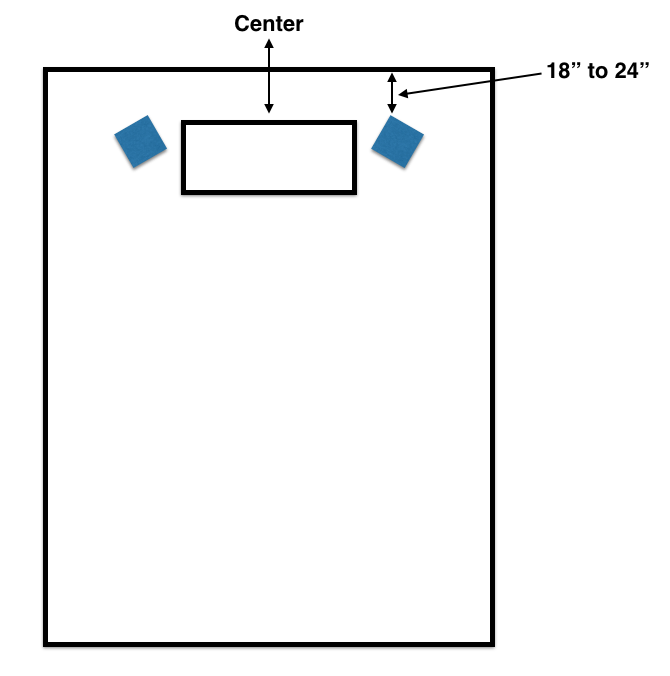
Distance between speakers from center of cones should be around 50″ to 60″.
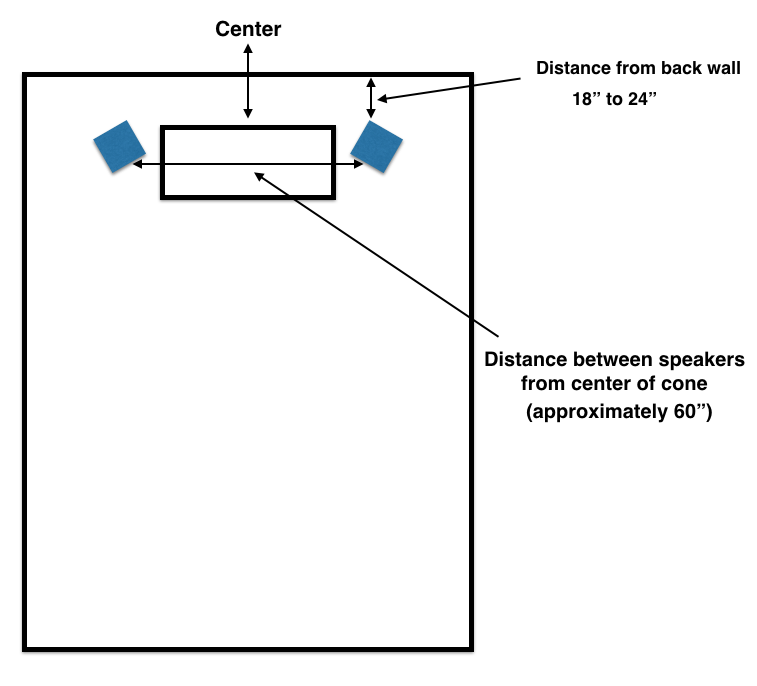
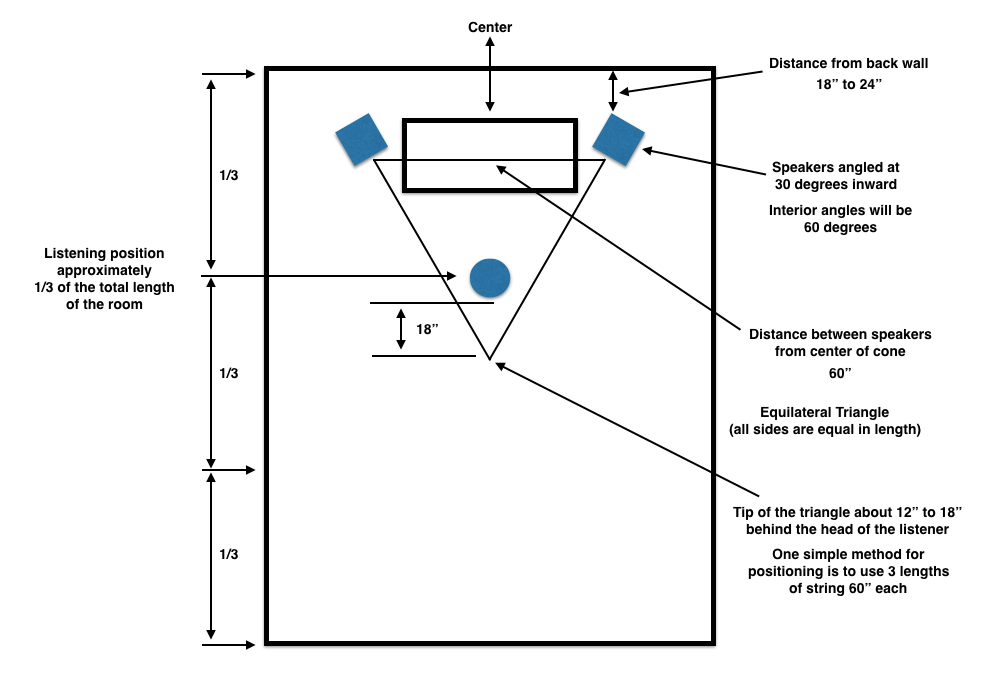
Other specs to keep in mind:
- There should be an equilateral triangle created by the distance between the speakers and 18″ behind the head of the listener. This accommodates for the position of the outer ears.
- The listening position should be about 1/3 the total length of the room from the front wall.
Bass Traps and Absorption Panels
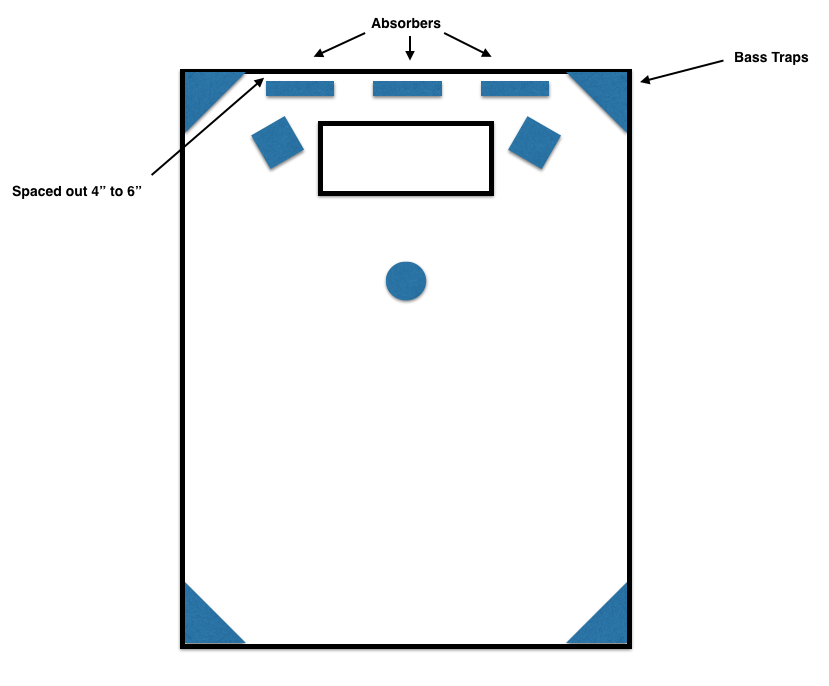
Add bass traps to alleviate bass buildup in the corners.
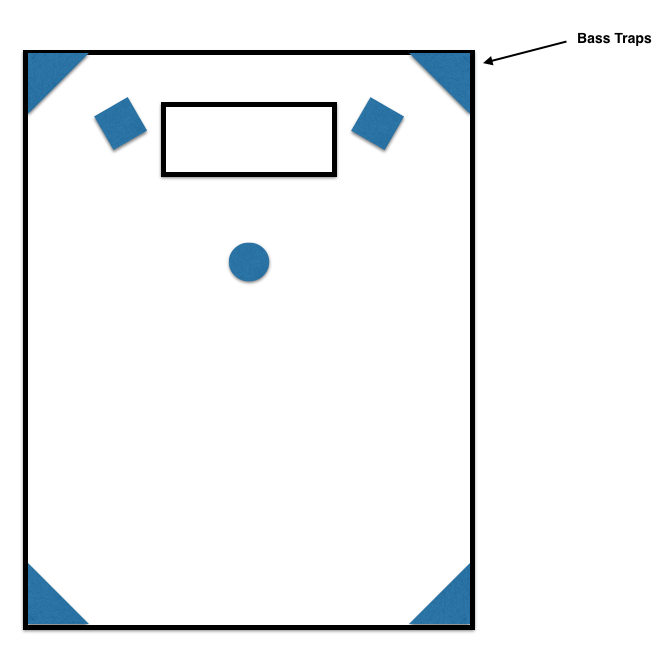
Positioning absorption panels spaced out away from the wall will increase their effectiveness in absorbing low end frequencies.
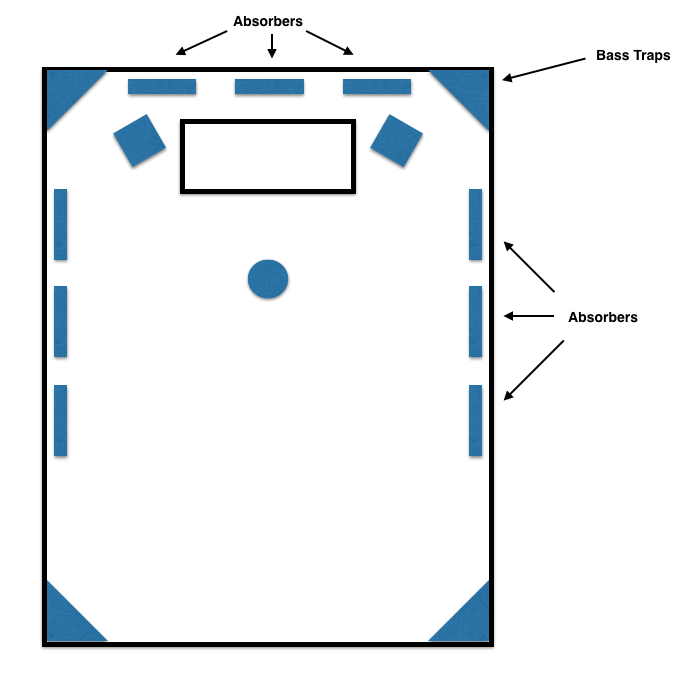
Position side wall absorption panels using the mirror technique: Have a friend take a mirror and move it flat along the wall starting at the front. Rotate your head to follow the mirror without moving from the listening position. If you can see a speaker in the mirror, that is a point of reflection and a perfect spot for an absorption panel. Panels should be placed in identical locations on the left and right to ensure balanced reflections.
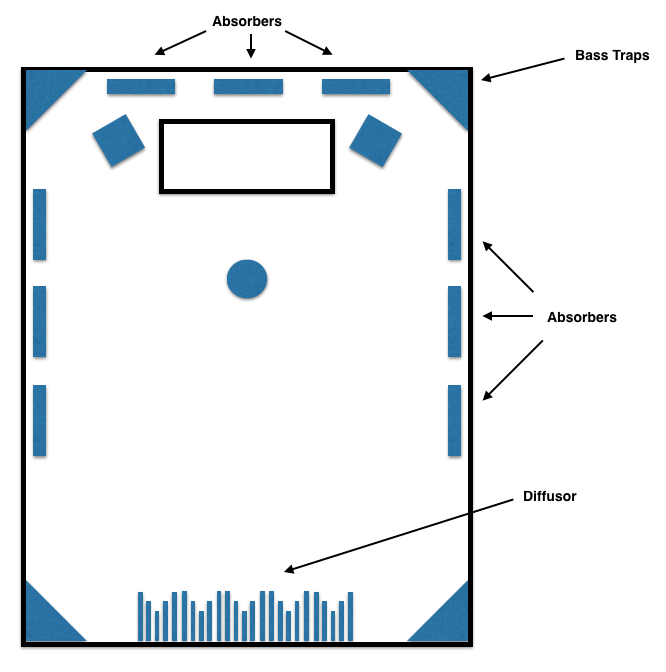
Diffusion Panel and Cloud Positioning
Add a diffusion panel to the back wall to spread out reflections evenly throughout the room.
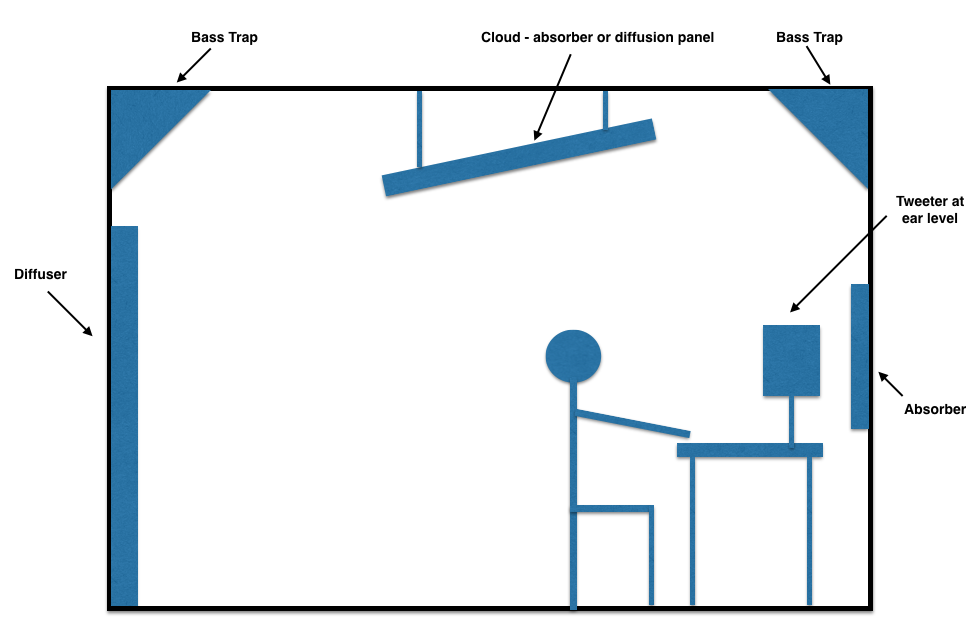
Finally, add a cloud diffusion or absorption panel at an angle on the ceiling to alleviate possible standing waves between the floor and ceiling.
DIY Absorbers Considerations
- 2 ft x 4 ft (2 or 4 inches thick) — the thicker the panel, the better the low end frequency absorption
- Rockwool or insulation — best material for absorption — much better than acoustic foam
- Build a wood frame to house the absorption material
- Wrap with acoustically transparent material (the wrong material can actually reflect certain frequencies instead of absorbing)
- Standard 2 ft x 4 ft panels can be positioned diagonally in the corners to act as bass traps or dedicated bass traps can be used (many different styles)
Cost for a 2’ x 4’ x 4” Panel
- Plenty of DIY plans and sources online: $30 – 35 each
- Pre-constructed: $65 – 75 each
DIY Diffusion Panels
Having a good balance of diffusion and absorption is essential. Too much absorption will give the room an unnatural coffin-like sound.
Professionally made diffusers are often designed using a mathematically derived series of bumps and wells intended to distribute and reflect incident waves equally throughout the room. The idea is to prevent the majority of the wave’s energy from bouncing back onto itself creating the standing wave problem.
There are many DIY diffuser types and patterns freely available online and if you have access to the right tools you can make your own. Cost will be largely dependent on the type of wood and overall size.
Poor man’s diffuser: Position a large bookshelf centered on the back wall of your studio and slightly pull out every other book an inch or two. While this is by no means scientific, it will certainly do some diffusion and will definitely be better than a flat open wall.
Speaker Isolation
Speakers stands are always a good idea and there are many available that will help to isolate vibration and transference (mostly a problem with low end frequencies).
But if you don’t have stands and are forced to place speakers on the desk itself, be sure to place them on acoustic foam. The Auralex Mopads can be purchased for about $40 a set. Even a piece of styrofoam is better than nothing in a pinch.
Failure to isolate speakers will create low end resonance not present in the original sound.
Do you have a problem?
Here’s a simple approach to determining if there’s an acoustical problem in your room.
- Record a chromatic series of notes starting at the lowest audible octave using a simple sine wave generator or a virtual synth that has a sine wave oscillator (or play back the files at the bottom of this page).
- If you want more control and have a Mac, feel free to download the freeware application I wrote for this purpose).
- Play back the file at an average loudness through your speakers (70 – 75dBSPL C-Weighted as measured by an SPL meter for a 1k tone at -20dBFS — if available).
- If you can hear any extreme variations in loudness at the listening position, you have a problem and you should try to alleviate it using the positioning, absorption, and diffusion strategies we’ve discussed here.
- For more specific frequency targeting use a sine wave sweep which includes the frequencies between chromatic notes.
- Note: You can also compare what you hear using headphones to what you hear with speakers to get an idea of what the room is doing to your sound. Remember, low-end frequencies will be perceived at lower levels than mid-range, based on the Fletcher- Munson Equal Loudness Contours.
Chromatic Series (E-1 to A3)
Sine Wave Sweep (20 to 220Hz in 20 seconds)
Sine Wave Sweep (20 to 220Hz in 60 seconds)
Conclusion
The best reference monitors in the world will do you no good if your room is not treated. Your mixes will not translate to other environments and you’ll spend hours trying to fix problems that could have been avoided with a relatively modest investment, when compared to the rest of your rig.
Taking the time to optimize your space will be well worth it in the long run.
Check out my other articles, reviews and interviews
Follow me on Twitter / Instagram / YouTube


