Plugin Review: bx_console from Brainworx
07/2/2016
![bx_console from Brainworx [Plugin Review]](https://i.ytimg.com/vi/Mo3xnsA_M-Q/hqdefault.jpg)
I downloaded a demo version here of the brainworx bx_console. This is a relatively new plug-in, and since it was released, I’ve been looking at it and seriously considering picking up my own copy of it, so what I thought I’d do is download the demo and give you a video of my first impressions as I’m thinking through whether or not this plug-in is different from all the other plug-ins I’ve got.
Does it add unique value to my workflow?
This is a console emulation style plug-in based off a Neve VXS console. It’s a channel strip. It’s got your basic functionality that you’re probably going to want to add to almost any element in your mix.
So we’ve got a filtering section with a high and low pass filter, we’ve got a four-band equalizer, expander/gate, and limiter/compressor.
Now, I know there are some guys that love to use channel strip plug-ins, and some guys that would never use them in any situation.
Me, myself, personally, my preference is a channel strip has a specific role. It has a function in my workflow, and here’s why. As an example, think about opening up a brand new mix. Nowadays, when I open up a new song, there’s usually dozens and dozens of tracks.
What I’ve got to do is prioritize and work quickly and efficiently and think about what are the most important elements of the mix and what are things that are less important?
So things like the lead vocal, lead guitar, kick, and snare, on those elements, I might try out three or four different plug-ins. Three or four different equalizers. Three or four different compressors that just specialize in those things. Pull up separate plug-ins that just do console emulation, analog modeling, harmonic saturation.
Try and figure out which one is going to work best for this song and on that element.
There are other parts and other tracks though, like the tambourine. Maybe the background vocals. An acoustic guitar that sits in the background of the mix.
I don’t want to have to waste a lot of time experimenting on those tracks, I want to be able to pull up one plug-in, like a channel strip, and be able to process the channel in a way to improve it so that it sits in the mix and then move on very quickly.
So for me, that’s the reason why I like to use channel strips. I don’t use it on everything, but it’s good on some things.
For a long time, I have used just a couple channel strips. They’ve been my go-to ones that I use in almost every mix. The first one is the Waves SSL channel strip. I had some experience working on an analog SSL desk, so I got familiar with the controls and how it sort of sounds, so I’ve used that plug-in for a long time.
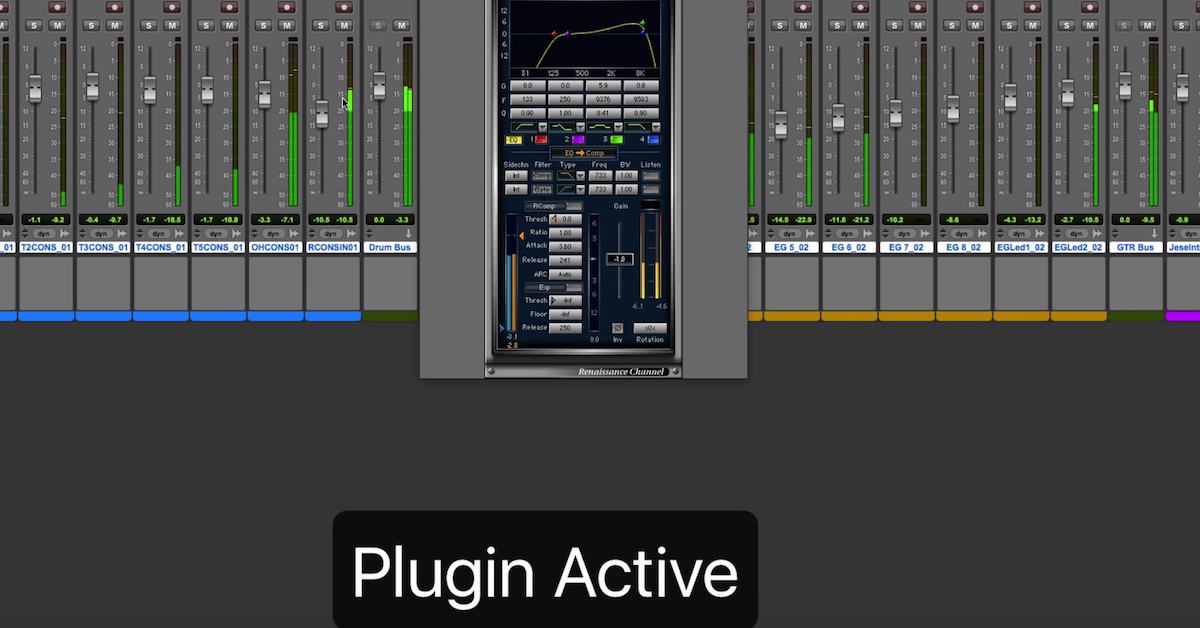
The other one is the Waves Renaissance Channel. I use it on almost any mix. I like some of the side-chain options and flexibility you have in that plug-in.
So I’m using those things all over the place in my mix. I’ve thought though for a long time, would there be a new plug-in released that can replace those things that might have some improved signal processing? The Waves SSL channel strip sounds great, it works great, but it’s been around — the modeling technology is probably a dozen or so years old. There’s nothing wrong with it, but I assume the modeling technology has improved since then.
So this is a brand new plug-in from brainworx. They have their own modeling technology. Maybe it’s better? Maybe it’s improved. So I wanted to experiment with this and think about if this was something that could fill that role.
So let me take you through kind of the unique things about the plug-in, then we’ll get on, I’ll demonstrate it really quickly on working with a snare.
So there are some weird things about working on a Neve style channel strip that you have to get used to. Now, I have also some experience working on a Neve VR desk, so I like the idea of this new plug-in being very similar to that. I like that sound of Neve consoles. I work on a lot of rock music, so Neve, SSL, those are natural ones to kind of just work with. That sound.
So as an example, one thing you have to get used to, or might be strange if you’ve never worked on a Neve console before, and they’ve kind of built into the plug-in, is in the analog world, a lot of the knobs, you pull them up or push them down to do things, which in the software world is sort of weird.
So they have things, like here you can click on these buttons and the knob moves up and down, or you can double click the button and it moves it. You just kind of have to get familiar with those things. You pull them up and push things down to change different functionality of other parts of it too.
So for instance, to turn this one on, low pass filter and high pass filter, it’s just a matter of then sweeping it. Right? All of the controls are going to be variable, so it’s not like an API where you’re just stuck with certain things, so that’s kind of a nice thing to be able to do. I like that particularly myself.
So the low pass filter, this is something I wish all console emulations, or all consoles would have. I love being able to roll off the high frequencies. That also comes from the fact that I work on a lot of rock music, so a lot of times I have to tame the high frequencies more than I have to think about making things excessively bright. I have to worry about getting rid of harshness, so I love being able to have this low pass filter to do just that.
Moving on then to the four-band equalizer, you have a high shelf and low shelf. You can turn both of those into peaking equalizers if you’d like. Here you just have low Q and high Q if you turn on this bell shaped curve. Then you just have a sweeping gain. 18dB of boosting and cutting, and you can pick whatever frequency you want from 1.5kHz all the way up to 17kHz.
Same thing down here. Plenty of control for the low frequencies. You’ve got high mids and low mids, in this case, fully parametric bell, gain, and frequency in here.
Right, for me, four bands of equalization is going to do almost anything I need for a tambourine or for a background vocal. So that’s plenty.
Moving over to the dynamics section, this is where the controls get even more weird if you’re not familiar with it. So you have on the left side here an expander/gate. You have this hysteresis control which is going to be the level relative to the threshold where it’s going to open up. Then you have the threshold control here, which I’ll demonstrate, you have a button to lift it up and down which is going to change the level here by 30dB.
So if you’ve got things that are relatively quiet or loud, you have extra range than just what shows up on the knob.
Then for the range control down here, this is how much gain reduction is going to take place. You also have the ability to set the speed of attack based on pulling the range up and down.
Now, it might not be intuitive for you initially. Why am I pulling the range up and down to have a fast gate or slow gate? But that’s where you have to end up doing it.
That’s another thing I really like about the dynamics section of the Neve. You don’t have to waste a lot of time setting things as being the exact speed of attack or on the compressor, it’s the same thing. I either — when I compress, or use a gate, I want things to happen quickly, I want things to happen slowly. So I like that I don’t have to have a separate knob just for those things.
It has some defaults that are going to work great. The release is now how you can dial in how long it takes for a snare so that it doesn’t overlap or go into the next snare hit.
Same thing on the compressor, you have make up gain, which is great. You have the threshold control here. Again, you can pop it up and down to give you more range of control over that, and the ratio down here is where you pull it up for a fast attack or turn it off for a slow attack.
That’s really nice being able to have. Similar kind of thing that you have on the SSL, you have a slow or fast attack, just two settings that you use. Then also control here, including all the way up to auto-release. Program dependent sort of thing.
Just to look at a few other sections, you have metering over here which is pretty cool. The VU meter and dBU, that’s helpful, especially guys that have experience working in the analog world. You have metering for the expander and compressor. You have input gain control. Then you have this virtual gain, and when I first looked at it, I didn’t really know what this virtual gain was all about.
Opening up the user manual, it says it’s just analog noise. So it’s background noise to give you some — what it sounds like in the real world. Now I’m probably the kind of person that’ll just turn this off. I don’t like the idea of intentionally adding in noise, but some people will. I like being able to go to the digital world and turn the noise off. I almost always did that on the Waves SSL plug-ins, and almost all their ones that add in noise, the first thing I do when I open up the plug-in is I’ll automatically go and turn the noise off.
Then you have the output control here. On the stereo versions of the plug-in, you can also pick where things are going to happen together. If these channels are linked on the stereo versions.
Another thing they talk about is they allow — they actually modeled a bunch of different channels. Separate channels. Each one is supposed to sound different. I don’t know how different they actually sound, but in theory, by modeling I think a total of 72 different channels, you have the ability that your mix can sound different by putting things through one channel or another channel.
Waves did this with one of their Non-Linear Summing plug-in. The NLS plug-in. They modeled a bunch of different channels.
In my own experience, very rarely did I go around and try out ten different channels. I pulled up the one that I like, if it was the SSL, I didn’t try out ten different SSL models, I usually used just one. I’ll have to see how it goes. Is it worth switching these channels or not, or will it just end up being a waste of time?
So I guess that takes you through all of the controls. Hopefully you have an idea now about how it works, right? You can turn some of these things on and off too with these buttons. There’s a lot on the screen at one time, but it’s helpful, right? That doesn’t even get into side-chain options, moving around the dynamics before the EQ and all that stuff too.
Let me go ahead and just demonstrate this plug-in on a snare drum. I think I’ll do another video following up after this to demonstrate some more things about it too.
So here’s my snare drum. Right off the bat what I’m going to do is roll off the lows and roll off the highs.
[snare]
Next up, let’s work on using the dynamics section. Getting rid of a lot of the bleed and kind of controlling the level.
[snare, adjusting dynamics section]
Now quick equalization, boost some of the lows, find the fundamental, scoop out some of the ringing of the snare, and give it some top end snap.
[snare, adjusting EQ]
So I’m pretty happy with just being able to quickly work through and dial in the different king of processors, equalization and dynamics I’d normally want to use on a snare drum.
What I’m going to do in a follow up video is really compare across a full mix then what is the brainworx channel strip doing compared to maybe another one that I normally used like the Waves Renaissance Channel? I know a lot of guys use that one too.
So that’s it for this video. Thanks for checking it out, I’ll catch you guys next time.