Mixing with Channel Strips: Brainworx bx_console & Waves Renaissance
09/2/2016

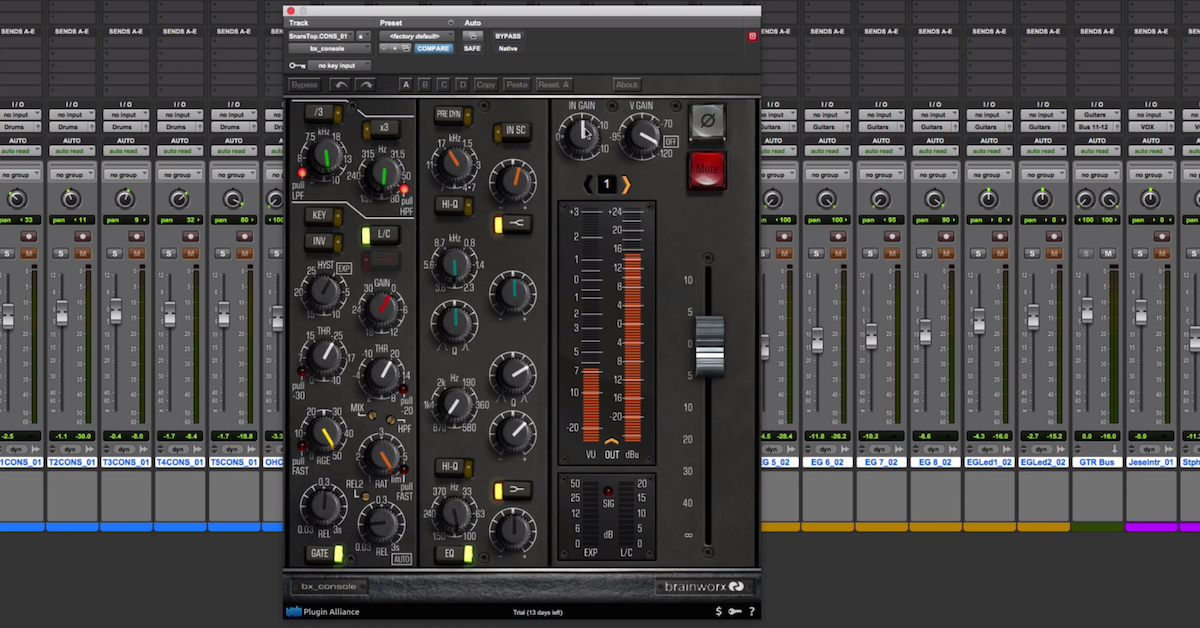
Recently, I picked up this plug-in from brainworx called the bx_console. It’s a model of a Neve desk.
In my workflow, I like to use channel strips for basic processing. Whenever I need to do some simple equalization, compression, or expansion, I like to pull up a channel strip where I’ve got all of the parameters and controls in one place that I can quickly dial in the settings and move on to more important things in my mix.
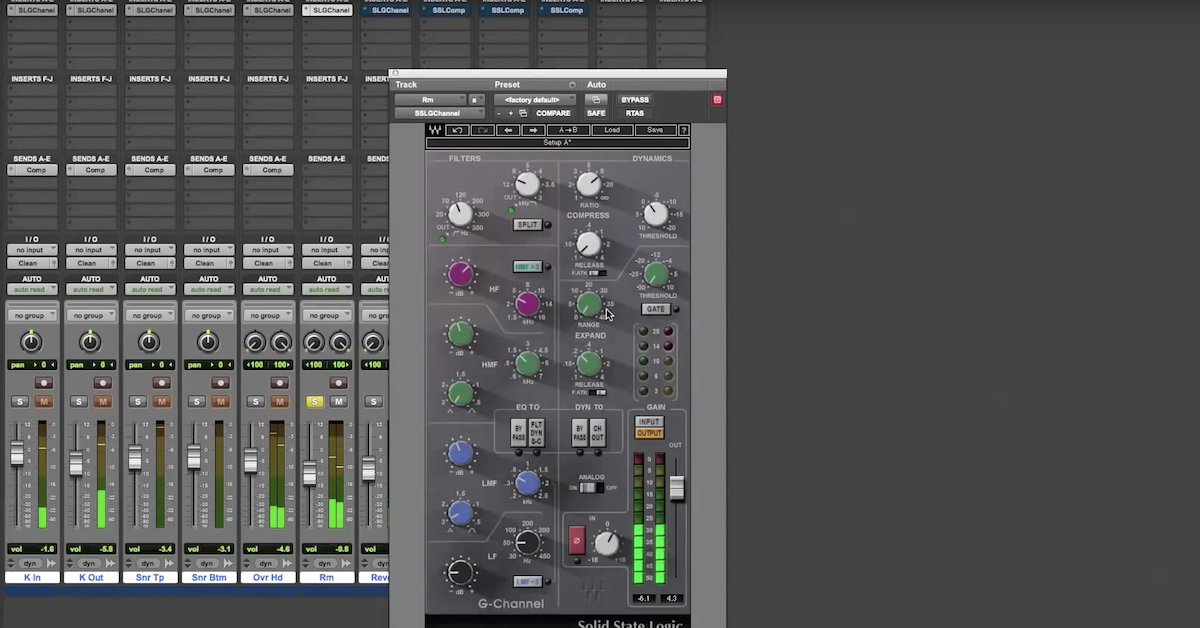
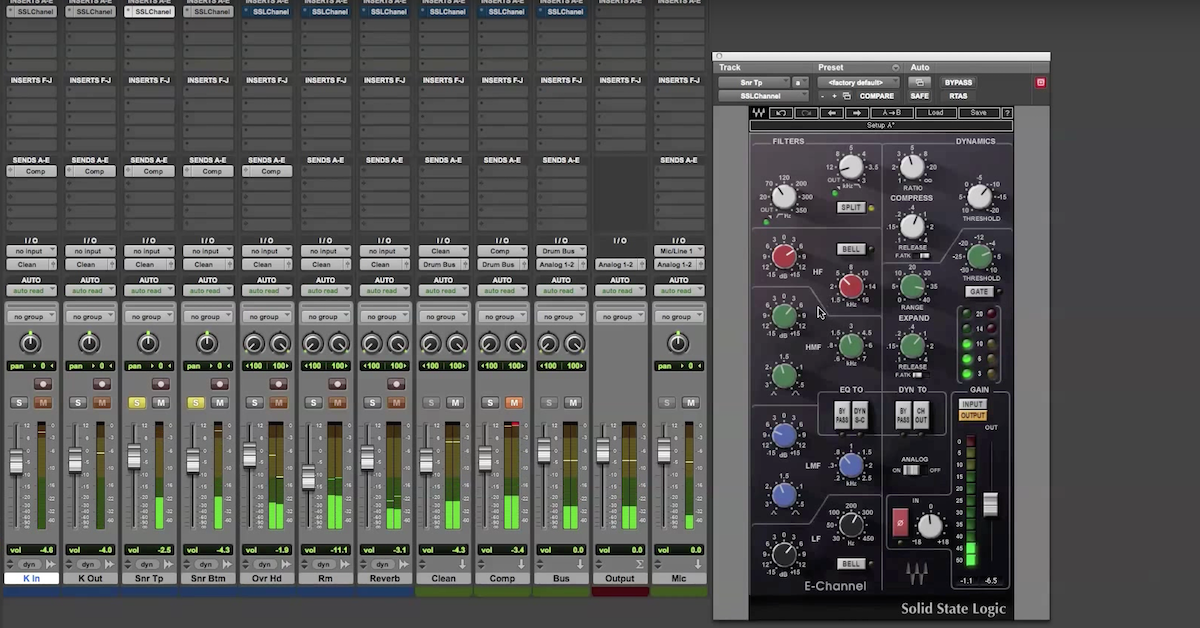
So in the past, I’ve used basically two tools and gotten really familiar with those. Waves Renaissance channel, and the Waves SSL desk. When I saw this plug-in come out, I got interested in it, and thought, “Is it time for me to replace my old tools with some new technology, and some new software?”
So I’ve picked this one up and I’ve been playing around with it for a couple of weeks. What I decided to do for this video is mix a song using this plug-in exclusively. No other plug-ins are used on this multi-track session. Just the brainworx console. So I’m not even using any spatial effects or anything like that, it’s just equalization, compression, and expansion.
Then what I did was I created another multi-track session where I’m just using the Waves Renaissance channel. My idea is not to do one-for-one parameter matching or anything like that, the idea is just to look at my results of what I would get just by using this plug-in in the mix. You know, things — impact, you know, the choices you make, like the metering you see, and the sounds that you’re hearing from the equalizer, and that kind of stuff.
So what I’ll do here is play you this track here to begin with. This is a song by the band Lines in the Sky called Parallel Travel. It’s kind of a heavy rock sort of sound, and I’ll A/B it, turn it on, turn it off so you can hear what the plug-in is doing, and then I’ll open up the other session, do the same thing, let you hear the Waves Renaissance channel in the context of the mix, and then I’ll come back and I’ll dig deep into a couple of the plug-ins and show you some unique situations and how I’m using it. How I’m using the routing and all of that kind of stuff so you get a better idea about how to use it.
So here’s the song. You can hear how it sounds and how the processor is affecting the overall mix.
[mix, with and without bx_console]
Now, here’s the same song in a multi-track session where I’m exclusively using the Waves Renaissance Channel.
[mix, with and without Waves Renaissance Channel]
The next thing I’ll do is play the mixes side-by-side and crossfade back and forth so you can compare them for yourself.
Now, to my ears, what I hear is with the brainworx plug-in, the results I ended up getting sounded a little bit smoother in the mid-range and crisp on the top end, whereas the Waves Renaissance Channel sounds almost brittle on the top end. Now, that might have been a result of the mixing choices that I made, but I’ll let you decide for yourself here.
[mixes, alternating between brainworx and Waves]
So there you go.
Another thing that I hear when playing them side-by-side is my drums really came out punchy with the brainworx plug-in. I didn’t really achieve that with the Renaissance Channel, even though I was stacking plug-in on top of plug-in, and trying to emphasize that, it just didn’t come out as good as it did with the brainworx plug-in.
So why don’t we look at individual instances of the plug-in and I can show you how I’m using. Here’s the one that I’ve got on my kick drum. In this case, I’ve got the gate engaged, fast attack, fast release, really tightening things up.
Then I’ve got the compressor with a pretty high ratio. Slow release and slow attack. The idea here is to compress more of the sustain.
I love on this plug-in how you really just have two choices, either fast attack to compress the transient, or slow attack to let the transient go through. On the EQ, nothing fancy here. Beef up the bottom end, roll off some of the boxiness, and find some of that snap on top.
So that’s the kick drum. On the snare, I’m doing two kind of things side-by-side. First up, I’m just — EQ, nothing going on here. I’m just using a fast attack to control level of the snare drum, and then in the second instance, this is where I’m using the gate to tighten things up, pull off the cymbals and bleed from this track and so on.
I’ve got a lot of the same kind of stuff for the toms. Over here on my room mic, this is where I’m using a high ratio. So I’m getting it closer to limiting, and very fast release. So kind of a classic crushed room sound.
Then on my drum buss over here, I’ve got two things going on. A little bit of equalization to sculpt it a little bit here. The first one is low ratio with a slow attack.
Then, I use a high ratio with a fast attack. This one is acting more as a limiter. I have that going on in several different places. On my drums, and then also here on my guitars. You see that this is acting as a limiter. Just taking off maybe one, two, three dB maximum.
So I like to use this plug-in not just for basic compression, but also for buss processing and buss limiting.
Over here on my guitars, using a lot of equalization. I hope you’re able to notice the guitars especially were kind of lifted up in the mix. That has a lot to do with the spectral processing.
Simple. Slow attack kind of compression. Usually a low ratio in that case.
On the vocals, this is where you can do some pretty interesting routing. So I’m using the side-chain here to implement a de-esser. So I’ve boosted up a lot of the top end, found where it’s really sibilant, and I’m emphasizing those things, and then I route that using this button here on the side-chain over to the compressor.
So now I’m only compressing on this instance of the plug-in whenever there’s those really, really bright sections — sibilant sections.
So I put the de-esser first, then my general purpose processing. Low ratio here, pretty fast release. This is where my equalization is going on.
My third instance that I’ve got stacked on top, turn the equalizer off, and now I’ve got the limiter, so now I’ve got different stages, different types of dynamics processing. All can be achieved with the same plug-in. From de-esser to basic compression, and then also the limiting to really hold the level of the vocal out front.
Same basic processing going on for the background vocals and another limiter here. Like I’ve shown you before, on my vocal buss, and then the music buss.
So that’s it. That’s the brainworx plug-in. You can use it for all kinds of different stuff from different types of dynamics processing, pretty powerful equalization, especially if you start to stack these on top of each other.
So I’ll play it out and let you start to hear it now, the mix going through the brainworx console.
[mix]
Elevate Your Ears