Making Convolution Reverb Flexible w/ Multiband & Stereo Processing
10/19/2014

I wanted to put together some ideas for you about creative ways of using reverb inside of your mix. In this video, I’m going to be focusing on convolution reverb and how you can process it so that it fits well with your song.
When most people think about convolution reverb, they think about loading up a static impulse response. If that impulse response doesn’t fit with your song, you load up a different impulse response. You go through this process one after the other until you find an impulse that actually fits sort of well with your track.a
What I’m going to show you how to do is how you can tailor and tweak the sound of that impulse so that it actually fits really well with your song. When you do this, you take a static impulse response, and you make it very very flexible. To begin with, let me show you some trick I like to use with reverb on drums. I’ll play my drums first, without reverb.
[drums, no reverb]
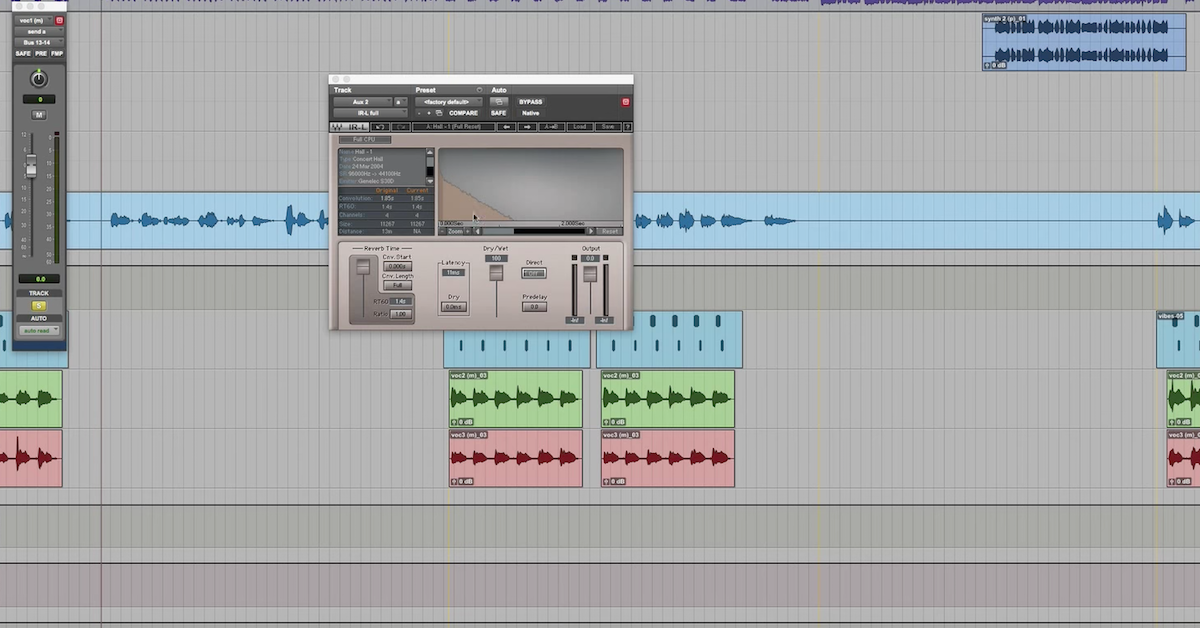
So a dry, drum mix. I want to make it more exciting by adding reverb to my snare. So what I’ve done is taken my snare top/snare bottom microphones, and bussed them over to here to an auxiliary track I called snare verb. Then I inserted up here the Waves IR-L plug-in that can convolve an impulse response. Then I loaded up an impulse response from the stone room recording studio.
I’m just going to blend in the sound of that reverb, and actually over-emphasize it so you can really hear what’s going on.
[drums with a lot of reverb]
Now let me get to actually processing the sound of this reverb. One common popular technique that people will use with reverb, is actually to use an equalizer to change the spectral shape of the reverb. So I’m going to show you just how to do that. You can do things like brighten it up or darken it by shaping the high frequencies.
[drums with reverb]
Maybe roll off the lows. A/B it.
So that’s a very straightforward common way of processing reverb so that it fits well with your song. Maybe you need to roll off the lows or boost the highs so that it fits in with other instruments in your song.
There are some limitations to this kind of processing for what you can and can not do.
On a lot of algorithmic reverbs, you have separate controls for changing the reverb length of your high frequencies separate of your low frequencies. On the Lexicon reverb, this is one of the common controls. Reverb time for the highs, verses the lows.
Now, if you just use a spectral processor equalizer like this, you don’t have the ability to do that. All you can do is brighten it up or darken it. So what I want to show you how to do is how to use a different kind of processor to have this kind of control that you’d normally only have on algorithmic reverb. I’m going to use here the Waves C6 multi-band processer. Not only can you do spectral processing with it, but because you have control over doing things like upwards expansion and downwards compression, or you can use it as a dynamic equalizer, you can actually change the length of the high frequencies separate of the low frequencies in your reverb. So let me show you how you can do this.
[drums play with reverb]
Brighten it up… Darken it…
So it’s a great equalizer. Another thing that you can do here is set this cross-over frequency right here. So I’m primarily focusing on the high-mids and the low-mids. The other bands I’ve swept away to the ends of the spectrum. So what I’m going to show you how to do, is first to begin with on my upper-mids, or my high frequencies, use upwards expansion to actually change the length and elongate the tail for the high frequencies separate from the low frequencies. So what I’m going to do is bring down the threshold into the range where the reverb is, and then bring up this range so that I am actually doing upwards expansion on the tail for the high frequencies.
[drums with reverb]
You can change the release time to really make it long, or shorten it back down. Again, you have separate control over the gain, so you make sure it’s not too dark, but still change the length of the highs. We can do the same thing with the lows, or maybe do the opposite. I’ll do downwards compression so this will shorten up the length of my low frequencies.
[drums with reverb]
Still, boost them up so that it’s not too bright.
Hopefully what you’re able to see with using this kind of multi-band processor, you have so many more degrees of freedom. Not only do you just have spectral processing to make things brighter or darker, but now you can actually accomplish what you could only do before with an algorithmic reverb, which is change the length of the high frequency tail separate from the low frequencies. So now, you can really dial in a sound that fits with your track.
If you want to get really crazy, you could duplicate this track here for reverb. Now I have one separate that I’m going to use just for my lows. So if I go in on this plug-in, solo the low frequencies right here, go in on the one next to it, solo the high frequency band…
Now, I have the same kind of control I had before, plus extra gain control here. But then, I can add in all kinds of other plug-ins after the fact, like modulation effects you would find on algorithmic reverbs, and just add that modulation to the high frequencies. So all kinds of other control just by opening it up and doing multi-band processing on your reverb.
Let me move on to some tricks that I like to use with reverb on vocals.
Now let me show you some tricks that you can use to change the perception of the stereo field of your convolution reverb. Here, I’m going to be adding reverb to my lead vocals. Start out by playing my vocals in context with the mix, and then bring in the reverb, again, over-emphasizing it so that you can hear.
[song, heavy reverb on vocals]
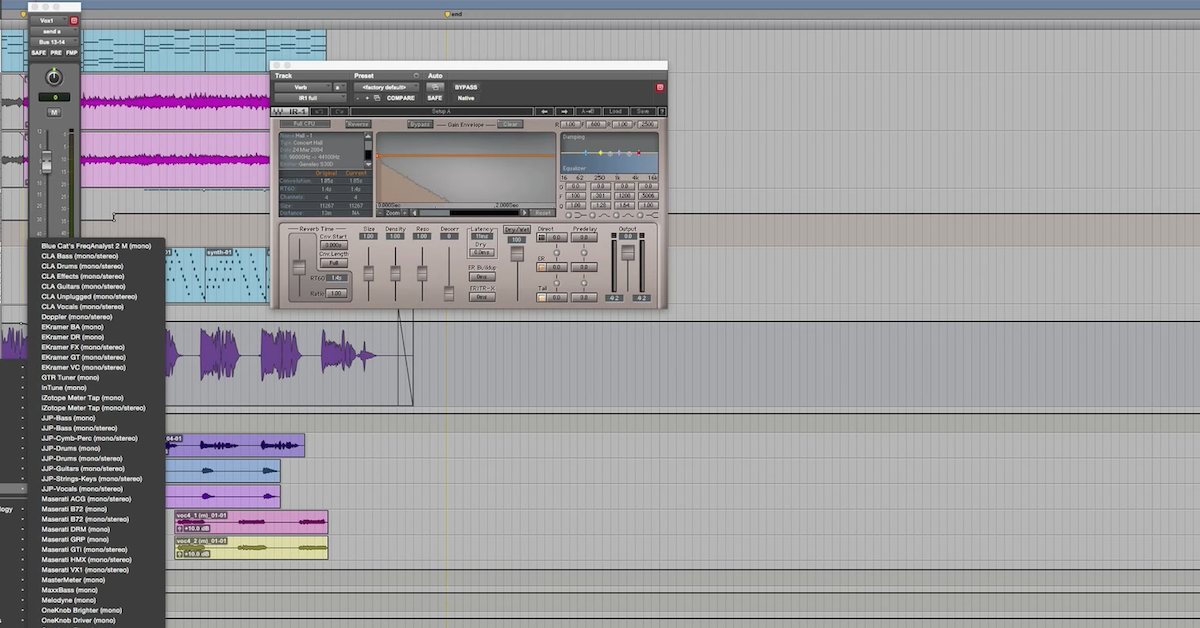
So like before, I took the signal that I was interested in, and bussed it over to a separate auxiliary track, this time called vocal verb, and inserted my reverb plug-in, the Waves IR-L, and loaded an impulse response. This time, the impulse comes from the Bricasti M7.
I’m going to process it so that I can change the perception of the stereo field with a plug-in like the Waves S1 Imager. Now what I can do, is actually widen out the reverb, or I can also make it narrower. So depending on my mix, whether I’ve got a lot of other instruments that are filling out the stereo field, maybe panned hard left and hard right, I can make the reverb narrower so they don’t get in the way of the other instruments, or the oppposite is the case. Maybe I actually want to use my reverb to fill out the stereo field. So just by processing it like this, making it wider or narrower, I can accomplish this. I’ll even solo these so that you can really hear it by itself.
[vocals with heavy reverb]
More of a mono reverb, or extra wide.
This is one way that you can fit your reverb in with all the other instruments in your track. You can even change it depending on what part of the song it is. Maybe in the verse, you want a narrow reverb and make it wider for the chorus.
Another way to go about doing this would be to use a different plug-in. Here’s the Waves Center plug-in. It actually performs mid/side processing.
In this case, what I’m going to do is carve out the center so I only have the signal on the sides, or I can only carve out the sides and have the signal in the center.
[vocal with heavy reverb]
This is another way that you can actually change the perception of width, such that during different parts of your song, you make it more of a mono reverb, or during other parts of your song, you make it more wide and more of a stereo reverb.
If you want to get crazy with this, you can come in here on your vocal reverb, you can duplicate it, devote one of these just to be the center, and go over to the other one, and pull out the center.
Now you have a mid/side matrix for your reverb.
[vocal with heavy reverb]
Now, you can do things like process these independently by adding other plug-ins in there. So again, you could add modulation kind of effects, or you could also add in this kind of dynamics processing that I showed you in the previous part of the video where I showed you upwards expansion or downwards compression to change the length of your convolution reverb, either on the sides, or in the center.
Hopefully I gave you guys a bunch of new ideas on how to use convolution reverb to make it very flexible, so that you can apply it to your track and really dial in the settings that fit well with your song.
Again, don’t just feel like you can use these techniques on vocals and drums. Apply them all over the place and see what works for you.
I’d love to get your comments and feedback on this. I’ll be checking them below. Until next time, take care guys.
Elevate Your Ears