How to Set Compressor Attack & Release Times
09/2/2021
Article Content
Let me state the obvious: too much badly dialed compression has probably ruined more mixes than any other cause. Trying to understand that better is likely the reason you clicked through to this article. Beyond simply overcompressing during production or in a mix, sloppy attack and release times are probably the easiest way to get compression wrong.
Before we look at how to find the attack and release sweet spot, let’s break down what these controls are about first.
Attack & Release
Attack and release times are about how quickly the compressor interacts with the sound you’re processing.
The attack time determines how long it will take the compressor to introduce the full amount of gain reduction after the incoming signal crosses the threshold. If I set a 5 ms attack time at a 4:1 ratio, then the compressor will introduce compression over a 5 ms window until it reaches the full 4:1 ratio of reduction — though the knee will affect this behavior as well.
The release time tells the compressor when to “let go” after that signal drops back down below the threshold.
On paper, these might seem like unimportant details, but in practice attack and release can be pretty make-or-break.
Why Are You Using Compression?
Compressors are tools, and like lots of tools, there’s more than one way to use them. Are you going for transparent or aggressive? Big picture dynamic leveling, or fine-tuning transients?
Compressing a vocal is inherently different from compressing a kick drum. For that matter, compressing a thin, snappy kick is different from compressing an 808 kick. Attack and release times are at the heart of how those applications are different. The point is, identify why you’re using a compressor before you start twisting knobs. It’s an easy first step that will make it much easier to get a result you like.
Understanding Attack Times
To help understand attack times, let’s look for a moment at the Empirical Labs Distressor. It’s a studio staple, and it’s also famous for being a real Swiss Army Knife. It does fast, slow, aggressive, transparent — you name it.
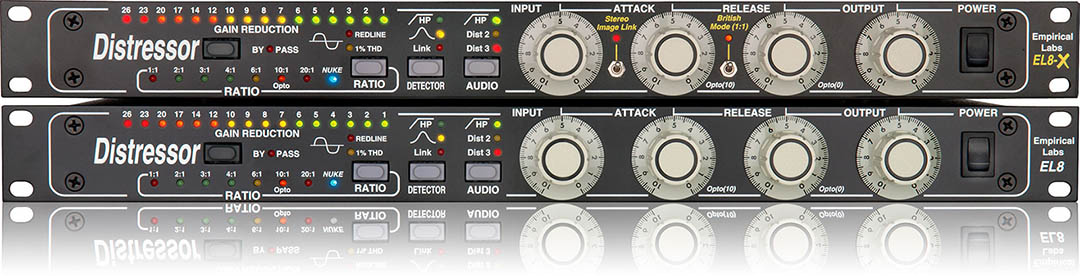
The Distressor’s wide range of very usable attack times helps it earn its reputation as a super versatile compressor
The Distressor’s fastest attack time is 50 us. That’s 50 microseconds, or 5% of 1 millisecond — lightning fast. Its slowest attack time is 30 ms, which is the slowest attack many compressors offer. In other words, that range of 50 us to 30 ms encompasses just about all the attack times you’ll need for recording or mixing.
If you’re new to using compression, I’d suggest you think of attack times like this:
- 0-1 ms is fast
- 1-10 ms is moderate
- 10-30ish ms is slow
- Above 50 ms is probably not useful for mixing or tracking
The operative question here is: how much of the initial attack of a given instrument does it need in order to sit right in the mix? Are you trying to sculpt it or squash it?
Fast Attack: The Transient Tamer
Fast attack times are great any time we want to add weight to a sound or tame spiky transients. They will tend to help emphasize the sustain of the sound being compressed.
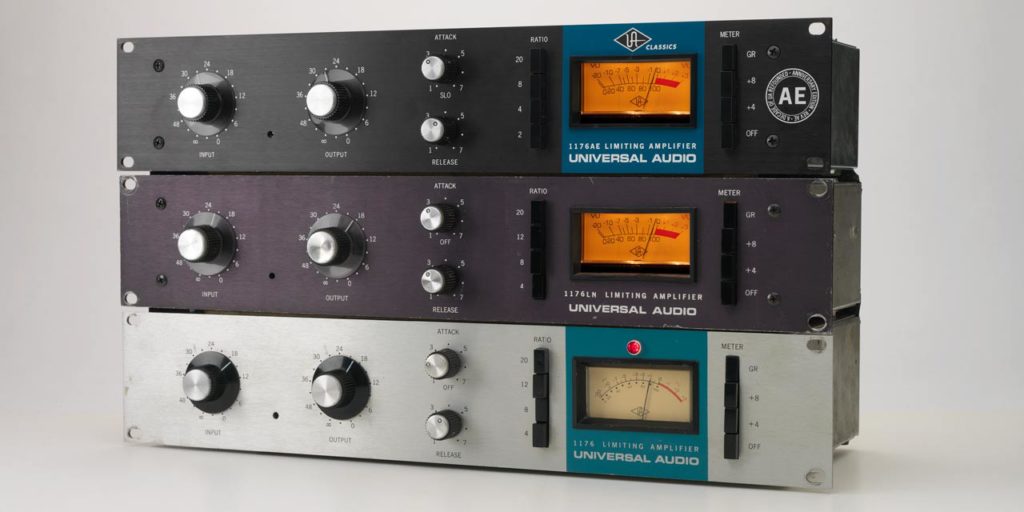
The 1176 basically only does fast attack compression, which makes it perfect for everything from surgical dynamic control to explosive parallel processing
Melodic instruments like electric guitar and glockenspiel often have more attack than they need — the initial spike might be loud, but the part you actually want to hear, the sustaining note, is much quieter. Clamp down fast on that transient and let it ring!
Faster attack times are also often useful for vocals. A compressor with a fast attack time can really help level out the dynamics of the performance, especially when used in combination with a slower compressor. Do a little reduction with both for best results.
Fast attack times are also great for drums when they have too much snap and too little weight. The second part of that sentence is important, though. If punch is lacking, fast attack compression is likely going to make the problem worse. If weight and sustain are what you’re after, make like Vin Diesel and get fast and furious.
Moderate Attack: The All-Arounder
Moderate attack times — basically single digit ms values — are great when you need dynamic control and don’t want to obliterate transients completely.
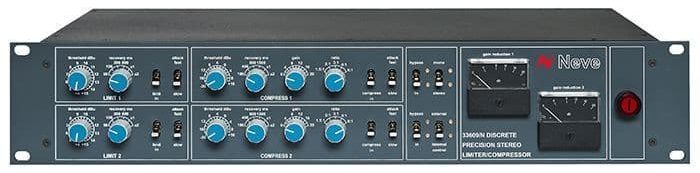
The Neve 33609’s moderate attack makes it a great choice for splatty drums and nicely-leveled buss compression
Instruments that are capable of producing quick, punctuated sounds as well as fluid, sustaining sounds are often good candidates for attack times around or lower than 10 ms. Vocals are the obvious example here, but woodwinds, brass and bowed strings often work well with compression settings similar to what you might use for vocals. All are capable of a range of articulations, but without the sort of “snap” that you might want to tame in an instrument like guitar.
Bass is another instrument that does well with moderate attack times, though more aggressive bass player’s tracks may require more transient taming than ones played with a gentler touch.
Moderate to fast attack times are also useful for drum compression, especially when used in parallel. That sort of compression can be a great way to add body without sacrificing too much articulation.
You might be thinking at this point that moderate attack times are the way to go, and if you are I’d say you’re half right. Great mixes are the result of making definitive choices. Moderation is not the right choice all the time — be bold when it works, and use a gentler touch when you need to.
Slow Attack: Punch and Transparency
Slow attack times — roughly 10 ms and higher — are great when we want to preserve or accentuate transients or achieve an especially transparent result. I tend to use attack times in this range for buss compression and most (but definitely not all) drum compression.
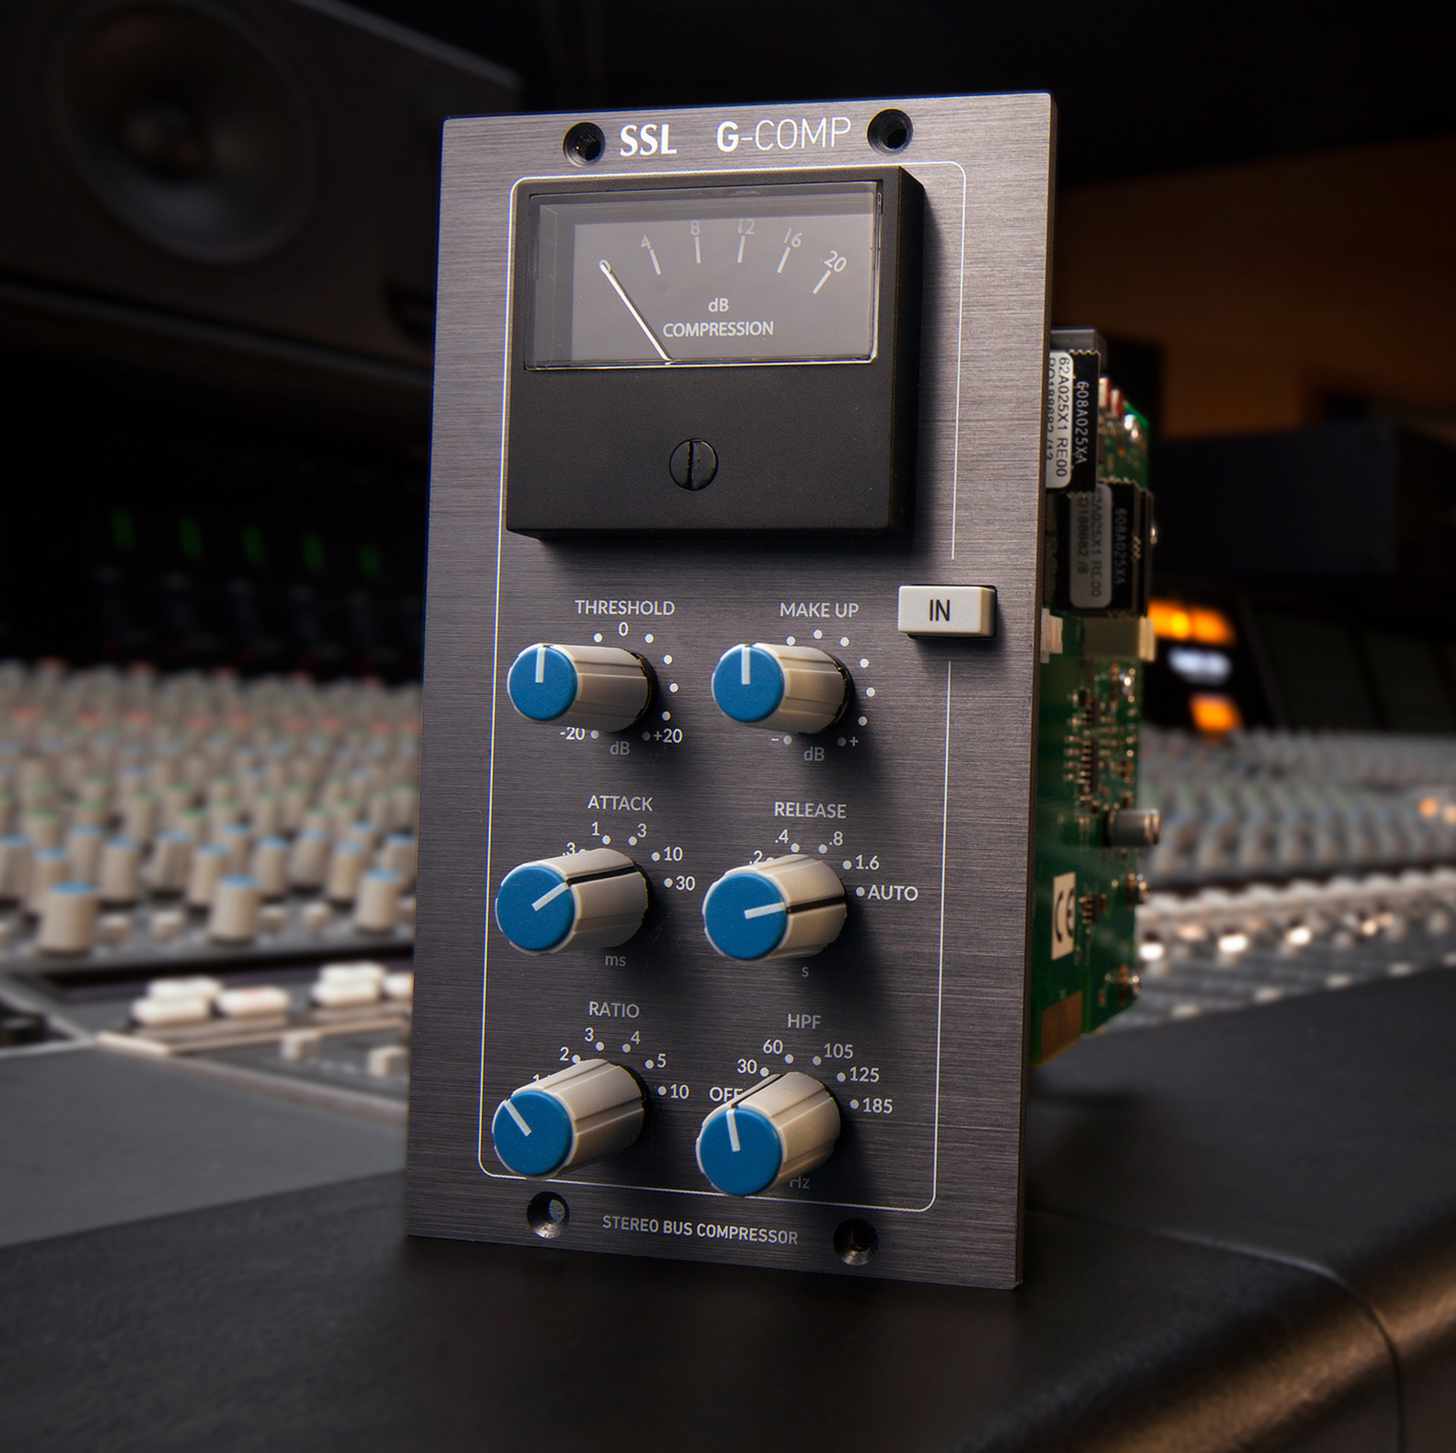
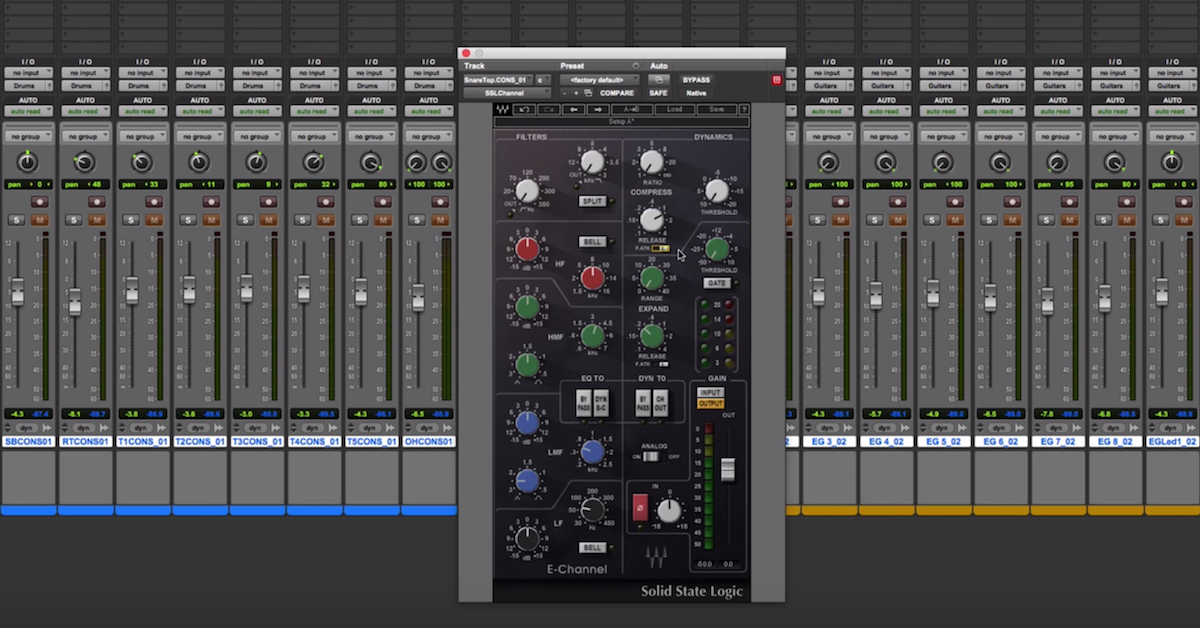
The SSL G-Series compressor is kind of bulletproof for buss compression. There’s that 30 ms attack setting again…
Remember how I mentioned that 30 ms is often the slowest attack time offered on compressors? That isn’t an accident. Though the exact duration of transients varies, and will sometimes be much shorter, 30 ms (give or take) is the window of time in which the “punchiness” of a sound really makes itself known.
When compressing individual drums, I’ll often use attack times from 15-30 ms when I want to accentuate the initial snap, not clamp down on it. I will also almost always go for a 30 ms attack time on my main drum buss compressor.
Slower attack times are also helpful for mix buss compression and mastering. They allow louder moments to pass through untouched, maintaining their impact, while reducing the chance that one spike in volume might cause audible pumping.
When punch or transparency is your goal, try starting with a slower compressor attack time. Of course, “punchy” and “transparent” are not synonyms for “good” (though some people do seem to use “punchy” that way). Slow attack times are great when compression needs to be polite, but don’t be afraid to be rude when that’s what will whip a mix into shape.
Setting Release Times
On a basic level, good release settings are about a couple things — they should be slow enough not to cause audible pumping or artifacts, but fast enough that gain reduction triggered by the last note or phrase doesn’t linger into the next. I typically rely on a few guides to help me know when I’ve hit the sweet spot:
Trust the Numbers
I’ve recommended using a chart like the one below to determine compressor release times (as well as delay and reverb times) in my videos:
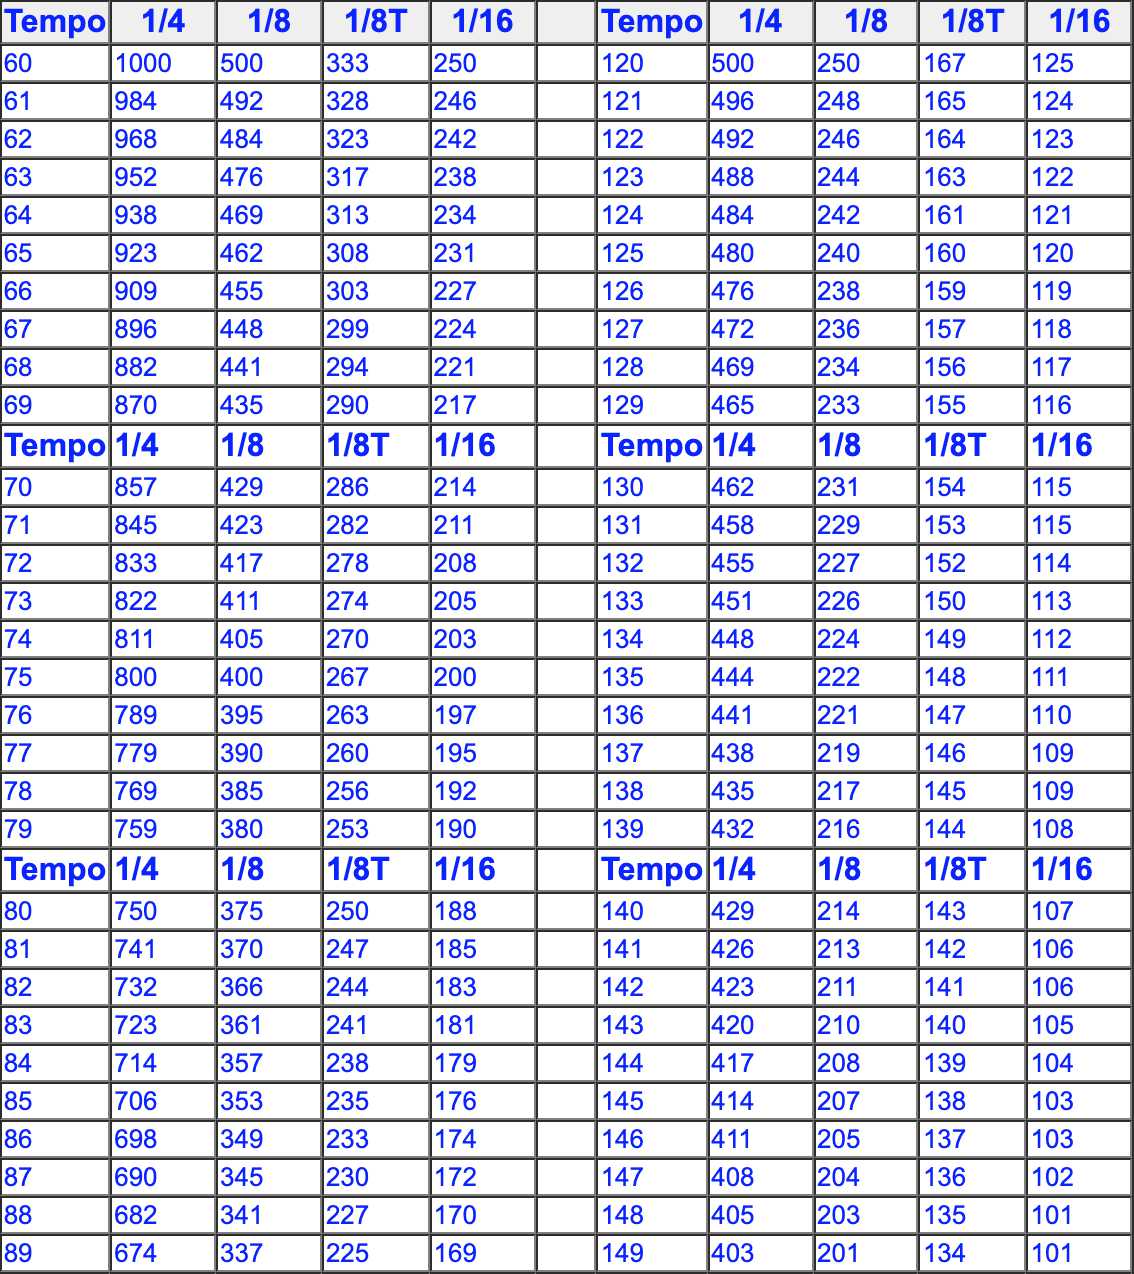
The idea here is pretty simple: you can use musically derived values to achieve a more musical result. Look up the tempo of the song you’re working on, and find a note value that corresponds best to the nature of the material or the pace of the part.

Ready to elevate your ears?
It doesn’t have to take years to train your ears.
Get started today — and you’ll be amazed at how quickly using Quiztones for just a few minutes a day will improve your mixes, recordings, and productions!
Slower parts, or more fluid instruments, may respond better to eighth or quarter note release values. Faster parts, and generally drums, will benefit from 16th note values or shorter. Use these times as a starting point — you may have to fiddle with them to get the compressor breathing just right.
Trust the Meter
Particularly when dialing in release times, the gain reduction meter is your friend. Look for the meter to dip back down to zero — or close to it — between notes or phrases. For quicker parts, it may not be possible to dial in compression that resets to zero reduction between each note without pumping. In those cases, find natural breaks in the part during which the compressor can “breathe.” The idea is that we want the compressor to be reacting to the music in real time. Letting compression linger from the previous phrase into the start of the new one can flatten a part and hurt its musicality.
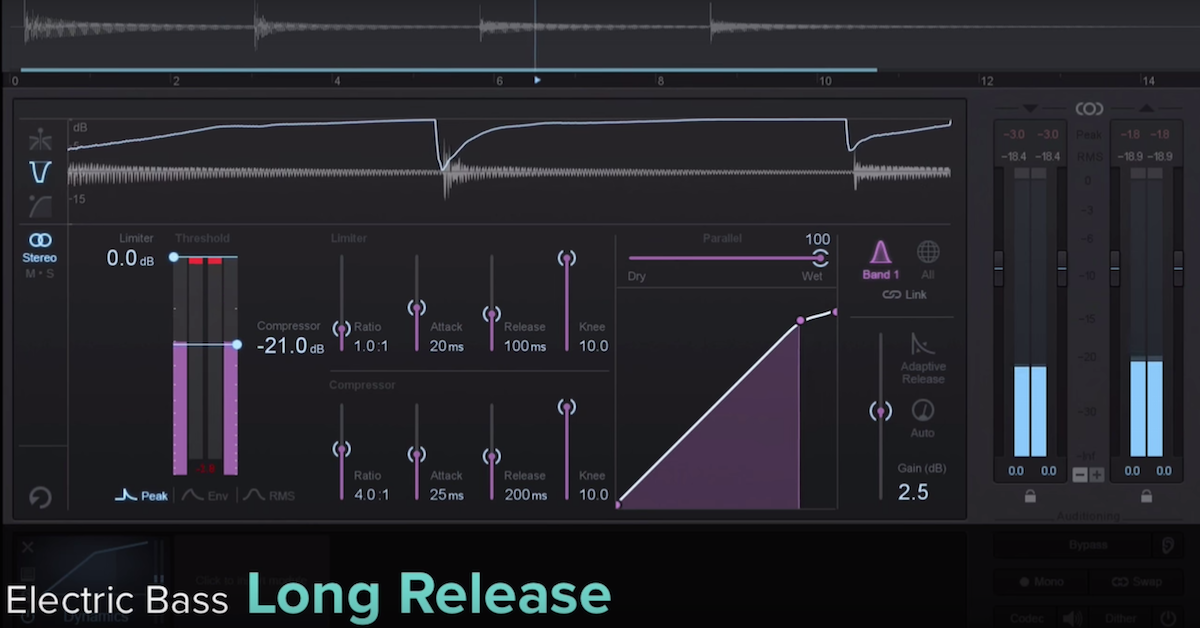
The FabFilter Pro-C 2 has one of my favorite gain reduction meters of any compressor I use. It makes it easy to see exactly how much reduction is occurring over how much time. The screenshot here shows the compressor responding to successive kick drum hits, applying reduction and returning to its baseline between each strike:
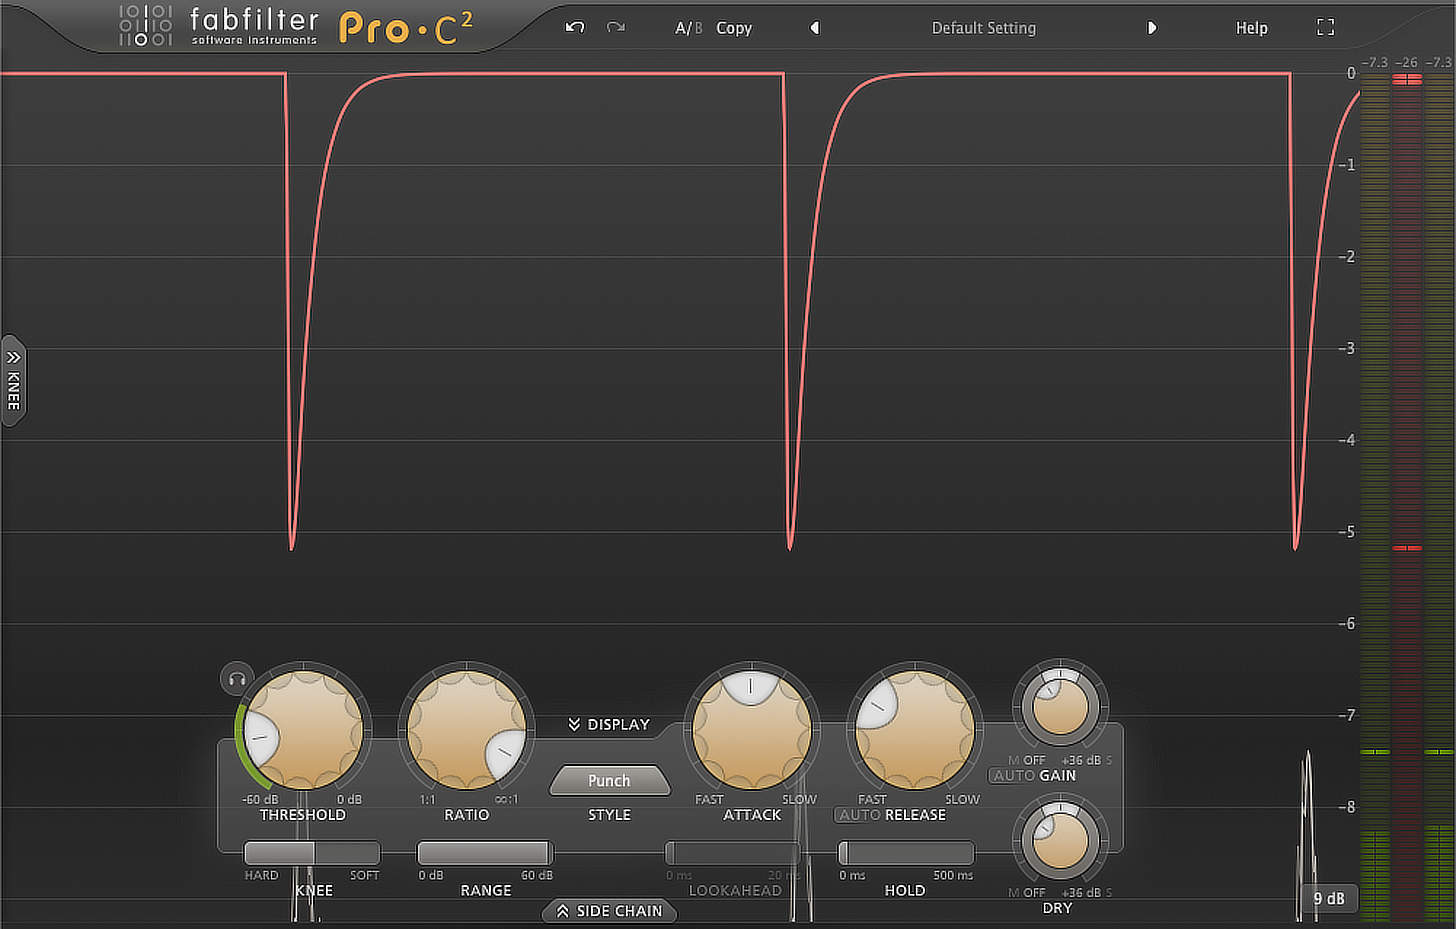
A short release time helps the gain reduction (in red) return to zero before the next hit
Trust the Compressor
If all these numbers and variables in attack and release times are making your head spin, I’ve got some good news: some of the most beloved compressors feature baked-in attack and release times. Better still, those preset times are often program dependent, meaning they will adapt to the material in a way that will tend to translate musically.
Studio staples like the LA-2A and DBX 160 are beloved, in part, for their idiot-proof interfaces. The LA-2A specifically features a multi-stage release that is almost always just right for vocals. The 160 applies a longer release time as it compresses harder, helping it deliver a smooth result even with extreme amounts of gain reduction.
If you’re really not sure where to set a compressor’s attack and release, you might just want to find a compressor (or a good emulation) that is known to be the right thing for the job.
Trust Your Ears
Ultimately, none of the methods I just mentioned matter all that much if they don’t produce the right result. Music isn’t a piece of Ikea furniture — you can’t expect to follow a uniform set of directions and get the same results every time.
I wish I could tell you that there is a single bulletproof setting for compressing a lead vocal, or a kick drum, or a bass synth. Unfortunately, however, the best method is going to depend on the result you’re trying to get and the material you’re working with.
That’s why understanding the goal for compression in a given instance is so important. It’s hard to hear whether a compressor is helping or hurting your mix until you have a clear sense of what helping or hurting means and sounds like.
Do you hear unwanted pumping in the part? Does the track disappear in the mix when it isn’t soloed? Is there unwanted coloration or saturation with the compressor engaged? These are some telltale signs of poorly dialed compression. If you don’t know how to identify them when they happen, it’s worth it to practice listening for them — and to practice listening for the kind of compression behavior you actually like.
Conclusion
There’s potentially a lot to remember in this article, but the foundation of setting compressor attack and release times is pretty simple.
Attack times will broadly determine whether your compressor is polite to transients, or whether it flattens them out (or something in between). It will also play an important role in how transparent the compression sounds, with slower times being less likely to cause unwanted pumping and artifacts.
Release times are all about getting the compressor to “breathe” in a musical way. Gain reduction shouldn’t linger too long, but also shouldn’t happen so fast that listeners can hear distracting pumping or distortion in the mix.
As always, your judgment is what matters most. Practice listening for what you like and don’t like in compression, and you’ll have no problem dialing in the right amount of compression, every time.
Tips for Setting Compressor Attack and Release

Eleveate Your Ears