11 Favorite Tips for Mixing with Delay
04/30/2022
Article Content
A while back, I wrote an article with tips for using reverb in a mix, and I thought I’d do a follow up about its cousin, delay. While reverbs emulate the way a sound resonates in acoustic space, creating a continuous tail, delay creates distinct, individual and often rhythmic repeats of a sound.
Reverb and delay share some similarities, and can both be used to create depth and ambience in a mix. Delay is ultimately its own beast, though, and invites its own set of creative uses.
In this article I’m going to take a look at some of my favorite uses for delay in a mix, as well as some of the ways I make sure I’m getting it right.
1. Nail the Timing
As basic as this tip might seem, you’d be surprised how many people screw up the timing of delays in a mix. Generally, delays should be timed so they work with the tempo of a song. Most software delays will sync with the tempo in your DAW, which makes choosing the right delay time pretty easy. Demo a couple options and choose the one that sits right in the mix.
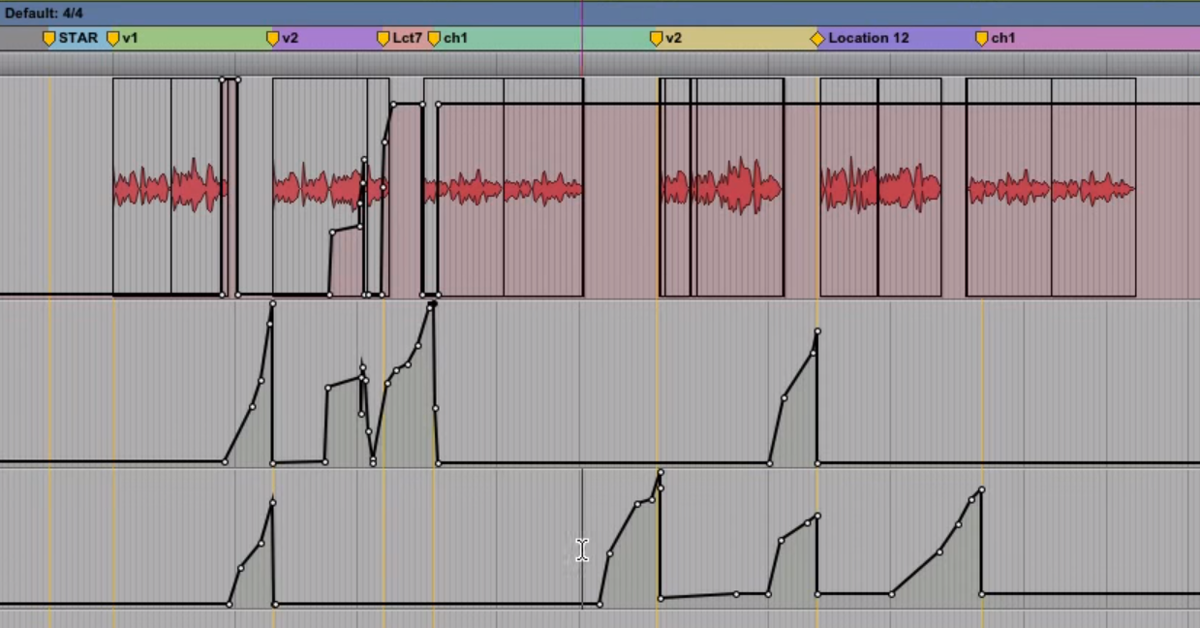
For most basic applications, straight note values — ¼, ⅛, etc. — will work best, though triplet delays are common in dub mixes, For example, listen to the triplet echo on the lead vocal:

Dotted delays can create cool rhythmic tension, as well as shimmery guitar textures, a la U2’s The Edge:

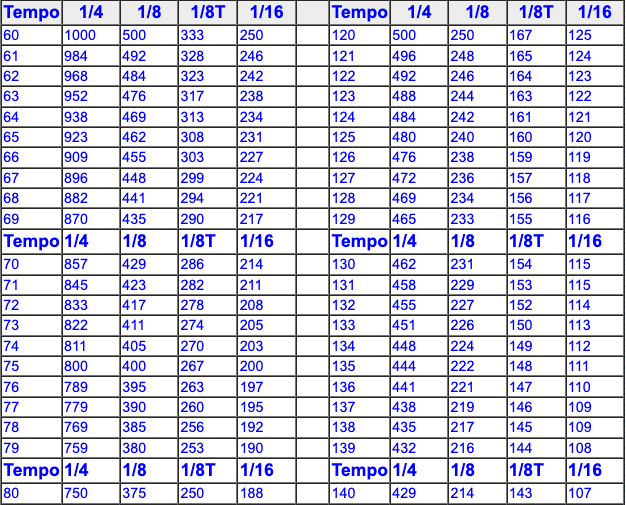
If you happen to be working with a delay that doesn’t tempo sync with your DAW, consult a handy bpm-to-ms chart like this one:
A Tip for Tape
One of my most beloved pieces of hardware is a Roland Space Echo tape delay that offers nothing in the way of numerical info about delay times. When I’m dialing in delay, I’ll often start by routing a snare drum or click track to the delay. The idea is to use something rhythmically consistent to help get the timing figured out — it’s usually easier than trying to gauge it with a more fluid part like a vocal. Once I’ve got it dialed in, then I’ll route the track I actually want delay on and hit record.
2. Figure Out What You’re Doing With the Mix Control
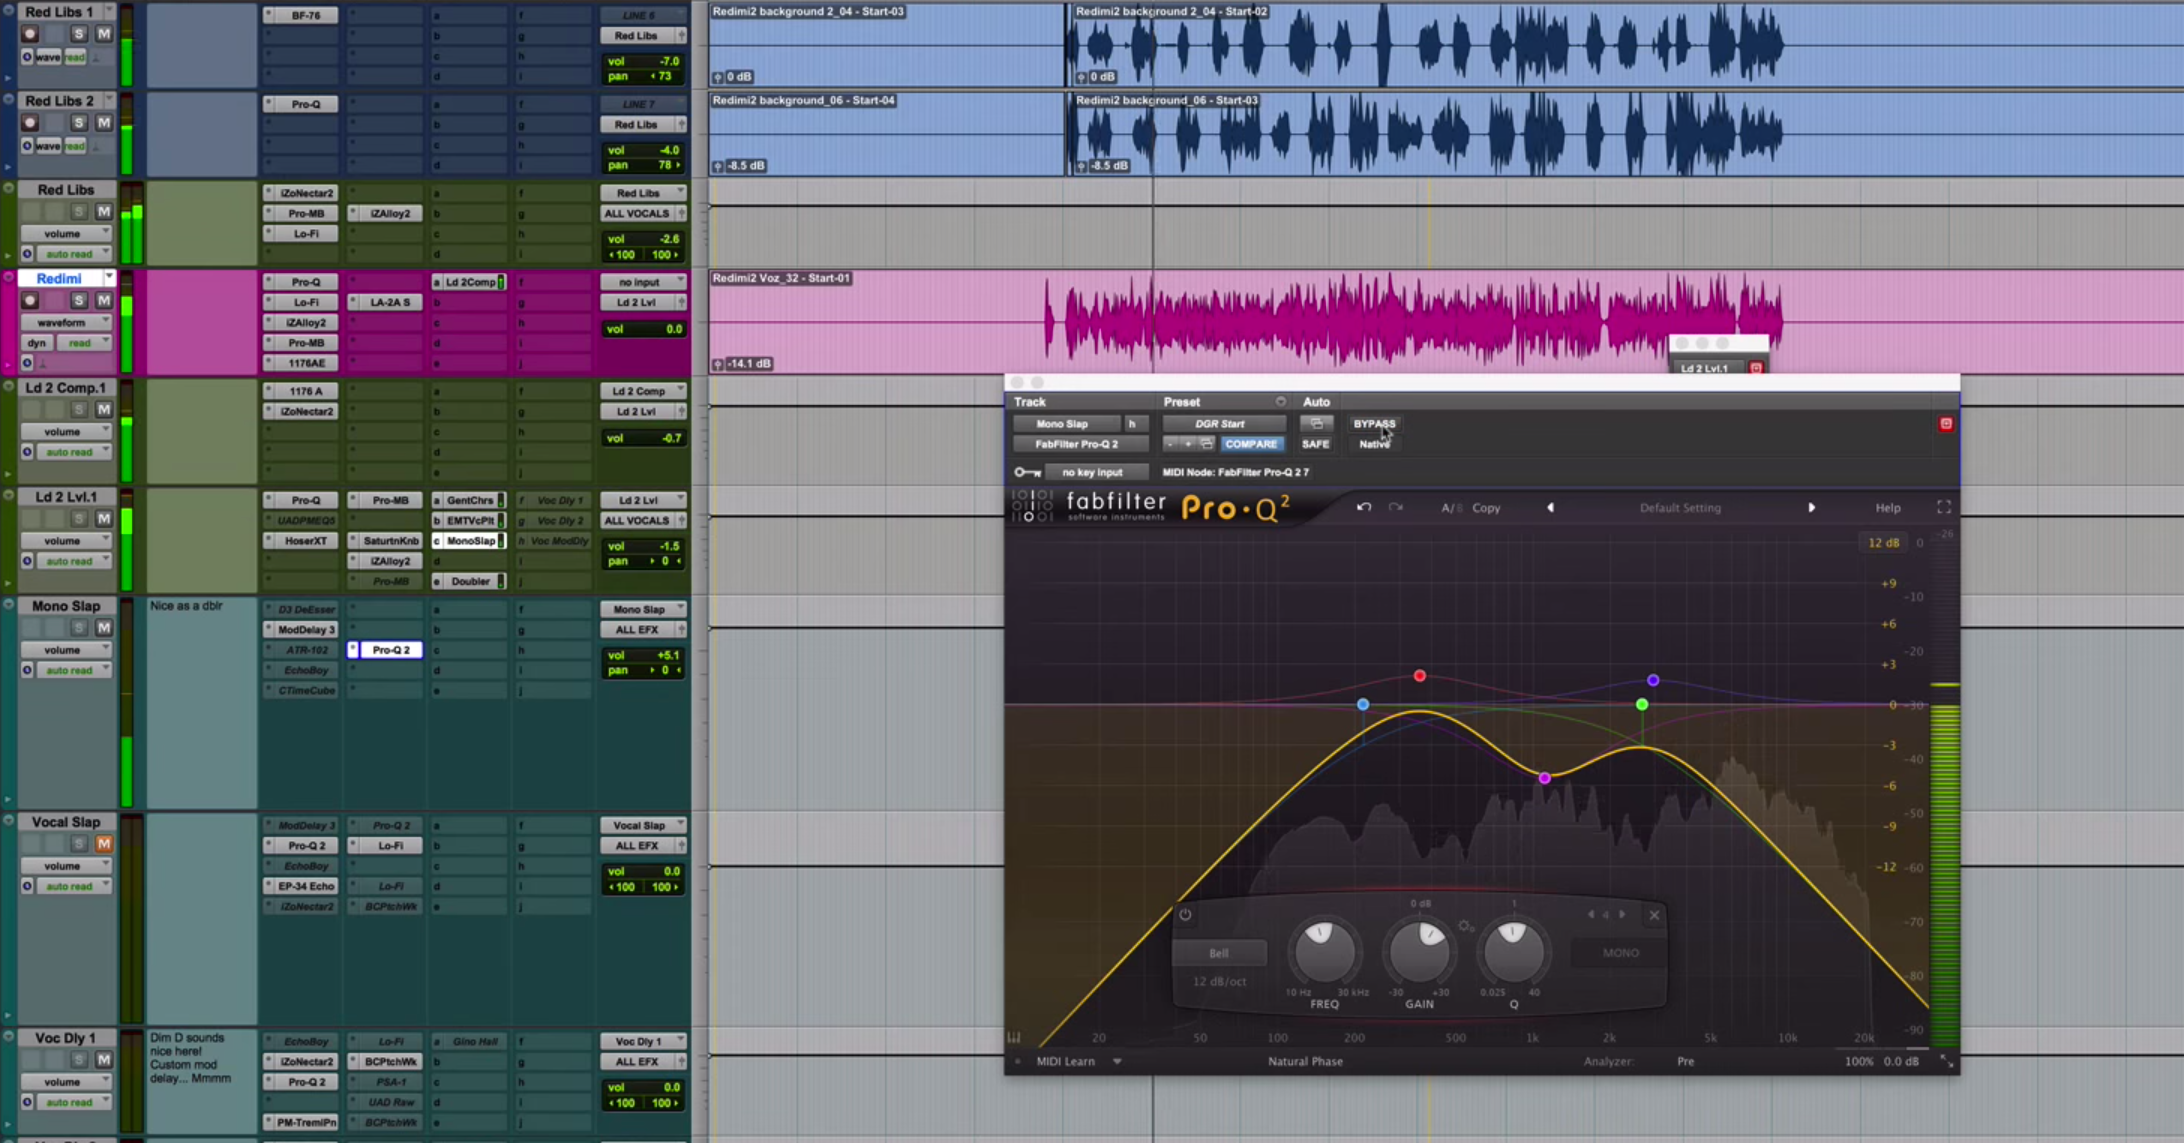
One of the most common problems I see in muddy mixes is misuse of the mix control on delay sends. Though there are certainly exceptions, typically you’ll use the mix knob to blend delay if you’re using it as an insert (directly on an audio track). If you’re using delay on a send, leave the blend at 100% and use the fader on the return track (or the level of the send itself) to control the amount of delay in the mix.
To understand why, let’s imagine for a second that you ignore this advice and use a delay’s mix control for a delay on an effects send. You send, let’s say, a vocal track to a delay buss, then dial the mix control back to 50%.
What that means, then, is that 50% of whatever signal you route to that return is coming out dry, which in effect is raising the volume of your dry vocal (not to mention potentially creating problematic phase interactions with it). If you send more of the vocal track to the send, then you’re effectively turning up the dry vocal as well as adding delay. Or, on the other hand, if you turn the mix control up, you’ll suddenly find the dry vocal getting quieter.
This kind of mistake makes a basic mix technique unnecessarily complicated — it’s an added headache with no added sonic benefit. I need to be able to turn a delay send up or down without worrying about domino effect implications for the dry track feeding it. Keep it simple, ok? When delay is an insert on a track, use the mix knob. When it’s on a send, keep the mix at 100% and use the fader to blend it.
3. Use Filters
I gave a similar tip in my article on mixing with reverb, but the same applies here: for best results, try pairing delay with filters.
I’m not specifying whether I mean low or high-pass filters here because both have their place. I will almost always place a high-pass filter on a delay send in order to keep it from muddying up a mix. Try a filter with a cutoff between 200-600 Hz — you’ll hear a more “open” delay that adds less clutter.
Low-pass filters can also be helpful to keep delay from being too assertive, pushing it farther into the background. It also can keep a delay from muddying the articulations of instruments like drums that rely on high frequency content to define their attack.
Check your favorite delay plugins for built-in filter controls before adding your own. These are often the best place to start, and essential when using delay as an insert effect.
4. Use Delay Subtly to Smooth Tracks Out
I’m a fan of some pretty cosmic, dubbed-out music, but a “spiraling vortex” vibe is far from the only thing delay is good for. In fact, subtly used delay can be a great way to add smooth, silky depth to a track.
Try dialing in delay with little enough feedback that discrete repetitions aren’t audible, with a short enough delay time that it isn’t noticeable as a separate event from the dry track. Then, bring that delay down just to where you notice it, and just a little further down from there.
What you’ll notice is sort of a “glow” that adds softness and polish to a track. I’ll often use delay in this sort of way in situations where I might otherwise use a room reverb, like on a lead vocal.
5. Pan Mono Delays for Width + Movement
One of my favorite delay recipes goes something like this: send a mono audio track to a mono delay. Pan the dry track to one side and the delayed sound to the other. Then, time the delay so that you feel a sense of “movement” from the dry track to the wet.
This trick works really nicely for synths, turning a basic mono track into a lush stereo pad that has subtle depth and energy. It’s also great for rhythmic parts with lots of space — try it on mono guitar, piano, or synth chords when the part leaves enough room to hear the echoes in the spaces in the dry track.
6. Use Stereo Delay to Make Tracks Thicker + Wider
Stereo delays are a great way to make a mix more lush and engaging, and it works whether the source tracks are stereo or mono. The sort of delay I’m talking about here isn’t ping-pong delay, where the left and right channels have their own distinct rhythms that “ping pong” from side to side. Rather, I’m talking about delays with slight differences between the left and right delay times.
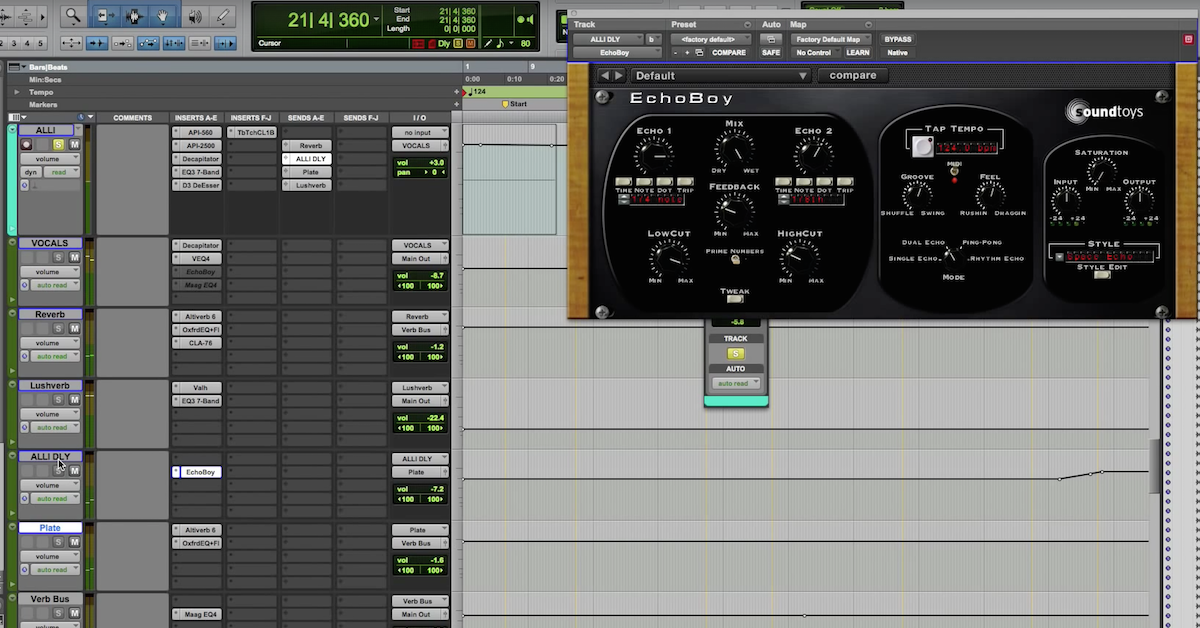
An easy way to do this is to set a tempo-synced stereo delay to the desired repeat length, then un-sync one side. Turn the delay time up or down by a few milliseconds, and listen to the way the delay now fills the stereo field. This can be a great way to make a melodic instrument or lead vocal feel full and lush, bigger and wider without imposing on the rest of the mix.
Left and right delay times are offset by a few ms, creating a more engaging stereo delay.
7. Use Super-Short Delays to Thicken Backup Vocals
A similar use of stereo delay involves using very short delay times to create the illusion of a bigger group of backup singers. I’ll use a stereo delay where the left and right channels are both set to short enough times so as not to be rhythmically distinct — usually somewhere in the range of 20-60 ms.

Ready to elevate your ears?
It doesn’t have to take years to train your ears.
Get started today — and you’ll be amazed at how quickly using Quiztones for just a few minutes a day will improve your mixes, recordings, and productions!
Most often, I’ll put this delay as an insert on my backup vocal submix, dialing the mix control down to 20% or lower. The effect is to create the sense that there are additional members of the group who are perpetually just a little bit behind everybody else. It isn’t noticeable as delay, but makes the group sound bigger and more robust.
8. Use Rhythmic Delay to Fill Out a Drum Part
When I say “rhythmic delay,” I’m not talking about slap-back echo or subtle ambience. I’m talking about delay that’s long enough to be heard as its own event, specifically timed to work in rhythm with the song. This sort of delay can be a great way to fill out and add movement to a drum groove (or any rhythmic element in a mix, really).
The idea here is pretty simple: time the delay to a note value — most likely ¼ or ⅛, though this will depend on the tempo of the song and the content of the drum part — where you hear it interacting with the dry beat. Dotted-note delays can work really nicely in this sort of setting too.
Use moderate amounts of feedback at most — the delay should feel like it’s bouncing off the dry drums and creating movement, not drowning the drums in a soupy haze. This technique tends to really shine when used with beats that leave a lot of space. The delay is going to do some of the rhythmic lifting here, so less is definitely more as you write the drum part.
9. Use Self-Oscillation and Automation to Turn Delay Into Its Own Instrument
One of the coolest features of hardware tape delays is their ability to self-oscillate. This means that the delay’s feedback recycles endlessly until it becomes its own, droning pitch. Even if you’re confined to in-the-box delays, there are plenty of plugins that are capable of self-oscillation.
Crank the feedback on a delay until the sound sustains itself, mutating as it lingers. The result can get pretty distorted and intense, but that’s the point!
If you’re working with hardware, you can use the knobs to “play” the delay. The delay time works to pitch the feedback up or down, while the feedback will control the intensity of the oscillation, or fade it out when you’re ready. If you’re working strictly in the box, you can automate these parameters to get the same effect. A MIDI controller with assignable knobs can make this a lot easier — and more fun.
If you clicked into this article specifically because you were looking for “soupy haze” or “spiraling vortex” uses of delay, by the way, self-oscillation is where it’s at. Comets on Fire’s dedicated use of an Echoplex in their lineup is one of my favorite examples:

10. Pair Delay With Reverb for a Deeper Mix
Reverb and delay can both, individually, have the effect of pushing tracks into the “background” of a mix. Used together, they can create the sense of that background being even deeper, as well as creating separation that can keep dry tracks distinct when ambient effects are intense.
Try this: use a send output on a delay return track to then send that delay to a reverb. Use a plate reverb, or something else that sounds lush and dramatic. The effect this produces can give the sense that delay is living further in the background of a mix. It can also help create a bit of separation between the dry track and its reverb, sort of like a more intense version of the pre-delay control on a reverb.
11. Compress It, Saturate It
I gave a similar tip in my article on using reverbs, and it works the same way here. Compression and saturation, paired with delay, can be great tools to extend decay length and make delay pop — all in a controlled way that doesn’t make a mix messy.
I will very frequently use a tape emulation or other favorite saturation plugin on a delay return track just after the delay plugin. Just before can work too, though it will do less to extend decay time. I will also commonly route dry tracks as well as effects returns to a submix buss, where the whole group will get one last subtle dose of compression to “glue” it all together.
One thing to keep in mind is that, after compressing or saturating a delay, you may find that you need to dial back the feedback, the amount of delay or both. This combination will tend to make less feel like more, so use your judgment to find the sweet spot.
Conclusion
This is far from a complete list of the ways you can use delay in a mix, but hopefully it’s given you some ideas to work with. Always keep in mind that delay is an effect that rewards experimentation — use it as an ambient effect, as a doubler or as an instrument itself. You really are limited only by your own creativity!
Eleveate Your Ears