10 Mistakes to Avoid When Recording Electric Guitar
Article Content
Being that guitar is my primary instrument, I tend to obsess over the details when recording it. The perfect recorded guitar tone is something I can hear in my head, but I’m not sure I’ve ever actually obtained it. It is my white whale, so to speak. That said, I’ve recorded plenty of guitars in my day, and I’ve learned what to do and what not to do when recording them. The good news is that amplified electric guitars captured correctly at the source when recording are actually one of the easiest instruments to mix.
Whether you are recording yourself playing or engineering for others, here are some things to avoid when recording electric guitars.
1. Make Sure the Instrument Is In Tune, Obviously
This shouldn’t have to be said, but here we are. For all that is great about electric guitars, they can be a bit finicky when it comes to staying in tune. There are a lot of great tuners on the market, from pedals, to clip-on tuners and even plugins.
Unfortunately, even if you do use a tuner and achieve perfect tuning when playing open strings, the instrument’s intonation might be off, meaning certain notes up and down the fretboard may be slightly sharp or flat. One of my first electric guitars (I won’t mention the make or model) had a G-string that gave me a lot of grief, and even a professional setup (which I strongly recommend getting every so often) didn’t remedy the issue.
Pay attention to both tuning and intonation when recording electric guitars, especially distorted ones. When multiple notes are played at the same time on a heavily distorted electric guitar, harmonics are created, making these issues even more obvious (and terrible sounding).
2. Avoid Recording With Old Strings
This is another one that is somewhat obvious but has a significant effect on the tonality of the instrument. Older guitar strings have a dull, flat tone to them and can severely hamper a guitar from being able to cut through a mix. In addition to this, older strings can have issues staying in tune. Lastly, really old strings develop a disgusting layer of brown filth that coats them. Please change them.
Brand new strings feel and look fresh but do require a short breaking in period before they stay in tune tune and warm up a bit, tonally-speaking.
3. Mic’ing Mistakes:
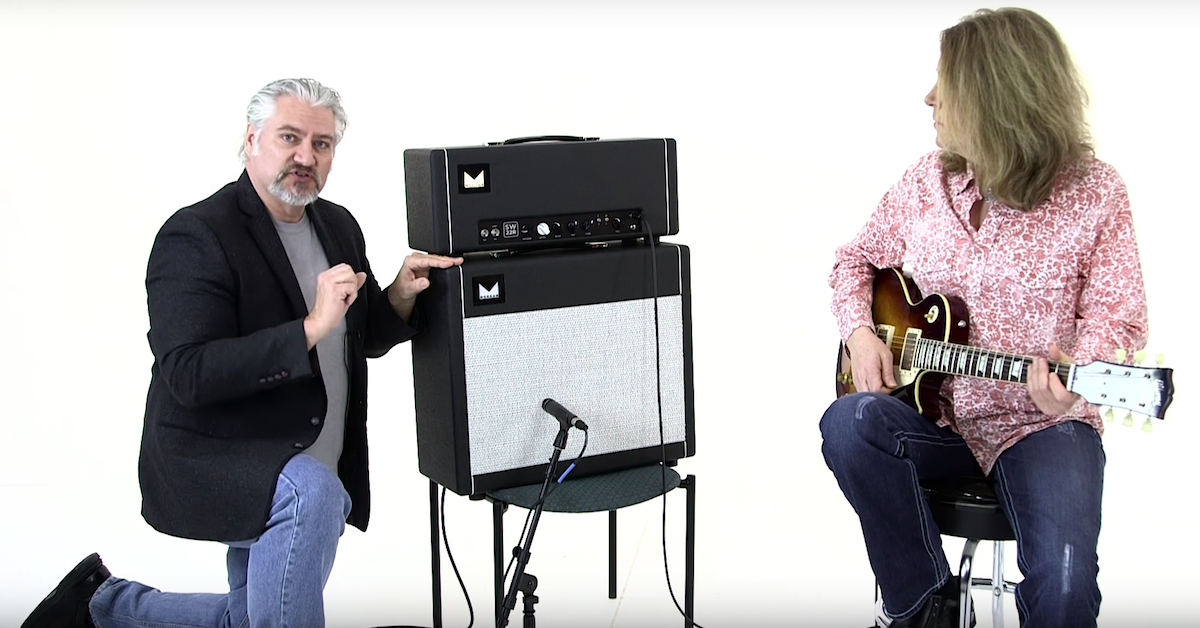
You can slap a Shure SM57 in front of an amplifier and expect serviceable results, but you’re much better off doing a bit of experimentation with mic placement, types of microphones used and where the amplifier is placed in the room. Avoid recording with amplifiers placed flush against a wall, as that can cause any number of sonic problems and even prevent sufficient airflow which leads to overheating. Besides, if you’re using an open back amplifier, you might want to place a second microphone behind the amplifier, aimed in such a way that it is mirroring whichever microphone is placed in front. This microphone should have the polarity reversed. The resulting sound is thicker, with a rich low end that can complement the brightness of the microphone placed in front of the speaker.
If you’re able, try moving around the amplifier while it’s being played, experimenting with mic placements and angles. Find the sound that works well for the production. You might be compelled to place a microphone only a few millimeters away from the speaker, but you may find that the sound is better and more developed with the microphone placed back a few inches to a foot. Recordings created when microphones are placed closer to the center of the speaker cone are going to be brighter, whereas moving them slightly to the left or right of the cone, or at an angle (off-axis) are going to have a bit less high end information captured. You may also want to consider an amplifier stand that lifts the amp off of the floor and angles it upwards.
4. If You Use Multiple Microphones, Check the Phase and Polarity
As I mentioned, if you’re using multiple microphones (one in front of the amp and one behind), it’s important to invert the polarity of one of those signals. Similar to when recording a snare with both top and bottom microphones, not inverting the polarity can result in the compressions and rarefactions of the waves working against each other, resulting in all sorts of weird sonic deficiencies.
It’s also important to phase align any close-miked signals. If the sound wave arrives at the microphones at two slightly different times, you risk phase cancellation. This drastically effects overall sound quality, and in particular the low end. Nudge one of the files so that the compressions and rarefactions are occurring at the same time.
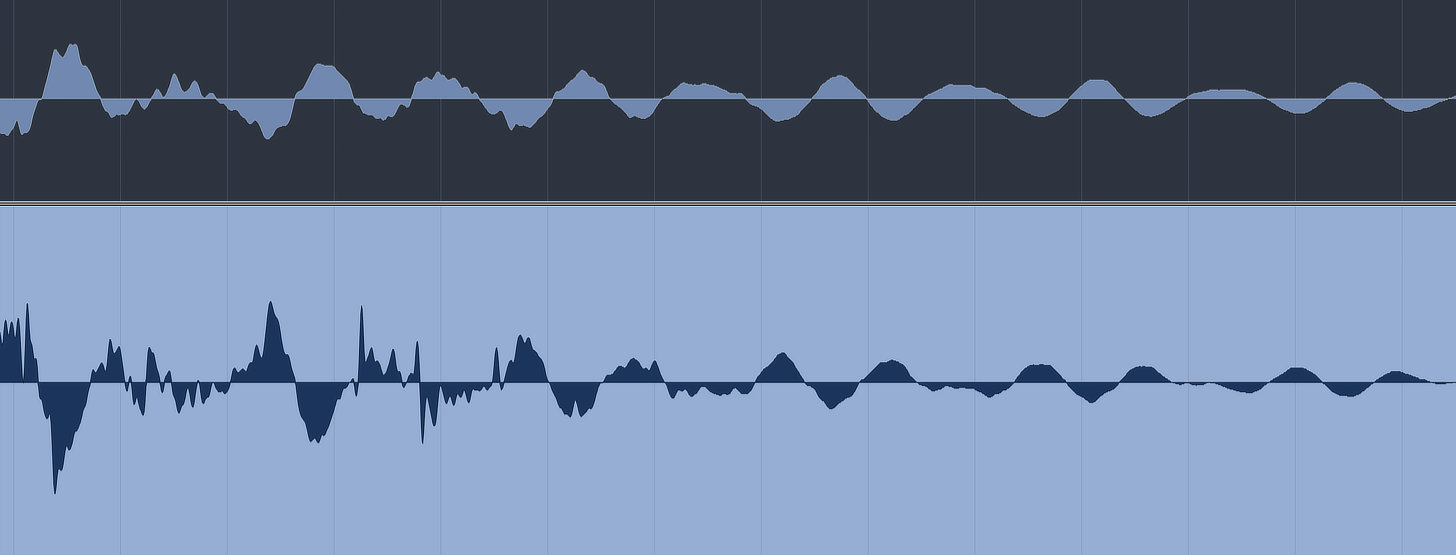
Note: look at the compressions and rarefactions of the waves working against each other in the screenshot above. The resulting sound will be quiet and thin.
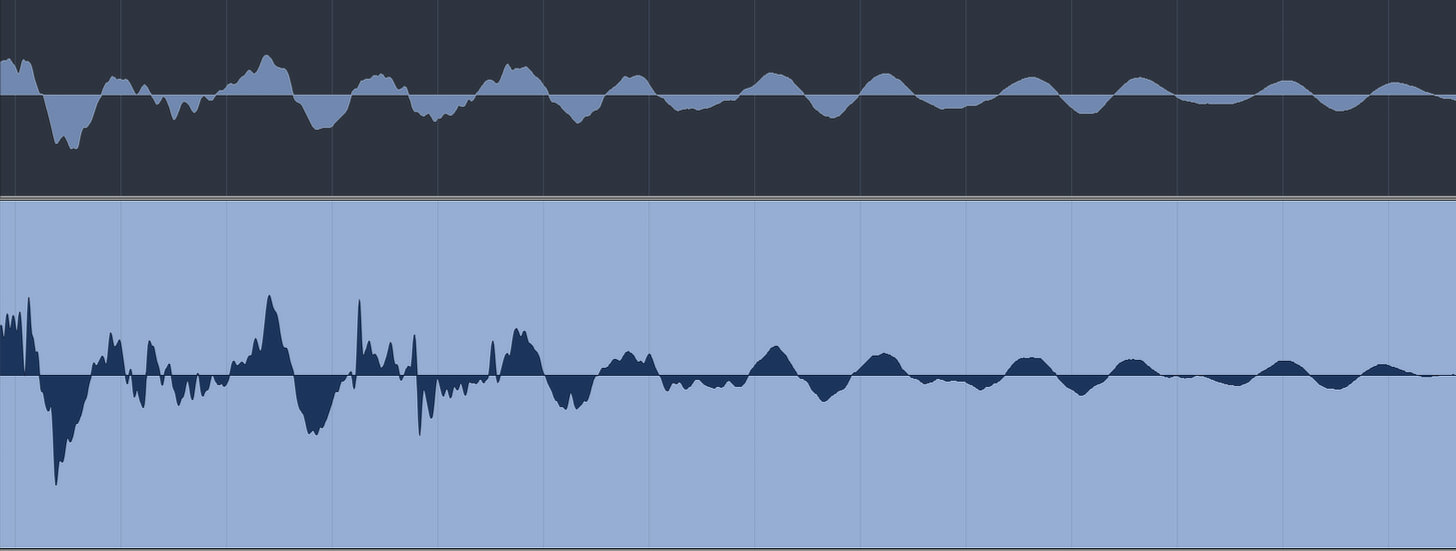
Note: by inverting the polarity of one of the audio files, the compressions and rarefactions are now going in the same direction and working together. The resulting sound is louder and fuller.
^ Before inverting the polarity of one of the files.
^ After inverting the polarity of one of the files.
5. If Recording Distorted Guitars, Find the Gain Sweet Spot
I am giving you advice here that I myself tend to disregard entirely, as I am a huge fan of electric guitar tones that have been absolutely obliterated by a combination of pedals, pushing the overdrive channels of amplifiers and driving mic preamps & plugin saturation effects. But sometimes less is more. When you’re looking for a more straightforward distortion tone, be aware of the exact point at which the distortion starts to introduce excessive high end overtones (aka “fizziness”). This will decrease string definition, clarity and overall musicality, while also raising the noise floor to unmanageable levels. While you may be tempted to dial everything up to eleven (and more power to you if the production calls for it), you might be better serviced by taking a more conservative approach.
6. If Recording Clean Guitars, Consider (Slight) Compression
Amplifiers begin to naturally compress guitar signals the harder you drive them. When played clean however, they tend to be incredibly dynamic, which can be a good thing depending on the quality of the player. I find that just a touch of subtle compression (generally via a pedal, but perhaps on the way in using a hardware compressor) helps tame the sound of an electric guitar to be a bit less harsh and “icepicky” as one of my colleagues recently stated. There are many great-sounding and affordable compressor pedals out there from both larger brands and more boutique companies. Check out these products by MXR, JHS, Electro-Harmonix, Keeley, Wampler, and Earthquaker Devices. Any one of these might be right for you, so do your research before purchasing.
7. Minimize Noise
As I mentioned before, guitars are kind of finicky in their ability to stay in tune and remain intonated. They (in conjunction with amplifiers) also tend to be noisy, especially at higher gain settings. So many variables can create noise, from internal components of the guitar and/or amplifier, to a bad cable or other factors. Be aware of this, and experiment by moving the player around the amplifier while holding the instrument, finding the sweet spot where the noise created by the relationship between the guitar and amplifier is the least prevalent.
8. Choose the Right Pickups
For a more detailed description (and sound clips) that illustrate the behaviors of different types of pickups and pickup positions, check out this article. To summarize, though, the three main types of pickups you’ll find in modern guitars are single coils, humbuckers and P-90s, which are a variant of the single coil design. Each of these have different sonic characteristics and can bring out tonal qualities of the guitar itself depending on where they are built into the instrument. Consider this when both writing and recording with the instrument, as certain songs may benefit from using the cleaner ‘”quack” of a single coil in the bridge position, whereas others might demand the rich warmth of a humbucker in the neck position. Choosing the right pickup and pickup position when recording guitar is basically the same as choosing the right microphone and microphone placement when recording a vocalist, so choose wisely.
9. Choose the Right Amp
Now this point is assuming you have the means to afford or gain access to multiple amps. I am of the belief that generally speaking, a guitarist should be able to make do with they have. But if you do have the luxury of access to multiple amps, consider their tonal qualities when recording. Any quality amplifier should be able to create a usable clean and distorted sound, but not every amp has the Fender clean sparkle, the Vox upper-midrange bite, the Marshall crunch, etc.
10. Understand When To Go DI
DI (direct inject) is a great option to have when recording guitars. For “chicka chicka” clean disco rhythms, DI is actually a preferred method. Funk/disco legend Nile Rodgers’ most famous guitar tones were recorded using a combination of going DI into a Neve 8068 console and combining this signal with a miked up Fender Deluxe Reverb. Recording with a microphone and going DI as well is advisable, as you can capture the sound of the amp in the room if you feel inspired by it in the moment, but also have the clean DI signal to do with it what you please later down the line.
Conclusion
As with any instrument, electric guitars and amplifiers have quirks that can make them a challenge to record and therefore mix, but follow the aforementioned tips to set yourself up for success.


