Miking Guitar Amps: Finding the Sweet Spot
04/29/2016
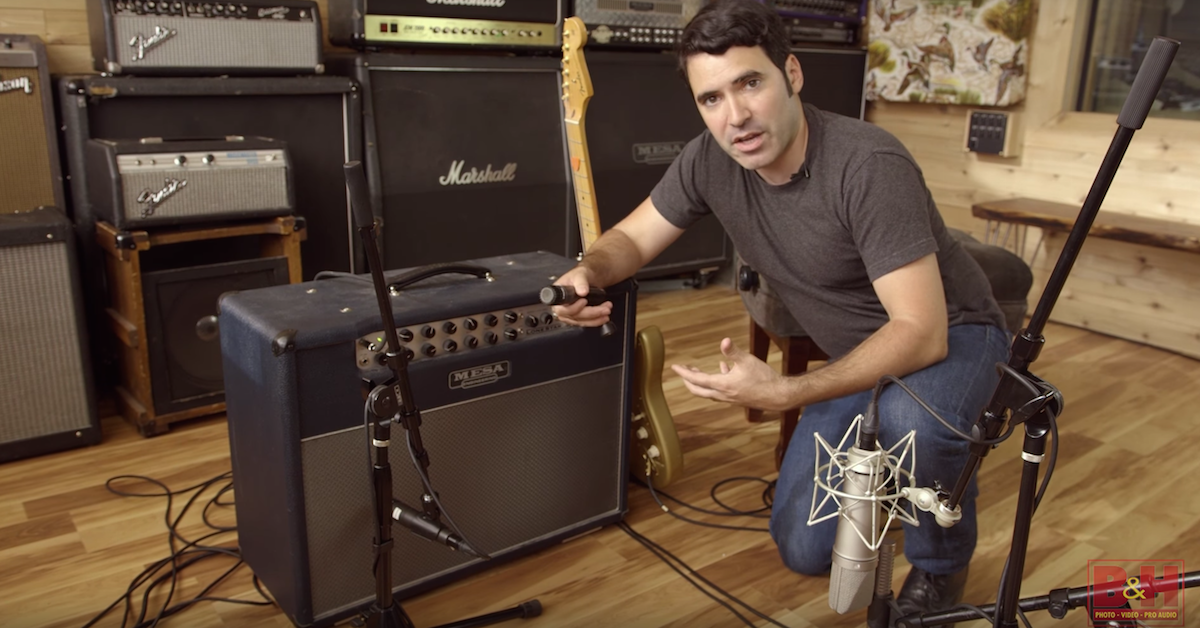
We’ll begin with something that seems fairly obvious, which is setting up your amp in the room, but there actually are some things you can do here that will really help you optimize your tone when you’re recording.
First of all, consider whether you want to place the amplifier on the floor, or get it up on a chair or some other object to control the bottom end. Here’s what it sounds like when the amp is on the floor.
[guitar, amp on floor]
Now, this is what it sounds like when we get the amplifier up on the chair. Now, we’re accomplishing a couple of things by doing this. First of all, we’re decoupling the amplifier from the floor, and we’re also preventing the microphone from picking up reflections of the sound coming off the floor.
Let’s listen to this.
[guitar, amp on chair]
The other thing to consider is how you’re aiming the amplifier in relation to the walls and ceiling of a room. Most of us work in rooms that have parallel surfaces, and what you don’t want is sound bouncing back and forth between those parallel surfaces, so I recommend that you actually set the amplifier up at a slight angle so it’s bouncing off the walls, and not coming directly back into the microphone.
Now, once you have your amplifier set in the room, you can begin setting up your microphone and finding the best position for it. To start, I recommend using a dynamic microphone. Dynamics are traditionally used on guitar amplifiers, they handle the level well, they have a sound that doesn’t necessarily pick up a lot of high frequencies or a lot of low frequencies, they have a tight mid-range, they’re very focused, and they work well on electric guitar amplifiers.
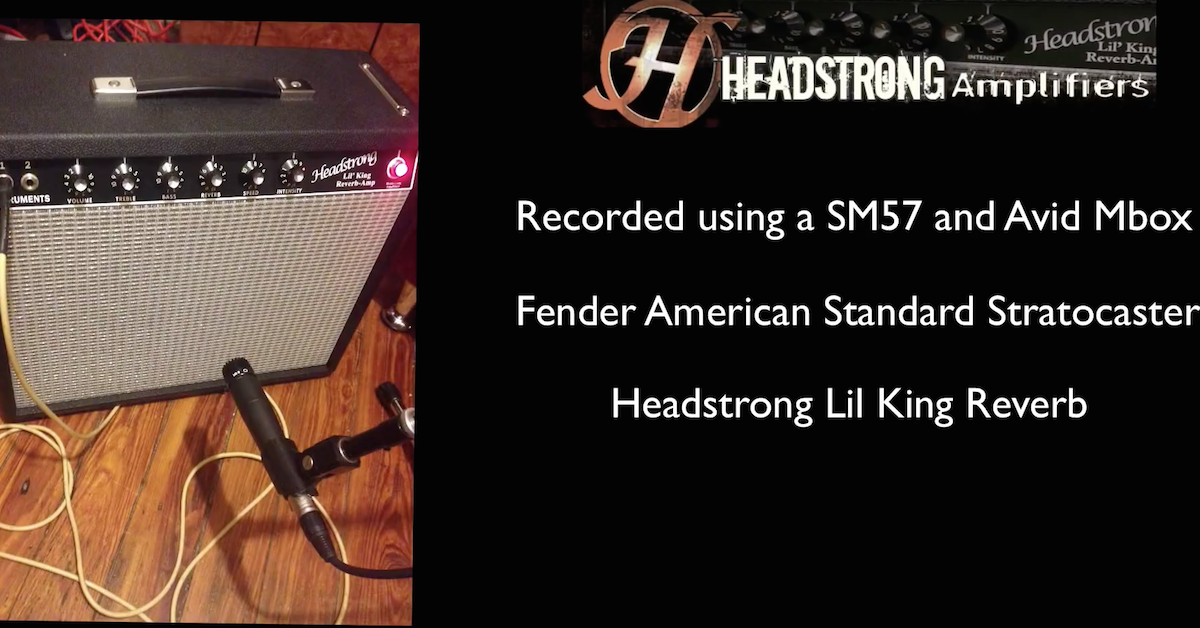
So I recommend something like an SM57 from Shure, which again is the traditional microphone that an engineer will reach for to put on a guitar amplifier.
To begin, let’s put the microphone in sort of a neutral position, and we’ll talk about some of the variations and other microphone positions you can use.
There are three zones to the speaker, if you will. There’s the dust cap in the center, which has a lot of high frequency content. As you move out the cone, you get a little bit more mid-range, a little fuller tone, and when you get out to the surround or the edge of the speaker, again, you’re going to be getting back into those brighter, thinner type tones, so by balancing that position, you can really fine tune the sounds that you’re getting without using equalization.
Here’s a tip that’ll help you find the different areas of the speaker. Use a flashlight. You probably have one in your smart phone, or of course, you can use a dedicated flashlight. Let’s turn that on. Shine it through the grille cloth. You’ll be able to see the surround of the speaker, the cone, and the center of the speaker.
Let’s begin by placing the microphone on the cone of the speaker. We’ll slide this in here. Now, I like to start with a microphone between one and two fingers away from the grille. So let’s pull this back a little bit. That’s roughly an inch away from the grille. The reason for this is we’re using a directional microphone, an SM57 in this case, which is a cardioid pattern or a heart-shaped pattern, it picks up from the front and drops off in the back, but because it’s a directional microphone, it has what we call proximity effect, which means that we get a great deal of bass increase as it gets closer to the source.
So by pulling that back a little bit, we’re going to control the boominess on the bottom end.
So Don, let’s hear what this sounds like.
[guitar, on the cone, one inch from grille]
Now let’s move the microphone to the center of the speaker. I’m still the same distance from the grille cloth. Don, go ahead and demonstrate this sound.
[guitar, on the dust cap, one inch from grille]
Now we’ll listen to the sound with the microphone on the surround of the speaker. I’m going to pull out my flashlight so we can see where that is and locate it easily.
Don, let’s check out what this sounds like in this position.
[guitar, on the surround, one inch from grille]
Once you’ve found a basic position for your microphone, you can start to fine tune it and experiment with some other possibilities. So let’s move back in on the cone, and this time, we’ll angle the microphone a little bit towards the dust cap.
So we’re a little bit off-axis. This changes the frequency response of the microphone and will change the tone of what we’re capturing.
[guitar, off-axis, one inch from grille]
Just changing the position of the microphone a tiny amount can have a dramatic effect on the tone. What I’ll do now is demonstrate that for you by hand holding the microphone and moving it back and forth across the speaker.
[guitar, moving mic around]
We can also experiment with how far we are away from the speaker. I’ve got the microphone placed pretty much right on the speaker, around the cone of the speaker. Don will play, and then I’ll move it back about a foot, and then we’ll listen to that. So Don, go ahead.
[guitar, mic on grille, then a foot away]
You can hear that dramatically changes the sound. The bottom end drops off, of course the level drops off as well, so you’ll need to turn your preamp up, but it does really give you a more natural, overall view of what’s happening in the amplifier, as opposed to being very close up on the speaker.
The other thing you’re balancing when you do this is the sound of the room, along with the direct sound of the amplifier. The farther back you get, the more of the room sound you’ll pick up, and the less of the direct sound you’ll get, by moving closer, you get more direct sound and less of the room.
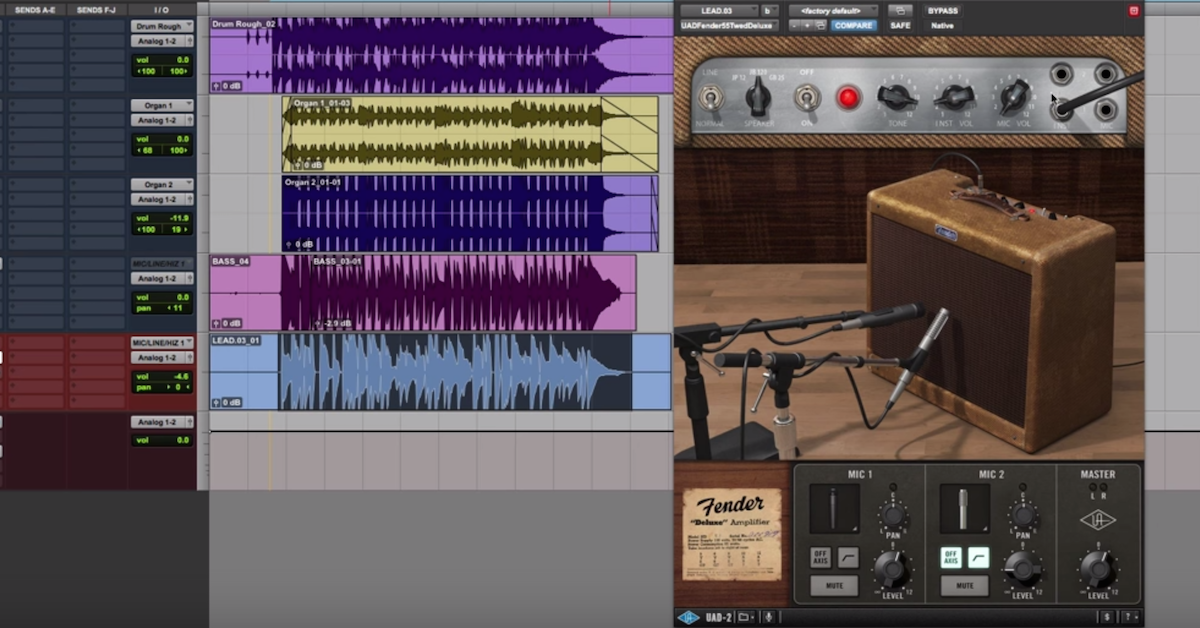
Adding a second microphone to the equation gives us a lot more possibilities. In this case, I’ve got a second SM57, and I was placing it slightly off-axis compared to the original mic. So I have one mic looking straight on into the amplifier, and I have the second one slightly off-axis that’s going to capture a little bit different tone.
By combining these two during mix down, we can really shape the sound the way we want. Don, let’s hear this.
[guitar, dual mic]
Now one thing to be careful of when you’re using multiple microphones is that the signals are in phase. This means that the sound waves arrive at the diaphragms of the two microphones at the same time. If they’re out of time, you get cancellations and the tone will change.
There are other things you can do with two microphones as well. For example, we could place one microphone on the center, and one microphone on the cone, place them the same distance away from the amplifier so that they remain in phase.
[guitar, one mic on cone, one in center]
We can also place one microphone close up on the amplifier, and pull another one farther back.
[guitar, close and far mics]
Now, phase is still an issue when you’re using a close mic and a far mic. You want to make sure that those two microphones are in phase, so you’re getting the strongest possible signal with no cancellations. Record the two microphones each to their own track in your DAW, then you can balance the level of those two microphones against one another later when you’re mixing down.
We can also pull our distance microphone way back. We can place it five feet, ten feet, way up in the corner of the room. This allows us to create much more ambience, and get a washier sound, along with the direct signal that’s coming from the amplifier. Then you can balance that to get a natural reverb.
We’re not limited to just dynamic microphones either. You can use a ribbon microphone. Ribbons sound great on guitar amps. A condenser mic sounds great as a distance microphone, and it can sound great close up as well.
So even with a simple setup like this, with one or two microphones, you’ll easily be able to capture great guitar tones.
Elevate Your Ears