8 Tips for Creatively Processing Vocals
11/23/2018
Article Content
Vocal production is fun. I find that when producing music, the way that rhythm sections are processed tends to follow convention more so than vocals. The human voice is the most expressive instrument, and not only lends itself to creative production styles but sometimes needs it.
Here are some interesting ways in which I process my vocals:
1. Long, Automated Reverb Tails
This has been an en vogue production technique for a few years now. On certain words, generally at the ends of phrases, producers place a long, lush reverb on the voice, creating a ghostly, lingering quality. It works great as a transitional effect, too.
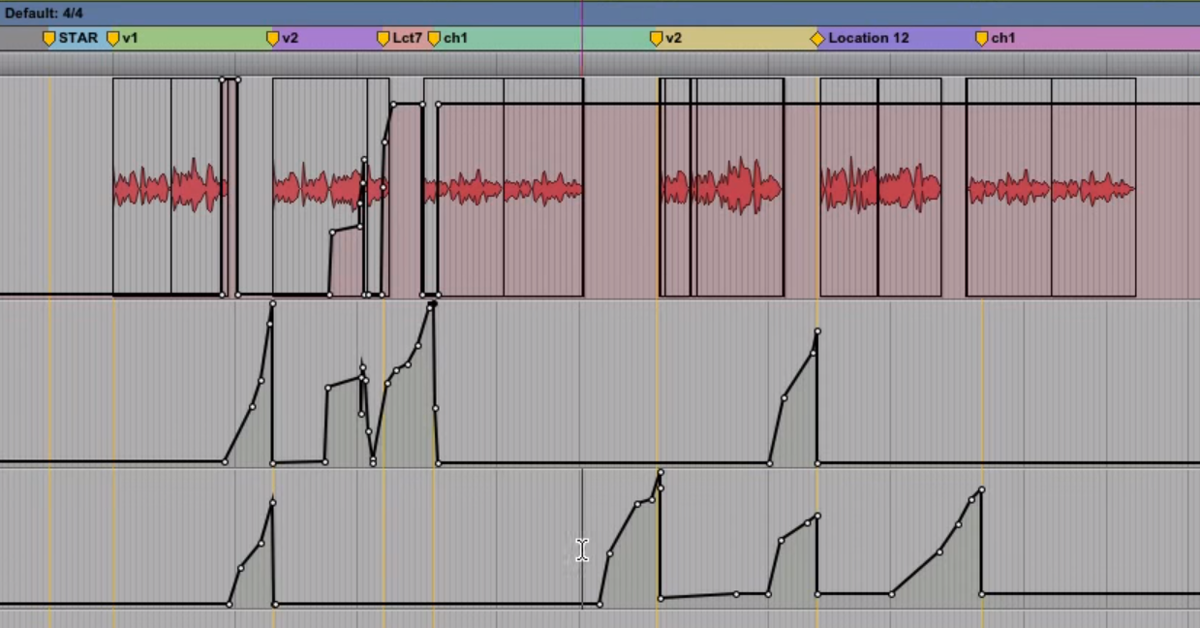
In practice, I soft-send the vocal to an auxiliary track, place a reverb on that auxiliary, and then automate the send level so that only the exact words that I want to be drenched in reverb are reaching the auxiliary return.
My favorite plugins for this application are Soundtoys Little Plate, FabFilter Pro-R and a handful of UAD Reverbs including the EMT 250, EMT 140 Plate and Lexicon 224.
UAD just released an emulation of the Lexicon 480L which I’m sure would work splendidly for this purpose. I often place a good deal of compression right after the reverb, because I usually want an unnatural, almost synthetic-sounding tail. I just mastered a track by the band Plake, and you can hear the technique in action during the verses.
2. The Classic “Throw Delay” (expanded)
A tried-and-true ear candy element for decades now, you can still regularly hear this technique on Pop, R&B and Rap. Revisit the paragraph on how I setup reverb tails for information on my preferred method of routing. The key is making sure that only the words that you want to be processed return on the auxiliary.
I sneak in vocal throw delays all over my mixes. Verses, choruses, bridges, it doesn’t matter — it’s one of those techniques that makes a pop mix sound “more expensive”. I also expand on the concept and rather than restrict the delay to 2-3 repeats, turn up the feedback and let it howl. Sometimes I’ll even put a reverb on that howling feedback to create this ethereal, smeary cloud that trails the vocal. This effect is great for transitions and even for smooth, dreamlike fade-outs at the ends of songs.
My favorite delay plugins for these applications include … let’s just start with my favorite delay plugin: Echoboy. It can handle this and any other delay-based task I’ve thrown its way. Other exemplary delay plugins include Softube Tube Delay, UAD EP-34 Tape Echo, and (especially great for the reverb/delay hybrid effect) the UAD Galaxy Tape Echo.

3. Pitch Shift Your Reverbs & Autotune Delay
If you’ve noticed a theme in this article thus far, it’s to not just set and forget your time-based effects. Fun and interesting things happen when you add additional processing to your reverbs and delays.
On a recent mix, I sent my lead vocal through a reverb (of the plate variety), committed that reverb to audio, and then pitch shifted it up one octave. Ultimately, the element was balanced pretty low in the mix but acted as this pad-like essence that added a subtle shimmer beneath the lead vocal.
I use tuning software all the time — Auto-tune for “obviously tuned” pop and hip-hop vocals, and Melodyne for a more subtle effect. Sometimes I combine the two by leaving the lead vocal tastefully tuned, and then applying the more noticeable Auto-tune to a delayed signal, so any repeats are hard-tuned. It certainly doesn’t work all the time but is worth experimenting with if you want to add some ear candy and production value to your mix.
4. Combine Different Tuning Plugins
Tuning software has earned its rightful place in the music producers’ toolbox. At this point, I view it as not much different from equalization or compression — it helps a recording sound better, so I’ll use it.
Are vocal lessons great? Sure. Is using Auto-tune or any of the other tuning software an automatic indictment on a singers’ ability? Not in my mind. My job is to make enjoyable sonic experiences and if tuning helps me get there — then how is it different than other types of processing?
I use tuning software in expressive ways to transform vocal recordings into musical moments that simply couldn’t be executed by a human being.
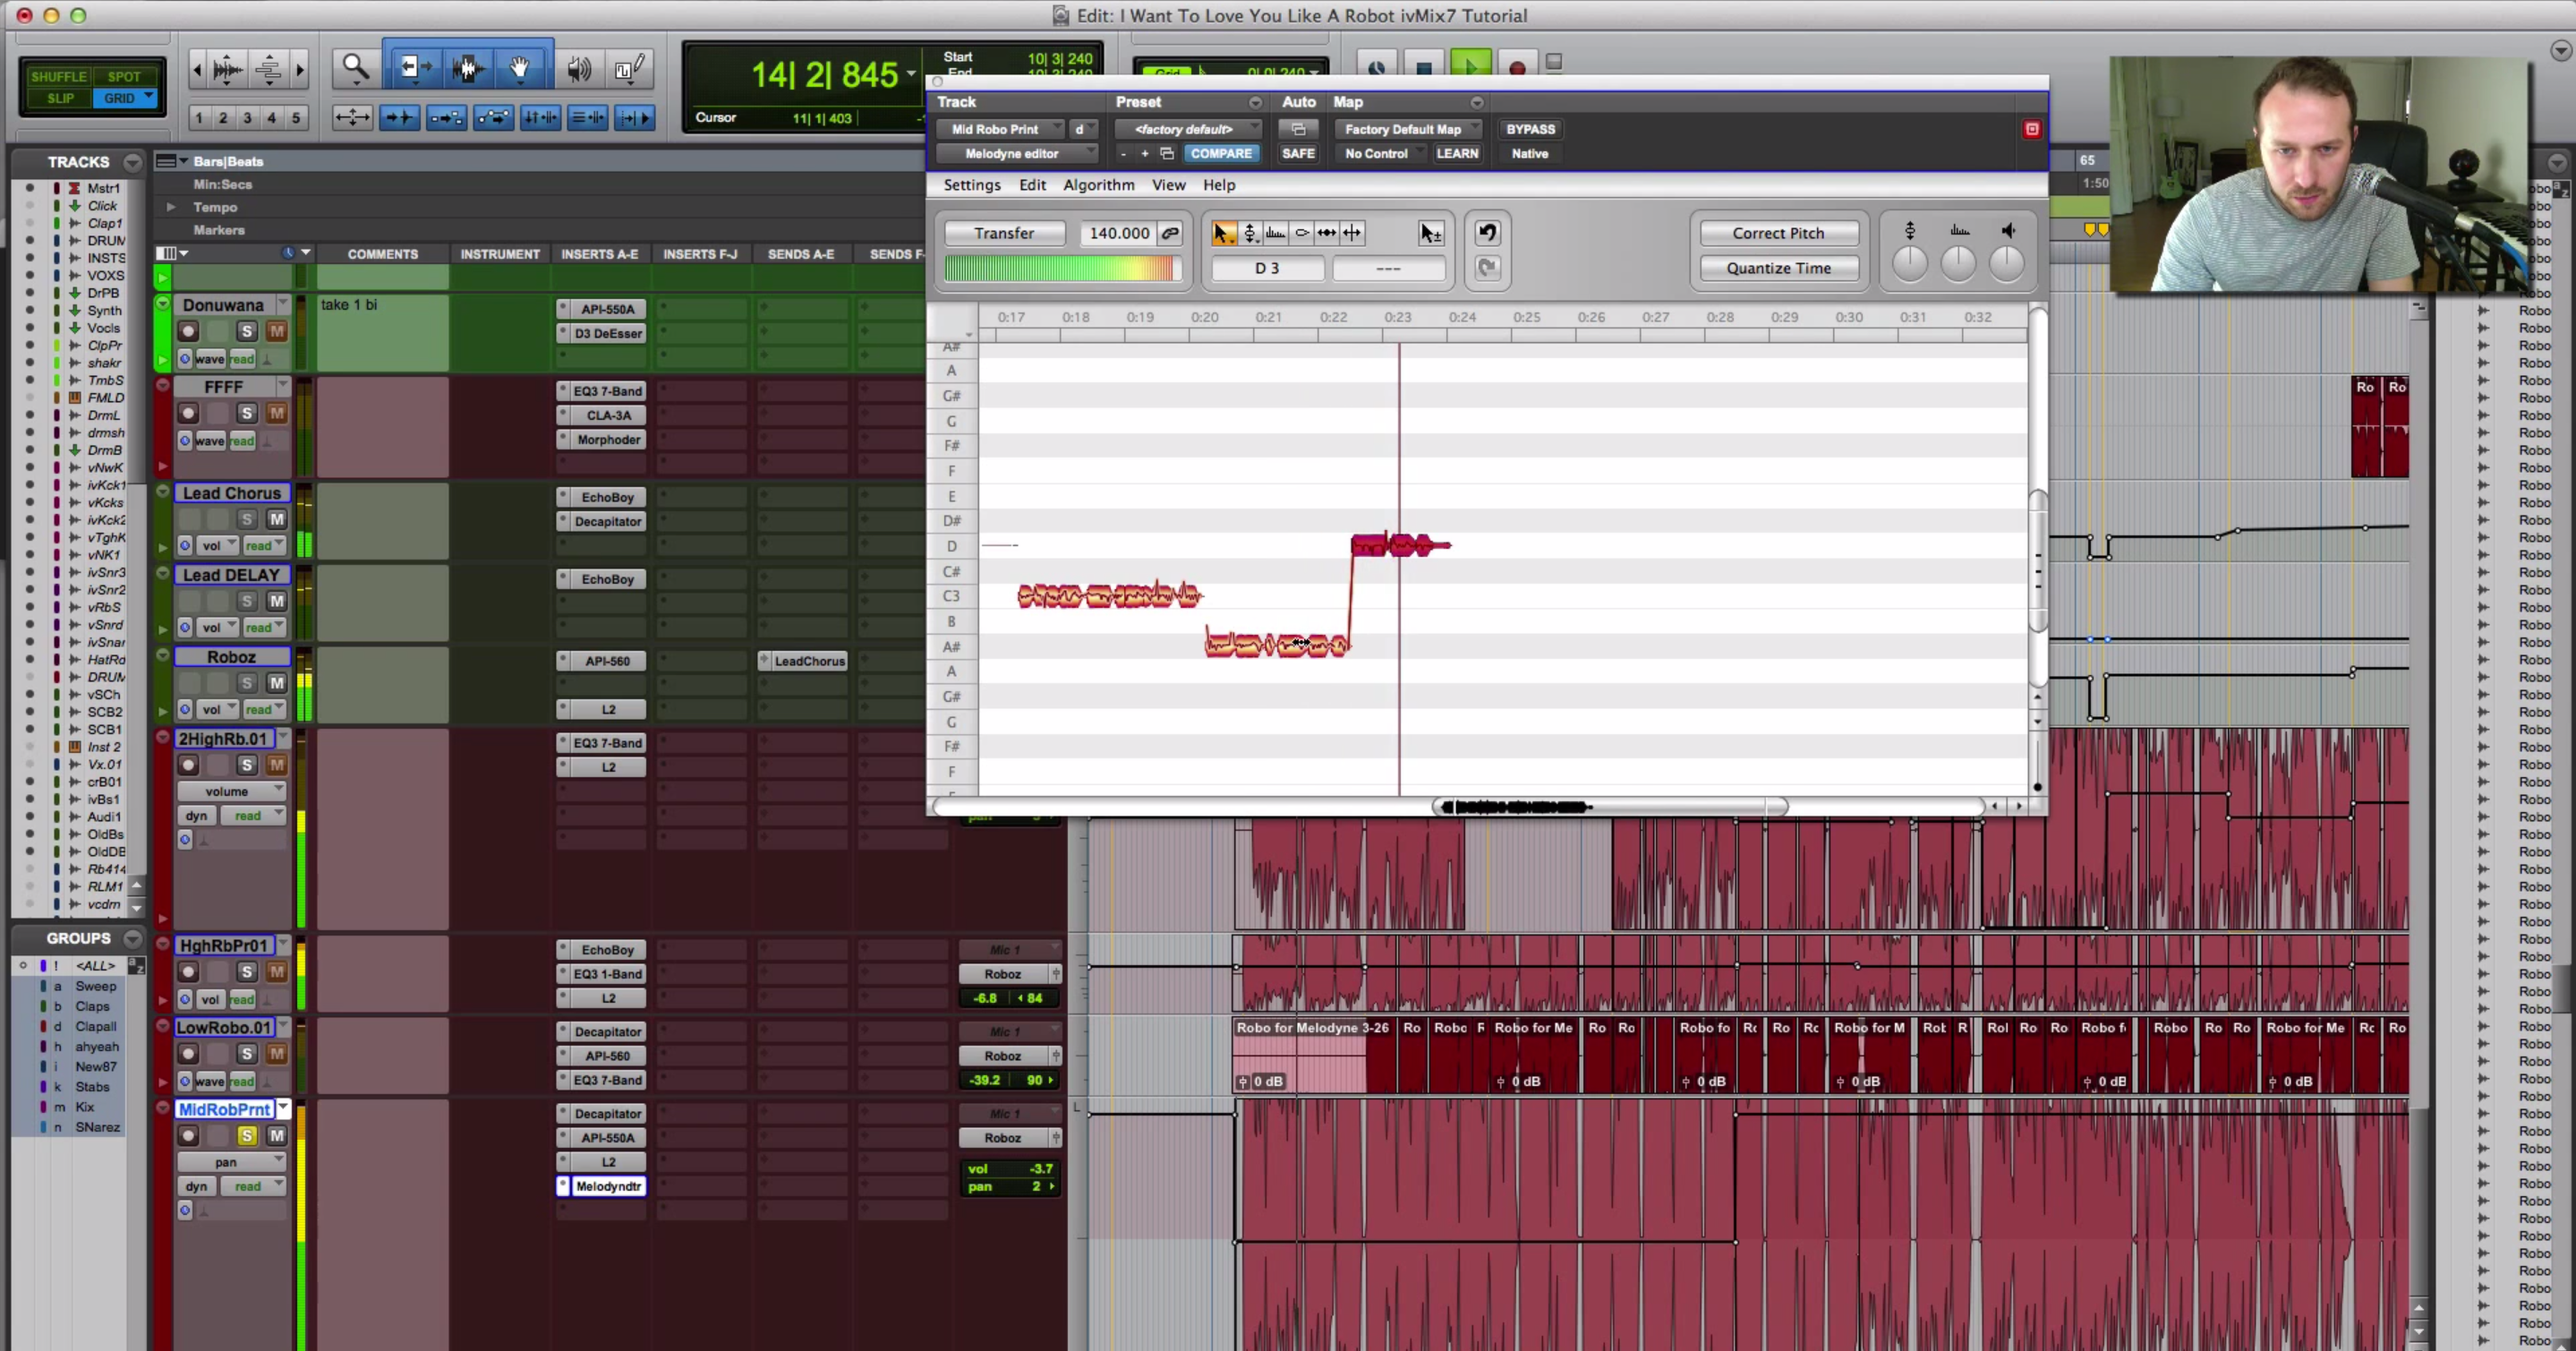
A technique I’ve used before is to have a singer record “ooohs” and “aaahs”, etc. (in varying lengths, and with as little vibrato as possible), load these recordings into Melodyne, and then manipulate in all sorts of ways. Sometimes raising the pitch several octaves, sometimes “morphing” regular vocal lines with bits of these manipulated recordings. Listeners like to be surprised, and this is one of the ways I process vocals to sound strange and interesting.
Soundtoys’ Little Alterboy is another plugin that allows me to get incredibly creative with how I approach processing vocals. Little Alterboy can even communicate with a MIDI device, enabling you to “play the notes” that you want your modulated vocal to sing. I greatly value any tool that allows me to infuse another layer of musical expression into my productions.

5. Use a Vocoder
While vocoders are at risk of becoming overused, they are undoubtedly a unique and fun sonic texture to incorporate into your productions. They provide a human/robot-hybrid effect, and can also be ethereal and beautiful when executed properly.
A vocoded lead can provide an interesting foundation for one to build a song upon, but I generally use vocoders as a pseudo-backup vocal element. I find vocoders to be rather finicky in practice, especially when it comes to sonic consistency. I regularly use iZotope VocalSynth 2, and the stock vocoder in Ableton Live. UAD/Softube just released a vocoder plugin, and I’m definitely going to demo it as I cherish the work that those two companies are doing.
Depending on how you set up your vocoder, it can be super bright and hi-fi, or very warm and mellow. Decent keyboard skills are preferred but not required to execute a high-quality vocoded part.

6. Bit-Crush Automation
So far, I’ve mentioned several vocal effects that are perhaps overused and are at risk of becoming stale, but one effect that I believe is underrepresented in modern music mixing is bit-crushing.

Ready to elevate your ears?
It doesn’t have to take years to train your ears.
Get started today — and you’ll be amazed at how quickly using Quiztones for just a few minutes a day will improve your mixes, recordings, and productions!
We can use bit-crushers in a typical way to make material sound degraded, or even as a sort of filter/equalizer, but something we don’t hear much of is using bit-crushers in a non-static way.
On a song I mixed recently, the intro was uninteresting. Musically speaking, the concept was strong, but the production needed some ear candy, especially considering the first ten seconds of a song are crucial for getting the listener to buy in. So I automated the resolution and wet/dry parameters on my favorite bit-crusher plugin (the UAD OTO BISCUIT) so that the signal became clearer and clearer leading up to the first verse.
The BISCUIT is a fantastic plugin for this application, and also has wonderful delay, distortion and step filtering capabilities.

7. Use Parallel Processing (With Caution)
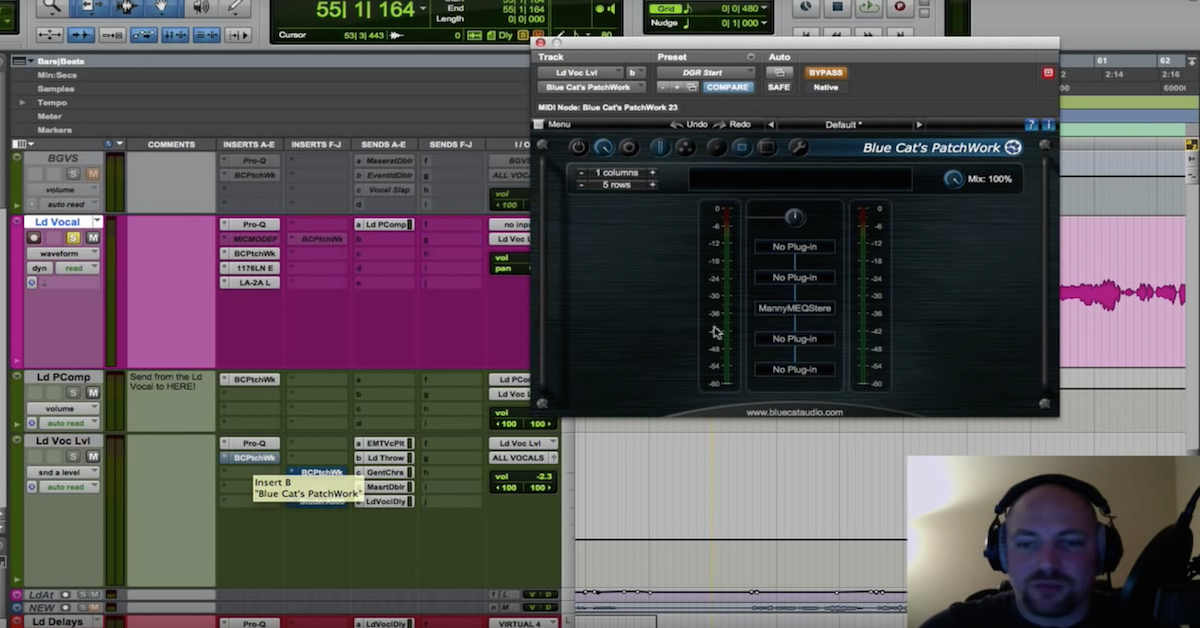
If you’ve read my articles and watched my tutorials, you’re probably familiar with my multi-buss technique, and are aware that my vocal sound is typically a result of me processing the vocal with numerous types of effects, repeating the process multiple times to achieve different qualities, and then combining those processed signals together or “in parallel” — with each layer as a piece of the puzzle.
We’ve seen an armada of plugins released over the past five years which include a “wet/dry” feature that allows you to control the balance of the processed and original signal, and my advice is to use this to your advantage. I’ll often push plugins like Soundtoys Decapitator, or FabFilter Saturn to their extremes, and then dial back the wetness.
Be cautious though, just because you can do something, doesn’t mean you should. Too much parallel processing using extreme settings without care and attention to detail can sometimes leave mixes lacking in definition.
8. Treat the Vocals as an Arrangement Unto Itself
Ultimately, getting the vocal or vocals to sit well amongst the rest of the instrumentation is the goal, but I often surprise myself when listening back to the a cappella while printing stems for clients. The complex interplay of reverbs, delays, and other aforementioned vocal effects, combined with how I change the balances over the course of a song often results in a pretty interesting listen. I don’t set out to create a mix that is meant to be listened to that way, but it’s a result of the willingness to put in the required amount of work required to make a song the best version of itself.
For rock music, simpler is usually better, and my vocal won’t be subject to many of the elaborate techniques I’ve mentioned thus far, as I’d rather keep them “honest” sounding, but for most pop mixes that I work on, I’ll throw the kitchen sink at the lead vocal, and then throw it again at the backups.
Eleveate Your Ears