Affordable and Quiet HVAC Solution for Home Studios — MRCOOL DIY Mini-Splits
12/7/2022
Article Content
Having taught acoustics for several years now I can say that HVAC (heating, ventilation and cooling) is an issue that deserves much more attention than is typically given in most textbooks. Years ago I moderated a panel discussion that included Paula Salvatore (Capitol Studios) and Candace Stewart (EastWest Studios), and both agreed that HVAC was a major concern in day-to-day operations. In their case, it was more about keeping systems functioning and maintaining a comfortable atmosphere in the studio conducive to creative production. Those working in home project studios face a variety of HVAC challenges that professional spaces have solved with expensive infrastructure, isolated fan & mechanical noise and specialized ductwork. But these solutions lie well beyond the resource limitations for most home-based producers.
Typical home studios are heated and cooled by traditional residential means including standard forced air heating and cooling via ductwork, radiant heating and window AC units. The biggest ambient noise producer by far is the window AC unit. It’s noisy, ugly and inefficient. Whereas professional studios are concerned with keeping systems operational, the biggest hurdle in project studios is limiting ambient noise to a workable minimum. Often, producers will convert garages or large detached sheds into music production studios. These spaces usually do not have existing ductwork. While you might get away with an inefficient space heater in the winter, the notorious window AC unit has been the only cooling option for some time.
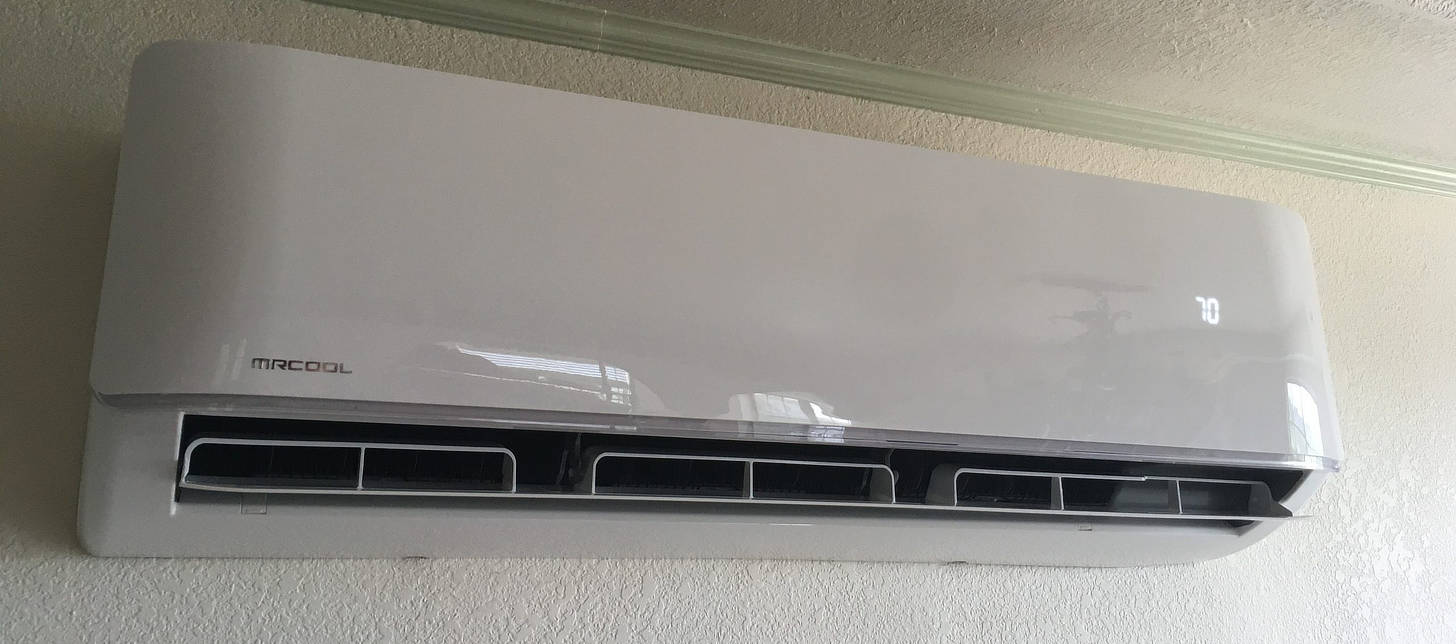
With the introduction of the mini-split heat pump, that has all changed. These versatile units can provide heating and cooling with multi-zone capability and high efficiency. They’re also exceptionally quiet, making them an ideal choice for project studio HVAC. What’s more, there are now DIY systems available that can save you some serious coin. MRCOOL, an HVAC company based in Kentucky, has led the way in the DIY market offering a wide variety of HVAC solutions that you can install yourself.
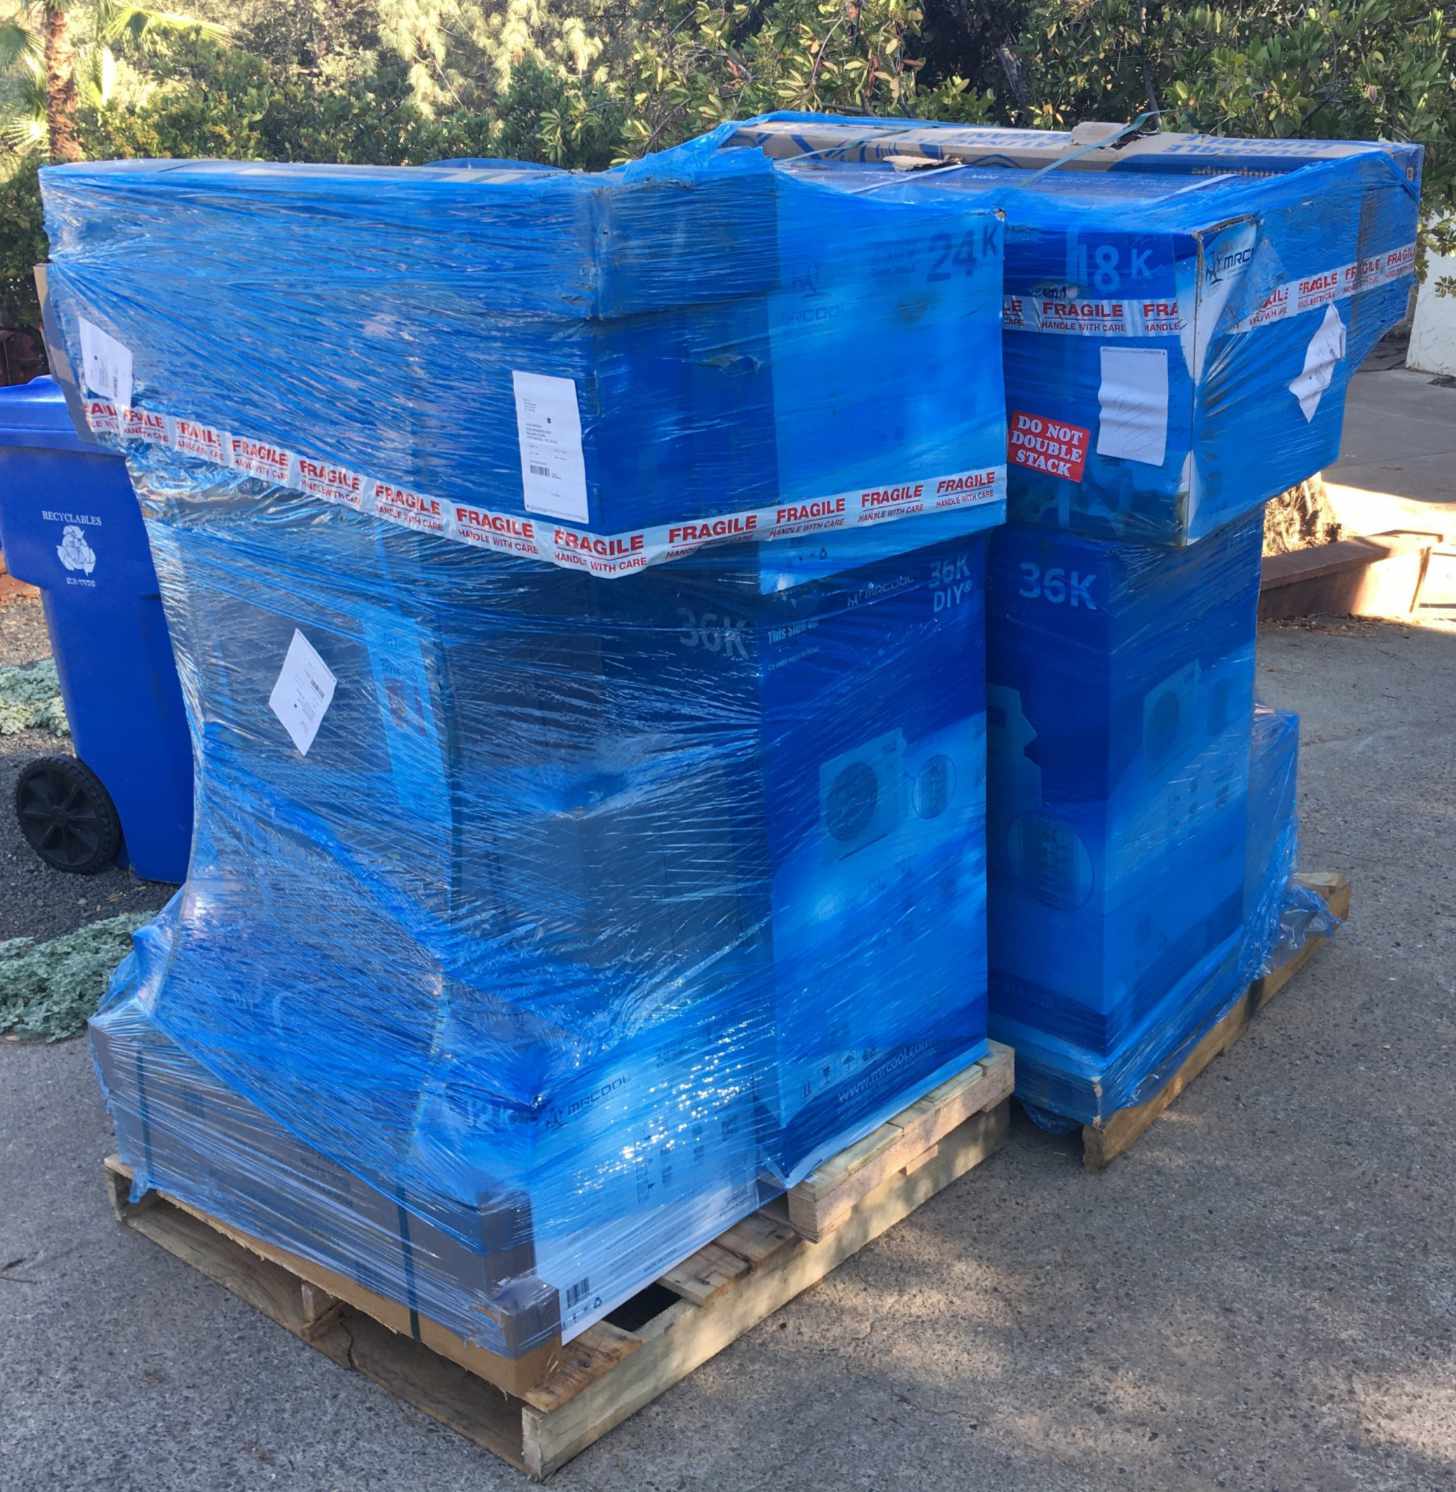
Recently, I purchased a house that had a wood stove as the only heat source and a loud, obvious window AC that labored to cool the entire house. I planned to have a mixing studio and other recording spaces in various rooms, so a quiet HVAC solution was needed. The house had no existing ductwork and the roof was flat, so installing ducts wasn’t an option either. Gratefully, MRCOOL came to the rescue and offered to provide two DIY multi-zone systems. The balance of this article will document the installation process and my initial experience with the system, including some sound pressure level measurements of the various components. This is not a step-by-step installation guide by any means — there are plenty of resources available from MRCOOL and from 3rd party content producers online that go into great detail regarding the process. Consider this more of an overview from the perspective of a home-based producer and musician. But first…
What is a Mini-Split?
A typical AC unit has two components: an evaporator and a condenser. They work in tandem to remove warm air and inject cool air into a space. A mini-split separates these two components so that the condenser is installed outside and one or more air handlers are installed inside — hence the term “split.” They are connected with a pair of refrigerant lines called a line-set and an electrical communication cable that controls the functions of the air handler. While traditional duct-based AC units will have one central air handler for the whole system, mini-splits have independent air handlers for each room or zone — hence, the term “mini.” These systems are more efficient, partly because there is no energy loss inherent in duct-based units, and there are even tax incentives available for people looking to make the switch.
If that wasn’t enough, these systems can not only provide cooling, but heating as well. The outdoor component, known as a heat pump, utilizes what’s referred to as the second law of thermodynamics, which in essence states that heat always moves toward cold. I won’t pretend to fully understand how the device works, but fortunately, with the MRCOOL DIY system, you really don’t need to know how it works to install it. My research found professional HVAC installation fees to be equal to or even greater than the equipment cost itself, effectively doubling the price of a new system. So for producers who would rather spend their money on gear, the DIY route is a great option.
Pre-Purchase Research
BTU’s (British thermal units) are typically used to measure your energy needs, and each HVAC device is rated to deliver a certain spec. My particular situation called for two independent 36k BTU systems, each with two zones (meaning two interior units in different parts of the house), but with the capability to expand to four zones. Your particular needs will depend on the square footage in your space as well as ceiling height. There are several online resources to determine the appropriate BTU capacity for your situation, including Calculator.net.
Mini-split systems have certain limitations regarding the length of individual line-sets, so do your research before ordering and make sure the placement of the compressor(s) will be accessible to each air handler. A typical maximum distance for one line-set is 50 to 75 feet, and there are other limitations for differences in elevation between units and compressors as well.
You will also need to install a dedicated 240v circuit with a disconnect box for each compressor. You need to have sufficient amperage available in your electrical panel as well. My chosen system required a 208-230V circuit with a max fuse breaker of 60 amps and a minimum circuit ampacity of 40 amps. While you can install this circuit yourself if you have the know-how, MRCOOL recommends contracting a licensed electrician for this task, as do I. High voltage and amperage circuits are not to be fooled with. Circuit specifications and line-set limitations are available from the manufacturer.
Receipt of the Equipment
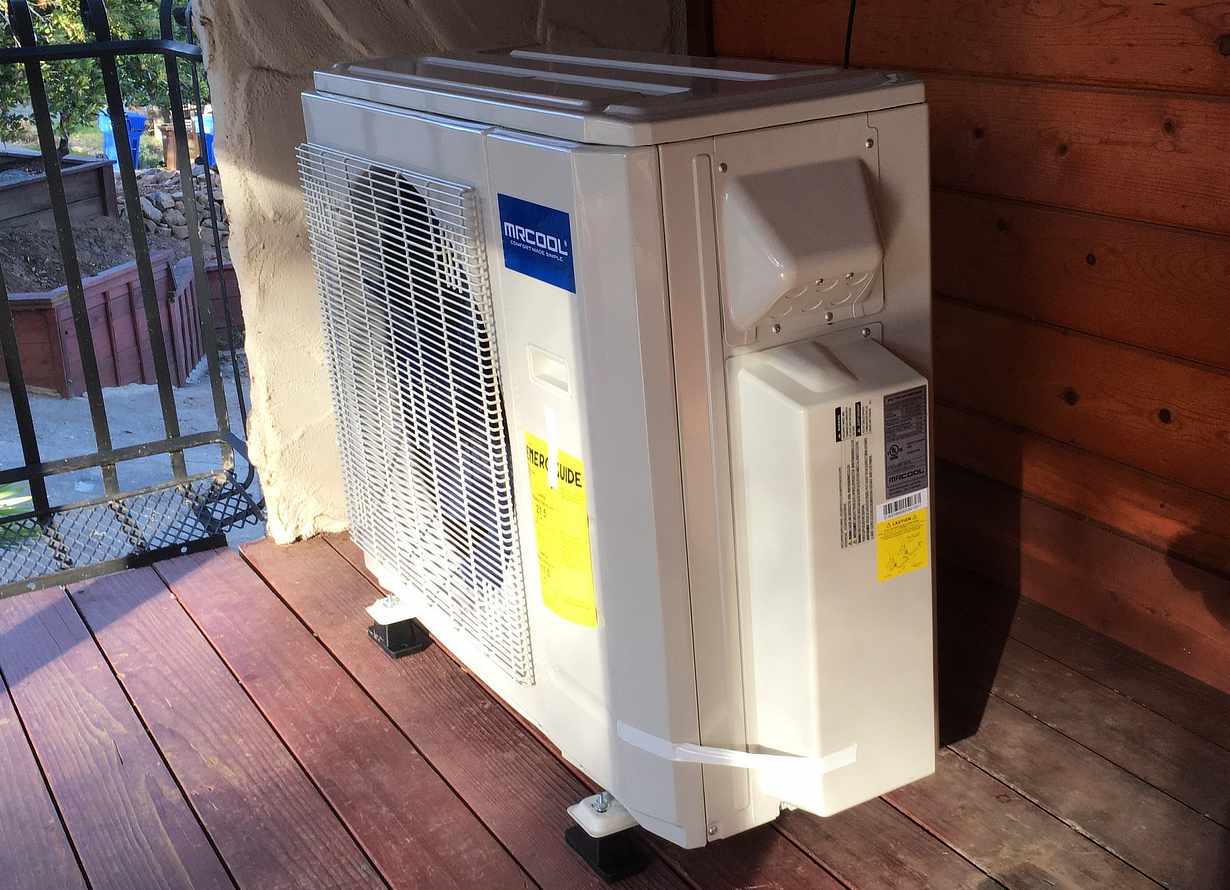
As promised, my MRCOOL systems arrived by common carrier on two pallets weighing over 800 pounds. As I peered at the behemoth shipment sitting at the foot of my driveway, I immediately regretted my decision. “I’m a musician, not an HVAC installer,” I said to myself. “WTF am I doing!?” I could have sworn I heard a few HVAC guys fiendishly laughing in the distance. But my trepidation subsided as I began to unpack the various components and things started to fall into place. Each system included a compressor, air handlers, remote controller, refrigerant line-sets, line guards and a wall mounting bracket. There were also necessary tools for the installation (Allen wrench, hole saw and two adjustable wrenches), various insulation and sound dampening material and large tie wraps. These systems are also Wi-Fi capable and come with a flash drive that provides connectivity and control via your cell phone or smart speaker (Alexa and Google Assistant). This functionality includes the ability to control your system from anywhere in the world, utilize geofencing (automatically turn your system on and off based on your proximity), manage timing schedules, keep energy usage statistics and more.
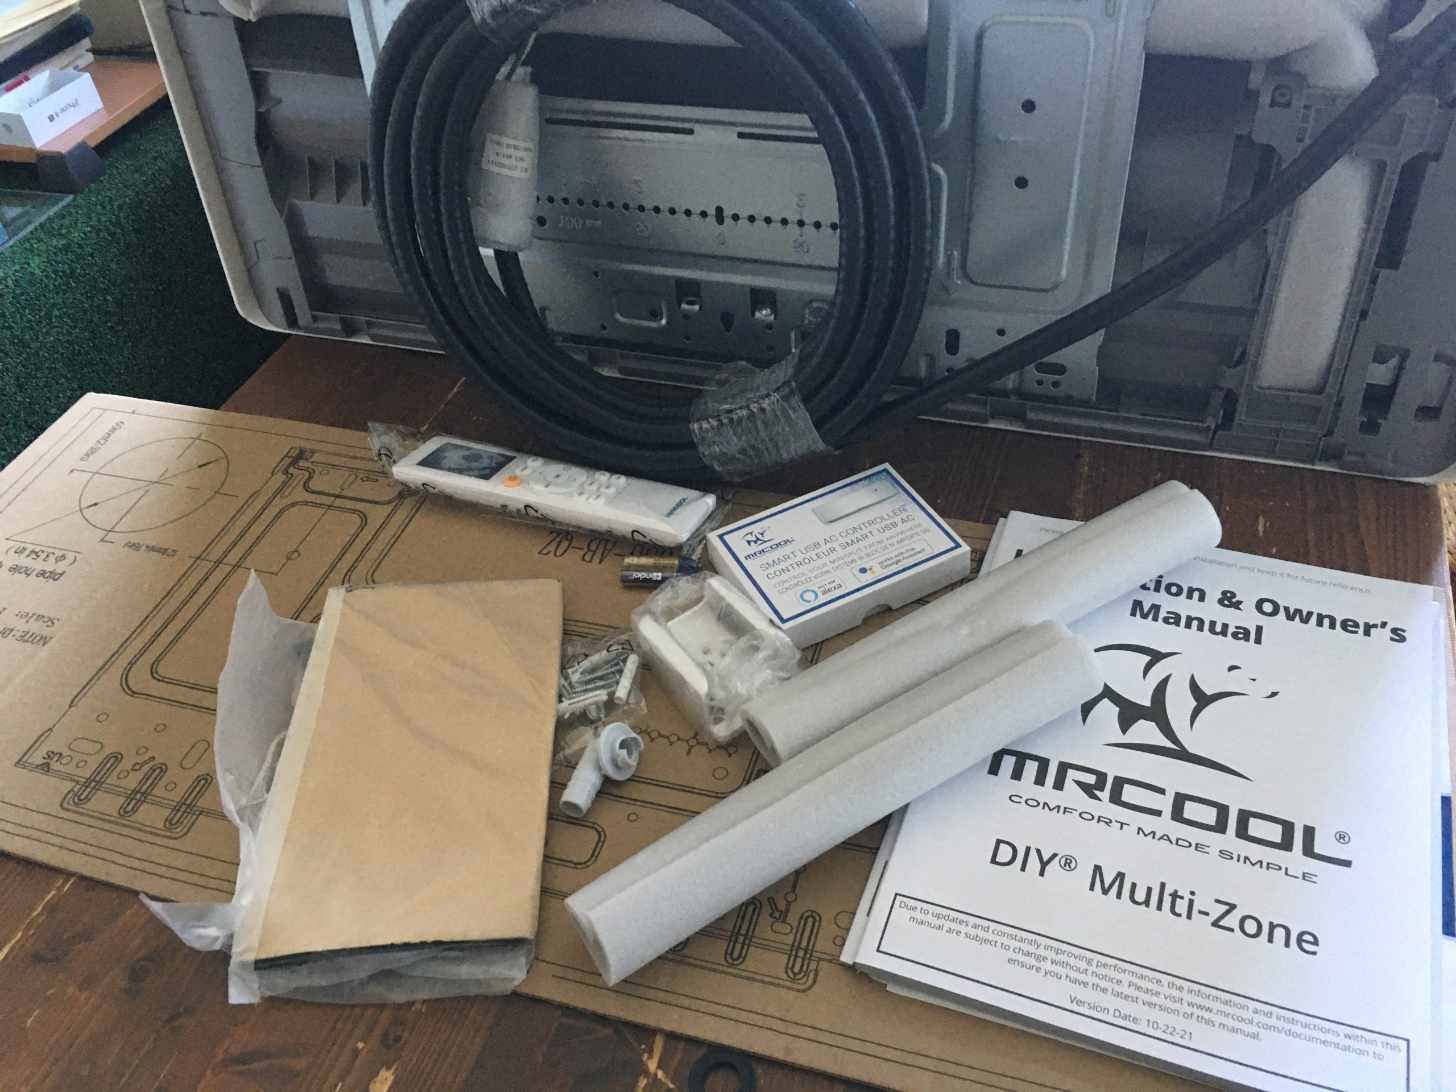
After opening the first air handler I did something I rarely do with audio gear — I read the entire manual — twice! I also sought out as many YouTube installation videos as I could find. Perhaps not surprisingly, none of them mentioned audio production, but I pushed forward nonetheless.
Installation of the First Air Handler
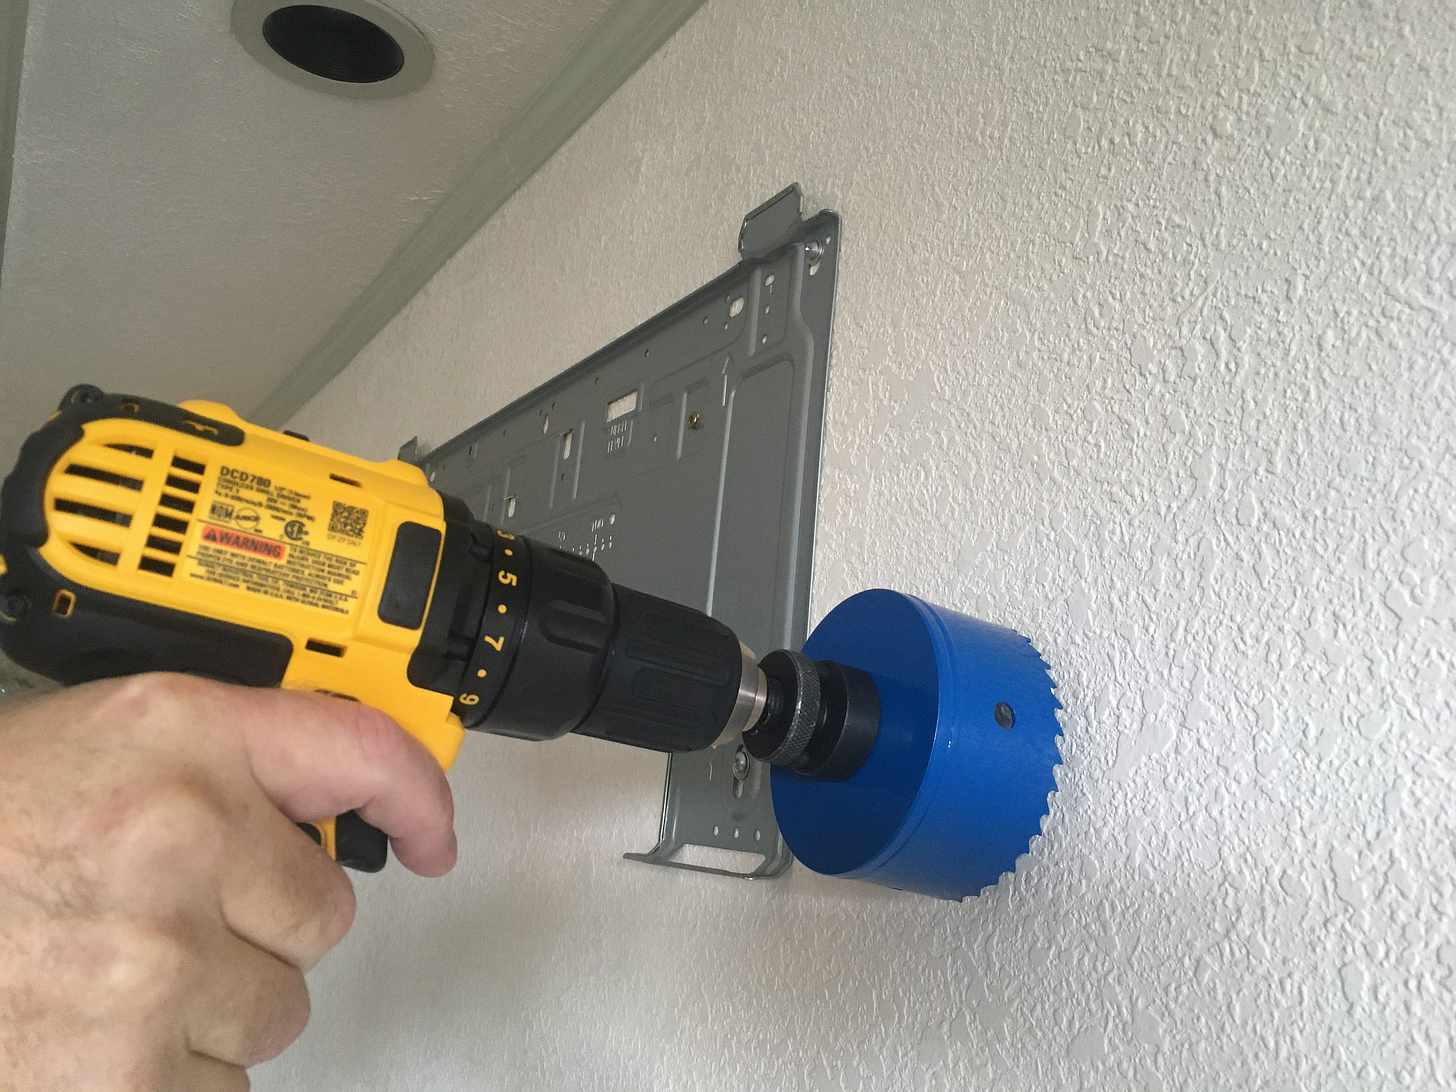
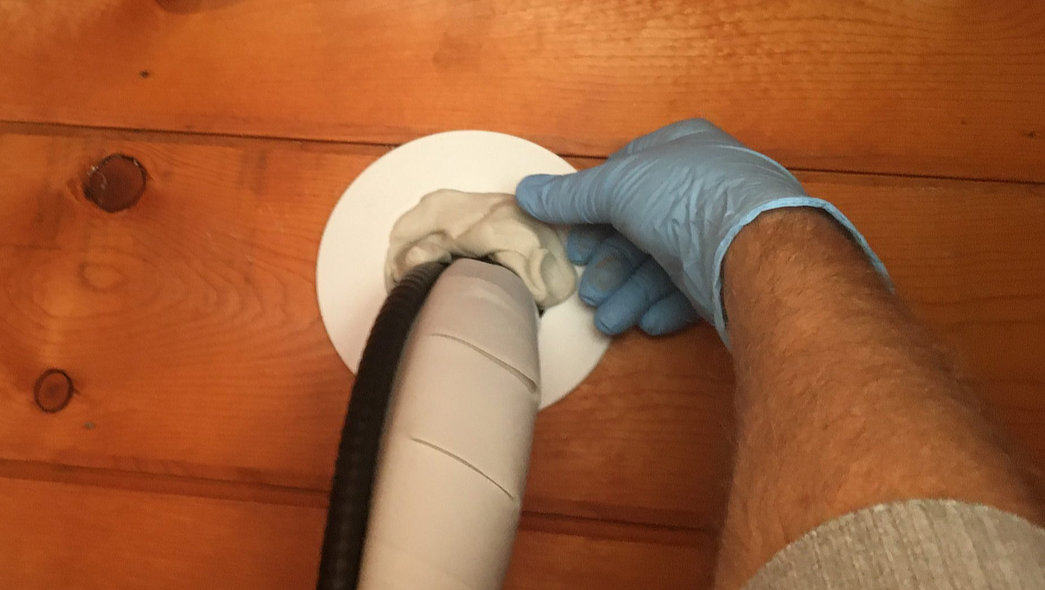
I chose to begin the process by installing the largest air handler (24k) that would be closest to the compressor. The installation process is similar across all the air handlers. You locate studs in the chosen location (a decent stud finder is highly useful for this), and use the provided cardboard template to determine where the mounting bracket will be positioned. This also should guarantee that the 3” hole required to route the line-set, electrical cable and drainage line will fall between studs (typically 16” apart).

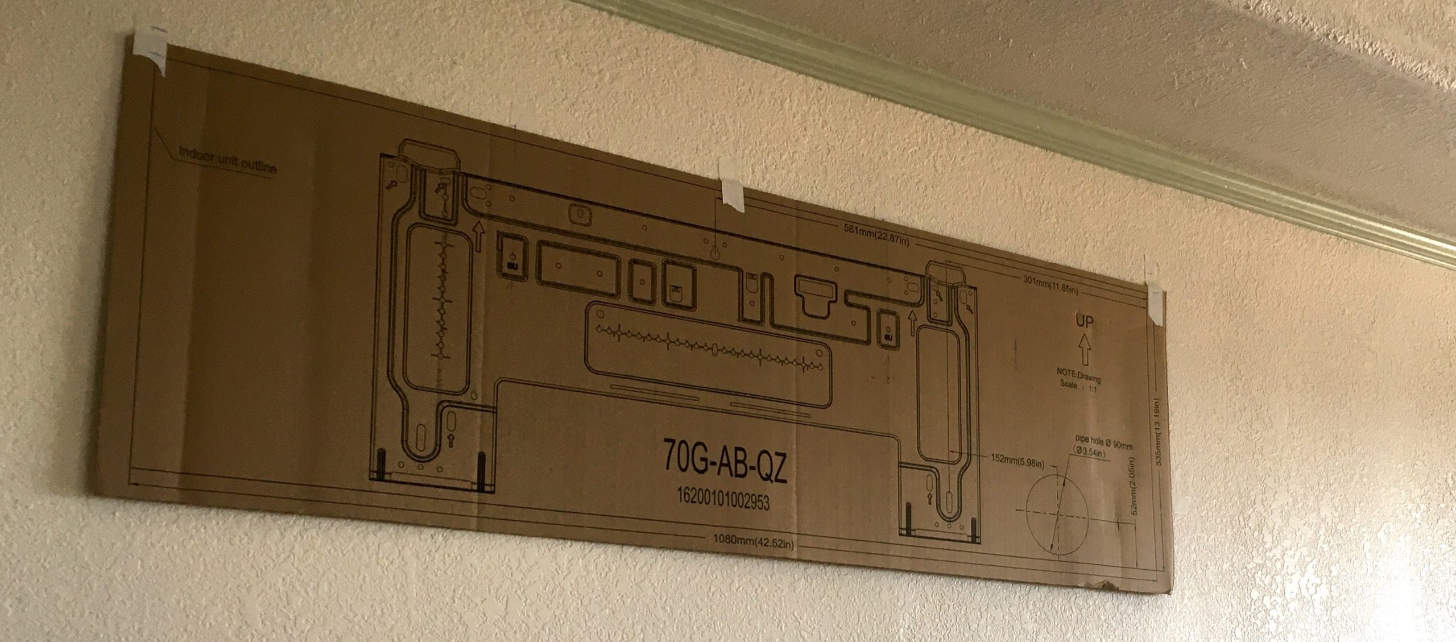
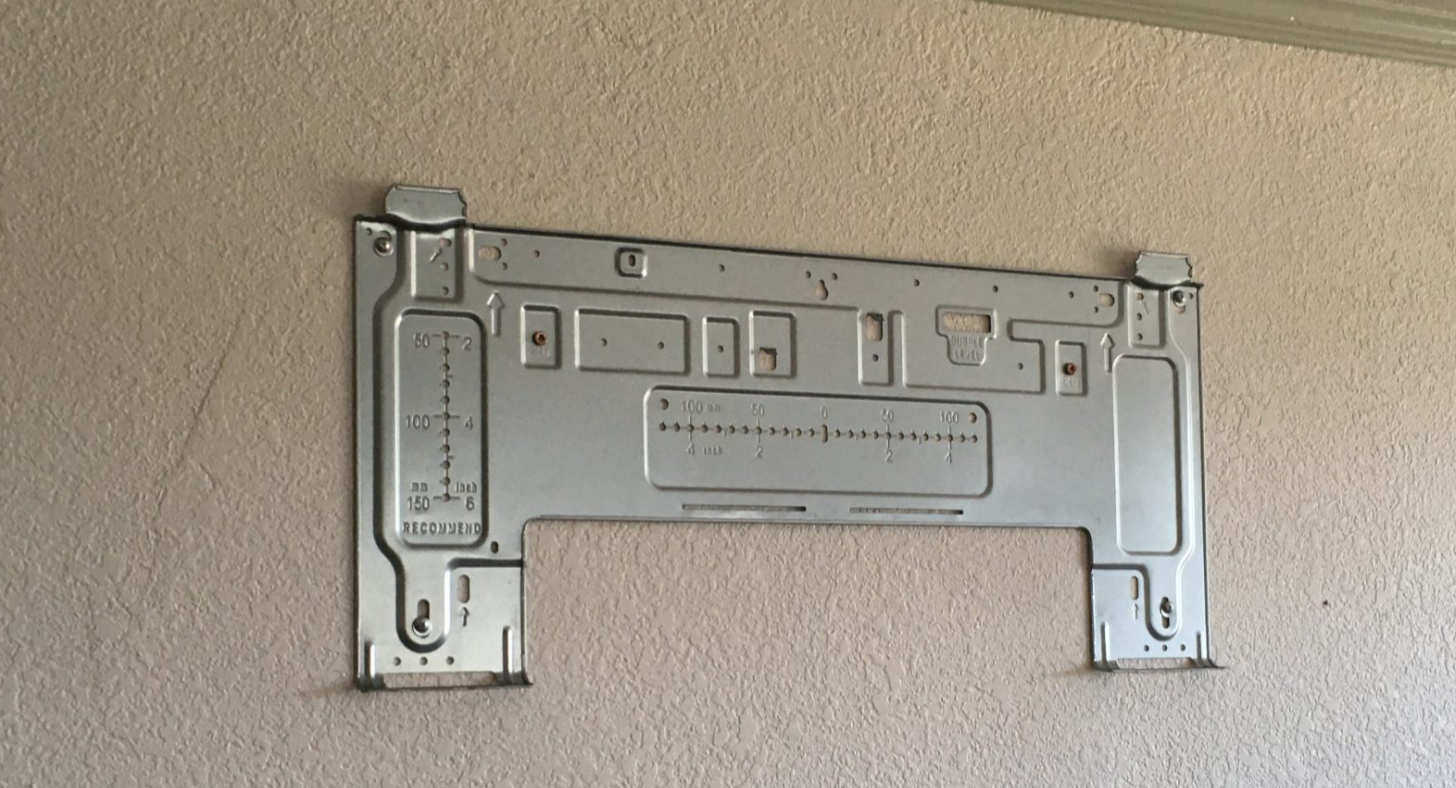
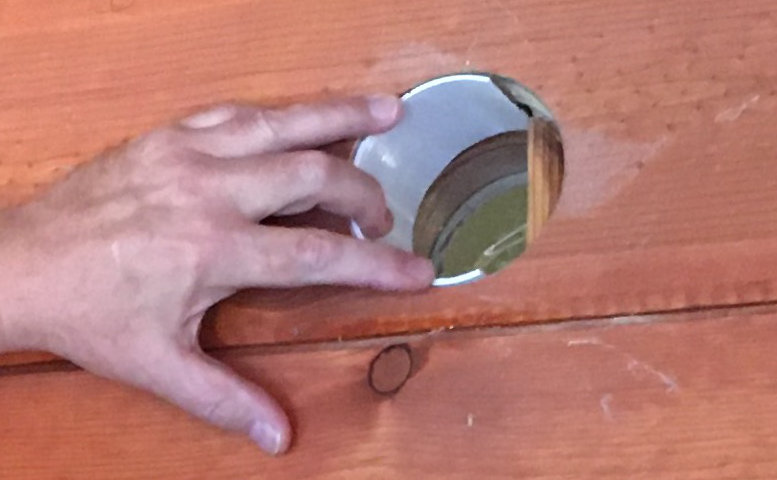
Once the mounting bracket is installed, you drill a large 3” hole using the provided hole saw. You will need a decent power drill for this. I used a cordless DeWalt, which worked beautifully. Before committing to the large hole, I drilled a small guide hole to make sure the exterior hole location would work. Also, MRCOOL recommends a 1/4” slope down from the interior hole to make sure the drainage tube flows nicely. My situation was fairly straightforward since my interior is drywall and the exterior is wood siding. Stucco or masonry would present additional challenges and you may need more appropriate drill bits in that case. If you are not comfortable drilling 3” holes through an exterior wall in your home, join the club. But the first one is the hardest and after installing the provided PVC hole sleeve, everything looked clean and good. My confidence level skyrocketed.


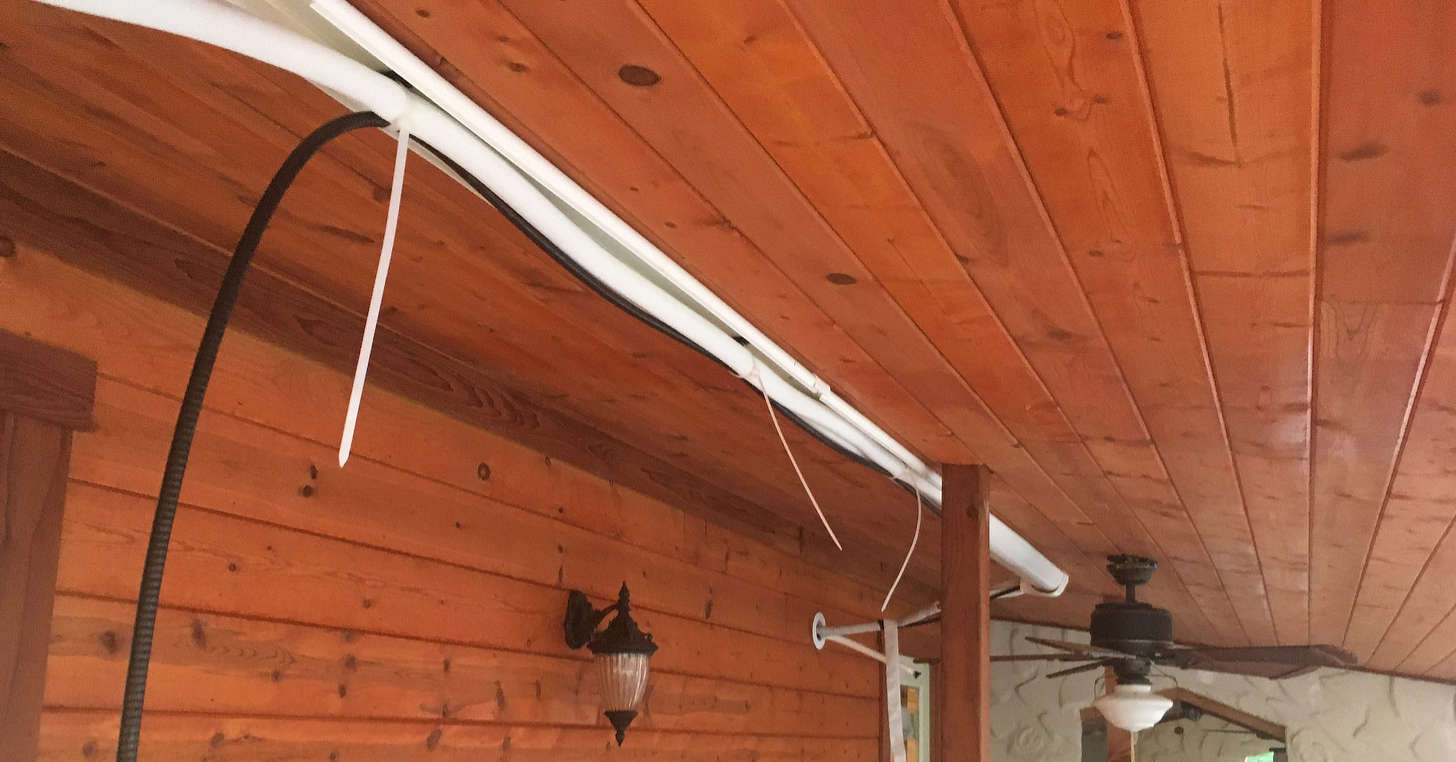
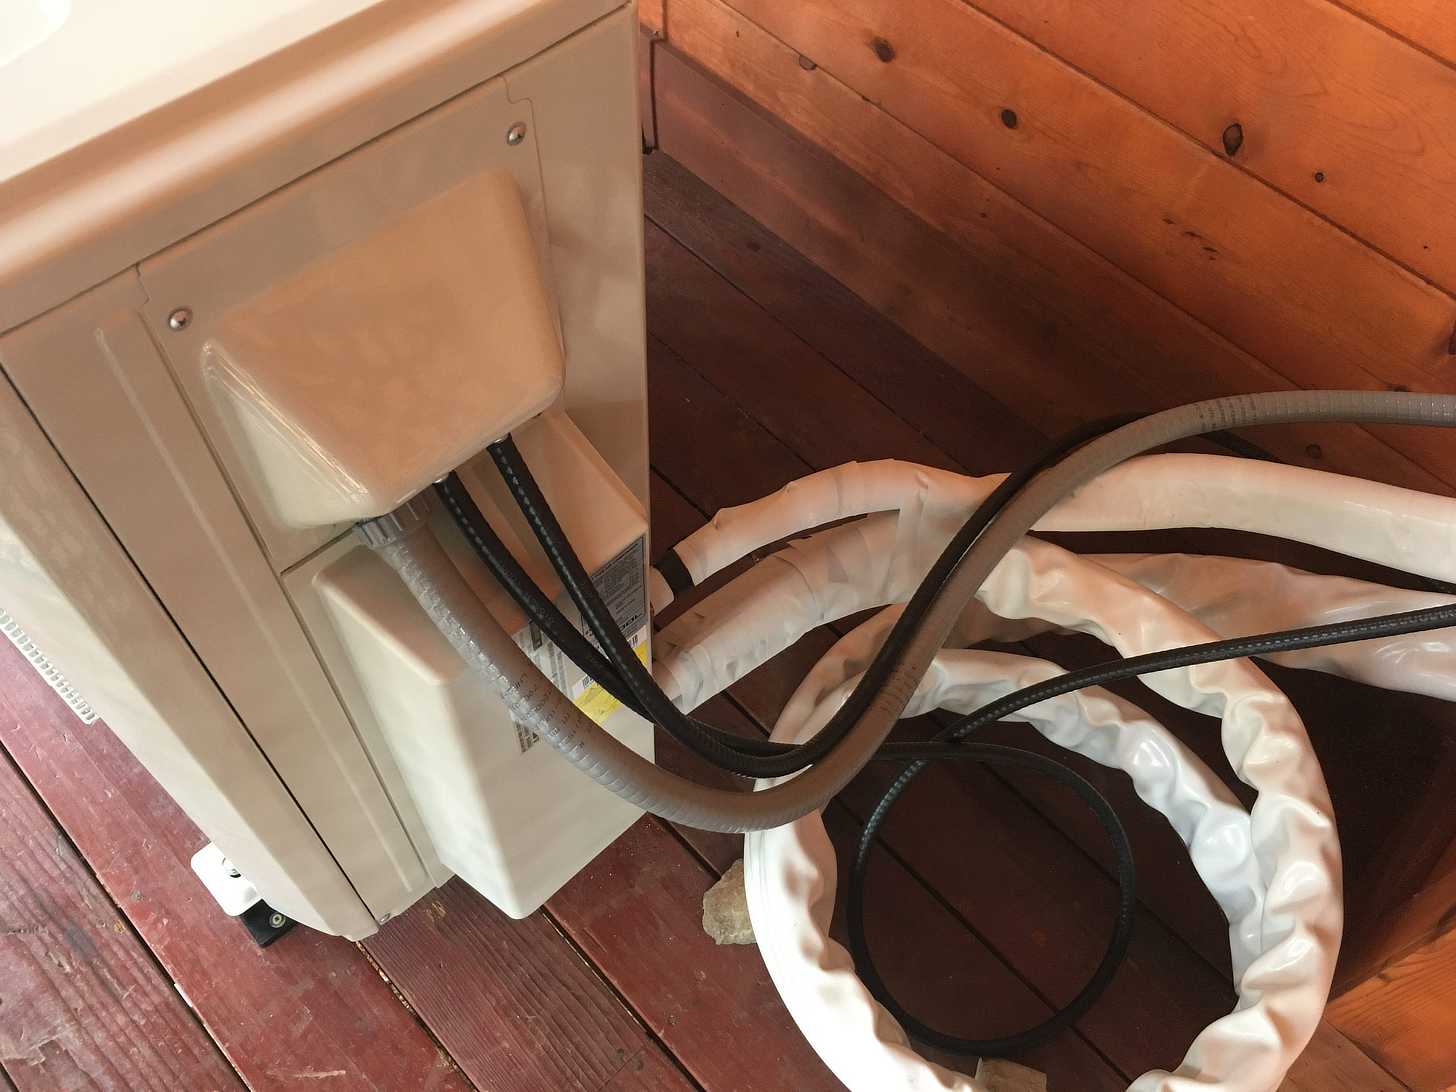
With the main hole drilled, the hole sleeve installed and the mounting bracket firmly attached, it was time to prepare the refrigerant lines, electrical conduit and get the drainage hose attached to the unit for installation. This involved bending the line-set out to a 90-degree angle from the unit and wrapping them together with the electrical conduit and drainage line using the provided vinyl tape so they could be fed through the large exterior hole as the unit snapped onto the mounting bracket. Since this was a 24k air handler and a bit heavy, it was essential to have help with this step. I was a bit concerned about this after watching how precarious it seemed in several videos. But it all went surprisingly well and I was ready for the next step — attaching the refrigerant line-sets and running them to the compressor location along with the conduit. The drainage line would be split out from the bundle so that gravity could do its thing.
Running the Line-Sets
The line-sets come in coils that need to be flattened out before connecting to the air handler. These are copper tubes that can be kinked and rendered useless if care is not taken when bending around corners. I was quite concerned about this having never run refrigerant lines before. But MRCOOL line-sets offer extra protection against kinking by way of spring-wrapped lines, so my fears were somewhat allayed.
https://www.youtube.com/watch?v=SDlR2fyUy9A
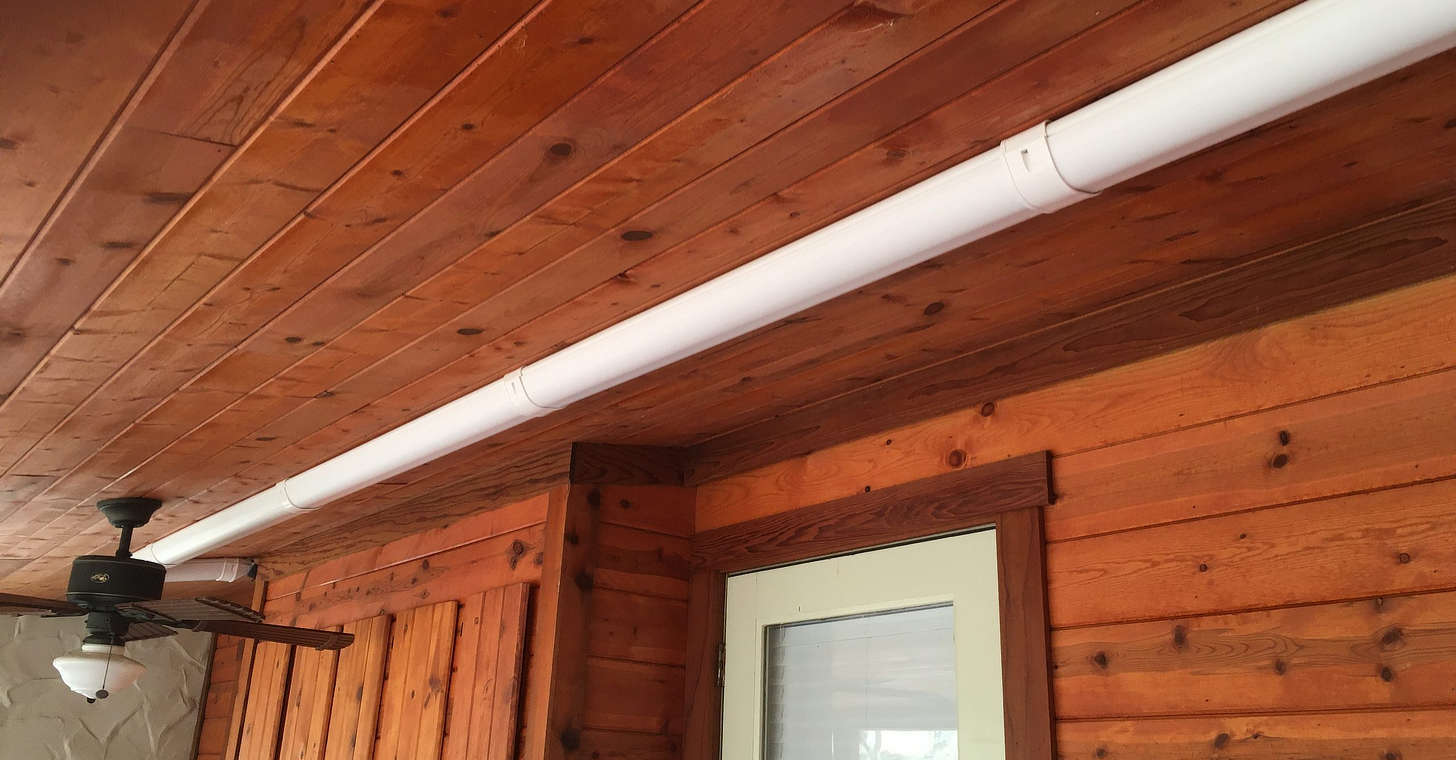
The systems were also shipped with line guard covers for both protective and aesthetic reasons (available at additional cost). These helped to keep the line-set in place, as it was installed using the included tie-wraps.
The second air handler was to be in my mixing room, and I began the work beaming with confidence after the successful 24k install. But when drilling the 3” hole for the unit I encountered a wall stud that went undetected by my stud-finder and should not have been there, based on the 16” center to center standard stud layout. Luckily, I was able to feed the line-set around the stud, which only partially impeded the hole. Catastrophe averted!
Compressor Location
Considerations for locating the outdoor compressor unit include:
- Will the unit be wall-mounted (brackets required and available from MRCOOL), or installed on a slab or concrete pad (will require some additional preparation)?
- Is there sufficient airflow around the unit?
- Is the location close enough to each interior unit to reach with available line-sets? According to MRCOOL, “…the maximum combined line set length for all rooms [is] 221.5 feet. The maximum line set length for one indoor unit is 73.8 feet. The maximum height difference between an air handler and the compressor is 49.2 feet, and the maximum height difference between two air handlers is 33 feet.” The company offers 16’, 25’, 35’ and 50’ line-set lengths.
- Availability of a 240 voltage circuit and/or installation cost.
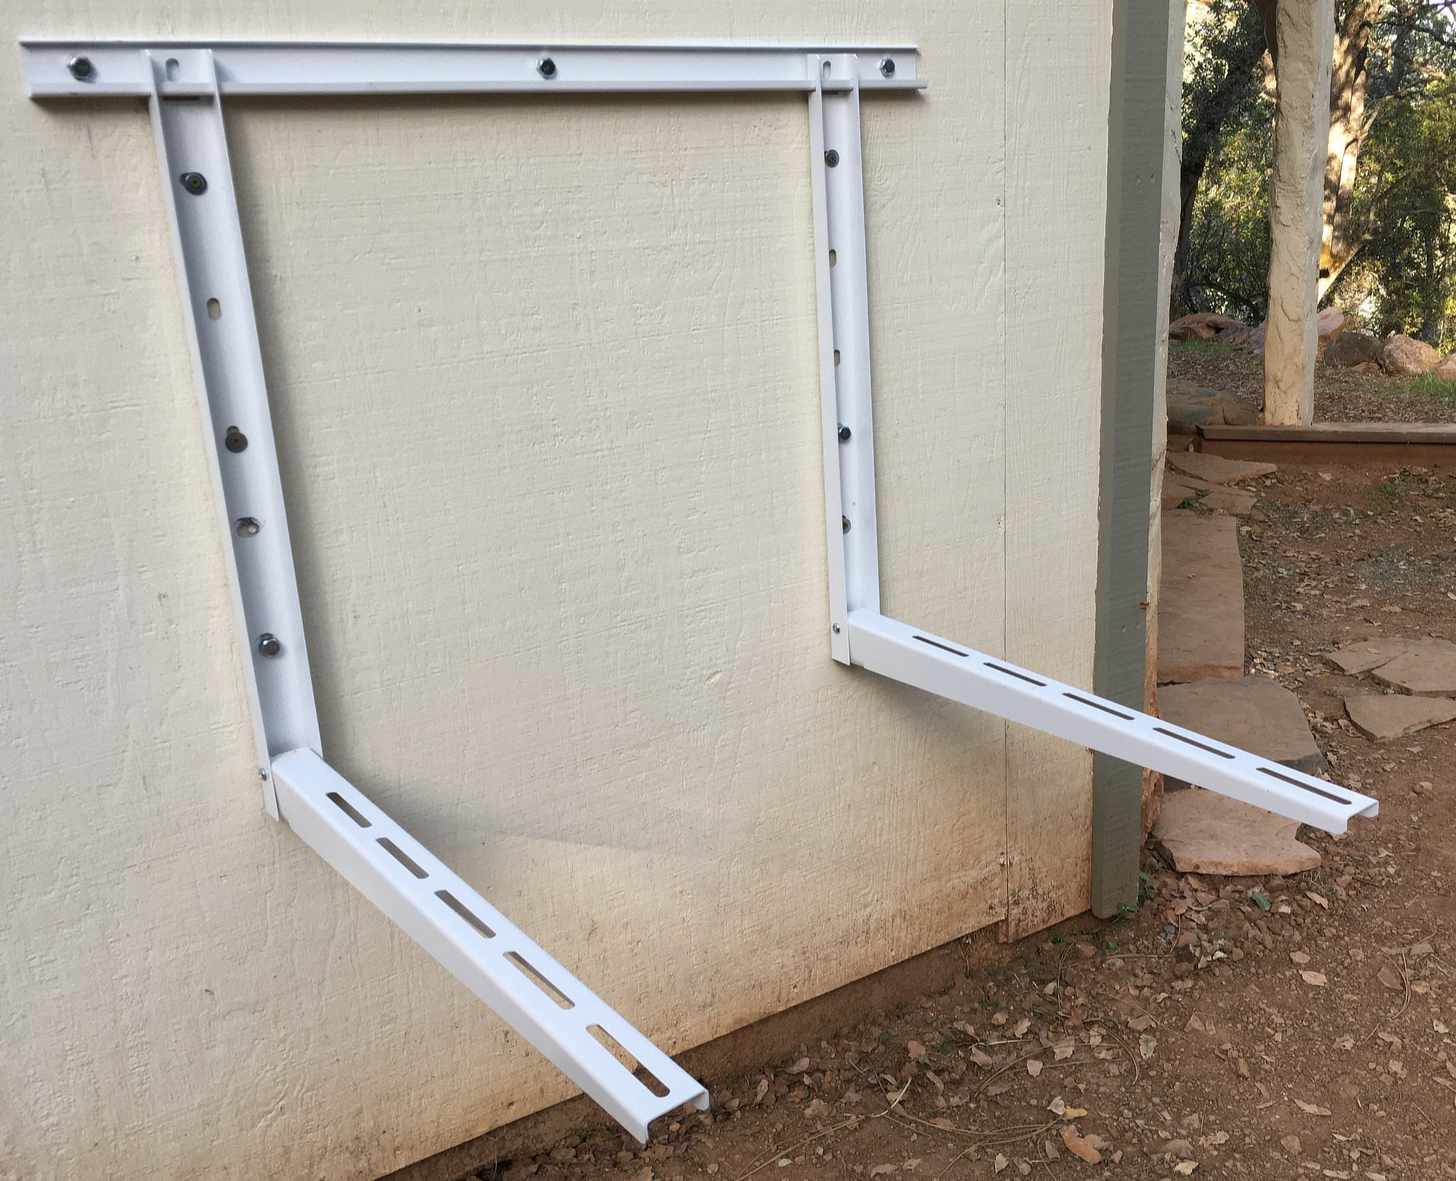
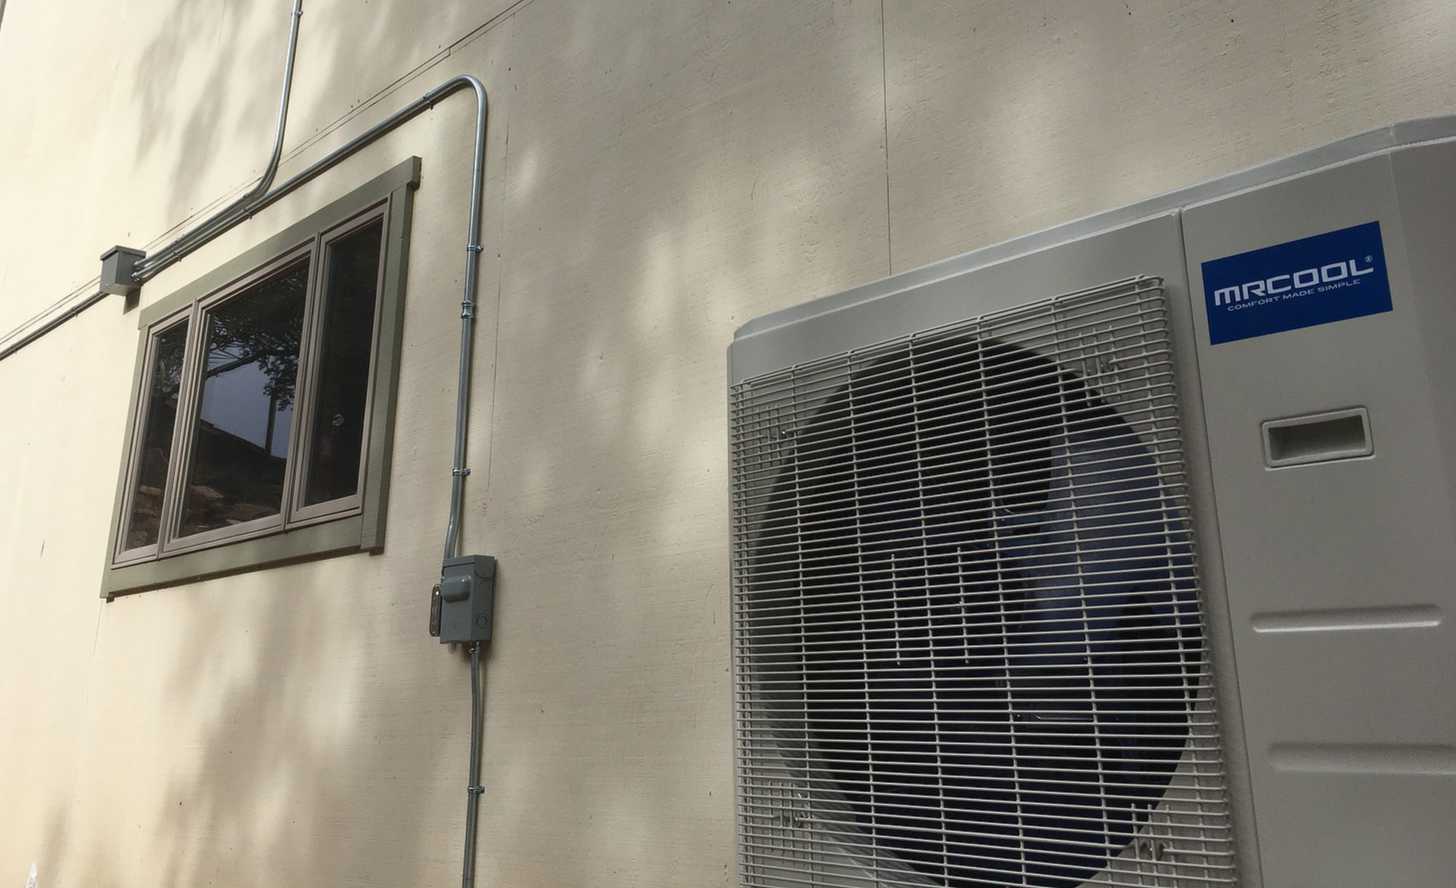
Based on these considerations I chose to locate the first compressor near an existing, but soon-to-be-removed, annoyingly loud window AC unit. There was already a 240 volt circuit in place with the proper amperage and all that was needed was to replace the outlet with a disconnect box.
It should be noted that while the system is called DIY, it is not DIA (do-it-alone). The 36k compressor weighs in at 170 pounds, so you’ll need to call in some favors to help get the unit to the install location. The second compressor would be mounted on a wall bracket in the back of the house.
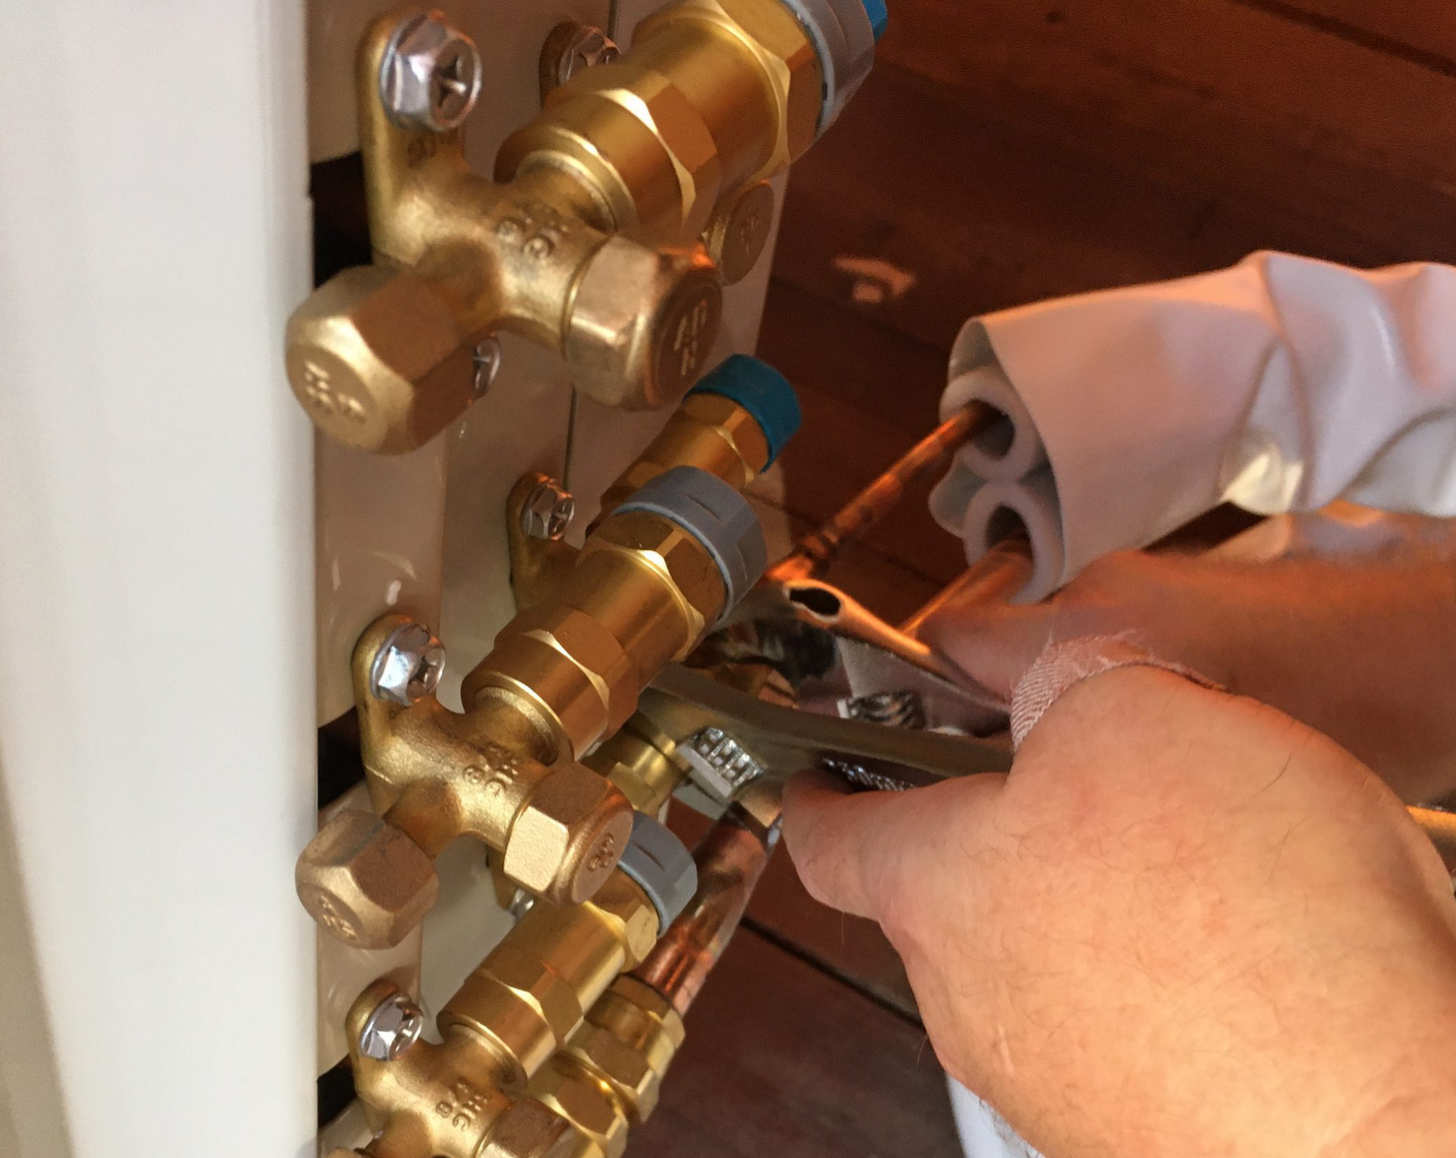
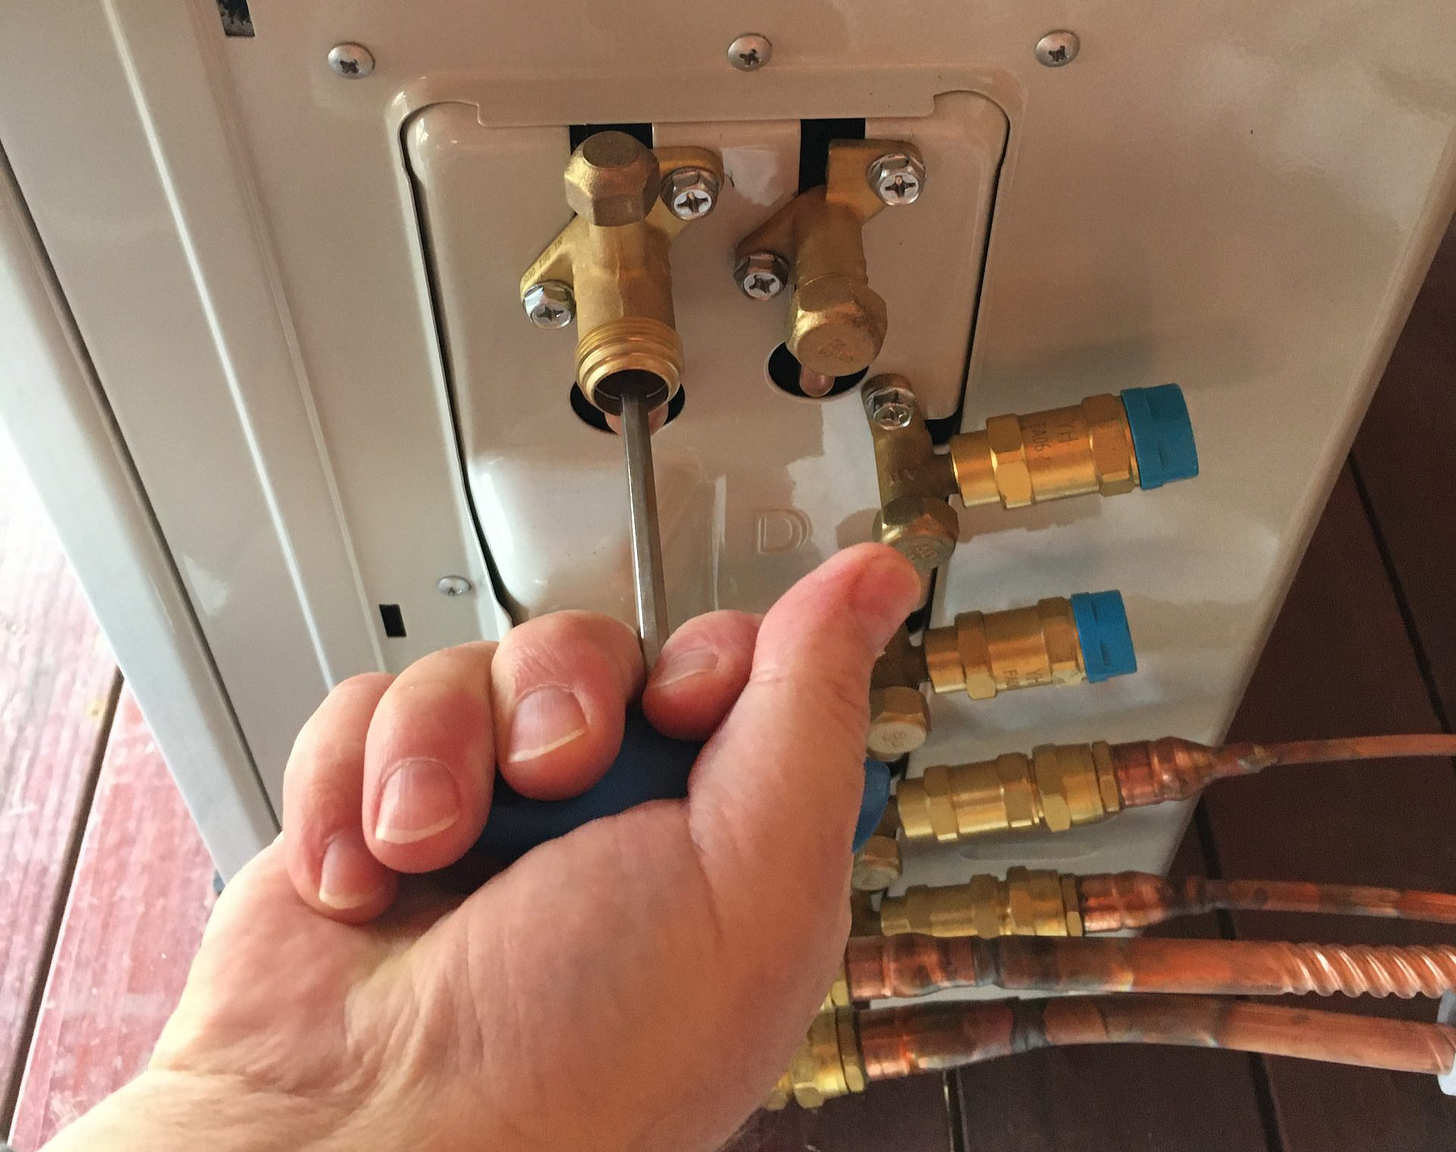
Mr Cool DIY systems come with pre-charged line-sets so that no additional equipment is needed. All that is required are a couple of adjustable wrenches to connect the line-sets and an Allen wrench to open the valves, all of which are included. Once connected and functional you spray the connections with some soapy water to check for leaks.
Electrical Connection
To reiterate, installing the necessary circuit for a Mini-Split is not to be taken lightly, and I highly recommend using a licensed electrician for this part of the job. Unless you feel absolutely confident that you won’t burn down your house or electrocute yourself, the few hundred dollars it will cost is a worthy investment. In my case, I needed two circuits installed, one of which required almost 100 feet of conduit to reach the back of the house. So I bit the bullet and had it done right.
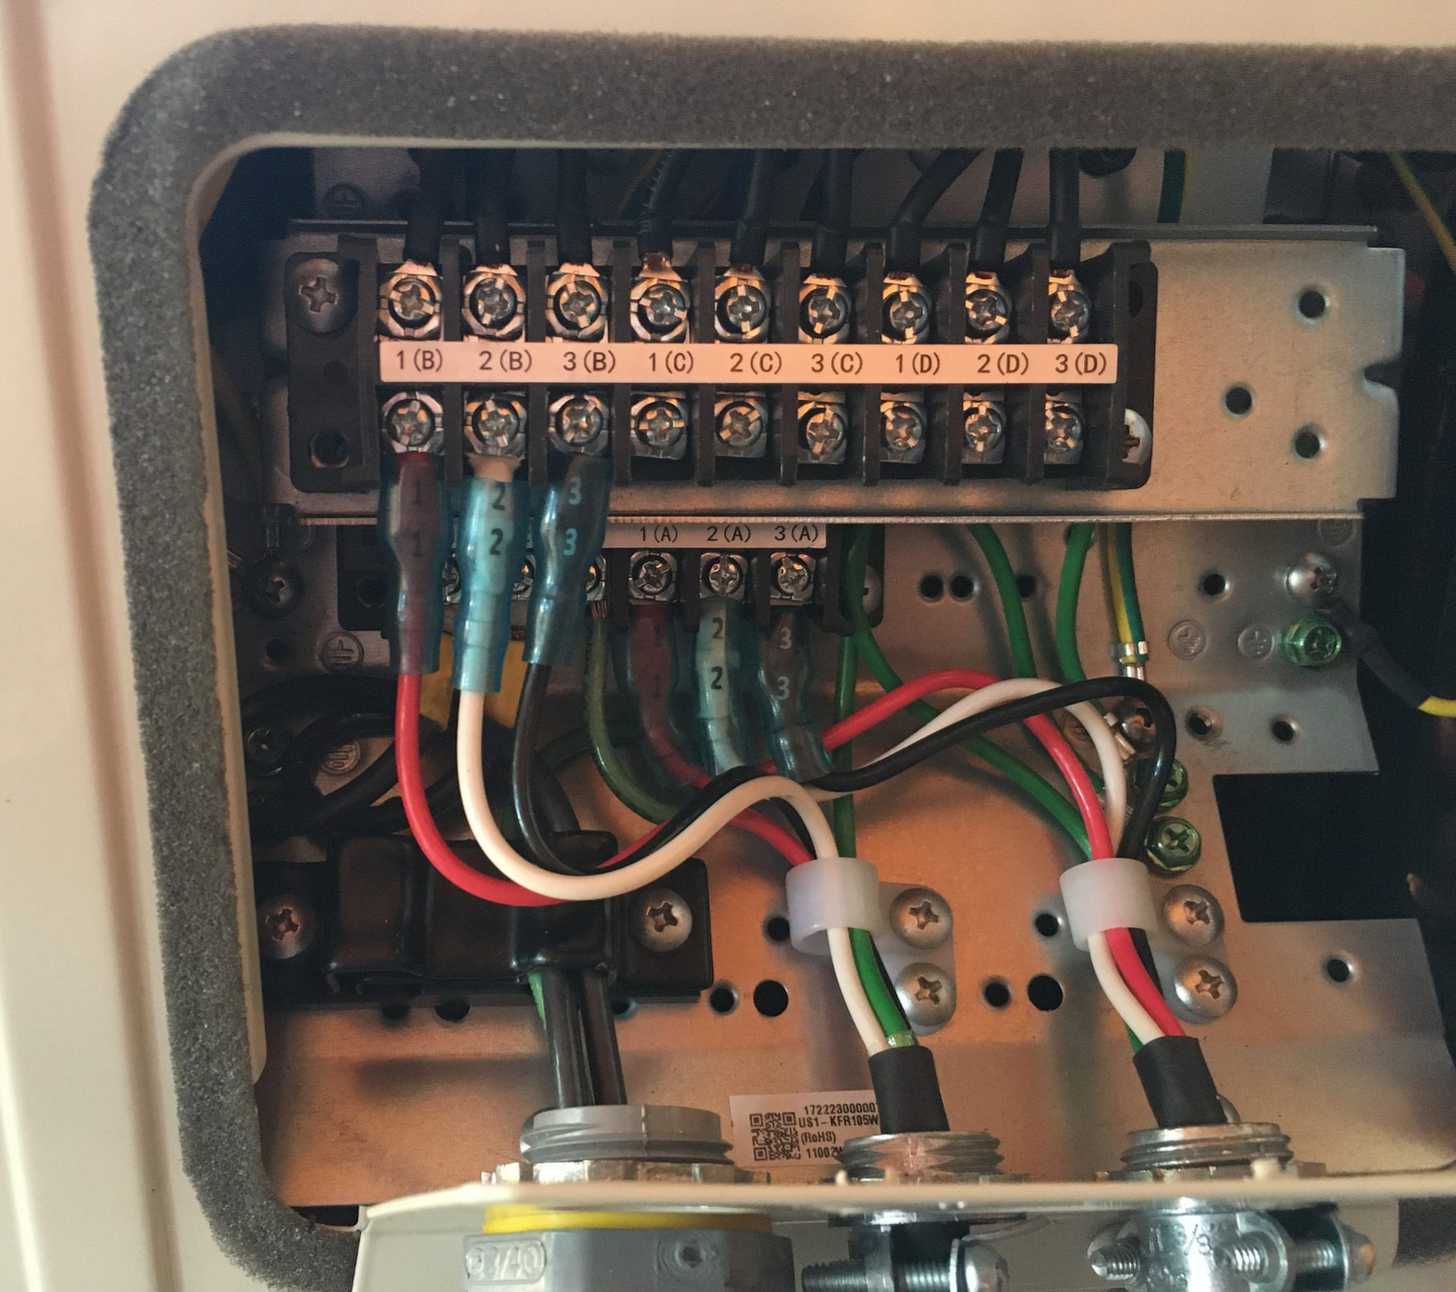
After the disconnect box was installed by my electrician and the compressor was wired in, I felt confident in connecting the individual units with the color-coded and numbered wires.
Now that the units were wired in, refrigerant lines connected and drainage lines installed, I checked for leaks and general operation. Once everything checked out I finished the installation of the line covers and stowed away excess tubing near the compressor. It is recommended to keep things neatly coiled up horizontally to avoid possible oil traps in the line.
Measurements and Recording Tests
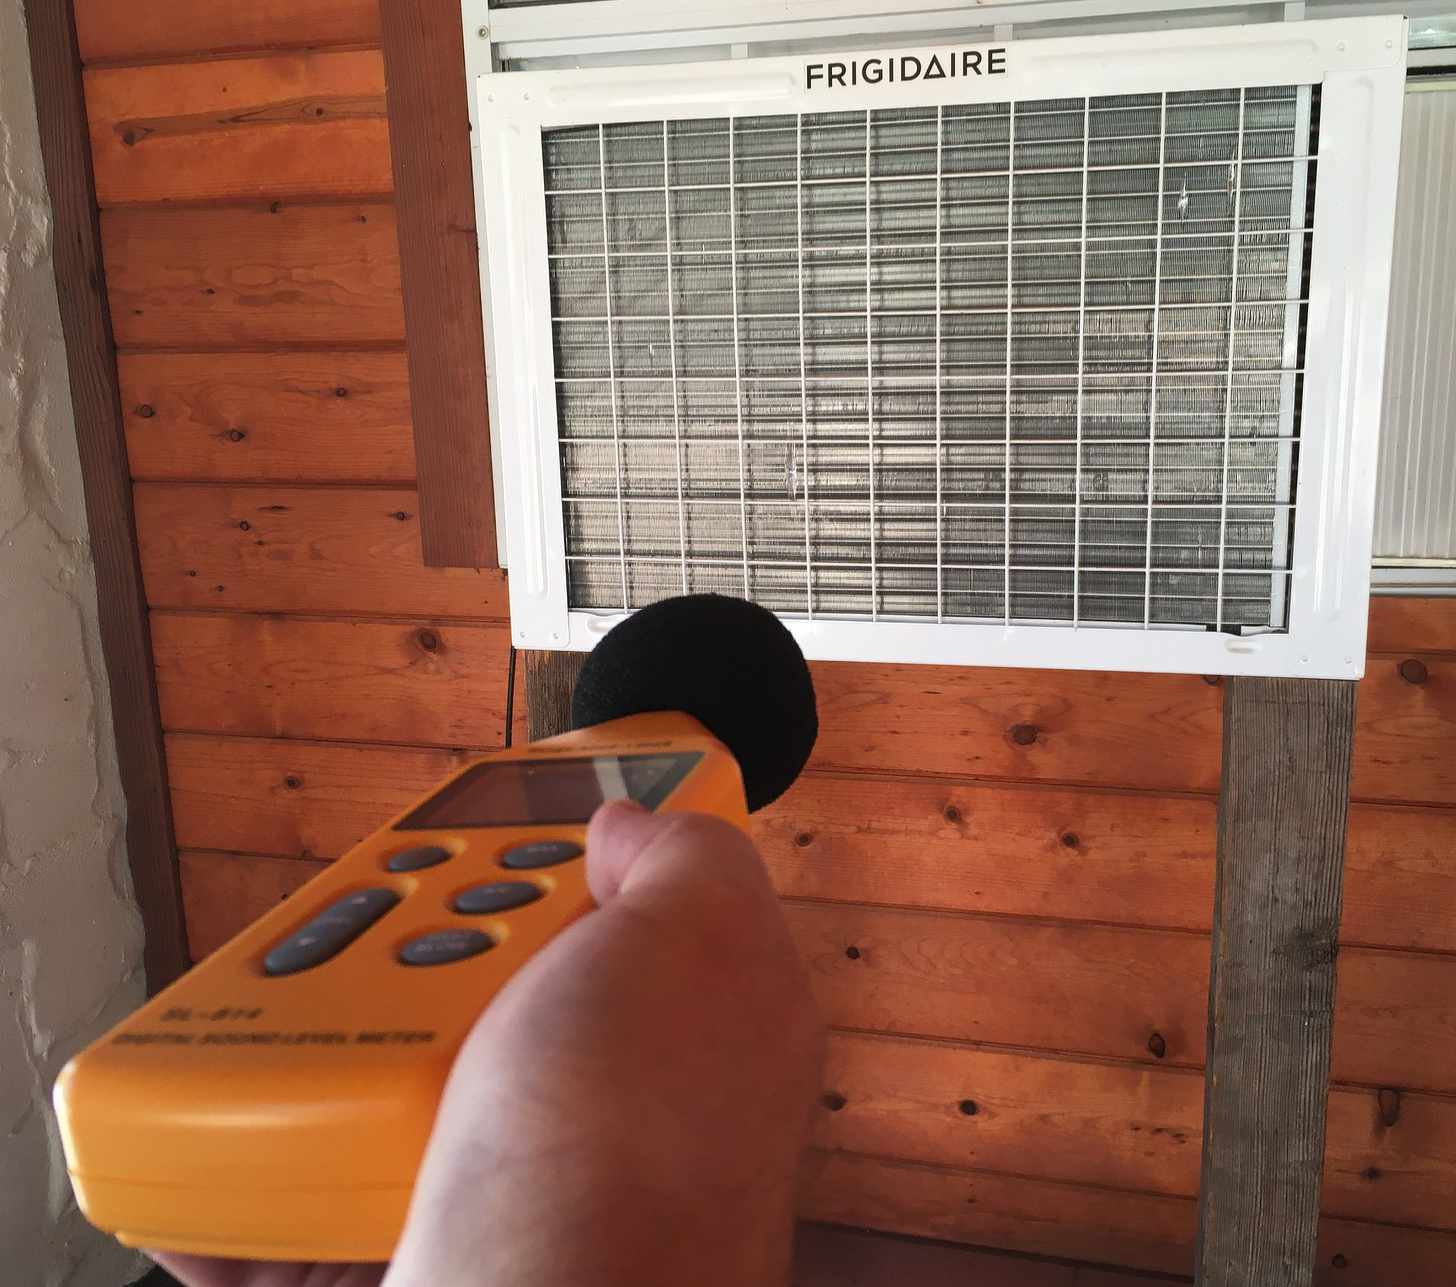
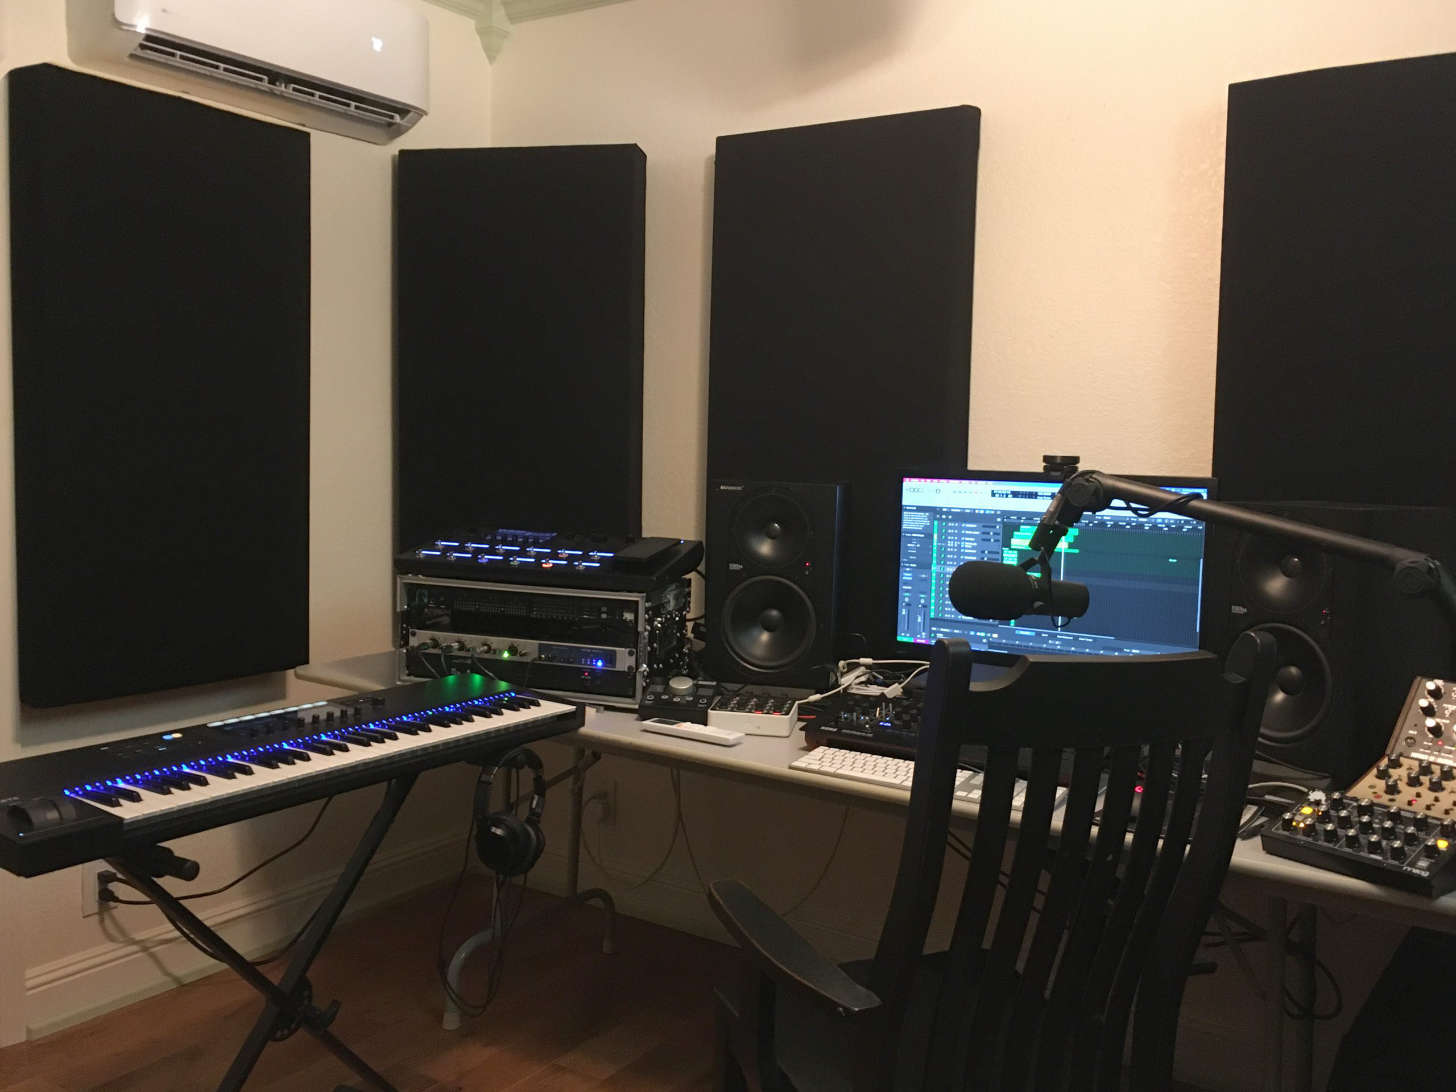
Before I began the project I took some SPL measurements of the existing window AC unit from inside and outside for comparison purposes. I repeated this process for the newly installed units. I like to record in various rooms in my house depending on the context. For example, I prefer a more reverberant space for acoustic guitar, so a lightly furnished living room with hardwood flooring and textured walls becomes a great tracking room. I installed a 12k air handler in my mixing space, which is relatively small and treated mainly with 2’x4’x4” absorption panels made with rigid insulation. This room originally had no heat and just a ceiling fan which will be removed to make way for a cloud absorber. Since this is where I spend most of my time, ambient noise from the unit was a concern, but it turned out to be amazingly quiet and efficient. See sound level measurements below.

I was particularly impressed with the extremely low ambient noise level of the 12k unit. For all practical purposes, it was sonically invisible at the low fan setting, which turned out to be more than adequate to keep the room at a comfortable ambient temperature. Note the significant difference in outdoor noise level between the MRCOOL compressor and the window AC unit. A switch to a heat pump system will surely make your neighbors very happy. I also did some sound recordings to see if there was a difference in the frequency content between the window AC unit and the mini-split. The window unit had significantly more high-end frequency content while the MRCOOL system seemed to more closely resemble pink noise.
Conclusions
After working in situations with window AC units, forced air systems and the clanking, steam-based radiators found in NYC apartment buildings, I am completely sold on mini-split technology as the best option for home studio HVAC. While considering HVAC solutions are nowhere near as sexy as buying a new synth or microphone, choosing the right system will have long-lasting implications for your productivity. A comfortable environment is essential for the creative juices to flow. Achieving adequate climate control with a quiet and efficient system at a reasonable cost is now completely within reach for home-based producers. MRCOOL has produced an excellent do-it-yourself solution that fills an ever-expanding niche. Admittedly, DIY systems are not for everyone, but if you can use a few tools and follow directions, you can certainly install one of these babies on your own. While I don’t see the possibility of a MRCOOL booth at the NAMM show happening anytime soon, as more and more home-based project studios emerge, the need for affordable and quiet HVAC systems will certainly rise. Although this system is still relatively new to me, my initial experiences with MRCOOL equipment and technical support have been excellent and I can wholeheartedly recommend them as a viable DIY HVAC solution. Look for an update to this article in a few months as the weather changes and things unfold.
Check out my other articles, reviews and interviews
Follow me on Twitter / Instagram / YouTube
Eleveate Your Ears