9 Workflow Tips for Producing Music in FL Studio
Article Content
Here are some tips and tricks for achieving a fast, reliable workflow when producing music in FL Studio …
1. Know the Navigation Keyboard Shortcuts
There are a few special ones that if you don’t have down you should get down! They are:
F5 – Playlist
F6 – Step sequencer
F8 – Browser
F9 – The mixer
![]()
These have large buttons at the top to get to these menus. However, you will flip between these constantly. Using the keyboard shortcuts simplifies the process of bringing these menus up and keeps you focused on writing music. The channel rack in particular is one you will constantly be bringing back and forth. You can click in an open space in the work area to bring this up as well. For this reason, I try to leave at least one little space of background as it can be faster sometimes. As a general rule if you reach for a menu more than 5 times in a single session consider learning its keyboard shortcut.
2. Use the Menu Shortcuts
The menus in FL have letters underlined.
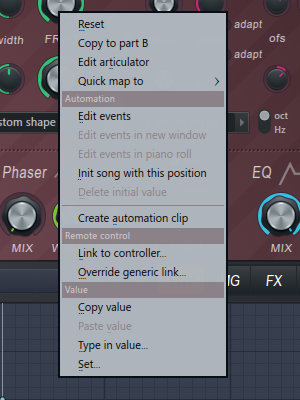
If you hit the underlined letter while the menu is open it will do that thing. For example, if you’re making an automation clip, something we do hundreds of times, instead of right clicking and then going to the “create automation clip” you can instead just hit “a.” It’s so fast that I am often asked about how I did that so quickly since the menu is only visible for a split second. As a quick side tip, if you’re going to make an automation clip consider selecting a part of the timeline because FL will automatically make the automation the length of your selection!
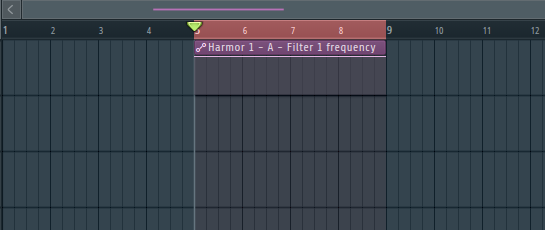
Another case where it’s useful and very common is making a pattern unique. Instead of opening the menu and looking for that option you can simply hit “m.”
3. Use Alt and Tab Keys To Manage Floating Windows
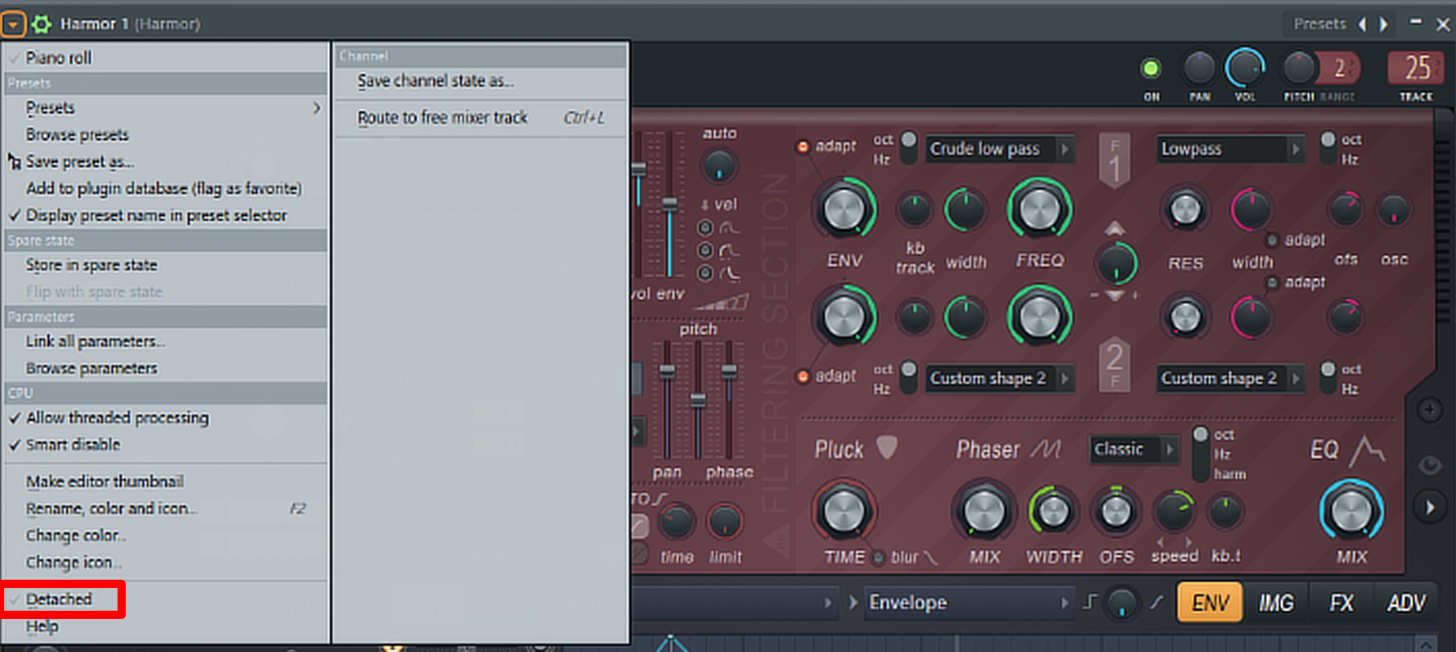
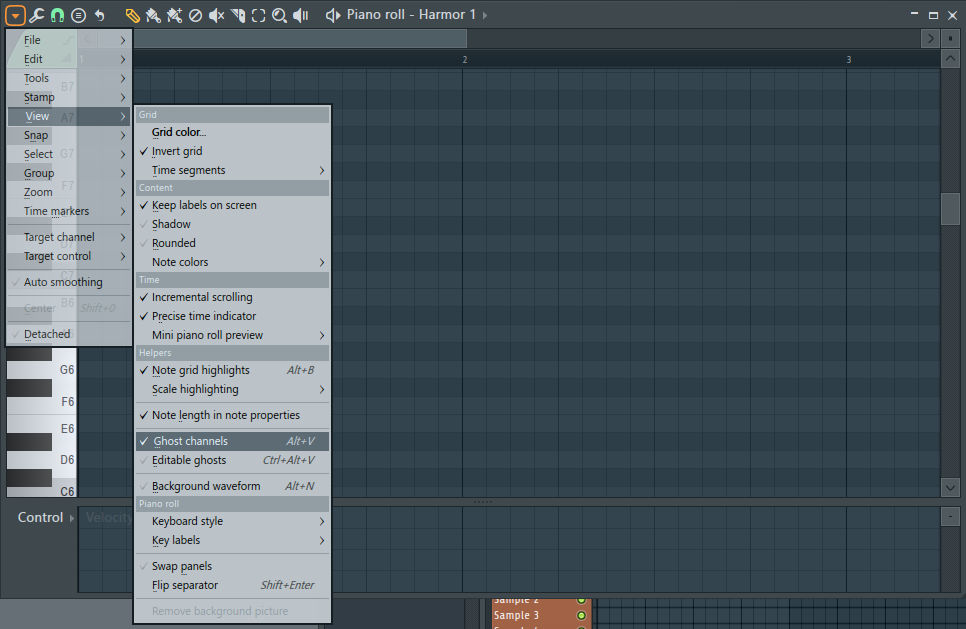
FL uses floating windows and because of this it is easy to get lost. FL also will automatically close some windows when you open another. If you have too many windows open, you can hit F12 to close everything. Often you may want some windows to float, or you may want to cycle through windows or to have more than 1 window open without closing another. To cycle through windows just use tab. This is great for plugins like Kontakt that I try to keep open because they take a long time to close and open. A couple pushes of tab and bam! It’s at the front. “Shift+tab” will cycle in the other direction. To open windows without automatically closing others simply hold alt while you click the channel or plug-in. To make a window a floating window (meaning one that is always on top of the program), you can go to the corner list and go to “detached,” or when the list is open just hit “d.” This is a super useful trick. A detached window can also be moved outside the FL window boundaries, so you can bring it to another monitor without having to extend FL itself. It will also always stay on top of non-detached windows which is great when you want to ensure it never gets covered.
4. Patcher Is There for You
Patcher is like an endless channel strip. You can route things in parallel or series easily, create multi synth mega patches with FX included, save channel strips with complex routing you regularly use and more, all in one preset!
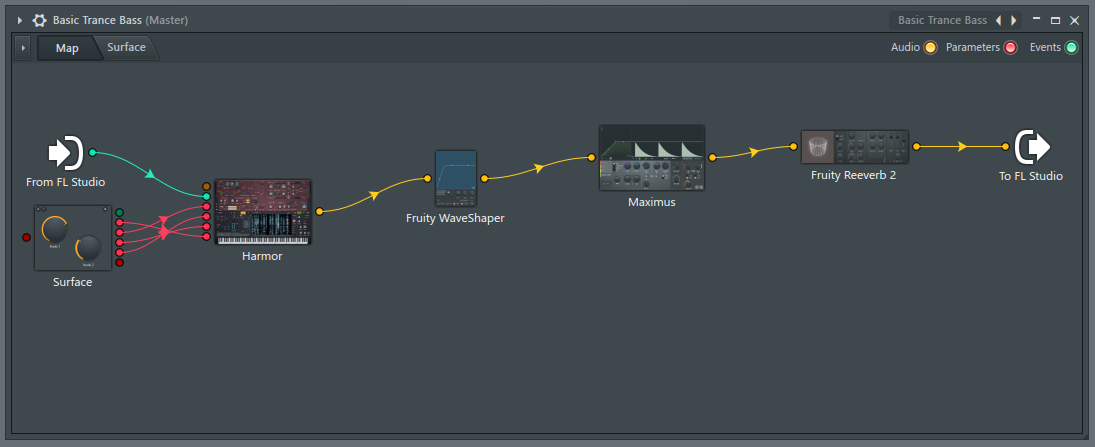
Here is a synth patch I created a while back and return to often. You can even make knobs appear of the surface to control the important stuff which is super handy in complex patches. Patcher can load any VST, not just FL native plugins.
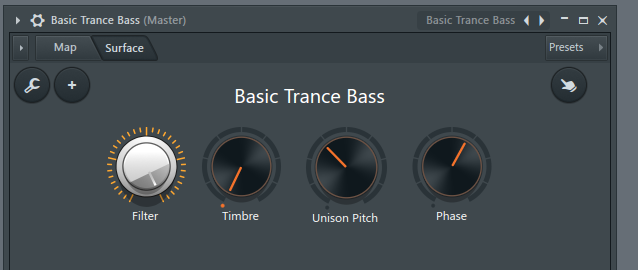
The image above shows the front end of the patch.
Patcher makes it so you can work across many projects extremely fast. On top of this you no longer need to worry about the limited number of inserts on a single channel strip which can make routing more complicated than it needs to be. Make regular use of patcher and before you load a plugin ask yourself if patcher could simplify the process.
5. Use the Plugin Picker
FL has the fastest plugin browser of any DAW I have ever used. When you start using FL and are new you don’t have many plugins, so the list view probably works for you. As soon as you start getting more plugins you will come to a point where the list is no longer reasonable. For this situation, use the plugin picker. Simply right click the + at the bottom of the channel rack or on an insert and the plugin picker will come up.
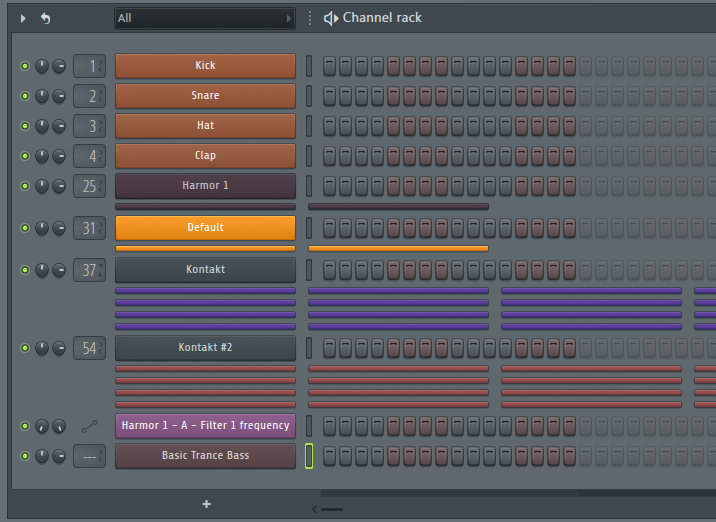
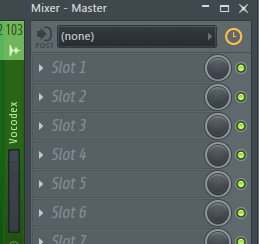
You will get a picture of all effects (or generators, depending on which one you picked) in your plug-in database, as seen below.
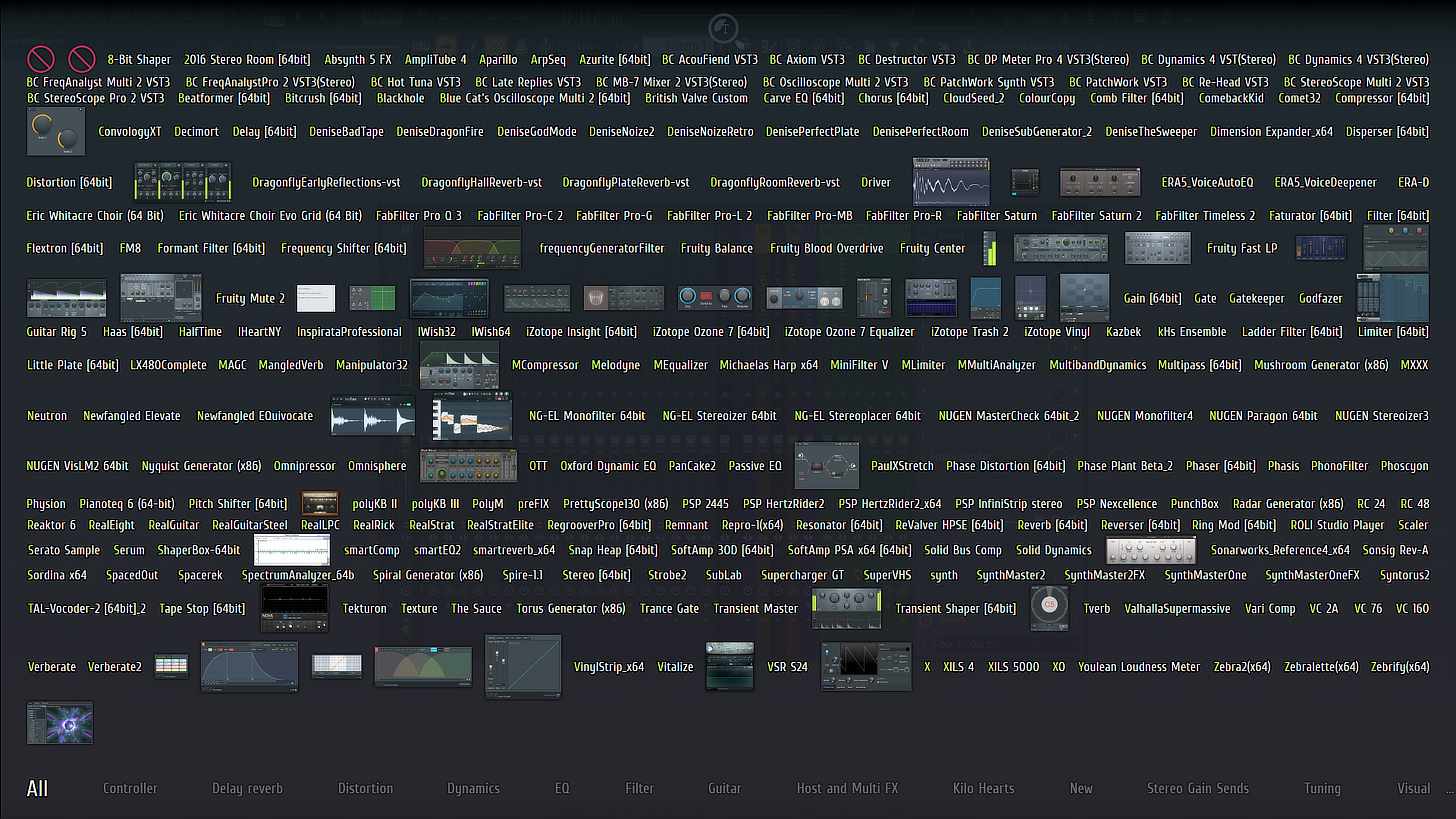
Next, don’t use your mouse. If you use your mouse, then you’re missing out on the greatness of the plug-in picker. Simply start to type the name. It will automatically select stuff with that name, and you can use arrow keys to quickly move to it if that is faster, and then hit enter to load it. No mouse required. For example, if I want to load an EQ, FL has a great one called the parametric EQ 2. I right click on an insert to bring up the plugin picker and type “para” and hit enter and it loads! It’s insanely fast. In patcher use “alt+F8” to bring the plug-in picker up. This brings me to my next point.
6. Update your Plugin Database
To open the plugin database right click on the file browser on the plugin tab and select open.
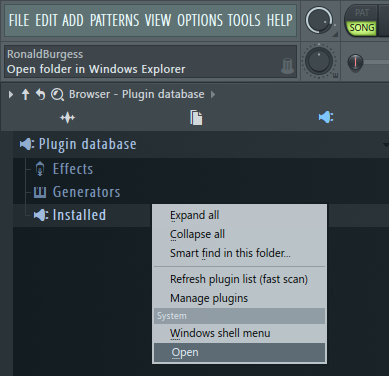
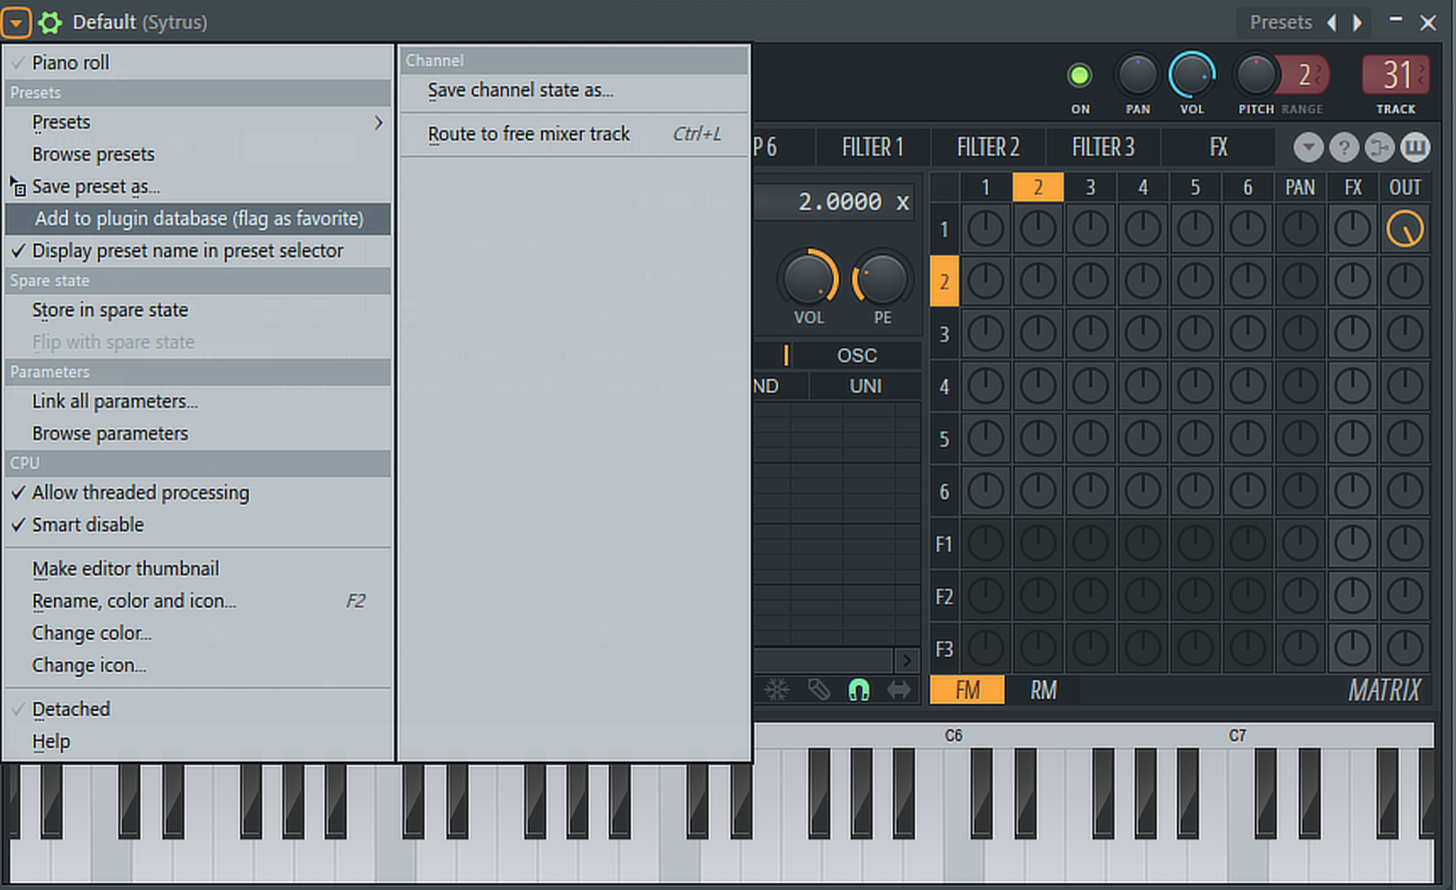
Your plugin database is what the plugin picker uses to show you your plugins and name them. Many plugins from the same company often have the same starting part of a name making them a bit of a pain to type; you can simply give them unique names in the database and bam, problem fixed. You can also delete plugins from the database that you use less often so you can browse faster and be more focused. The plugin will still be there but now it will be in the “more plugins” list at the top of the normal list.
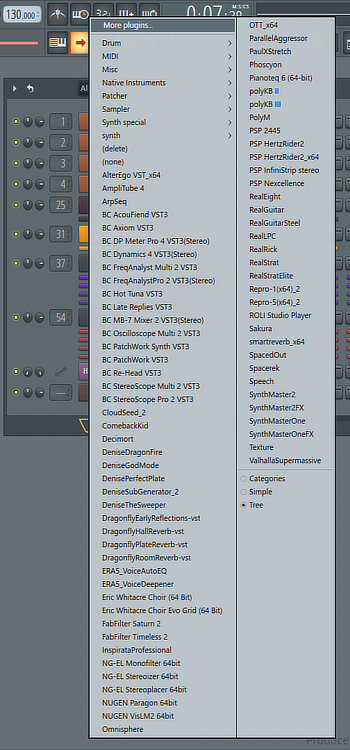
This helps keep clutter out of the way. If you find you’re using a plugin more, you can simply go to that plug in the drop down in the upper right of the wrapper and add it back to the database!
7. Know How Duplicate Works
This is a short one, but I see it misunderstood all the time. FL has a duplicate option that makes it very fast. First, if you make a selection and hit “ctrl+b,” FL will duplicate that selection at the end of that selection of events. This lets you super quickly duplicate events. Often there is a small rest at the end of a phrase or bar so the event itself doesn’t go all the way to the end of the bar. This means if you duplicate the event like this there will be a small offset making your track off by a bit. If there is a gap at the end of your selection, then you need to make a horizontal time selection and then hit “ctrl+b” to get the events to line up. Since you selected an amount of time instead of an event it will duplicate that time, so your track will still be lined up.
8. Use Ghost Notes to Navigate
Ghost notes are notes that appear on the piano roll editor when other MIDI channels are playing notes in the same pattern.
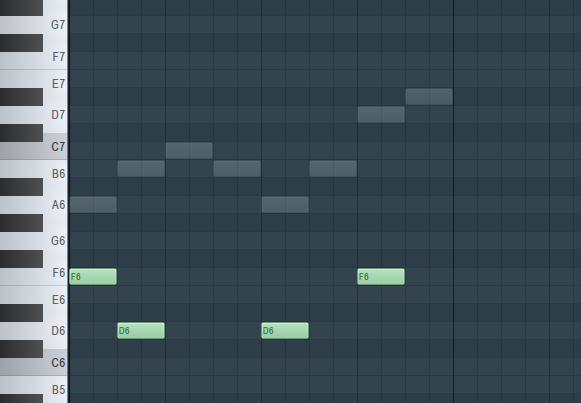
To turn ghost notes on go to the piano roll and from the drop down in the corner go to view and then to ghost channels.
Seeing harmony is much easier with ghost notes, and many DAWs sport this feature but in FL you can navigate with them. Simply double right click a ghost note to move to that channel. It’s easy, fast and it makes altering parts a breeze without a ton of window hopping.
9. Secret Mouse Menu
This isn’t too much of a secret anymore, but when working in the piano roll or playlist area there is the regular suite of tools: the edit cursor, pencil tool, etc.
![]()
Going up there to click the tool you want takes time and can break your focus. There are 2 better ways. First, you can middle mouse click and hold, and then left mouse click in the edit areas. A menu will pop up will all the same options! Gone are the days of going to the top area to pick your tool!
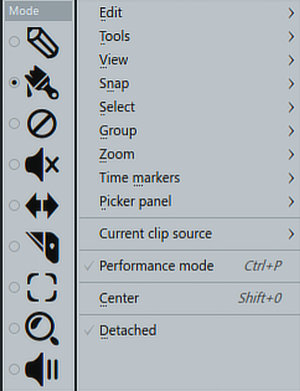
A second option is to right mouse click and scroll the mouse wheel which will scroll through the tools. I use the first method, but I have colleagues that like this method more.


