3 Tips for Clearing up a Muddy Mix
03/14/2020
Article Content
When you ask any A-Tier mixer what they think the primary differences between a professional and amateur mix are, at some point, they’ll probably mention something about mud*.
*Mud. Sound engineer lingo for pretty much anything in a mix which is undesirable, undefined or unclear.
To that end, today we’ll be looking at three ways you can go about scooping out the “mud” from your productions while bringing back a whole lot of clarity:
1. High/Low-Pass Filtering Wherever Possible
Believe it or not, filtering is one of the most powerful processing moves in an engineer’s arsenal. In fact, filtering is so powerful, that it’s often the only type of processing applied to several channels in each of my mixes.
Generally speaking, each instrument in a mix should be living in its own frequency space without having to compete too hard for occupancy of said living space. When working on a song with a dense arrangement and dozens of similar sounds fighting to be heard over each other at all times (like EDM for instance), there’s often only one solution to fixing this real-estate problem: CARVING OUT SOME ADDITIONAL SPACE!
Imagine the following scenario: You’ve been sent an electronic song with dozens of synth basses, leads, pads and plucks playing simultaneously, all adding up to create an undefined, cloudy mess throughout the entire frequency spectrum. Where do you begin with making sense of everything?
To start off, you need to go through and try to determine the primary purpose of each sound — If there are two basses, does one of them have a better low end than the other? Does one of the layered lead synths have a nice high-end while the others’ resemble a bee swarm?
Next, instantiate some filters and work in broad strokes to “channel” each sound into their intended “designated living space” — If the pads and synths have a lot of low-end, filter a bunch of it out to make more room for the bass. If one of the basses’ sub information is muddy and undefined, carve out everything below 100Hz on that channel to allow for the tight, clean low-end of the other bass to punch through clearly. If one of the synths has an ear-fatiguing, “white noise-esque” buzz around 8-10 kHz which is masking the high-end detail of everything else in the song, low-pass filter it down to where it’s less obnoxious.
Sure, your individual instruments might sound a little bit “thin” or “dark” when played back in solo after filtering off a bunch of their lows and highs, but nobody’s ever gonna hear them in solo, are they? Always think about the big picture, and make all of your decisions in this context!
2. Timing & Filtering Your FX Sends
When using reverb, people often just choose a preset which they think sounds cool, adjust their send levels and call it a day.
The problem is, the lush, long, full-frequency reverb sounds that we often end up being drawn towards actually take up far too much room in the context of a full mix, and can usually benefit from some additional “taming” in order to better fit in with the surrounding arrangement.
The first step you can take towards making sure your reverb tails aren’t contributing a huge amount of mud to your mix is to time them to the tempo of your track.
Think of it this way: If your snare reverb is too long, then each hit is going to overlap with the next, blurring the transient impact of the drum, and causing an unnecessary build-up of reverberated resonant frequencies.
On the other hand, if your snare reverb is too short, and isn’t ending in a rhythmic manner, then you’re effectively compromising the integrity of the overall groove by using it.
The solution to this problem is to calculate the decay times of your reverbs to end on rhythmic subdivisions using a simple formula:
60,000 ms (1 minute) ÷ Song BPM (beats per minute) = Time between ¼ note beats (in ms)
For example: If we were working on a song at 140 bpm, we would divide 60,000 by 140 to determine that the duration between each ¼ note at this tempo is 428.5 ms. Knowing this, we can then multiply this number by 2 to set our reverb to last an exact ½ note (857ms), or by 4 to last a perfect bar (1714ms).
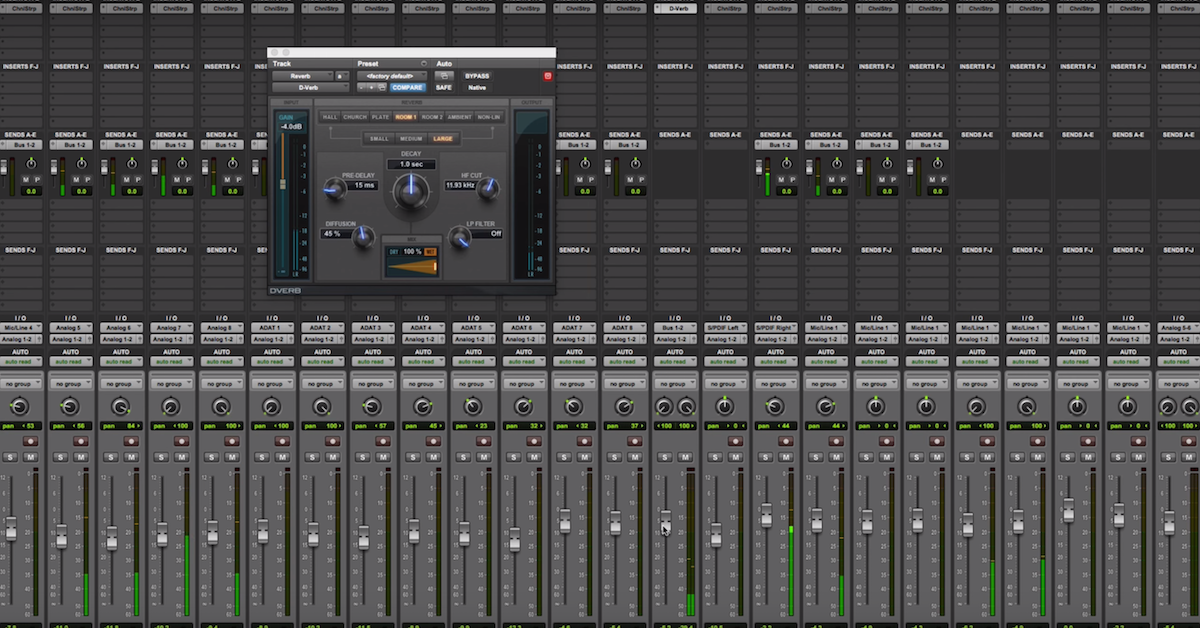
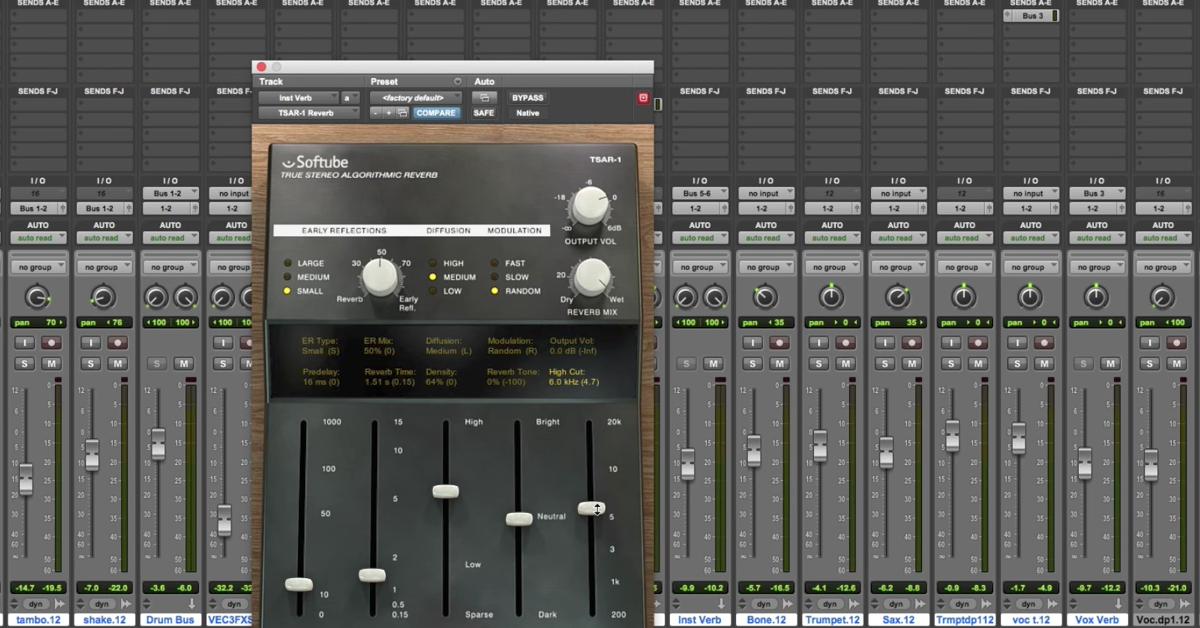
Our second step towards reducing reverb-induced mud is to adjust which frequencies are being reverberated to begin with by using filters.
Generally speaking, we want our reverbs to operate fairly discreetly in the mid-range without “cluttering up” our low-end every time a kick drum hits, or “spluttering up” our high-end every time the vocalist says something sibilant.
Back in the 60s, the brilliant engineers at Abbey Road Studios figured out that by simply filtering off everything below 600 Hz, and everything above 8-10 kHz on their reverb sends, they were able to free up a huge amount of frequency real estate without really impacting how the effects were heard within the mix.
This isn’t to say that you should always stick to these numbers exactly … my reverb-send pre-FX High and Low-pass filters often fluctuate between 250-600 Hz and 5-10 kHz, respectively, depending on what the particular song and instrument I’m working on calls for.

Ready to elevate your ears?
It doesn’t have to take years to train your ears.
Get started today — and you’ll be amazed at how quickly using Quiztones for just a few minutes a day will improve your mixes, recordings, and productions!
The result of applying both of these tricks to every single reverb in a track is a drastic improvement in overall clarity and a surprising increase in rhythmic definition.
3. Edit Samples To Prevent Overlaps & Smearing
Drum samples are awesome and play a huge role in modern-day music production. Being able to audition through thousands of sounds to replace and augment your raw performances with only a few clicks of a mouse is nothing short of astounding — But the question is: Are you triggering these sounds correctly?
A lot of us use samplers and MIDI to trigger external drum samples in our tracks. The primary issue with this method is the fact that some sampling software doesn’t include the option to “mute-and-retrigger” when MIDI notes are played in quick succession, which can cause an undesired overlap of the two sounds.
In the following example image, our first channel includes two, fast 16th note kicks which were triggered via MIDI using the sampler in Steven Slate Drums 4, while the kicks in the second channel were pasted into Reaper’s editing window manually and trimmed to prevent any overlaps:
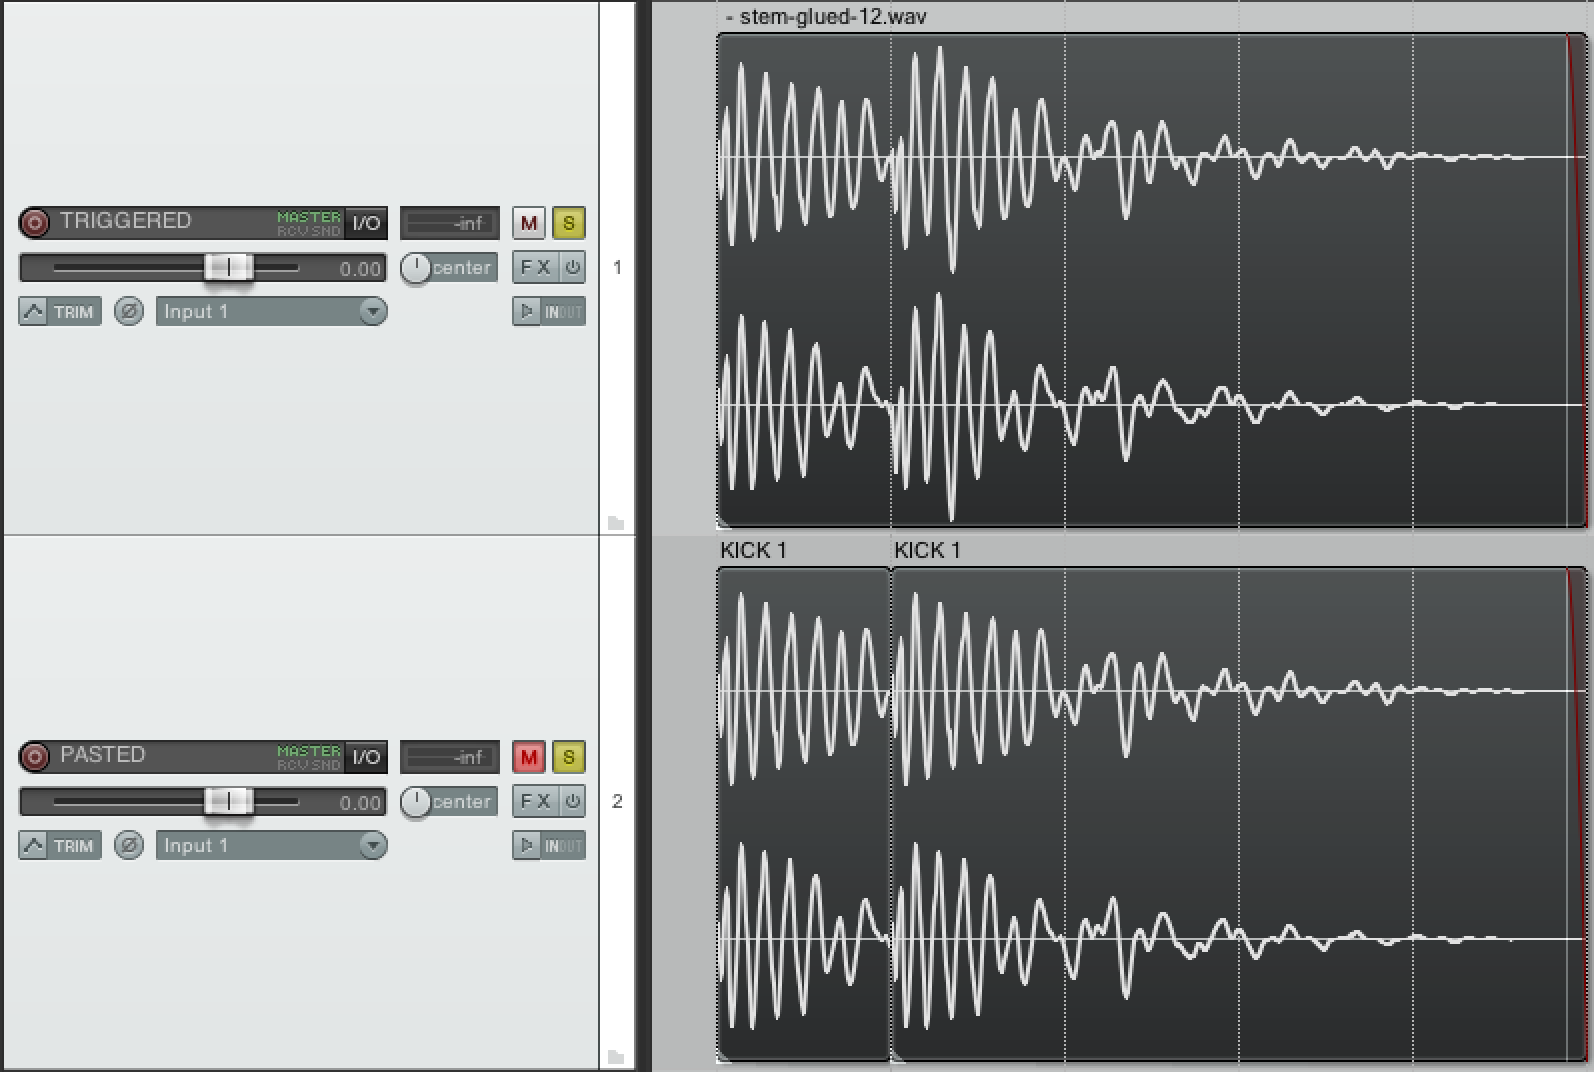
Sampler-rendered Kicks vs. Manually Placed Kicks – Waveform Comparison
As you can see, in the “TRIGGERED” channel, the second kick’s waveform is larger due to the fact that it’s overlapping with the first kick’s sustain, whereas in the “PASTED” channel, the 2nd kick is being perfectly re-triggered with absolutely no overlaps.
“Are sample overlaps really such a bad thing?” I hear you asking. Well, it all really depends on the musical context. For example:
If you were recording a grimy heavy metal track on a huge drum kit with two separate kick drums, and then sample replacing the kicks after-the-fact, you might actually want to ALLOW the resonance of consecutive double kicks to somewhat overlap for the sake of maintaining realism.
On the other hand. In less organic genres such as Pop, Hip-Hop and EDM, you probably want to achieve perfect re-triggering for each hit in order to maximize clarity and transient punch at all times, and although it definitely takes a lot longer to do, manually slicing and trimming your drum samples in this manner is the most foolproof way of guaranteeing these results!
Conclusion
It’s important to remember that a lot of the time, “perfection” isn’t achieved through a single, large, swooping move, but rather through the accumulation of hundreds, even thousands of tiny moves which might seem totally inconsequential in isolation.
I have a few other extremely powerful “go-to” tricks up my sleeve which can come in handy in the battle against mud, however, upon writing this article, I really felt like they each deserve a whole article of their own.
On that note. Stay tuned for more articles and tips on achieving professional-quality mixes, and in the meantime, let me know of your favorite techniques in the comments section below!
Eleveate Your Ears