What Is an Arpeggiator? (+ 8 Creative Uses)
Article Content
In the traditional sense the verb “arpeggiate” refers to playing the notes of a chord sequentially as opposed to simultaneously. In a sense, it is the melodic version of the harmony. Along with scales, instrumentalists learn how to play arpeggios as part of the fundamentals. Jazz players are especially well-versed in playing arpeggios over chord changes since the use of chord tones in improvisation guarantees the notes will fit the harmony.
Arpeggiators found in DAWs, virtual instruments and hardware synths allow for a slew of possibilities regarding how the notes of the chord input will be treated. The use of arpeggiators can be a fast and powerful way to generate melodic content, interesting textures and rhythmic complexity from a simple sustained chord progression.
Basic Functionality
While all arpeggiators offer different GUIs and various functionality, there are some processes that are almost always available. I have used screenshots of the arpeggiator found in Logic Pro for the examples below. It is a full-featured plugin that’s instantiated as a MIDI Effect on a MIDI or instrument track.

Direction and Note Order
The order or direction of how the input chord tones will be played is perhaps the most fundamental control in an arpeggiator. The basic options are:
Ascending – notes are played from lowest to highest and then jumps back to lowest to repeat
Descending – notes are played from highest to lowest and then jumps back to highest to repeat
Palindromic – notes are played from lowest to highest, then in reverse, highest to lowest
Alternating – highest note played first, then lowest, then second to highest, then second to lowest, etc.
Random – input chord tones are used as a supply of possible notes that will be played in random order
Here’s a demo of all the modes above in order (2 octaves) using a simple Dm7 chord as input. Each mode is played for 2 bars.
As played – is the last choice where the notes are played in the order in which the keys were pressed
Rate
The rate determines the speed of events in terms of division of the beat and is synced to the session.
Latch
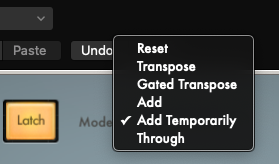
Activating the latch mode will cause the device to play continually using the last chord received, even without any MIDI events in an active region. This could be especially useful for live performance or to simply audition ideas before committing to the harmony or setting.
The latch mode menu allows for several ways you can interact with the device when an input chord has been initiated. You can add notes, transpose the chord, etc.
Octave and Variation
The octave control allows you to greatly expand the range of the arpeggiated notes by one or more octaves. Holding down a 4-note chord in one hand and activating the +2 octave switch is the same as holding down a 12-note chord, which would otherwise require a couple of toes or a second person to play.
Logic’s sequencer also has variation controls with 4 possibilities that will result in different effects based on the currently selected note order button. For example, if the ascending note button is selected the variations would result in the following alterations in note order:
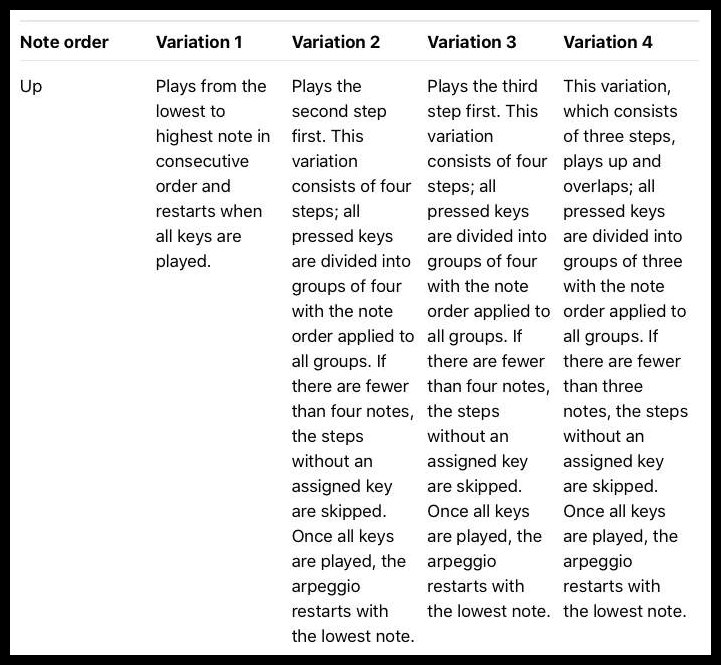
Here is an example of the same Dm7 chord used above using the ascending note order and cycling through the variations.
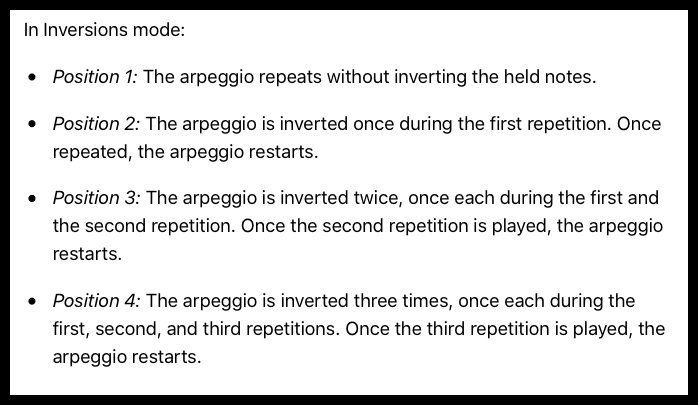
The octave slider also doubles as an inversion control which inverts the input chord in various ways as shown below:
Here is an example of the same Dm7 chord used above using the ascending note order and cycling through the inversions.
Options Window
These options allow for randomization of duration and velocity, setting the cycle length and swing if desired.
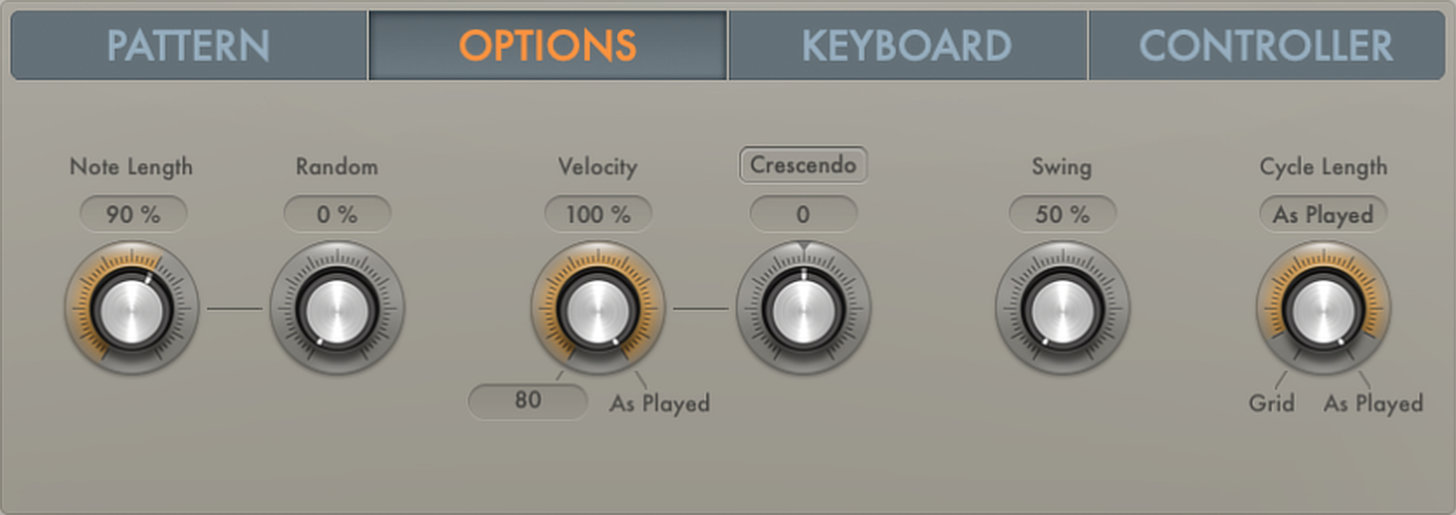
Here’s an example of that Dm7 chord arpeggiated in alternating mode with random velocity and note lengths.
Scale Quantization and Keyboard Splits
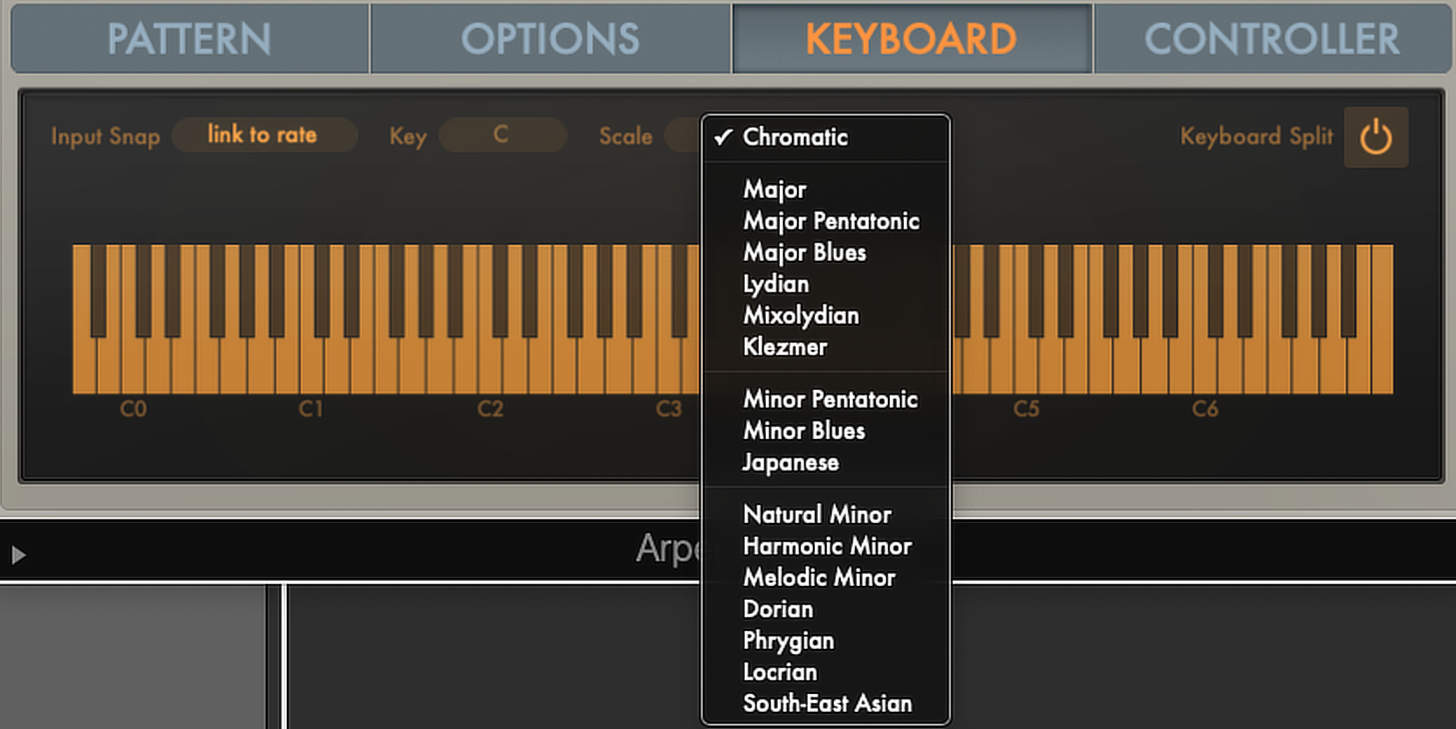
It is possible to have keyboard splits and scale quantization right in the arpeggiator, rather than relying on additional plugins or processes, making it easier to save complete ideas as presets.
Silent Capture

Click the disclosure triangle at the lower left to display the silent capture checkbox. Selecting this feature will allow you to enter the notes you wish to arpeggiate step by step in non-real time. The arpeggiator will play the selected notes when you hit the start button.
Grid Mode
This is a super-powerful mode that works similarly to a step sequencer. You can affect note duration (gate), velocity, add ties or rests, vary between single notes and full chords on each step, change the number of steps in the pattern, etc. It comes with a ton of complex preset patterns that can be easily altered to fit the context.
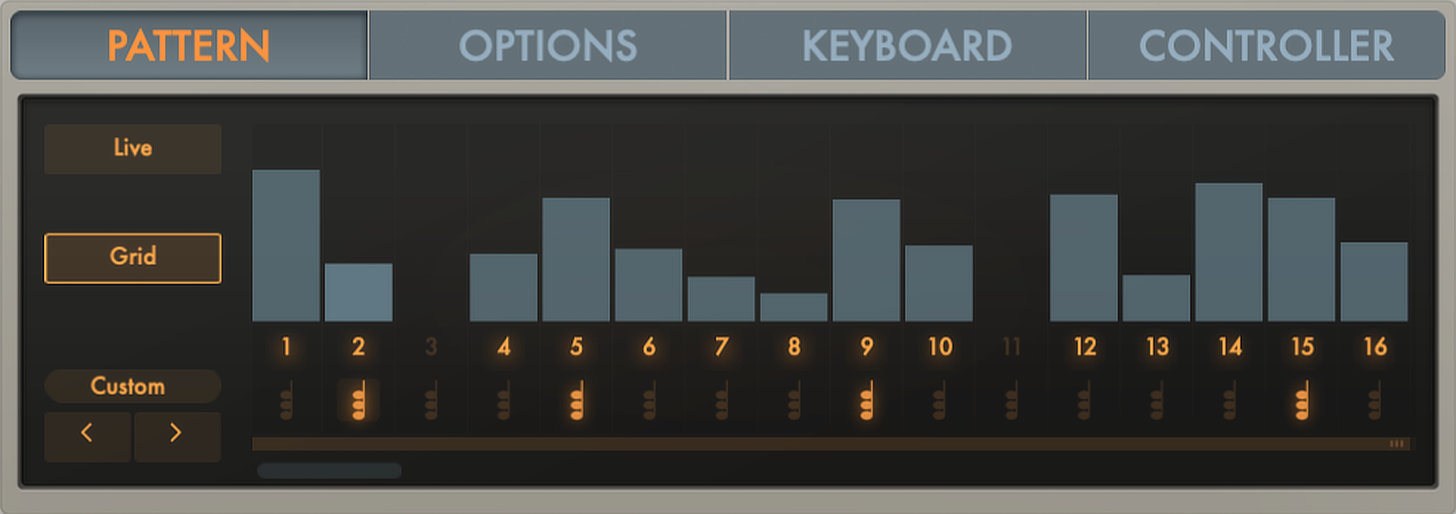
Here is a recording of what is possible with a simple Dm7 chord as input for the grid mode cycling through various patterns. The piano is doubled with an ensemble string pizzicato patch an octave higher.
MIDI Editing of the Arpeggiator Output
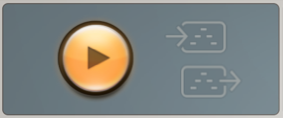
Many virtual instruments and synths have built-in arpeggiators which is great. But I’ve often been frustrated that many lack the ability to export the arpeggiator output being generated as MIDI. This is a crucial feature since having the MIDI data opens the door to all the capabilities of piano roll style editing in a DAW including note duration & velocity control, transposition & doubling, micro-editing of specific events, etc. In Logic Pro, it is not immediately clear how MIDI data is exported, but there are two icons on the upper area of the device. The top icon will export the current chord being used as input, while the lower and more useful icon exports the complete arpeggiated line as MIDI by simply dragging and dropping the icon into the session window. Once it’s there, turn off the arpeggiator (unless you want to experiment — see below) and the region will playback as MIDI.
Experimental and Creative Approaches
Here are some things to try with arpeggiators that can often yield serendipitous results:
- Stacked arpeggiators – use two or more arpeggiators in series with different settings
- Use multi-octave arpeggiated lines on instruments with restricted ranges, such as orchestral sample libraries to get rhythmic variation when out of range notes are skipped.
- Use an arpeggiator to drive drum samples or a drum rack instrument like Battery or Drum Machine Designer.
- Use an arpeggiator after a chord generating plugin like Chord Trigger in Logic or 3rd party plugs like Scaler.
- Copy an arpeggiated line to multiple instruments and subtract events randomly in each instrument to get a sort hocket-like effect.
- Use an arpeggiator in combination with transposers, scale quantizers and other MIDI effects to generate additional variations on the fly.
- Map a MIDI controller to the number of steps in grid mode and perform variations on the fly
- Experiment with MIDI mapping other things like division length, inversion, octave, etc.
Final Thoughts
Hopefully, this article has inspired you to dig deeper into the capabilities of whatever arpeggiator you have access to. I encourage you to try some of the approaches mentioned above and to be playful. Misusing or abusing one or more arpeggiators is an innocuous act that can result in a bunch of useless unmusical trash or the magical content for your next masterpiece. But either way, you are sure to enjoy the process.
Check out my other articles, reviews and interviews
Follow me on Twitter / Instagram / YouTube


