The 6 dB of Headroom for Mastering Myth Explained
02/27/2018
Article Content
Not a week goes by where I don’t see somebody on a forum or Facebook group asking about how much headroom to leave on a mix for the mastering engineer. Then comes the flood of varying responses, but the most common is to see somebody suggesting peaks at -6 or -3 dB. While that isn’t incorrect, it’s also a bit arbitrary.
For the most part, following these 2 steps will provide a mix that is ideal for mastering:
- Don’t allow peak levels to reach 0 dBFS.
- Don’t use a peak-limiter or other similar plugins that prevent peaks that would otherwise reach or clip 0 dBFS by creating a hard ceiling at or below 0 dBFS.
The Early Days of Digital Audio
It’s my belief that the suggestion of having your peaks at -3 dB or -6 dB dates back to the early days of digital audio when mixes were captured on a DAT (digital audio tape) or on an Alesis MasterLink two-track recorder, for example. You had to be careful not to clip the input which could easily sound bad.
These devices were fairly primitive and didn’t sound good when the input levels were clipped or even when levels reached the very top range of the digital scale. The suggestion for peaks no higher than -6 dB was a safe and general recommendation for good reason back then.
Digital audio has advanced by leaps and bounds since those days so putting too much thought and effort into peaking at -6 dB or -3 dB in your DAW is more or less of a waste of time. It’s essentially all the same.
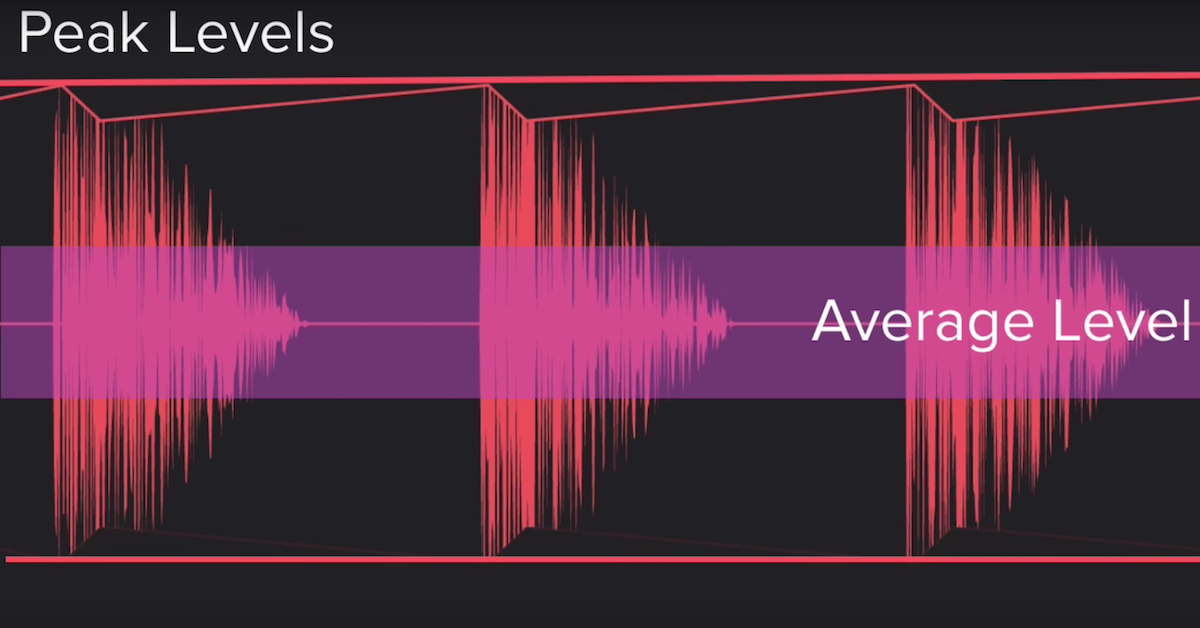
As a mastering engineer, I really only care if the peak levels of an unmastered mix hit 0 dBFS (decibels relative to full scale) on a 24-bit mix file. Once a peak hits 0 dBFS and becomes clipped off from its natural state, this is damage that can’t be undone. One stray peak isn’t the end of the world, but when this happens throughout the song on nearly every drum hit, for example, it can be a problem from a mastering standpoint, even if it sounds OK at the moment. In other words, a high average loudness is really what can be problematic, and eventually a mix reaches a high enough average loudness where limiting and/or clipping the peak levels is required.
Whether a mix peaks at -12 dB, -6 dB, or even -1 dB, I don’t really care, I can optimize the level of the song for my mastering chain without compromise. If the mix is being captured from an analog source, you may want to be a bit more conservative and attempt to keep the peaks around -6 dB because some cheaper and even some decent analog to digital converters can sound a bit harsh when the very top range of the input level is used, but hopefully your ears already tell you this. You do want a healthy level that is above the noise floor of any analog equipment being used, but you also don’t want to overcook the audio, which can’t be undone.
If you are capturing a mix from an analog source, be aware of analog to digital converters that have built-in processing which can affect the loudness, or “soft-clipping” options which can prevent your DAW peak lights from triggering giving you a false sense of safety and headroom, even though you are still essentially capturing a clipped waveform often not ideal for sending off to mastering.
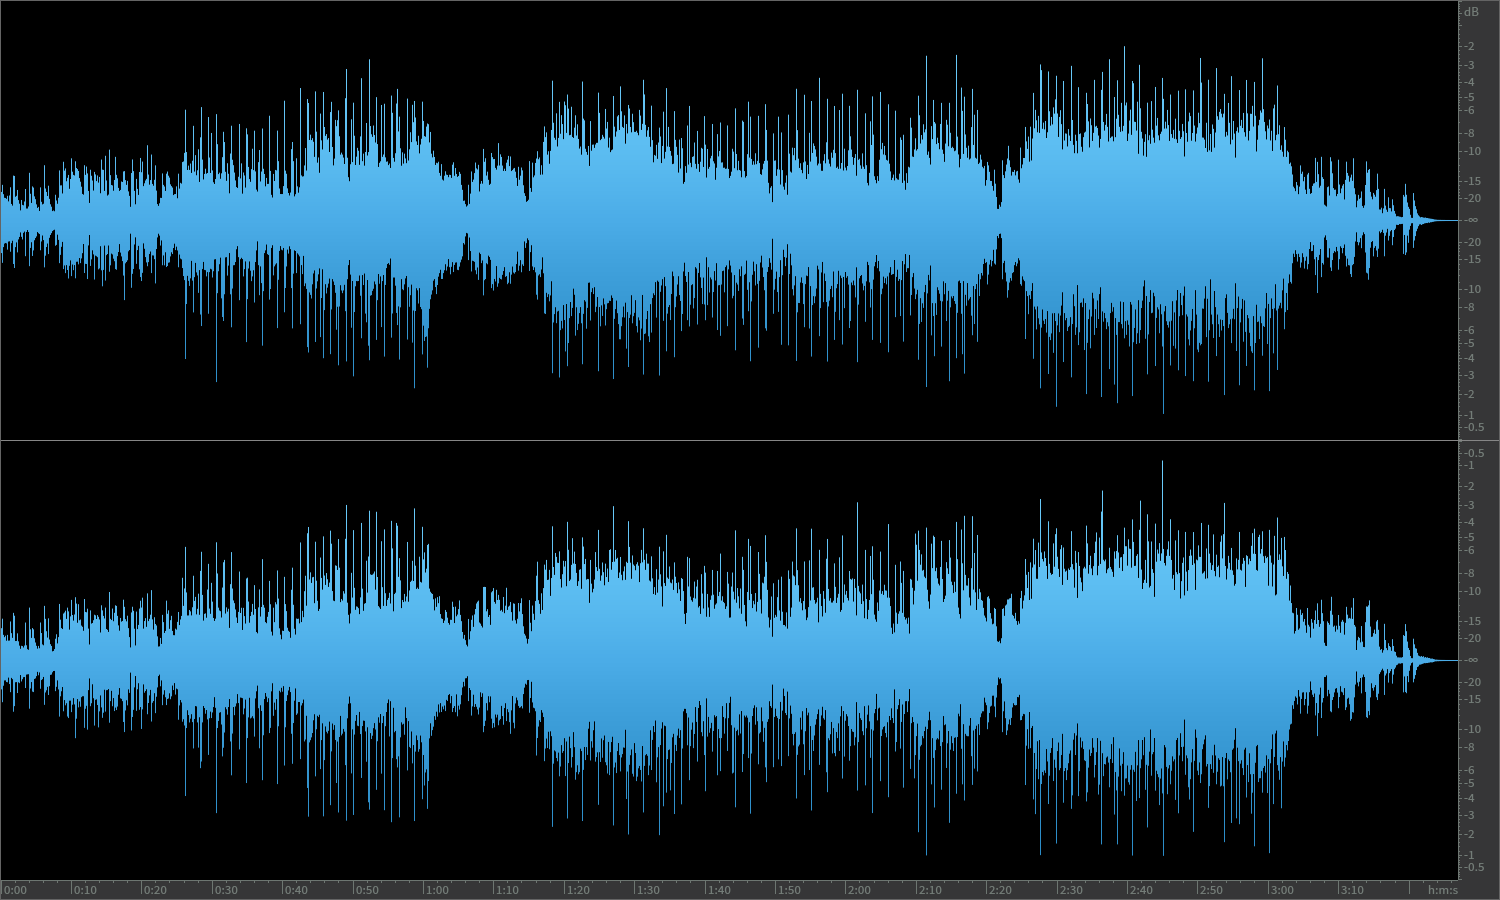
This is a textbook example of what a well done pop/rock mix looks like prior to mastering. Beautiful dynamics, and adequate headroom for mastering work. The peak levels are irrelevant.
Understanding “In The Box”
I think we’ve reached a point where a majority of the mixes being done today are 100% “in the box”, meaning the audio stays 100% in the DAW and is not being captured from an analog stereo source such as an analog mixing console or summing box.
100% digital “in the box” mixes are where the peak level becomes much more arbitrary. Again, you want to aim for a healthy level that isn’t so low that it’s near the noise floor of any plugins on the master fader that may produce some kind of simulated analog noise or hiss, but for the most part, as long as regular peaks are happening above -20 dBFS, this will be fine for mastering from.
The thing to avoid with digital mixing entirely in the box is sending in mixes for mastering that have some form of peak limiting applied to the master fader. This could be anything from an actual peak-limiter, or perhaps a compressor or other type of plugin that creates a hard ceiling at 0 dBFS (or lower) and prevents what would otherwise be clipped peak levels from actually occurring. There are a few plugins that aren’t actual limiters that prevent peak levels louder than 0 dBFS to pass through which by doing so is likely painting your mastering engineer into a corner. Also, if you are planning to release the material on vinyl, this can be very vinyl un-friendly, and for the most part uncorrectable in the mastering stage.
I can’t tell you how many times I have attempted to communicate this ahead of time to a mixing engineer and/or client only to receive mixes that are heavily peak-limited and/or clipped with no headroom for additional mastering.

An example of a mix that has already been heavily peak-limited, or is simply clipping the DAW mix bus and saved as 16 or 24-bit fixed point. Irreparable damage has been done and I often reject mixes like this when they come in for mastering, or at least ask for a better starting point which can usually be accommodated with proper communication.
In most cases, following these 2 steps will provide a mix that is ideal for mastering:
- Don’t allow peak levels to reach 0 dBFS
- Don’t use a peak-limiter or other similar plugins that prevent peaks that would otherwise reach or clip 0 dBFS by creating a hard ceiling at or below 0 dBFS.
It’s really that simple though somehow it manages to get convoluted and controversial. I’ve had people turn down what was a peak-limited or clipped mix by 6 dB and then send it in thinking that I can work with it. I’m not sure why they think having them turn down a mix like that is somehow better or different than if I would do that on my end before I start mastering, but it happens.
Yes, a mastering engineer can turn down a loud unmastered mix to a level they can work from, but they can’t undo the damage done from any peak-limiting or clipping, so that is why following those two steps is important. Once a mix is limited or clipped, the damage is done and can’t be undone. It also means that any additional analog or digital processing just ends up making it worse or marginally better at best. The audio is in a delicate state at this point.

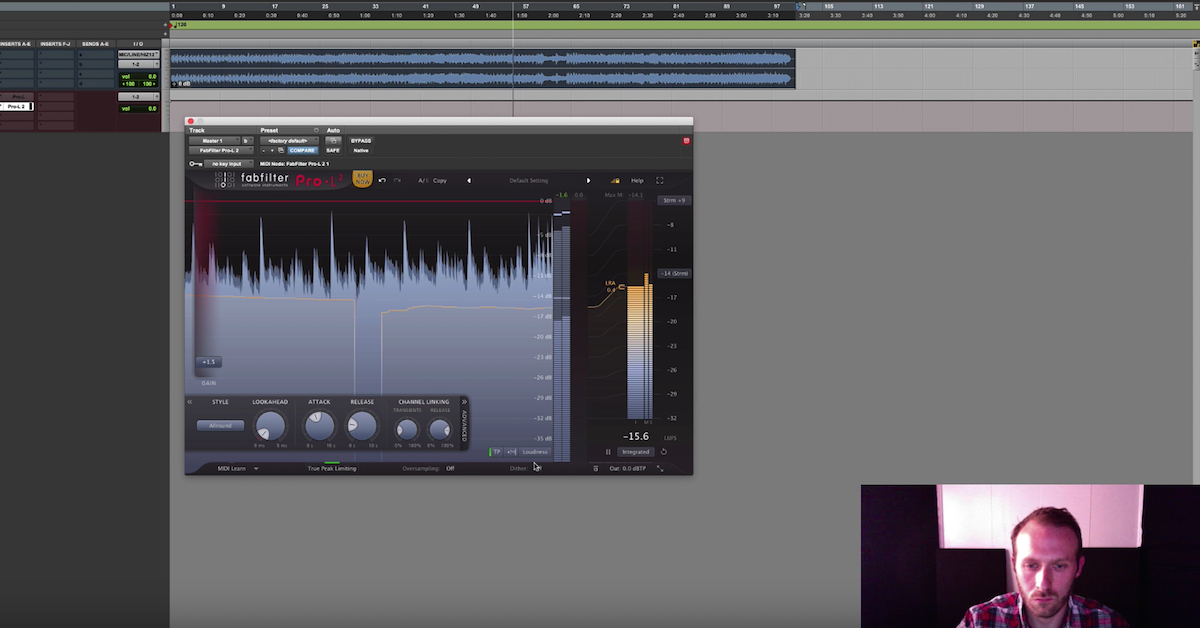
Although this mix is technically not clipping and the peak levels are at -6 dB, this mix has clearly hit a peak-limiter or brick-wall of some kind and is not an ideal place to start mastering from. This is false headroom.
Law Of Averages
Aside from peak levels, what’s potentially more important to watch (and listen!) for on a mix being delivered for mastering is the average loudness. Average loudness used to commonly be measured in what’s known as “RMS” (Root Mean Square) but now it’s more commonly measured in what is referred to as “LUFS” (Loudness Units Relative to Full Scale). RMS and LUFS are somewhat similar in concept but LUFS factors for certain frequencies that are more (or less) sensitive to the human ear so LUFS readings tend to agree with the human ear better than RMS.
There are three main ways LUFS are measured. Integrated LUFS measurements measure an entire song or piece of audio from start to finish, and is often done in an offline process faster than real-time instead of playing the entire piece of audio from start to finish. Short-Term LUFS measures the average loudness but only looks at a 3 second window, so it will more closely follow the dynamics of a mix as it plays. Momentary LUFS is a very fast measurement that is somewhat explanatory in name in that it displays the loudness in real-time as the song or material plays. The numbers change very fast during playback.
If I receive a mix that has an Integrated or frequent Short-Term LUFS reading of -13 LUFS or louder, usually some form of digital peak-limiting is being done to achieve that loudness and it’s not ideal for mastering from. Of course, if some heavy but skillfully refined compression/limiting on the individual busses within a mix is occurring you can achieve a mix with a high average loudness that doesn’t clip 0 dBFS or hit the ceiling, but most of the time when I get a mix at -13 LUFS or louder, some peak-limiting and/or clipping has occurred whether it’s intended or not.
Back to peak levels though. If you are mixing in the box and have some occasional peaks that clip 0 dBFS, one option is to attempt turning down the mix in the DAW, but that can get tricky when FX sends that are post-fader are involved or there is other complex bussing and routing within the mix.
The beauty of most modern DAWs is they allow for you to save a mix as 32-bit floating point or some even allow saving as 64-bit floating point and more will follow soon.
Saving a stereo mix that clips your DAW mixer output as a 24-bit WAV will result in a waveform that has unrepairable damage to the peaks. The peaks are sharply chopped off at 0 dB and that’s that. It paints the mastering engineer into a corner and is often considered not vinyl-friendly. Again, not a good starting point to master from.
However, saving a mix that clips your DAW output as a 32-bit or 64-bit floating point WAV instead of 24-bit means that any peak levels that exceed 0 dBFS are actually preserved and the mastering engineer can effectively turn the level down to work with the mix and retain all the peak info for the mastering process. It’s a bit like magic. What looks like a brick-walled waveform at 24-bit suddenly looks (and sounds) like a useable mix at 32-bit (or 64-bit) floating point when properly gain staged.
 The GIF above demonstrates how even though the waveform initially looks to be peak-limited/clipped like the previous image, the fact that it was saved as 32-bit floating point by the mix engineer means that the peak levels are preserved when the level is reduced. This allows for useful mastering work to still be done without compromise.
Recorded Bit-Depth vs. Actual Bit-Depth
One point of confusion here is the difference between recorded bit-depth and the bit-depth of the processing done by your DAW and plugins. You can record something at 24-bit or 16-bit fixed point but as soon as any digital processing is done, the bit-depth will increase to floating point. Some DAWs and plugins work at 32-bit floating point and some at 64-bit floating point but the difference between the two is really spitting hairs.

Ready to elevate your ears?
It doesn’t have to take years to train your ears.
Get started today — and you’ll be amazed at how quickly using Quiztones for just a few minutes a day will improve your mixes, recordings, and productions!
There is a free plugin called “Bitter” by Stillwell Audio that can help show you this. Insert Bitter plugin last on your master fader/bus to see the actual bit-depth of your audio stream which as mentioned can be different than the recording bit-depth setting you chose when setting up the recording or mix session.
The main thing to take away is that if you’re not using a peak-limiter on the master fader and the peak levels are still hitting 0 dB now and then in your mix session, simply save the mix as 32-bit (or 64-bit) floating point and the peaks will not get chopped off as they would when saving as 24-bit WAV. Everyone should have good intentions of never hitting 0 dB on the master fader of your DAW mixer when mixing, but in reality, the mix level can creep up as you work and you can run out of headroom. It happens.
Sending Two Mix Versions
One thing that has become common these days, at least for me, is to receive two versions of the mixes for a new mastering project. One version of the mixes has all the mix bus processing applied that was there during mixing and mix approvals. This helps me know what everybody is used to hearing in terms of loudness, dynamics, tonal balance, and other sonic aspects. Then I will also receive a version that has little to no processing on the stereo mix bus so I have a better starting point to work from. Almost 100% of the time this is what I use to master from.
My general philosophy on mix bus processing before mastering is to turn off anything that adds loudness and leave only what is needed for the right tonal balance, dynamic range, character etc. If a limiter, multi-band compressor, or even a normal compressor is used to increase the average loudness only, get rid of it. If a limiter is catching peaks, get rid of it and trim the mix appropriately to avoid any naturally clipped peaks, or save your “in the box” mix as 32-bit float instead of 24-bit and preserve the peaks that way.
Anything on the stereo mix bus that doesn’t affect the loudness such as EQ, saturation, etc. that is essential to the sound should remain active for both versions. If you are in doubt if something is working well, it’s usually best to shut it off before mastering.
The number #1 comment when I ask for a mix with the peak-limiting removed is that the mix will “fall apart” if the limiter is removed. That may be true but it means that:
A) It may not be a great mix in the first place
B) It’s a safe bet that the mix will get back into shape (ideally even better) after the mastering engineer applies their digital limiting, since they can do some detailed corrective processing before the digital limiting is applied.
A basic limiter has very few parameters to adjust and therefore it is not hard to recreate that type of processing in the mastering process, even though you may think it’s working some serious magic during your mixing session.
Mastering engineers understand that sometimes a mix needs some extra juice from a limiter or maximizer to get approved by certain clients, but often that type of processing is usually best applied at the end of the mastering process, and not before mastering starts. This is why the sending of two versions can be an effective and easy way to go. The limited version provides the vision, and the non-limited version with headroom/dynamics provides the mastering engineer room to do his or her job without compromise which ultimately will produce the best result. If not, you have yet to find the right mastering engineer.
Sadly, some mixes — or at least the reference masters from the mix engineer — are already much hotter than I would ideally make the master, so the damage is already done. In the end, the mastering engineer’s job is to satisfy the client and/or producer but it’s unfortunate when those involved in the process get accustomed to overly limited and overly loud mixes from the mixing session which then dictates how loud it must be mastered to seem right.
All the more reason to aim for more conservative levels in mixing and just make sure the mix itself sounds great without any peak-limiting/clipping and let the mastering engineer handle the loudness aspect.
This is increasingly true now that more and more streaming services are using some form of Loudness Normalization meaning that something that is mastered especially loud just gets turned way down anyway, but that topic warrants a separate article so we’ll have to leave it there.
As with most things, communication is the key. Often times when I receive mixes to master that are already peak-limited and lack headroom for any additional work, it’s because the mixing engineer didn’t know anybody else was going to master it so they took it upon themselves to apply some peak-limiting and other mastering processing.
Eleveate Your Ears