4 Applications for the FabFilter Pro-Q 3
12/9/2018
Article Content
FabFilter recently released the Pro-Q 3 — an update to their flagship equalizer plugin. Its predecessor, the Pro-Q 2, was already an incredible tool that I’ve used on virtually every session, and the latest iteration of the plugin added some extremely valuable features including:
- Dynamic EQ mode which allows you to process particular areas of the frequency spectrum when they cross a set threshold. Essentially, this feature combines the reactivity of a compressor with the tone-sculpting capabilities of an equalizer.
- An extremely steep brickwall slope setting for low-pass and high-pass filters. I’ve found this feature to be extremely useful for drastic filter sweeps and expressive sound design applications.
- Full surround support — up to Dolby Atmos 7.1.2 — for those working in audio post-production for visual media.
- Per-band Mid/Side processing, which allows for extremely detailed sonic-shaping capabilities across the stereo field.
- External spectrum visualization from other instances of Pro-Q 3 which allows you to see how different elements from your session are interacting and perhaps conflicting.
- Improved Spectrum Grab which provides valuable visual information about the problematic areas of the frequency spectrum and the ability to quickly fix problems.
Combine these helpful new features with what was already under the hood in the powerful Pro-Q 2, and you’ve got arguably the most versatile equalizer plugin on the market. Here are some of the many applications for which the FabFilter Pro-Q 3 can be used.
1. Dialog Editing
A clear, natural, believable dialog track is absolutely essential when working on audio for visual media. There are many factors that could have rendered the captured on-set dialog sounding less than optimal. Perhaps some distant highway rumble made it onto the recording, or the microphone was slightly off-axis from the performer as they delivered their lines, or noisy preamps were used on the day(s) of shooting.
It’s entirely possible that each of these sonic maladies (and more) are present over the course of the production, and the role of the dialog editor is to create a fluid dialog track that never feels jumpy or distracting. For lines that simply can’t be salvaged, we resort to ADR or “automatic/automated dialog replacement” which involves getting the actor(s) into a studio and re-recording the irreparable lines. It can be incredibly challenging to balance the fidelity of on-set lines with the ones that were recorded in a controlled environment, but the Pro-Q 3 has some incredibly useful features for this particular application.
While I’ve never found any plugins’ EQ match feature to present the be-all end-all solution to balancing the frequency-based content in different lines of dialog, the tool found on the Pro-Q 3 is quite serviceable, and I find it great for getting me a percentage of the way there. If a line is still a tad bright, nasally, boxy or deficient in any way after applying EQ match, the ability to quickly generate and manipulate additional bands allows me to finish the job.
Perhaps the biggest update to the Pro-Q 3 is the dynamic EQ mode — and this feature will prove to be quite useful to dialog editors. The dynamic EQ allows you to set a threshold at the per-band level. If the plugin doesn’t detect that the threshold has been crossed, no processing is applied. So if the frequency-based content in your lines become problematic, but only during certain passages, the moments that are not problematic won’t be affected, whatsoever. For the purposes of reducing unwanted low resonances, harshness or sibilance, the Pro-Q 3 is unrivaled thanks to the dynamic EQ feature.
2. Mastering
Mastering is the art and science of optimizing program material for distribution, and one of the key roles of a mastering engineer is preparing music for listening over a wide variety of playback configurations.
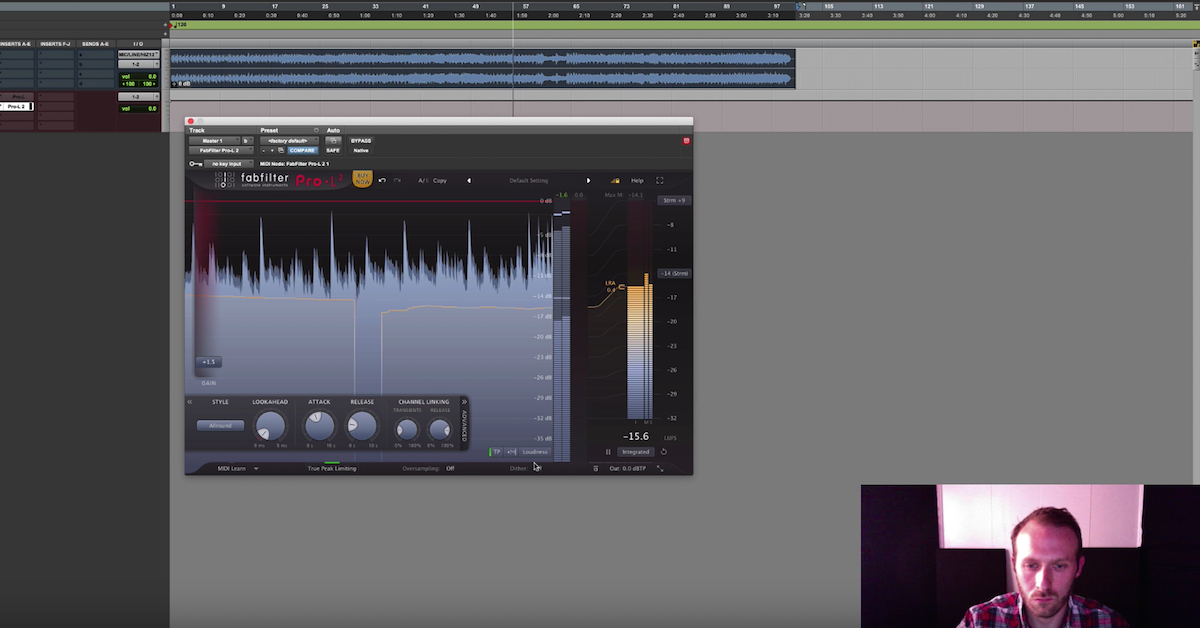
Oftentimes when mastering, I’m concerned with hiding sonic deficiencies present in mixes as much as embellishing their strengths. Upon receiving a mix to master, I first hunt down and attenuate unwanted or overly prominent areas of the frequency spectrum. This process helps to preserve headroom — a precious commodity when squeezing as much volume as possible out of a track via compression and limiting, and of course, creates a tonally balanced and pleasing listening experience. For this application, the Pro-Q 3 is outstanding. The sheer precision with which you can manipulate and shape the bands allows me to meticulously sculpt the tonality of my masters.
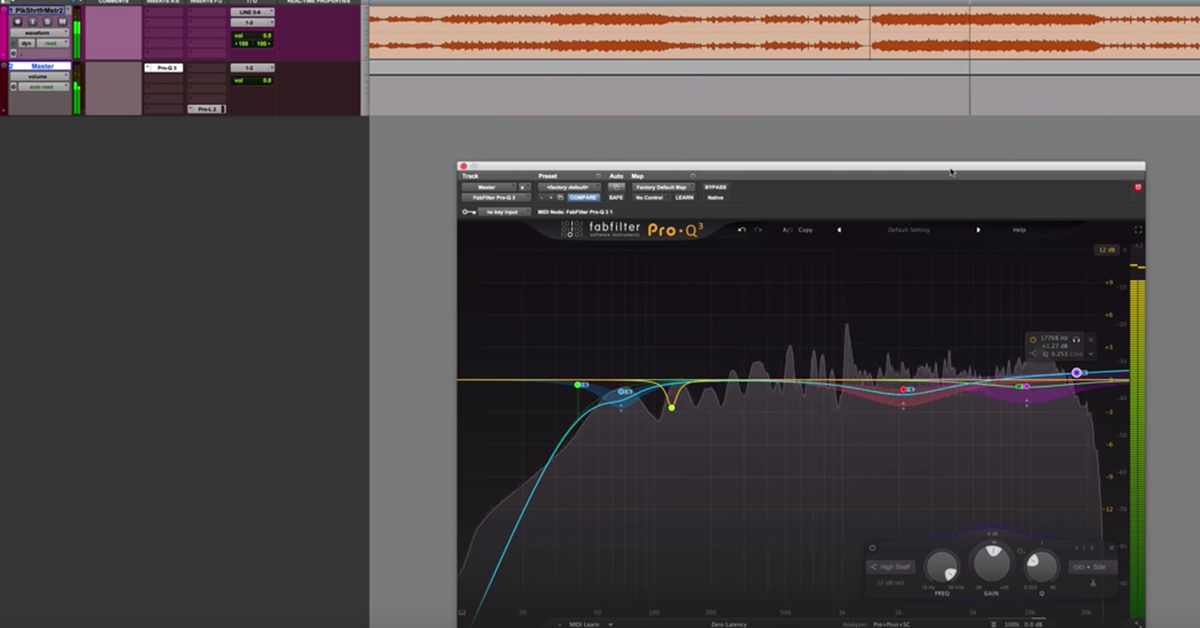
Supremely helpful is the updated spectrum grab feature. Upon inserting an instance of Pro-Q 3 on a track, press play and hover your cursor above the frequency analyzer. It will become purple and show any peaks that may be present — which you can grab and attenuate. A recent track I mastered had an excess of 2-3 kHz in the choruses, primarily because of a couple of slightly tinny-sounding wide-panned guitars. Pro-Q 3 confirmed for me what my ears were suggesting, and identified peaks at 2 kHz and 2.8 kHz.
Having the ability to choose between traditional stereo, mid/side, or left/right processing per-band is another update that makes the Pro-Q 3 an asset for music mastering. Those same bright guitars I previously mentioned were panned hard left and right, so I chose to apply attenuation between 2-3 kHz, only in the sides, as to avoid processing signals that were panned straight up the middle such as vocal and kick drum. I also engaged the dynamic EQ mode, since the over-prominence of 2-3 kHz was only apparent when the guitars came in during the choruses. For most of the verses, no attenuation was applied, but in the choruses, when the threshold was crossed, a gentle dip in the upper midrange helped the song sound much more pleasing.

3. Sound Effects Editing, Sound Design and Re-recording Mixing in Surround
The fact that the Pro-Q 3 provides surround-sound support for up to Dolby Atmos 7.1.2 is a major development for anyone involved in audio post-production for visual media including Film/TV/Advertising/Gaming. For removing low-end rumble, excessive brightness, and for general “audio clean up” duties, each iteration of the FabFilter EQ has been top-notch, and now it can be incorporated into high-end post-production workflows.
Equalization is an essential tool for sound effects editing and design. Let’s say I’m designing the sound for the impact during a car crash scene — I’ll likely include a metal-on-metal element that has a good deal of low-frequency content and a solid punch, but it’s important to also add “sweetening” elements to really fill out the frequency spectrum and add realism.
In this case, let’s say we want to add the stinging, shimmery sound of razor-sharp bits of glass as the sweetening element. In my effects library, I’ve got thousands of explosions, many of which have glass components to them. The issue here is that I don’t want to add the low end rumble from the initial explosion to the equation, so I may simply employ a high-pass filter and remove all content beneath where the glassy component is occurring, and then blend that in with my original car crash impact. I could see the ultra-steep filters being useful for this application, and to have all the functionality of the Pro-Q 3 accessible in full-surround is a game-changer, in my book.
Further down the post-production pipeline, one of the many tasks of the re-recording mixer is to set appropriate balances for all of the delivered components that make up the films’ soundtrack. I see the value of the Pro-Q 3 when delicately controlling the frequency-specific interactions between the dialog, music, effects, etc. in preparation for final mixdown in a surround environment. The ability to use external spectrum visualization for the purpose of seeing the frequency read-outs of multiple instances of Pro Q-3 the re-recording mixer may have employed in a large-scale session is valuable.

Ready to elevate your ears?
It doesn’t have to take years to train your ears.
Get started today — and you’ll be amazed at how quickly using Quiztones for just a few minutes a day will improve your mixes, recordings, and productions!
4. Music Mixing (Obviously) including Score Mixing
For score mixers, the benefits of having the Pro-Q 3 are obvious. It’s simply one of the best equalizers currently available for musical applications — and now, it works in surround. I recently composed music for a short film and found the filters to be great at cleaning up individual tracks that had a bit too much low-end, and the dynamic EQ to be a perfect choice for when more intense moments of the score conflicted with the dialog.
As I’ve pointed out, the Pro-Q 2 was a very robust piece of software even before the upgrades found in Pro-Q 3. For virtually any sound source that needs surgical removal of problem frequencies, gentle (or steep) filtering or subtle tone-sculpting, the Pro-Q 3 is going to be one of the tools I reach for often. It’ll be found all over my mixes — on individual tracks, subgroups and the master buss.
Currently, one can use the external sidechain option to visualize the signal from another source via the analyzer, or for EQ Match purposes. The only addition I would make to Pro Q-3 would be the ability to use the sidechain feature to apply dynamic EQ to one signal based on the input from another. Aside from that, I’ve found the FabFilter Pro-Q 3 to be a flawless equalizer plugin, and I predict it will make life a lot easier for many different types of audio engineers.

Eleveate Your Ears