11 Things I Do on Every Master
12/1/2018
Article Content
Every production is unique — each with its own set of strengths, weaknesses, problems, etc. Because of this, my approach, to a degree, changes on each and every song. However, there are certain processes that I find myself resorting to on every single piece of music that I’m hired to master.
1. Engage in a Dialogue with the Client
This is a service-based industry. While I am most likely hired based on my particular aesthetic, skill set and set of tools — my ultimate goal is to fulfill a clients’ artistic vision. I am clear about this from the onset. I always ask what specific file types need to be delivered — some clients plan to release their music via streaming only, others plan on having CDs manufactured and widely distributed. The deliverables change dependent on how the client plans to release their music.
Many clients need some guidance regarding loudness. Different streaming platforms adhere to different loudness normalization standards. I prefer to master music with dynamics left intact, and in such a way that the tonality of the mix isn’t compromised. I find that after a certain point, the higher LUFS value that is achieved, the less I am able to retain those qualities. Music that has been slammed with compression, limiting, and other techniques that boost perceived (and actual) loudness definitely has a sound, and one I often enjoy and can easily achieve, but not every production needs that sound. I offer my clients options from the beginning and enjoy educating them about the fascinating history of loudness as it relates to mastering, and about the compromise that is made when one chooses loudness over naturalism.
2. Listen as a Music Lover, Not a Technician
It can be hard to turn off the technical ear, but it’s essential when preparing a piece of music to be enjoyed by consumers. Very few listeners (if any) are going to listen to a song and ponder the particular sonic decisions I’ve made as a mastering engineer. This is partially why I find mixing to be a bit more creatively rewarding, but I digress — quality mastering is ensuring that a particular piece of music is optimized for enjoyment. My first step when mastering is always to listen to the song as a music fan. I’ll listen to the lyrics, the rhythm and the less technical aspects of the song.
As I mentioned earlier, it’s a challenge to not analyze the song from a technical perspective, but I’ve created some tricks that allow me to do so. I close my eyes, tap my feet, move with the music, and try to feel the emotions of the performer(s). After I’ve experienced the song through the listener’s ear, I then decide how to enhance the piece of music, sonically speaking.
3. Reference on a Variety of Monitors and in Several Listening Environments
The average listener isn’t going to be experiencing a finalized piece of music on the same high-end signal path, expensive monitors and acoustically treated environment that I have. I use these aforementioned privileges as a sort of microscope — I analyze the music with great attention to detail and then process it so that imperfections are hidden, and the good stuff is embellished.
Usually, after my “first pass” that includes several processes (that I will be detailing in later points), I print the file and listen both casually and critically on a variety of monitors, and in several acoustic spaces. Two of my unorthodox favorites are listening out of my iPhone while walking my dog down the street, and blasting the song out of home theatre speakers, going into another room, and listening to how the low end resonates through the walls. Again, I’m trying to experience the music as the eventual consumer will, and I find these two methods allow me to accomplish just that.
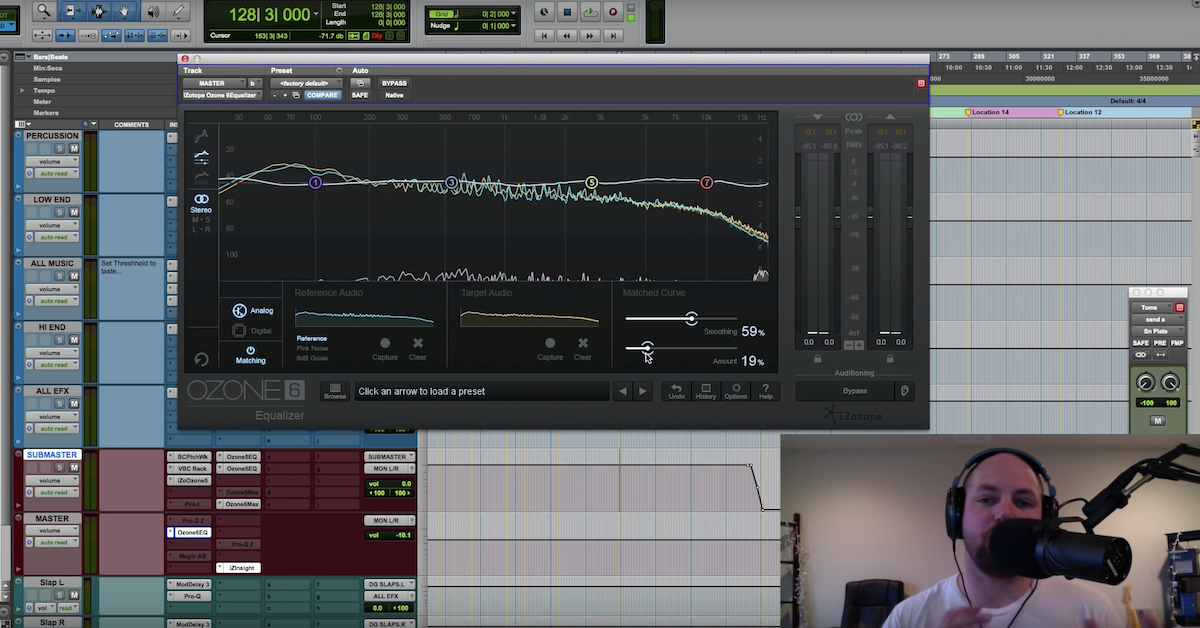
4. Employ Mid-Side Equalization
Usually, the Brainworx bx_digital V3 is the very first link in my signal chain. I use it for its transparent sound, and ease of use despite being a fairly deep plugin. The V3 allows me to process the middle (generally home to kick, snare, bass, lead vocals) separately from the sides (where you’ll usually find drum overheads, double-tracked guitars, panned synths, and most reverbs).
Most of the time I do end up employing subtractive equalization for the purpose of “cleanup” and to free up headroom, but what I love most about this plugin (and any that allow you to hear the middle and sides separately) is the ability to glean information about how the frequencies and dynamics of the mix are spread out across the stereo field. This information will often inform decisions I make later in the mastering chain.

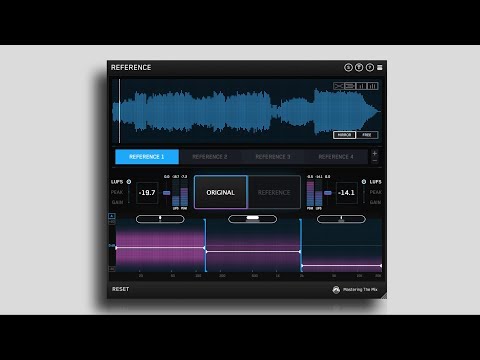
5. Compare My Master to Reference Tracks
What better way to prepare a piece of music to be (hopefully) commercially viable than by comparing it to others that have already proven to be so? Some of the reference tracks that I use are pieces of music that I believe sound great, while others are recommended by the client. I’ll often listen to reference tracks in the same manner that I listen to my printed masters, through a variety of monitors and in several environments. There are also some fantastic tools on the plugin market that offer unique ways of comparing your program material to reference tracks, my favorite of which is REFERENCE by Mastering the Mix.
6. Careful Compression
For controlling dynamics, adding perceived loudness, and even for imparting tone and color onto program material, compression is one of the essential utilities for a mastering engineer. I honestly can’t recall the last time I mastered a piece of music and didn’t use some amount of compression. Improperly applied, however, compression can introduce pumping, distortion and literally squeeze the life out of a music mix.
I would suggest using a slow attack, fast release, a low ratio, and altering the threshold until you see (at most) 1 to 2 decibels of gain reduction on the meter of the compressor. Each piece of music will respond uniquely to compression, so I certainly suggest experimenting with the controls to best suit the material, but these settings are a safe starting point. Once you understand how to utilize this conservative approach, you can incorporate methods such as using more extreme compression in parallel, or multiple stages of compression in serial, but I’d suggest getting the compressor to simply “kiss” the material as a good starting point.
7. Consider Saturation, Enhancing, Excitement or Similar Processing
These types of processing greatly contribute to what I consider my personal aesthetic as a recording, mixing and mastering engineer. I personally believe tastefully adding harmonic content to material creates liveliness, vibrancy, and even a heightened sense of emotionality. I use a combination of plugins and analog hardware (my latest piece is the M-A-S from Overstayer) to subtly enhance the timbre of program material. These processes don’t always work, so if it’s not benefiting the music, I’ll remove them, but generally speaking, a bit of character goes a long way when mastering.
8. Use My Eyes
As I just mentioned, I pay attention to the meters on a compressor to ensure that not too much gain reduction is applied to the material. There are plenty of other fantastic tools that I use to gain visual information about the music I’m working on. iZotope Insight ranks among one of my favorite utilities due to its clean layout, and wide variety of useful meters. For getting confirmation that my masters will comply to loudness standards, Insight is perfect. I mentioned Mastering the Mix before and often rely on their EXPOSE and LEVELS plugins to tell me if my masters check all the necessary boxes, quality control-wise.

9. Use a “Sculpting” Equalizer
I feel fortunate that I’m usually delivered some pretty great-sounding mixes to be mastered, but none are ever perfectly balanced from a frequency distribution perspective. Even if they were, sometimes the many types of processing that I apply in the pursuit of achieving competitive loudness can alter the frequency spectrum in a displeasing way. So, usually close to the end of the chain, I’ll employ an equalizer (of the hardware or software variety) that allows me to tastefully balance the tonality of the master. There are far too many excellent products to mention, but the Manley Massive Passive or a BAX-style EQ are great “finishing” equalizers.

Ready to elevate your ears?
It doesn’t have to take years to train your ears.
Get started today — and you’ll be amazed at how quickly using Quiztones for just a few minutes a day will improve your mixes, recordings, and productions!
10. Final Stage Limiting
In my 40-page thesis, I compared audio engineering to culinary art. As both audio engineers and culinarians, we balance flavors with the hopes of creating enjoyable (or even transcendent) sensory experiences. The more I ponder it, I would say that the best culinary analogy for downward compression (and its more extreme relative, limiting) is salt. Salt is a widely-used preservative, employed to prevent spoilage, and we also happen to adore the flavor. Similarly, we use compression and especially brickwall limiting to prevent signals from passing a certain level, distorting, or even blowing out a sound system, and also have developed an affinity for the sonic characteristics that they impart onto the signals.
Whether or not my analogy holds up is arguable, but it’s undeniable that it’s possible to overuse both limiting and salt. Too much limiting can result in a flat, thin, even brittle-sounding master. The FabFilter Pro- L 2 is a mainstay in my chain for its mostly transparent sound and beautiful approach to metering. When possible, I’ll use a slow-ish attack to preserve transients, and a moderately fast release so that the compressor “dances” with the music.

11. Work Until the Client Is Happy
None of these aforementioned processes is worthwhile unless the paying client deems my work satisfactory.
It may take a series of revisions, and sometimes I’m asked to make aesthetic decisions that I don’t necessarily agree with, but my work isn’t finished until the client is happy.
While my style and practice inevitably evolve along with technology and trends, these are the main tenets of my mastering process.
Eleveate Your Ears