3 Ways to Use a Gate for Punchy Drums
07/3/2013

How to Use an Expander/Gate to Mix Punchy Drums
So what is an expander/gate? It is a dynamics processor that makes quiet sounds even quieter but doesn’t do anything to loud sounds. I’ll show you the basic controls of how to use an expander/gate, and then the basic techniques and also some more advanced or creative techniques. So let’s get to the session.
I’ve got five audio tracks of a typical multitrack drum recording. We got kick drum, snare top mic, snare bottom mic, a stereo pair of overheads and a stereo pair of rooms. Let me play you back just a four bar loop so you can her how the drums are sounding.
[drums]
So it sounds like the drums have been recorded pretty well, but they’re not very punchy and also the room is a little bit boomy and overpowering of the other drums. So I’m gonna show you you can use an expander/gate to solve some of these problems. Let’s start with the kicks rum microphone.
When you’re recording a full kit, a lot of times what will happen is you have bleed from different instruments going into the different microphones. So this is a close microphone on a kick drum but what you’re gonna hear is there’s some other bleed from like the snare drum coming through on this microphone. And by removing that bleed, it’s gonna make the kick drum a little bit more punchy. So let’s listen to it…
[drums]
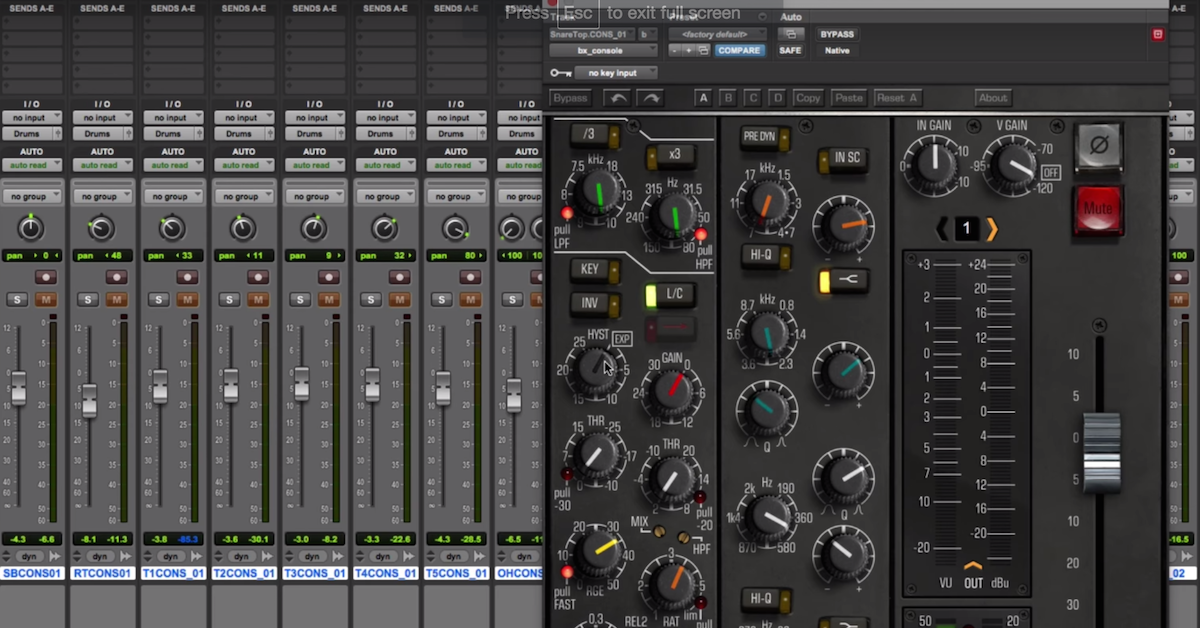
That snare drum is just cutting through a little bit or bleeding through, I’m gonna use an expander/gate so that on this channel, there’s basically only the kick drum coming through, and then I’m taking out the snare drum. So let’s get to the basic controls of an expander/gate.
The main one to start out with is the threshold. As I said before, a gate will make quiet signal quieter, so basically any signal that is below the level of the threshold is gonna be made quieter. Any signal that is above the threshold is not gonna be changed in volume. So when I play it back, what you wanna watch for on the meters is basically part of the signal is gonna go above when the kick drum hits, but then he snare drum is gonna be down here. So let me kick it on so you can hear.
[drums with gate]
If you don’t set the threshold properly, you’ll still hear the snare coming through. So what are the other controls? These control the time basically the gate stays open or the expander allows the signal to go through unprocessed. So you have an attack time, that’s as soon as the signal goes above the threshold, then the expander/gate will let the signal pass without turning it down. Then the hold and release controls kind of work together. That’s how long the gate stays open to allow the signal to pass even after it drops below the threshold. For this particular technique that I’m showing you, what I want to do is allow the entire signal of the kick drum to go through, but I just want to cut out the part where the snare drum is. So I’m gonna use a long release. Here you’ll hear what happens is I’m cutting off a little bit of the snare drum, or the kick drum tail — I don’t want that to happen. I want the whole kick drum hit to go through. Then you have ratio and range controls that basically it’s how much you’re gonna turn down the signal. And for this one, I basically just want to have a high ratio so that where the part where the snare drum is is turned down by a lot. So that’s the first technique that I want to show you. It’s basically how you can remove bleed from microphones in a multitrack drum recording.
Next I want to move on to the snare drum. So the snare drum is pretty isolated right now on this track, but what I want to do is use the expander/gate to cut down on some of the ringing so that the initial transient is more pronounced or more emphasized. So let me keep this one on. Similar to before, you have to pick the threshold so that the signal goes above it for part of it and part of it is below. For this one, rather than having a long release, what I want to do is use a short release to cut off some of that ring. The point is to just make the sustain of the drum quieter. So I’ll adjust the release there. I don’t need a whole lot of a high ratio. I can actually get away with a low ratio here to get the sound that I’m going for. Next let me show you this in the context of the other instruments.
[full drum kit]
The room kind of overpowers, so I’m gonna turn that off for now. You can hear how the snare is ringing more here. And by using the gate, it’s now more punchy.
The next technique I want to talk about is sidechain with the gate. So here on my snare bottom mic, you’re gonna hear bleed again, and that’s another problem. This time it’s the kick drum bleeding into the snare mic.
[snare drum]
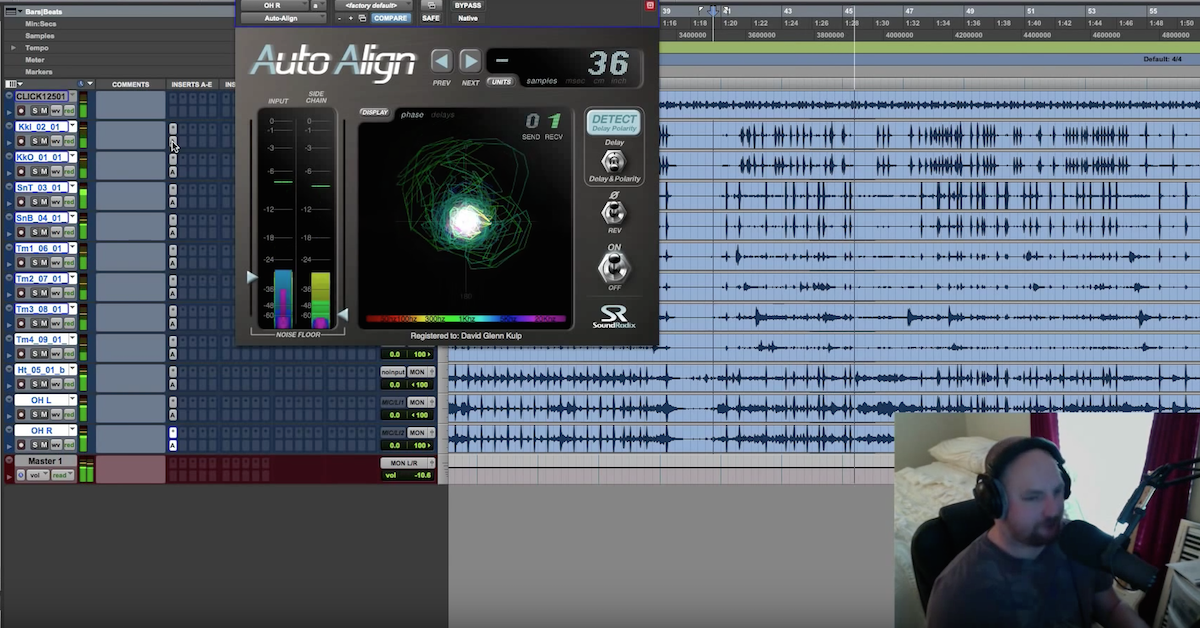
So I might be able to use the same technique before that I did on the kick drum, but I want to show you a different one that you can also use. So as I talked to you about before, the snare top mic was pretty isolated — there wasn’t a lot of bleed on it. So what I’m actually gonna do is set up a bus, and send this signal over to my gate. And the gate is gonna listen to the snare top mic and decide when to open and close. Or when to turn down quiet signals based on the snare top mic, but it’s gonna be affecting the snare bottom mic. So how you set this up in Pro Tools is you’ve got a bus called bus one. I’ve got it set on pre so that when I change this level, it doesn’t change the signal going over to my expander/gate. Then over here I’ve got the key input set on bus one, so it’s gonna listen to that bus. over here on side chain I’ve clicked on the key one. And that’s what’s gonna be the thing that’s affecting the gate. Now let me show you what happens when I kick it on.
[snare top mic]
You can listen to the snare top mic in order to set the parameters that you want. Then go back and listen to the snare bottom.
[snare bottom mic]
This is just gonna be another step to tighten things up by cutting out the kick drum bleed through.
So here I’ve bypassed all the gates and I’ll show you how I’ve just tightened things up a little bit each step of the way.
Now I’m gonna get to the problem of the room. Sounds very boomy and over-powering. And it kind of loses the punch of the drums, so what I’m gonna do is actually send the same bus from bus one of the snare drum over to the room. And what I want to do is only have the room mics, that reverb, or that ambient sound, only coming through on the snare drum. So if I set up the same input, key input over here, bus one, and listen to it on the snare mic. I’m gonna have the expander/gate listen to the snare mic, but affect the room mic.
[full drum kit]
Here’s the snare mic going through. If I bypass it, it’s very boomy. Especially on the kick drum. The kick drum makes it too loud. So what I’ll do is adjust the time, release, and ratio until I find that it’s basically only allowing the snare drum room to go through.
Let’s hear all the tracks. Much tighter. The final technique is a little bit more creative that I want to show you. And that’s to use the sound of the drums to actually trigger the sound of a pad. So here I’ve got the pad going through.
If I actually bypass this. Now if I play back the drums. Again with the key input this time coming from the overheads, that’s how you can make the drums affect the, make a more rhythmic or pulsing pattern to your other instruments.
Premium Mix Training