Tips for Splitting Kick Drums into Frequency Regions
02/2/2015
Now, we’re in part two of tightening up your kick drums. The first part, we talked about how to take a kick from sounding like this…
[kick drum]
…to this.
[kick drum with processing]
Okay. And in this video, what I’ve done is I’ve exported in Pro Tools that kick, by selecting that range, getting that track, I don’t know if any of you guys are familiar with this. I’ll send it to a quick mono buss, and then right-click, bounce it, some of you guys in other DAWs have easier ways to do this, but I’ve exported that kick, and imported it back in so that I get all of that processing, and then now I can treat it a little bit differently, so.
For this video, I’m going to go ahead and put that back to the right routing, and so now this kick down here – you see three of them, I’m going to explain that in a second – this one here, bypassed, is the same…
[kick plays]
…as this one.
[other kick drum plays]
And actually, I take that back, because I did it before the gate. Now it’ll be the same.
[kick drum]
There you go. So they’re the same kick, minus that gate on the end there, which I talked about in the first video.
So now what I’m going to do is I’m going to duplicate that track, and I’ve saved us some time, i’ve gone ahead and done that. You see these three right here are the exact same, and I’ve duplicated them so that I can get in and treat the sub of the kick, the mids of the kick, and what I call the click – not just me, everybody calls it the click – the click of the kick differently.
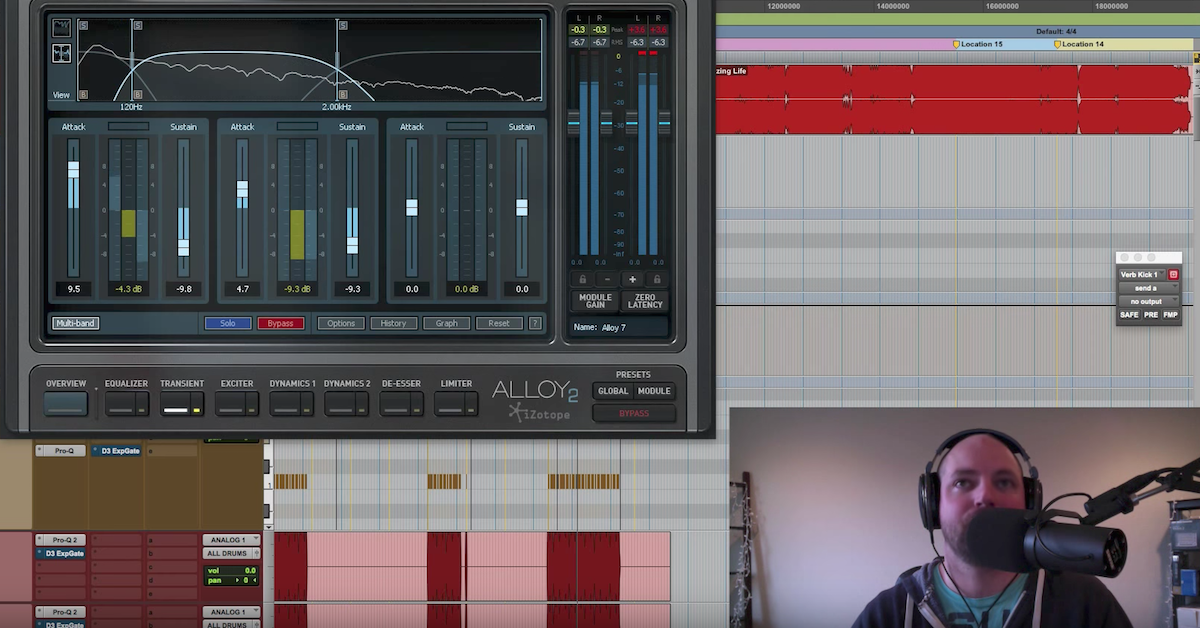
So let’s take a look at the frequency range I’ve selected to do that. I’ve got an EQ that I’ve put on each of the three of these at the beginning, and I’ve designated this one to be sub-region, 70Hz and below. The next one over here the mid, I’ve got just over 70 through to about 1kHz, and then for the click of the kick, I’ve selected the range 1kHz and above.
You can do that a little bit different for your taste or what you want to go for. The freedom of being able to control that is awesome. If you want it, there you go, you have it, but moving on from that, now what I can do is up here, we talked about the iZotope Alloy 2 being able to 120 and below, 120-2k and above, to be able to add attack, cut sustain on each of those independent frequency ranges, but not everybody has that plug-in, so what I wanted to do is give you an example of how you can do this, and then you even get greater control because you can add a bunch of plug-ins on the back end of that specific frequency range of the kick drum, vocal… I just talked about in The Mix Academy webinar how I’ve heard Justin Neibank, who mixes for Taylor Swift, Rascal Flatts, a lot of popular artists in the country and pop-rock world, how he’ll split a vocal apart, and while he’s mixing, he’ll ride 2k, some sparkle, whatever into Taylor Swift’s vocal for just the chorus, and then he’ll back it off. He’ll actually ride those frequency ranges of the vocal to give a little bit more, but anyways, more on that to come.
The kick subs, let’s take a listen to this before. This is just with the EQ. Breaking everything above 70Hz out.
[subs play]
And you can hear what I talked about in the first video, is it just being a little bit too washy, a little bit too muddy for this particular song. Too much decay, too much sustain coming from that kick, and I want to tighten it up.
Right out of the gate, I’m only focusing on the subs of this kick, I can just put a gate – no pun intended – put a gate on it, and tighten it up.
[subs play]
There you go. And I can dial that in a little bit.
[subs continue playing]
Here’s a little bit of the distortion.
Before.
Okay, so we’ve got a little bit of some stuff going on.
Tweak to taste those settings. You can determine on your own. The other thing you could do aside from that, is you can get in with, like we talked about, boosting the attack. If you have – let’s see, what are some good plug-ins, for boosting attack… Obviously Alloy 2, we talked about that. The transient designer in there is great. We’ve got Kush Audio’s Pusher is excellent for that. The SPL is really popular.
Let me go, I think I’ve got that under Plug-in Alliance. You can pull open SPL Attacker, and boost.
[sub kick play]
You’re going to hear the extra attack. Attacker, pretty straight forward.
And we can manipulate and control the sub-frequency all by itself.
Moving on from the subs, you can come up here to the mids, take a listen to those.
[mids play]
That frequency range that I’ve chosen, you can get in here and EQ it, cut it, shape it a little bit.
You do what you want. You can gate it and really tighten that guy up.
Something I like to do with mid-range of kicks and bass is distort it. You can come over here, and get out our buddy, Decapitator. I think it’s going to be harmonic. Let’s go to that one, let’s see what we get if we drive some distortion into this guy.
[mids play, distorting]
Kind of a cool thing. Get really aggressive with it. Let’s hear it before and after in that. I’ll do a Control+Click on Pro Tools, and I’ll bypass all of them at once.
[kick drum, bypassing and re-enabling]
That’s what we started with. Tighten that up.
Cool. I guess this tutorial is more of a multi-purpose, just telling you, “Hey, you break them apart, give them their own frequency range, the sky is the limit. You’ve got ten plug-in spots here.” If you use a plug-in like Blue Cat’s Patchwork, you can get even more than that. That’s what, 10 slots per instance? Do the math. There you go, you’ve got tons of flexibility. You could send each of these to their own FX, and do some cool stuff with that.
All kinds of work you can do by splitting and duplicating the tracks. Again, you have this above 1kHz. We could gate that.
[highs play]
Look for anything harsh up there, and just take that out.
And then of course, the beauty of this, I’m going to mute this other kick. The beauty of having them on their own faders now, is I can control the volume of them independently.
So you see kick sub, mid, and click right there. Let’s pull down the mid and the click.
[song, adjusting mid and click levels]
Cool. And then the other cool thing is if you’re not digging the kick click, you could import a kick, trigger this guy… All kinds of stuff you could do to get that to shape a little bit better with the kick drum, or whatever you hear in your head to come out.
Options, upon options, upon options. I hope you dig this.
Split them apart, treat them differently, do some cool stuff to it, get creative with distortion and your gating, tighten up your sustain… I think you’re going to enjoy that.
Feel free to e-mail me, david[at]davidglennrecording.com
Elevate Your Ears