Tips for Using Sidechain Compression in a Mix
05/13/2016
If you’re new to this series, I’m going to recommend you rewind and go back to the first installment in the series, where we check out parallel compression on this tune, but if you’ve already seen that, or you’re just ready to dive into sidechain compression, let’s get started!
So, with sidechain compression, you’re using one track to control the compressor on another track. Some of the earliest applications for sidechain compression were things like voice over dialog, and if you had music playing in the background, and you just want that music to be turned down as soon as someone starts speaking, you could setup a sidechain compressor.
So you actually have a compressor, say, sitting on your music track, and as soon as someone begins speaking, that’s what triggers the compressor and brings down the level of the music track. But that’s not the context we’re going to be looking at today. We’re going to be looking at the kind of more modern ways to use sidechain compression, and that’s to help elements poke through a mix.
A very common application of a sidechain compression is to allow percussive elements, like say, a kick drum, to cut through a more resonant instrument, like a sustaining bass part, or a pad, or maybe a higher synthesizer pad that’s masking that kick drum. Rather than turning down the pad, you’re just going to turn it down at those moments that the kick drum comes through, allowing it to poke through without lowering the overall level of the more resonant instrument that’s masking it.
We’ll look at some places where we can do that in this mix today, but it doesn’t apply to just kick drums and basses. You can use this on all sorts of percussive elements, and even melodic instruments that are playing a relatively more attack heavy part, that are being masked by some kind of pad. So let’s take a look at that on this mix.
So here is the mix that we’ve been using already from our friends at DeGraw Sound. This is sounding great just with the faders at zero, but let’s see if we can get this kick drum to poke through a little bit more during the choruses so it doesn’t get masked by this nice, lush bass synth that’s making an appearance in the choruses.
Let’s hear how that sounds.
[mix]
Pretty cool, but let’s see if we can get that kick drum to poke through without even touching the kick drum, and instead trying to bring down the level of our bass synth, and maybe our bass, which may be masking.
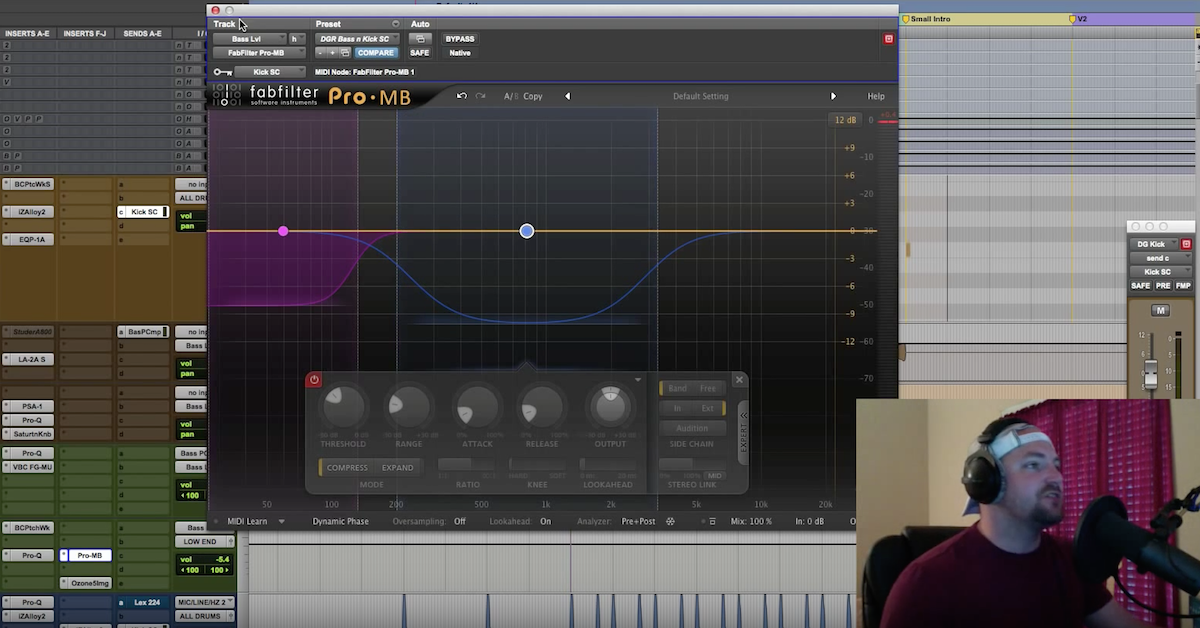
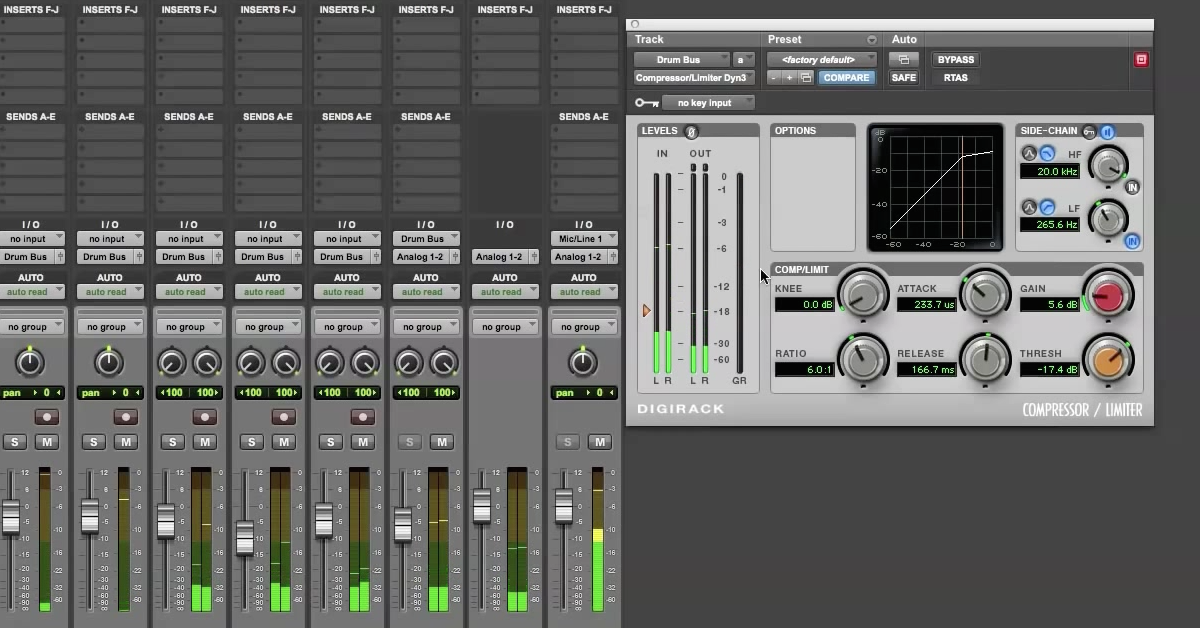
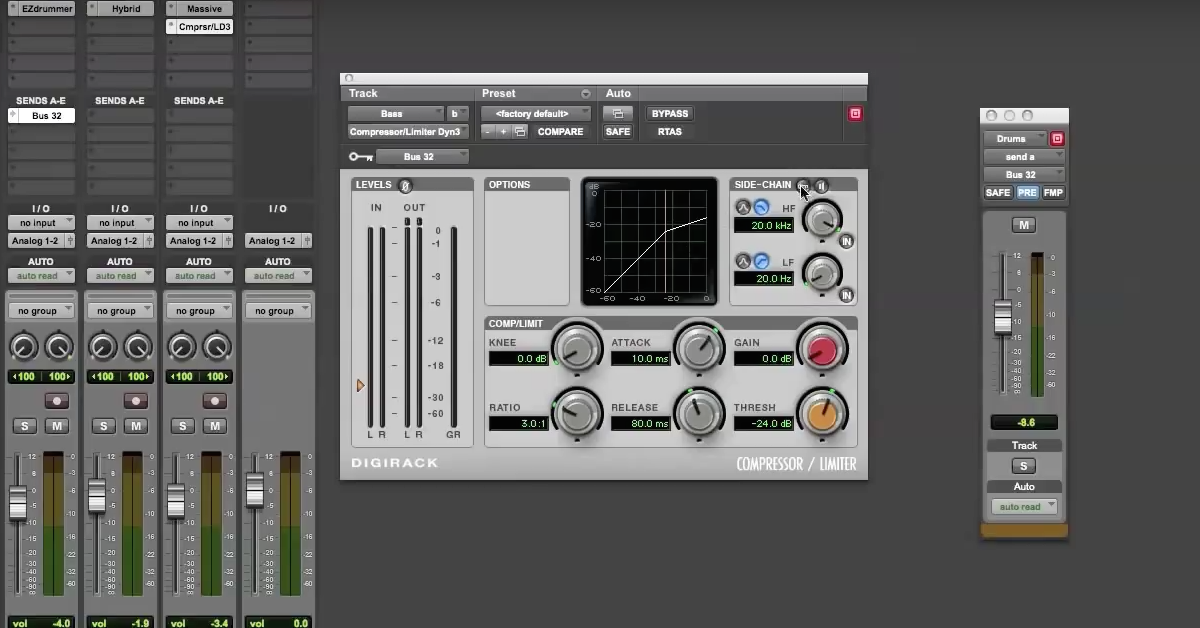
So I’m going to put a basic stock compressor onto our bass synth. We’re here in our dynamics, let’s go to our Dynamics III Compressor and Limiter, which is built into Pro Tools. Now, we’re going to go over here to our sidechain, and we’re going to click this key button. This turns on our side-chain compressor, and it looks for a key input from another track. Over here, where this key symbol is, I’m going to tell it to look for signal from buss 1.
Great, so now whatever instrument we send to buss 1 is what’s going to trigger this compressor. Now, all we’ve got to do is make sure our kick drum is the thing that’s triggering that compressor. So let’s setup a send on our kick drum and send that out buss 1. So I’ve got my kick drum track here. I’m going to make sure that my edit window shows me my sends, and then let’s add a send here out buss 1.
Cool. So let’s jack it up all the way here and let’s see what happens when we have a compressor on our bass synth, but the kick drum is what is going to be triggering the compressor on the bass synth. Remember, this compressor is not looking at the bass synth at all for its cues on when to compress. It’s just looking at the kick drum. We’ve done this by turning on the sidechain and setting the sidechain input to be buss 1.
[mix]
Cool, and you can see for yourself how this gain reduction meter is really just kicking in when the kick drum hits, even though it’s reducing gain on the bass synth.
Now, let’s make this thing really apparent. I’m going to make these settings more dramatic, so you can really hear the kick drum poking through. I’m going to set a really fast attack, a kind of medium, maybe medium fast release, and let’s also put this on our bass track. I’m holding down Option and dragging this plugin to add it to additional tracks, and lets also put on our keyboard pad here. So now, whenever this kick drum hits, it’ll be reducing the level in our bass, our bass synth, and our keypad.
[mix]
Cool. Now let’s hear it without and with this sidechain compression. In order to do this, I only have to turn on and off my buss send from the kick drum, because if I’m not sending any signal to buss 1, well, we’re not going to be triggering these compressors at all.
So first, without, and then with the side-chain compression.
[mix]
Are you hearing that difference? To make it a little more dramatic, I can juice up just how much send I’m doing to the compressors.
[mix]
Now that version makes me a little seasick, right? We’re overdoing it a little bit, but you can really hear that the kick drum is triggering a pull down in level on those other instruments.
To do this well, you’ll want to make sure that you aren’t overdoing it. That you’re not getting these kind of pumping effects. Ultimately, the effect should be subtle, but it can have more impact with fewer artifacts than an EQ, or trying to compress the kick drum itself to death, just to get it to kind of poke through.
By using sidechain compression in a subtle way, you can allow percussive elements to poke through more resonant ones with a minimum of artifacts, and to explore that, let’s turn this down again and hear a more subtle version again of this sidechain compression.
So here it is without, and then with.
[mix, with and without sidechain compression]
You hear how we’re getting a lot more level and sense of loudness off of that kick drum without even raising the volume of the kick drum, without even any EQ, and again, we can refine these settings by playing around with the attack time, with the release time, with the threshold, so definitely play around with those.
But I tend to find that a very fast attack, and maybe a medium to medium fast release can work fairly well.
You’ll want to time that release so that it compliments the sustain of the percussive instrument, and so that you’re minimizing pumping and breathing, but that’s a setting to play around with a little bit. You also want to set your threshold so that this compressor is only engaging when the instrument hits, and not at other times.
Lastly, you’ll want to set your ratio so that you’re getting a good amount of gain reduction. Often enough, you don’t really even have to mess around with the makeup gain for sidechain compression. The whole idea here is about bringing this instrument down, and only in those sections where another instrument is playing.
So makeup gain here kind of defeats the purpose, but with that said, once you’ve applied sidechain compression, you should be able to get your masking instrument to be louder than you’d otherwise be able to get it in the mix.
So again, this allows you to get really kind of bold, forward, expansive, resonant sounds, without them covering up your percussive sounds in a way that sucks impact and life out of your mix.
Well, I hope this brief video on sidechain compression has been fun and edifying for you. Go ahead and look for places that you can apply sidechain compression in your own mixes. Very common places again are letting kick drums kind of poke through maybe a more resonant bass line, maybe allowing a snare drum or a more percussive guitar line to poke through a synthesizer pad. These are places to look to use this particular technique.
Thanks again for hanging out with me as we go through some techniques for sidechain compression. I hope you enjoyed this one. This has been Justin Colletti at Joe Lambert Mastering, coming at your courtesy of B&H once again, who is allowing us to bring this intermediate and advanced compression tutorial to you free of charge.
If you want to get more great video tutorials like this one, you go to B&H, you sign up for the newsletter there, go to sonicscoop.com, sign up for our newsletter too, and we’ll keep you abreast of more of these videos as they come out.
Until next time, happy tracking, happy mixing, I’ll see you in the next video.