How to Set Up Multiple Outputs for Virtual Instruments
06/14/2013

I’m going to demonstrate a functionality that might be easily overlooked by many users. This functionality is the multi-out capability of a virtual instrument. So if you’ve been kind of stuck in a rut or haven’t been feeling very creative with virtual instruments, this kind of functionality is going to give you a lot more creativity and be able to do a lot more different things with the virtual instrument. To demonstrate this I’m going to show you how to do it with Toontrack EZ Drummer.
So here I have my recording session in Pro Tools, but this applies to any DAW that you want to use. What you need to do is bring up an instrument track, so go to New > Track New, I’m gonna go ahead and make this a stereo instrument track, create it, and you’re going to see it shows up right here. I’m gonna go ahead and click on it and name it EZD for EZ Drummer.
Now if I switch over to my mix view, what you’re going to see is my track, I’m gonna go ahead and insert the Toontrack library as the first plugin slot on my track. So go to Instrument > Go to EZ Drummer, and here it comes up.
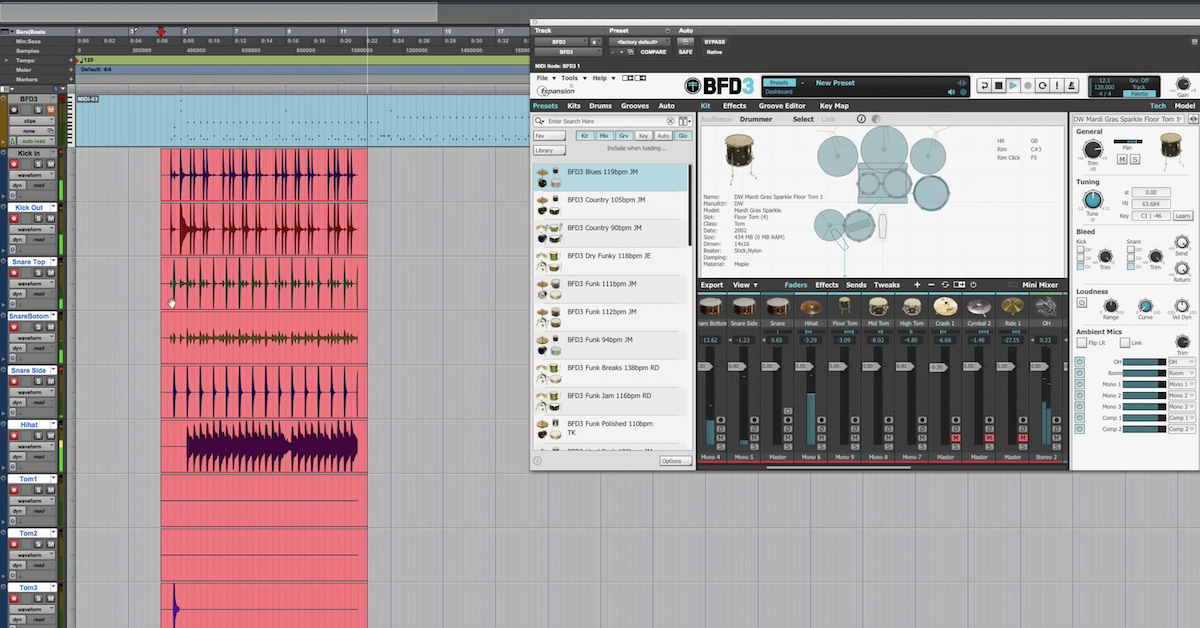
If you’re not familiar with Toontrack EZ Drummer, it’s a sample playback engine, that also includes a library of multi-sampled drums. Now how this works is if I bring up the mixer this might give you a better idea. Toontrack recorded a drum kit — actually multiple drum kits — in a recording session, with the conventional microphone set up you’d see in a conventional studio if you were gonna record some acoustic drums. So you have microphones for individual instruments that are close to the instruments, like the kick drum, the snare, hi-hat, toms. But you also have overhead microphones and then room microphones that you can use, and what you do is there are samples for each of these tracks, and you trigger them by using MIDI notes. There are a library of groove samples included with EZ Drummer, and you can bring those up here. I’ll do that so you can see how it works really. Bring up, you know, one of these grooves. And you can click here to play it back.
[drums]
If I switch over to my mixer, you hear the individual microphones as they were recorded: snare, kick drum, overheads, room mics. Now the way it’s set up right now — and you’ll see over here — all the microphones are being output from EZ Drummer, down this same track. They’re all going out of my instrument track. So, if for instance you want to add some kind of processing like compressors, EQ, limiting — those sorts of things — as it’s set up right now you have to add them in as plugins after your EZ Drummer on the instrument track. However, those processors are going to be affecting all the tracks that are coming out, so not only the kick close mic, but then the samples of the kick drum that are going to the overhead and the room.
Let’s say you’re interested in adding some EQ to the snare drum. But you don’t want to add it to the kick drum. Well, the way that it’s set up right now, you can’t really do that. So you might think, if you’re familiar with Toontrack, they have Superior Drummer 2. With Superior Drummer 2, the mixer allows you to — inside the plugin — put on different processors: the compressors, those sorts of things, inside of the plugin. So you might think, oh I need to step up from EZ Drummer to Superior Drummer. Well there are different advantages to Superior Drummer to EZ Drummer, but what I want to show you is using the multi-out functionality of EZ Drummer you can accomplish a similar sort of thing.
So right now if you look at the output here, everything is assigned to track 1. Track 1 is in Pro Tools, just going to play everything down this instrument track. If I switch this now over, you see that there are now eight total ones — different tracks to use. So what you can do is just go over here to track 2 for your kick drum, track 3 for your snare, just like this. Overheads I’m gonna make track 4. Track 5 I guess I have hi-hat. I’m gonna go ahead and put that on my overhead track too which is track 4. Great.
Now, if I come over here to my Pro Tools session I’ve got some auxiliary tracks already set up. So if I show these, I’ve got auxiliary tracks and what you can do is use the auxiliary tracks to route audio out of your plugin, our of your virtual instrument, and then on to different tracks. So, if you go to the input selector right here, you’ll see normally you just have interface and bus, but now you have plugin, and EZ Drummer shows up, and you have these tracks. You know, track 2 is EZ 2. Track 3 is EZ 3. Just like that. Now all you have to do is select the appropriate one that matches what you’ve got it set up inside of EZ Drummer. Got 5.
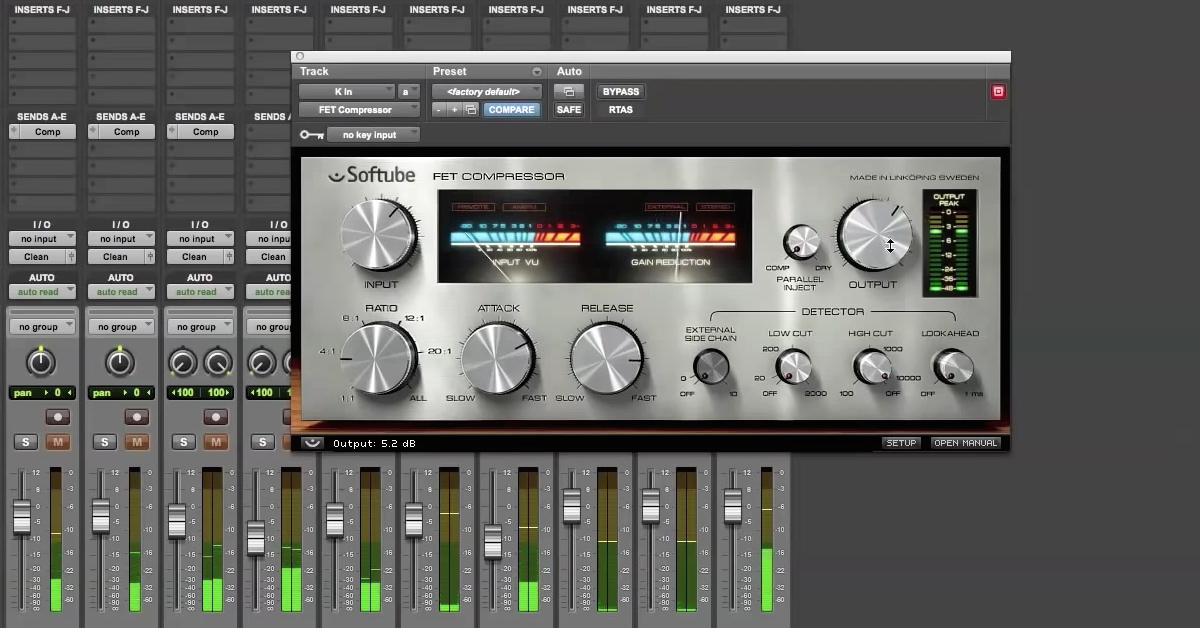
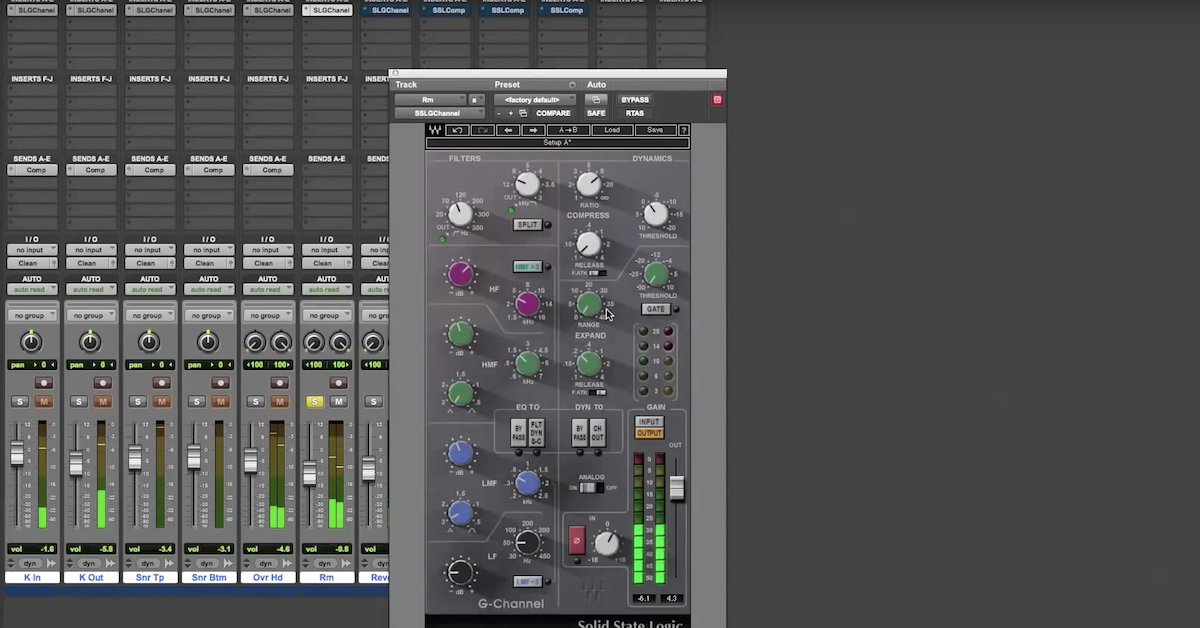
Now if I play back my groove, you see nothing coming out of my EZ Drummer track, and all the audio coming out on these auxiliary tracks. So now I can solo them, and also, then at this point you can add your different inserts in. Different effects, or you can even have sends if you want to have a send to a reverb or a delay. Anything like that is now possible with EZ Drummer.
Another thing I want to show you is you don’t necessarily need to use auxiliary tracks. You can actually print the audio onto audio tracks from EZ Drummer and route it out the same way. So I’ll go ahead and make these inactive. Bring up some audio tracks that I’ve already got set up. Just like with auxiliary tracks, you just go in, set the input: EZ 2, plugin, EZ 3, and I’m just gonna record some of these, so now if I start recording, bring up EZ Drummer, play it back.
[drums]
Let’s look at what I’ve got. You print these tracks and it’s actually audio you can use. So, EZ Drummer is not the only sample library that has this functionality. So if I get rid of this, you can also do the same kind of thing in other things like, let’s bring up Superior Drummer. Make it active. Alright. Superior Drummer it’s a similar sort of thing, all you gotta do is go in to the mixer, at the bottom you have the output 3/4, 5/6 — you even have more options now, not just 8, but you can send it out to a total of 32 different tracks. These can either be mono or stereo depending on how you set up your auxiliary tracks. Very intuitive, very simple thing to do.
Another one I can show you is addictive drums. This one works a little but different but again, can accomplish the same thing. So when Addictive Drums come up, rather than having these tracks that you have to assign it to in the mixer, Addictive Drums is even a little bit more simple than that. It might not be as intuitive, but all you do is the output, you have an arrow right here, and these are gonna be direct outputs from your mixer. And then what happens in Pro Tools there are stereo tracks over here and mono tracks over here. If I bring up over here, let’s say, one of the stereo tracks like my overhead, make it active, go in here — plugin, now you’ll see Addictive Drums comes up and I just have for instance now, stereo tracks to use. Things like overheads, room and bus. But if I had mono auxiliary tracks than you’d see all the mono tracks show up too.
Lastly, the thing I want to demonstrate is how to do this with Kontakt. It’s a little bit more complicated with Kontakt than the other ones, but basically this kind of multi-out functionality can be done in almost an virtual instrument. It can be done in Steven Slate Drums, BFD 2 — all the different ones that you want, you know, it’s a very popular things to do with drum samples because you want to have access to the different instruments. But this is also the case, it can be depending on what you’ve got, even synthesizers have this kind of functionality. So if you’re kind of getting stuck in a rut, think about whether you want to do this with a virtual instrument, and how it might be useful.
In order to do it in Kontakt, you switch over to output, then what you need to do here is create a new track, add channel, quantity 1, number of channels 2 — that’s stereo — go ahead and create it. What you need to do now is switch over here to the output at the bottom, assign this, i’m gonna assign this to aux 3, make this a stereo one just like that, click ok, it’s gonna want you to save it but you don’t necessarily have to do that.
Come over here to my overhead, bring up Kontakt, you can then go to AUX 1, AUX 2, those sorts of things, and then when you play back your drum sample library now, it’ll show up inside of Pro Tools as a separate track. So it’s a little more complicated in Kontakt but again, it accomplishes the same thing.
So if you’re stuck in a rut doing the same thing, tired of the same sounds that you’re hearing with EZ Drummer or something else, try this multi-out and it will accomplish something new for you. And then allow you to be a little more creative.
Elevate Your Ears