How to Mix Acoustic Music — Part 2: Lead Vocals
02/27/2014
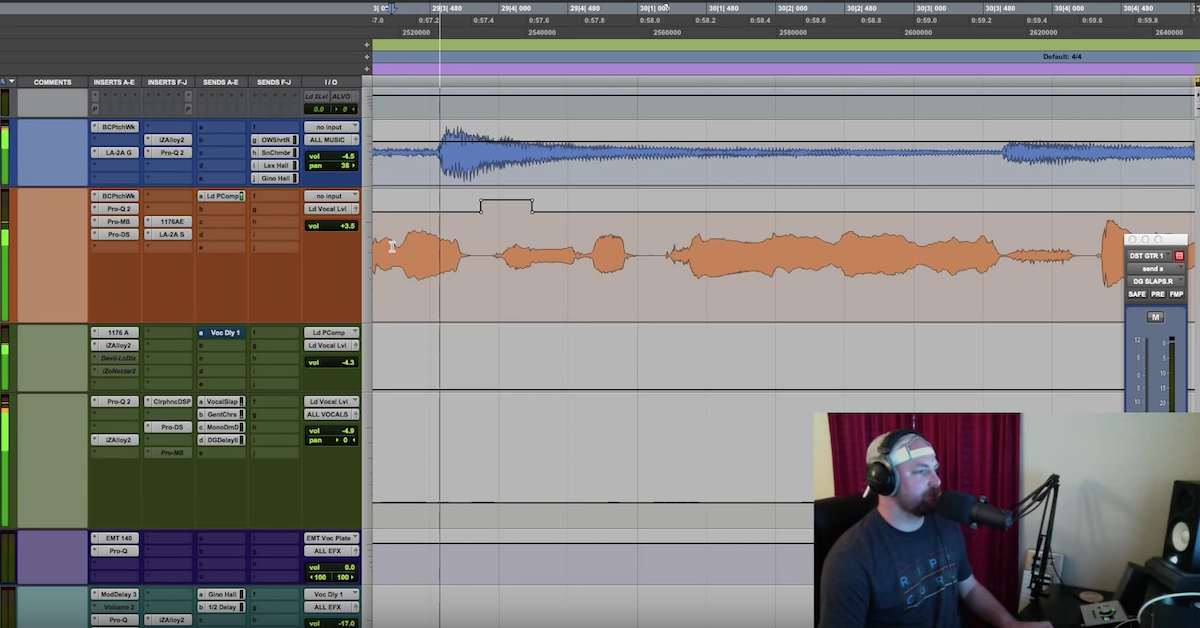
Diving into the lead vocal. The first thing I want to talk about with you guys is controlling the breath. So, the first thing I’ve done is I’ve taken… In Pro Tools, we have a clip gain. I don’t know what it is in Logic or if it exists, but I’ve gone down, and I’ve reduced all the breath. So, you see these lines right here. Let’s take a listen to that example. Solo him.
It’s not going to be too dramatic of a difference. Jaris is a great singer. He controls himself very well. Aside from his sibilance, he’s very sibilant. The breaths are all nice and tight and well-performed. Not to spend too much time on that, but I do go down. I highlight those, and I pull them down. The second thing I want to talk about is the clip gain with phrases. Now, since doing this video, I have become a little bit more OCD, where I will go in, and I’ll be more OCD with the vocals. So, what you’re going to see here is I’ve gone… As a matter of phrase by phrase, I’m treating the vocal with clip gain, additive clip gain or reducing the volume. In this case right here for this line, you’ll hear it coming out of this section and we’ll skip ahead to this.
So he got a lot louder, so I pulled that down quite a bit. You’ll see section to section. I don’t track with… I have a UAD Apollo. I don’t track with compression or anything that often. Sometimes, I’ll use it like in 1176 with the UAD stuff for peak limiting, but for the most part, I track dry. So, then I go in with clip gain, and I use that, and then a mixture of that and volume automation to kind of balance and level out the vocal passes. I’m not going to spend too much time on the in-depth clip gain, but just to see, you can see I’ve gone in and raised and lowered the level of the clip gain to kind of help smooth the vocal out. Jumping into the EQ chain here. We’ve got the Fab Filter Pro Q. Love this plug-in. I’ve got just some minimal stuff going on, doesn’t look like anything to write home about here. My lovely mother hooked me up for Christmas with some plug- ins, and this happened to be one of them, the bundle from Antares and the Mic Mod EFX. I’m going to show you a before and after of this, because whether or not it’s doing anything magical or not, I don’t know if it’s making the full 14 sound like a U-47. I’m not going to argue you on that, but I did like the tube saturation that it gave. So, let’s take a listen of
that before and after. Let’s solo it, and actually, let’s move to another section in the song. Maybe something back here. Yeah, the chorus is cool.
If you guys are hearing that, I liked what it did. So, I kept it in there, but I was definitely experimenting with this one. The next one I’ll pull up is what we got here, the de-esser. Like I said, Jaris is actually extremely sibilant with his S’s. They can get pretty harsh sometimes, so we have to work on the mic technique sometimes with the S sounds. Then, definitely using a de-esser, and I’ll also go down, and I’ll draw them down, depending upon the song that we’re working on. But, that’s taking care of that. I don’t know if there’s anything to really dive in deep with that. But then, I will say I de-S early in the chain, if not first, and that’s reducing those. Then, if I over-de-ess, I can go back and tweak it, or I can add a little bit of clarity in the upper end later, but I do de-ess first. Then, it looks like we’ve got the 1176. This is going to probably… If I hit play, I’ve pulled this up from an older session, but controlling the peaks a little bit.
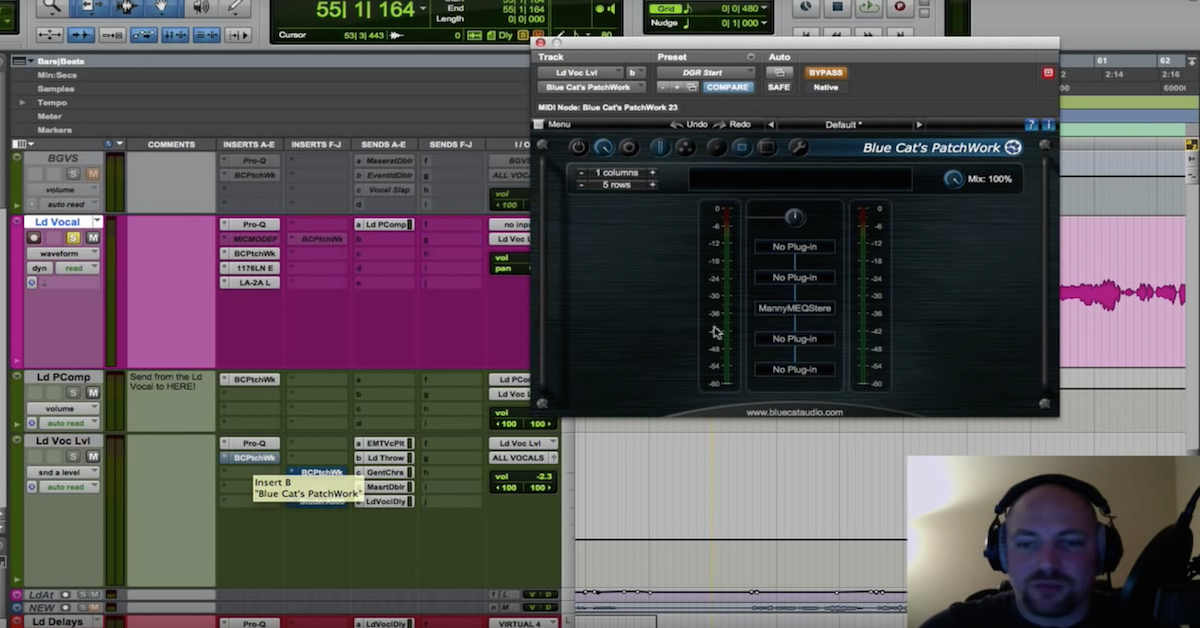
It’s just kind of helping to control it a little bit, nothing too fancy. You can see I got a slow attack, kind of a medium to fast release. Then, moving on from there, I’ve got a parallel compression chain. I’ve got another video series on how I use aux tracks to give control when I do parallel processing. That’s available if you guys want to check that out. I get a little bit deeper into the plug-ins I use on my parallel chain, then I use what’s called a lead vocal level on this song. If I remember correctly, when I mixed this, I threw a C4, a wave C4 or something on there. The way I typically do my parallel chain is I’ll take the dry, unprocessed vocal, and I’ll send that to a lead vocal level. Then, the parallel compression chain also goes to the lead vocal level, and you got the blend. Then, you pull it up. You kind of blend in the parallel compression. Then, I control it with the lead vocal level one. This song, if I remember correctly, I put a C4 on or something, and the phase got all out of whack. I think it was a delay compensation bug. So what I did was I went back to kind of what Dave Pensado does, and he sent the parallel chain out to all EFX or all vocals, whichever one you pick. But this is an older song, so I do still do what I taught in the other video. I highly recommend it, but like I said, there was a little bug when Pro tools 11 first came out. So anyways, moving onto the parallel compression. I’ve got the waves, CLA 76. Usually, I will follow that up medium attack, fast release. Then, I’ll generally follow that up with an L 1. That’s definitely the case here. Actually, if I remember, this is actually a thicker part of the tone than the dry. A lot of times, I’ll try to get that dry very present in the blend, and then pull the parallel compression in. I think this is one where the parallel compression chain is going to be more dominant in the sound.
Now, what I want to do is mute the parallel compression chain. Let’s see how much of that dry signal was in there. Back in. Yeah. So, most of that tone is coming from the parallel chain. That sounds good to my ears. I liked it, so I ran with that blend. I do see the EQ. It’s a little bit dramatic. I’ve got the 1K region. It was about 1.3, where I felt like that sounded good on his vocals. So, I boosted that up. That’s typically in area one, 800 to 1.2, somewhere in here that I’ll sweep through and find a sweet spot for the vocalist. I’ll pull that up a little bit. [Clearing throat]. On his voice, I, for some reason, maybe went back and did this. I don’t typically lift too much in the 2 to 4K region, but I did that. Then, I’ve also added some classiness up in the 10 K range. A couple of frequencies that kind of bothered me, and I’ll use the Pro Q. If you haven’t seen that before, let me show you a demonstration of how you can take and sweep through frequencies. Let’s take this band here.
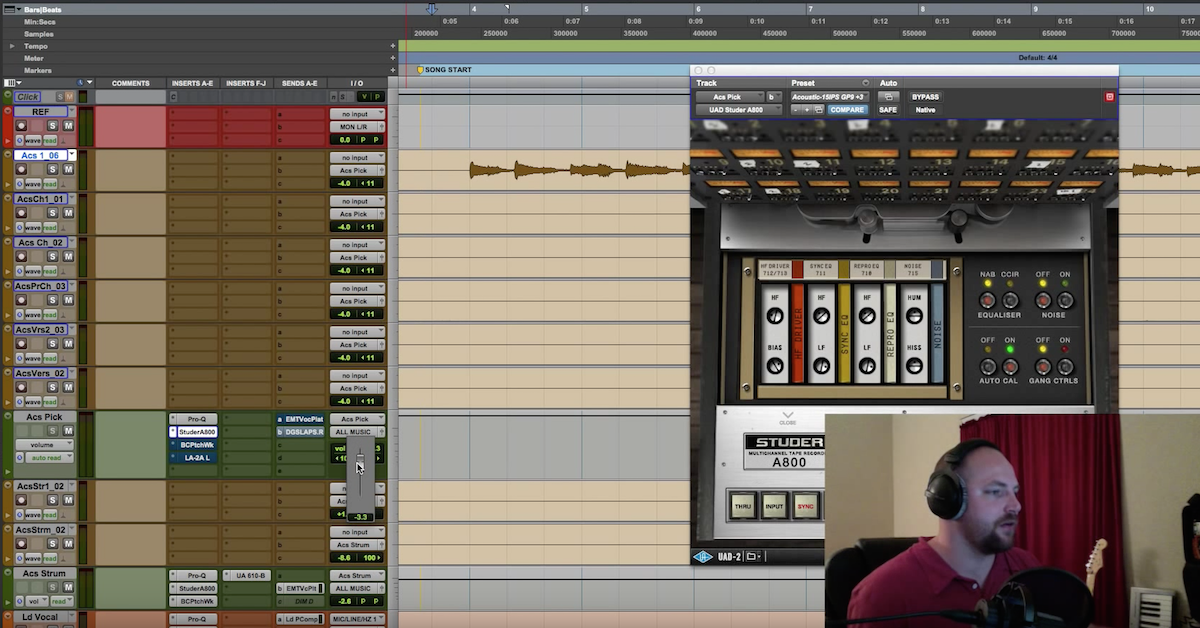
Going to sweep through. So, that was a little snippet of that. Then something I’m really excited about, as an Apollo user, UAD, they recently released this, actually just a few days ago, the preamp emulation of the UA 610 B. So, this vocal chain, I already kind of mixed it and set it up. But before I pulled it up to do the tutorial, I thought, “You know, let me see what I can do with that.” I pulled it in, and I really liked it. So, I left it on, and we’ll do an AB of that. Let’s find a good section here. Let’s go to the end, where he kind of gets a little more energy.
It’s very subtle, so let me do this. Let me play it, and then I’ll bypass it halfway through. It’s out. Back in. Cool So, I liked what it’s doing. It’s adding some character to it. I’m not mad at that. Then, you can see I’ve got some effects. I’m using a very minimal amount of effects. I wanted to keep this kind of dry. This is more of a demo songwriting track. I kind of give this one away, kind of build up some fan base, sent it out, blast some emails, and do like a teaser before we release a full radio version of this song. This is an EP that I’m producing for my buddy and give a shout out actually. Jaris Cole and the coproducer up in Chicago, Victor Incarnacion, working really hard. So, shout out to Vic. Moving on. The vocal delay. Vocal slap, if I remember, I threw a Studer on the back of the plug-in mix. Echo Flex. Maybe do a whole series on effects here, but pretty much, I’ve dialed this in at about hundred, I’d say 160. That’s a lot higher actually than I usually will dial that in, but I’ve got that sending to a vocal slap. Then, something cool. I can’t remember where I picked this up, but I’m throwing this Studer on the back end of my delay. I’ve used, for those of you that have this, I’ve used a cassette deck preset and driven the crap out of it, and then just pulled down the output. Let me show you the difference between the… Let’s pull the vocal slap up. We’ll solo it.
So, there’s no Studer on that slap delay. Now, I’m going to put the Studer on, and let’s hear what we get. Pretty sweet. Right? So, you hear the driving, the artifacts, the distortion kind of kicking in. I really liked it. I didn’t bring in too much vocal slap on this. For this particular acoustic track, I wanted to keep it somewhat dry, just more of a feeling rather than hearing the delays or the reverb, but not a bad effort with the Studer there. So, cool little trick. If you guys aren’t using saturation on the back of your delays or that kind of stuff, I recommend it. The ENT vocal plate, pretty straight forward. Just kind of put them in the same space that I put the acoustic guitars in. Let’s hear that. That’s without it. Cool. And then, moving onto… I threw a delay on here, a stereo delay. That is extremely light as well. Let’s take a listen to that and boost it up.
Again, I was trying to create a space around the vocalist. You kind of hear a couple of those kind of trickle off. It’s a nice little effect for a little acoustic track. I tend not to get too crazy with delays when I’m doing acoustic demos and that kind of thing. The UAD dimension D is in here a little bit. I actually don’t mind that whenever it’s boosted up a little hotter. So, that’s kind of a walk through of the effects. That’s the lead vocals. So, if you guys have any direct questions, man, email me at David, at Davidglennrecording.com. I’m trying to think of there’s anything else I can cover on this one, but it gets you started with kind of cleaning up the track, kind of working through some of the breaths. Sibilance is something to pay attention to, depending upon the singer. Compression to control the peaks. We’ve got parallel compression in there. You saw the settings for that. I added some saturation, some character. So, if you guys have any more questions, anything of what I’m doing here that you see maybe I didn’t cover, feel free again to message me. Video three is coming and that’s going to be on Mid-side EQ of the acoustic guitar.
Elevate Your Ears