12 Tips for Mixing Metal Music
02/14/2022
Article Content
Being that the common end goals in audio are typically things like width, depth, clarity and impact, most traditional mixing concepts like “reducing mud” and “gluing things together” tend to apply universally regardless of whether you’re working in a rock, rap, soul or even an orchestral context.
This being said, when you’re talking about a style of music as extreme and complex as heavy metal, sometimes “traditional” simply won’t cut it. You may have to opt for a more creative problem solving approach.
On that note, today we’re taking a look at 12 tips which are fairly specific to mixing heavy music, and how they can be used to tackle some of the unique challenges you’re likely to come across. Let’s get started!
Firstly, What’s So Difficult About Mixing Metal?
Upper-Mid Density
Especially nowadays, with mainstream pop & rap instrumentals consisting primarily of subby bass synths, simplistic programmed drums and sparse, minimalist, lo-fi sounding synths, there really isn’t a huge amount of abrasive upper-midrange content present for vocalists to have to compete with. In hard rock and heavy metal on the other hand, you’ve got aggressive double (or quadruple) tracked high-gain guitars, punishing (and clicky) 16th/32nd note double kick drums, roaring & heavily distorted bass and more often than not, a ton of additional production elements like synths, loops, or even full orchestras which the singer somehow has to cut through and sit on top of. (Yikes!)
Instrumental Focus
The singer is generally the obvious “star of the show” in a lot of radio-friendly music — often sitting significantly louder than everything else in the mix. In metal, while the vocals are definitely important, you need to make sure the entire band is operating as a single cohesive unit and that everyone gets to shine. Combining the fact that you can’t simply get away with turning up the vocals too loud, with the fact that you’re typically dealing with a dense, upper-midrange-heavy arrangement to begin with, you often have to work much harder to get the singer heard.
Here’s a perfect example of how dense and “over the top” a lot of metal productions can get:

It’s All About the Source
While a lot of mainstream music is constructed primarily out of fairly “mix-ready” samples, loops and synth sounds, most of the tracks you’ll receive for a typical metal mix will arrive in a pretty raw, “fresh off the microphone” state (if not in a totally raw DI state). Given the fact that dialing-in and capturing raw drum, guitar and bass tones that sound totally awesome straight off the bat is a skill that can take years to develop, chances are good that people are gonna be sending you some pretty sub-par sounds that may require some heavy-handed processing to sound decent.
Metal Can Be as Fatiguing to Mix as It Is to Play!
Another huge difference between mixing something like a smooth pop ballad and a blistering death metal track that you may not have considered is that with the latter, you physically cannot afford to listen at loud volumes for much longer than 5-10 minutes at the risk of rapidly fatiguing your ears. Ever stood next to someone who’s operating a drill or jackhammer for a few minutes, only for everything to sound like it’s underwater afterwards? Well, listening to loud blast beats tends to have the same effect. Do yourself a favor: monitor metal at low volumes!
Anyway, now that we have a better understanding of the potential difficulties that lie ahead, let’s dive into some actual tips on mixing metal!
Mixing Metal, Instrument by Instrument
Bass
1. The “Split Bass” Technique
When talking about bass in a heavy metal context, there’s typically some sort of distortion or heavy saturation somewhere in the picture, as in order for the bass to cut through a massive wall of guitars, well… there kind of has to be. The problem with applying serious distortion to a bass guitar, however, is that as the amount of gain goes up, the clarity, punch and definition of the low end will go down — often just resulting in a bloated, “farty” mess (for lack of a better description).
A tried-and-true solution to this problem which has been used on countless fantastic-sounding heavy records is to simply “split” the bass into two separate frequency bands, allowing you the freedom to process the lows and highs independently from each other for maximum control and sonic fidelity.
To do this, first start by duplicating your bass DI channel. You essentially want to create a clean “lows-only” channel and a second distorted “mids and highs-only” channel, which you’ll balance and buss together to create your full range bass sound. For your low bass channel, you simply want to low-pass (high-cut) the bass at somewhere between 150-250 Hz, depending on what sounds best and how muddy the DI is. You can then limit or compress this signal for a tight, clean, consistent low end. For the high bass channel, you can use pretty much any form of saturation or distortion including amp sims, fuzz/overdrive/distortion pedal sims, heavily-driven console or tape emulations — pretty much anything will work for this purpose as long as it sounds cool. After dialing in your cool distorted bass sound, you then simply want to filter out a significant amount of the lows/low mids using a high-pass filter. You can afford to go fairly high with the cutoff point on this one, somewhere between 300-500 Hz depending on what sounds best. Just make sure there isn’t too much of that farty mud we talked about earlier. Now that you have your two channels, all that’s left to do is balance the two channels against each other, tweak the filter cutoff points slightly to where they’re best complimenting each other, and then buss them together under a single “parent” channel, where you can apply further processing to the final combined bass sound as a whole if necessary.
Check out the following video, in which Periphery producer (and previous bass player) Adam “Nolly” Getgood demonstrates how he essentially uses the split bass technique within a single instance of FabFilter’s Saturn multiband saturation/distortion plugin:

2. All About That Bass… and Mids!
Given that metal arrangements can be so dense, unless you want your bass to just end up sounding like a bunch of undefined low end rumble under everything else, you’re probably gonna have to push a significant amount of upper mids in there to get it to cut through. A common term you’ll hear used to describe this kind of present, heavy bass tone that cuts through a mix like a hot knife through butter is “throaty,” often referring to an abundance of the 800-1250 Hz range. Generally speaking, if you sweep around this area in the context of a full mix with a wide bell boost, you’ll likely find a spot where the bass suddenly comes to life. You can typically get away with cranking much more of this area than you’d think, so don’t bother pussyfooting around with the bass in solo. Listen in context, and just lift it to where the bass is really holding its own against the competition!
3. Kick/Bass Low End Juggling
You’re probably familiar with the classic “kick ducking the bass” technique, commonly used in EDM and pop as a musical effect. Well, believe it or not, we can apply the exact same concept to a rock or metal context, albeit to a much less blatant degree. While in the aforementioned genres you’d typically duck the whole of the bass for an obvious “pumping” dynamic, when talking about real bass guitar, you definitely don’t want the performance cutting in and out every time there’s a kick — especially if there are a lot of kicks (as there often are).
A simple solution to this problem which allows for drastically improved low end compatibility between the two instruments without totally compromising the bass is to duck only the lows of the bass using a multiband compressor sidechained to the kick track. Setting the crossover of the compression band so that it’s covering 20-100 Hz-ish (depending on your particular kick and bass sounds), and adjusting the compression threshold so that you’re getting 5-10 dB of gain reduction with a fast attack and medium release (where it’s musically releasing in time with the BPM of the track) will make a huge difference to how tight and punchy the kicks sound, without the listener ever even noticing that the bass is ducking (assuming that you’ve dialed everything in correctly).
Distorted Guitars
4. Dynamic Low Mid Control (The C4 Trick)
A problem you’re likely to come across when mixing heavy guitars is that whenever there’s a palm mute, the low mids will tend to “bloom,” or jump out disproportionately to the rest of the performance. Sure, you could try reducing this area with an EQ, but then you’ll most likely just be left with a thin sounding tone for the rest of the performance.
The more intuitive solution to this problem is to simply instantiate a multiband compressor like FabFilter’s Pro-MB or the Waves C4 (from which this technique originally gets its name), with a band of compression focused around the 150-250 Hz area. Basically, you just want to adjust the threshold and ratio to where it’s only applying gentle gain reduction on the palm mutes (around 1-3 dB), and isn’t being triggered by the rest of the signal. The result is a tighter, more consistent tone from start to finish, and you don’t have to spend ages manually automating low mid EQ dips.
Check out the following video from pro metal mixer Jordan Valeriote, in which he demonstrates the C4 trick perfectly:

5. Enhancing Transients in a “Brickwalled” Guitar Signal?!?
Due to the nature of how distortion works, by the time you’ve sent a guitar DI through an overdrive pedal and a cranked 100 watt amp head, there’s a good chance the resulting waveform is just gonna look like a solid block of audio, void of pretty much any discernible dynamic transient information whatsoever. So, being that expanders and transient designers rely exclusively on dynamic fluctuations to do their job, how do you go about using these tools to enhance front-end attack on “flatlined” guitars? The simple answer is, you don’t. But don’t give up on the idea just yet, as there’s a lesser known way we can go about achieving our goal, albeit via some forbidden “audio dark magic.”
While we may not be able to trigger expansion directly using the distorted signal itself (as it simply doesn’t have any dynamic information to react to), assuming the original raw DI of said performance is still kicking around, you can use it as a sort of “proxy,” guiding the expander as to when it should react on the distorted signal via a sidechain input. Basically, just line up the DI and corresponding amped track, insert your expander of choice on the distorted channel, select the sidechain input for the band as the DI channel and then adjust the threshold, attack, release and ratio settings to where you’re getting the desired transient enhancement effect you’re after. You can experiment with using said expander in a broadband or multiband configuration to enhance the full signal, or to focus just on the high end attack from around 3-5 kHz & upwards. Either way, the result is dynamic transient control at a degree that otherwise simply isn’t possible when talking distorted guitars.
6. Keeping the “Fizz” In Check
Generally speaking, high-pass filtering is much more common in mixing than low-pass filtering. Heck, in a typical clean pop or rap mix, you may end up not using any high cuts whatsoever! The thing is, the only time the ultra highs above 10-12 kHz really become a problem is when you’re dealing with heavily saturated or distorted signals (à la heavy metal). Guitars, bass, vocals and even drums are often cooked to the point that they get pretty gnarly and abrasive and can potentially require some high end “taming” to remain listenable at higher volumes. With distorted rhythm guitars for instance, inserting a fairly steep (18-24 dB/oct) low-pass filter at anywhere from 8-12 kHz is standard practice to remove “nonmusical fizz.” For heavy bass, you can even afford to filter all the way down to around 5-6 kHz, as the high mids are where it’s primarily going to live anyway, and anything beyond there is really just contributing unnecessary noise into the mix.
Check out the following video, again from pro metal mixer Jordan Valeriote, in which he demonstrates how you can use a basic low-pass filter to tame unruly high end fizz in distorted guitars:

Drums
7. Fake It Till You Make It
Real acoustic drums are awesome, and with the right combination of engineering skill, gear, drummer and room, it’s possible to capture killer “organic” drums that’ll sound punchy and aggressive in a mix with very little effort. The problem is, unless you’re already operating within “the major leagues,” with access to all of the perks and benefits listed above, it’s much more likely the files you’re capturing or receiving on a regular basis will be, well… less than optimal, for lack of a better description.
Now, while you may have certain personal views on how rock & metal should always be “real,” or how using samples or MIDI is “cheating,” the simple truth is that it’s just extremely difficult to achieve the kind of hard-hitting, polished drum sounds we’re used to hearing in modern productions nowadays relying on real drums alone. This isn’t to say you have to go all in on one way or the other, however, as there are definitely compromises that can be made to marry the best of both worlds.
Generally speaking, an approach that a lot of pro “heavy” engineers tend to prefer is to combine the human variation of a real drum performance with the inhumane consistency of some great sounding, mix-ready drum samples. Essentially, it’s just about taking the raw drums as far as you can and then subtly (or not so subtly) feathering in some complimentary “enhancement” samples underneath to fill in whatever’s still lacking. This enhancement could range from something as simple as just layering in a few awesome room samples to enhance the snare and toms in a big, thundering rock ballad to combining multiple “click,” “sub” and “punch” samples into a single Frankenstein’s monster-esque “mega kick.” There are no rules, as it all just depends on what the particular context calls for in order to achieve the best results.
Anyway, now that I’ve hopefully convinced you to give samples a shot, here are a few fantastic third-party sample packs I highly recommend checking out if you’re looking to get into the sample layering game:
Bogren Digital – Jens Bogren Drums
Bogren Digital Samples Demo

Drumshotz – Various Packs From Major Producers
Room Sound – Various Packs From Major Producers

Ready to elevate your ears?
It doesn’t have to take years to train your ears.
Get started today — and you’ll be amazed at how quickly using Quiztones for just a few minutes a day will improve your mixes, recordings, and productions!
8. Harness the Power of MIDI!
The more complex a drum performance gets, the harder it is to accurately gate/expand each individual element with natural sounding results. While knowing exactly how these tools work and how to dial them in will take you a long way when dealing with more sparse and minimalist drum arrangements, the moment you start dealing with fast blast beats and chaotic drum fills, even the best engineer will have a hard time finding a single setting that achieves clean, consistent, “glitch-free” bleed-reduction results throughout the full duration of a song.
Although definitely a little more time consuming, a much more foolproof way of dealing with leakage in the world of heavy metal drumming is via the use of MIDI and what are often referred to as “key spikes.” A key spike is just a simple transient sound you can use to trigger a gate/expander threshold via a sidechain input. This spike could be a simple “blip” or “click,” or even a random kick/snare sample from your collection. Basically, as long as it’s short and clean, it’ll do the trick.
Essentially, before you even begin your mix, you want to spend some time going through and creating MIDI performances of the kick, snare and toms. You can either do this 100% manually or via various DAW-specific tools which can help to somewhat automate the process. But either way, you just want to make sure everything is as accurate as possible as to prevent mistriggers from altering the original performance. Sure, this ordeal may take you an hour or two depending on how you go about it, but given how much easier it’ll make applying all sorts of processing to your natural drums afterwards, it’s an investment I believe is definitely worth making.
9. Maintaining Double Kick Low End Consistency
Let’s say you have a heavy track in which the drum performance alternates between some sparse, single-kick grooves in the verses and pre-choruses, and a blistering “double-kick bonanza” in the choruses. If you mix the low end of the kick to sound big, beefy and long while looping just the sparse sections, chances are when you finally get around to the chorus and all of those fast 16th/32nd notes, you’ll just find an undefined, boomy, muddy mess waiting for you as the sustain of each successive kick rings out into the next.
Now, at this point you have a few options for resolving the issue:
Basic – Automate an EQ Cut: A simple, albeit technically imperfect solution would be to simply automate a broad, 2-4 dB low end cut whenever there are fast double kicks to balance out the cumulative bass buildup. This is a bit of a “band-aid” solution however, as it won’t resolve any of the phase cancellation issues that are likely also occurring.
PRO – Shorten Successive Kicks: A much more clean & “correct” solution to eliminate the issue entirely would be to manually replace the offending kicks with appropriately shortened kicks at the correct length (depending on the pattern and tempo), so that each and every hit is essentially rhythmically muting and resetting before the next. This will completely prevent any low end buildup, phase, or “punch reduction” issues from occurring. Of course, the slight downside of going down this route is that it’s not as natural. However in the context of a full mix, it’s unlikely anyone will be able to tell the trickery that’s going on.
Vocals
10. Gritty Vocals? Make Them Even Grittier!
It’s rare to come across metal vocalists who can naturally perform the kind of brutal, guttural screams that sound like they’re being channeled directly from the depths of the abyss. In fact, it’s much more likely that a lot of the vocal files you’ll receive to mix in this style will sound fairly quiet, whispery and even funny in their raw state. Since the ultimate goal with metal vocals is to get them sounding aggressive, fearsome and larger than life, you can afford to really go to town while mixing them — pushing pretty much everything a lot further than you typically would when dealing with clean, sung vocals.
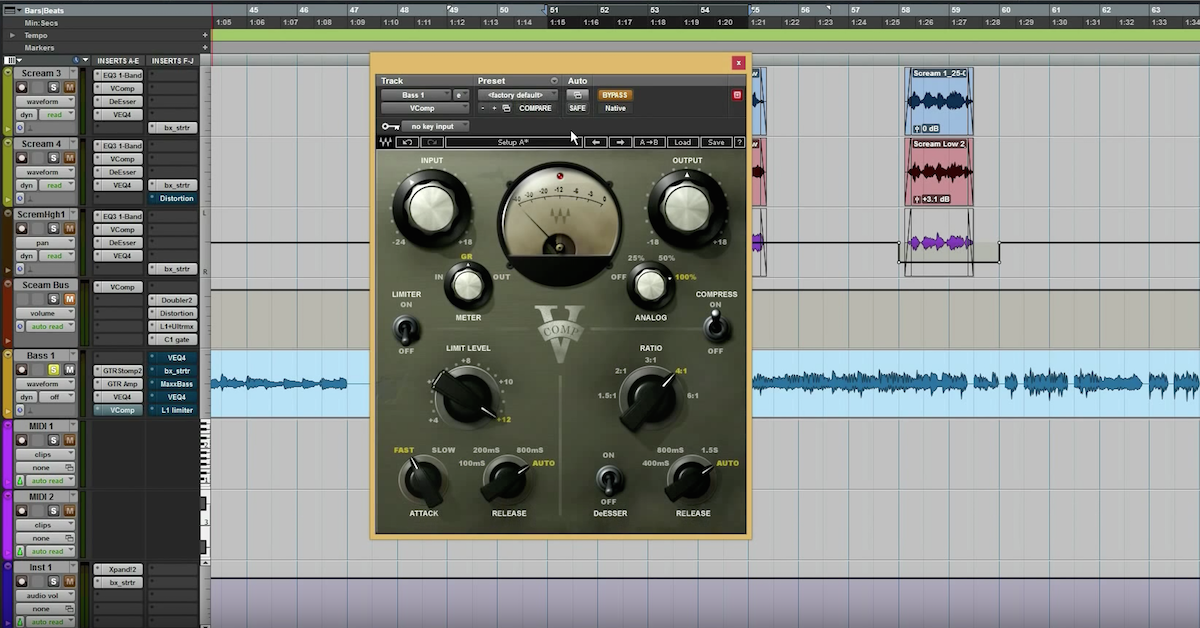
With compression, try pummeling them with 10-20 dB of 1176-style compression at a 4:1 ratio to really accentuate the attack and “spittiness” at the front ends of each word. Use one of the 1176’s slower attack times (which is actually very fast compared to most other compressors) and a fast release. You can even try taking this a step further, and use the “all buttons in” mode to give the vocal some serious grit and distortion. Top this off with a de-esser to control any excess sibilance and you’re off to the races!
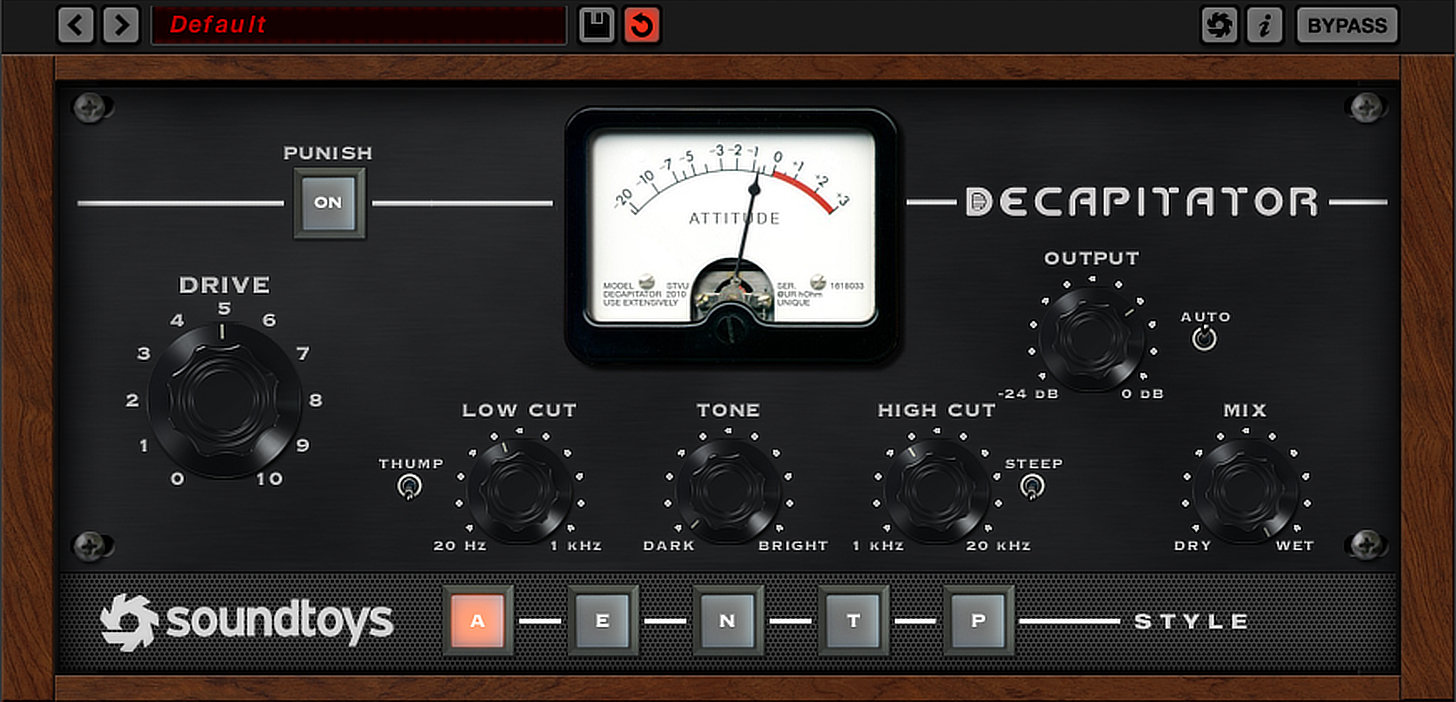
Screamed vocals will pretty much always benefit from some extra saturation or distortion to get them sounding really BR00TAL. My personal favorite tool for this purpose is an amazing plugin by Soundtoys. Try using the Decapitator plugin on the EMI setting — but pretty much any saturation unit will do the trick, including hard-pushed tape emulators and even guitar amp simulators if you’re feeling extra creative! Experiment with using your distortion directly on the channel or in a parallel configuration for added control and flexibility.
11. Reverb in Metal?
A lot of engineers, myself included, tend to favor delays over reverb for ambience and space when mixing vocals in a heavy context. Generally speaking, when you’re dealing with a super-dense, heavily distorted arrangement, as is typical in the genre, reverb often simply can’t cut through all of the noise as you’d hope it would, and will mostly just contribute noise and mud into the equation.
Delays on the other hand, if treated and set up in the right way, can give the same illusion of depth while still remaining audible — all while taking up a lot less space in the overall frequency spectrum. It’s simple: dial in your delay (or delays) as you typically would, but heavily filter out the lows below 500-600 Hz and highs above 5-6 kHz. This “diet plan” alone will allow you to push them much louder in the mix without getting in the way of anything else.
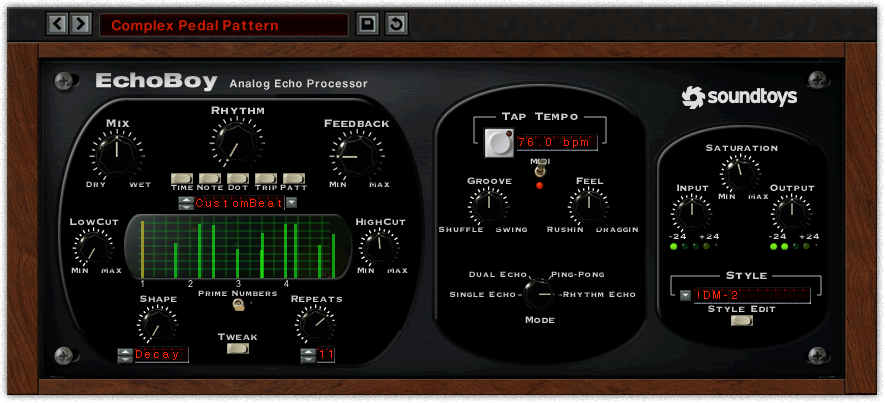
To take this even a step further, saturate/distort the delay return, either via the built-in options available in your delay plugin of choice or via an external distortion plugin. Personally, I find that either of the “studio tape” and “telephone” distortion characteristics within the Soundtoys Echoboy delay plugin are fantastic options for this purpose depending on how blatant of an effect I’m after. Saturating/distorting a delay has the effect of channeling it further into the midrange as well as somewhat compressing it — both are results that will allow for better separation and audibility within a full mix.
12. EQ for Aggressive Vocals
Although there aren’t any huge differences between how you’d approach mixing a typical clean vocal versus a screamed one, there are definitely a few things you need to keep an eye out for:
High End “Hiss”: As it is when mixing regular singing, it’s generally a good idea to boost some broad, musical highs/high mids on aggressive vocals around the 5-10 kHz area to help them cut through and sound present. The one detail that differs slightly however, is that with screams you’ll most likely also end up introducing a huge amount of hissy, “white noise-esque air” in the process, which can be pretty painful to listen to if left unchecked. As we talked about earlier on the topic of distorted guitars, you can usually resolve this issue fairly painlessly with a basic 12-18 dB/oct low-pass (high-cut) filter set somewhere between 8-12 kHz.
The Magic Is in the Midrange: While you may be tempted to scoop out a lot of the mids between 500-800 Hz in your screams, if you take things too far, chances are they just won’t cut through enough. If you listen to a lot of the most well-revered metal mixes of the last few decades, you’ll be surprised to hear that there are actually quite a lot of mids left intact in the vocals. Sure, do some basic cleanup by all means, but don’t totally kill the aggression of the vocals in the process.
Check out the following track, Lamb Of God’s “Walk With Me in Hell,” for a perfect example of pretty much all the vocal mixing tips we’ve discussed in this article being put into practice to great effect:

Mixing Metal — Conclusion
While I’m happy working in pretty much any genre, I really do have a soft spot for mixing heavy music. It’s just so involved — brimming with hundreds of amazing tricks and techniques you can use to creatively solve seemingly unsolvable issues. While you personally may not be into aggressive music as much as I am, I truly believe there’s a huge amount to be gained from learning to mix it to a high professional standard regardless. A lot of the new skills you’ll pick up by doing so are transferable, and will likely give you a ton of new ideas and solutions which you can just as easily use while mixing pop, rap or country.
Give it a go, and you never know… You may just end up joining the dark side!
Eleveate Your Ears