4 Tips for EQ’ing Acoustic Guitar in a Mix
05/29/2019
Article Content
I was fortunate to have grown up in a musical household. Among the several instruments my parents had in our home, and the one that would alter the trajectory of my life was a beautiful 1970 Guild acoustic guitar that my father owns (and still plays to this very day). I recall being mesmerized that my Dad could hear a song on the radio, pick up the guitar, and quickly figure out the chords to it. The guitar was my gateway into songwriting.
The only issue was that despite having been born right-handed, I absolutely could not figure out how to play while fretting with my left hand, so I flipped the Guild upside down and figured out enough songs to convince my parents that buying me my own left-handed six-string would be a worthwhile investment.
In addition to playing, I love recording acoustic guitar, but it is definitely one of those instruments that needs a lot of care when capturing and when we arrive at the mix stage. I can augment drums with samples, I can re-amp bass guitar, and I can Auto-Tune vocals, but acoustic guitar really needs to be performed and recorded with care, and with respect to context.
Acoustic guitars come in many shapes and sizes, and depending on the skill and comfort of the player, and the environment in which they are captured, tend to be a bit finicky — buzzes, rattles, squeaks, and resonances can make their way onto the recording. Because of this, microphone choice and techniques vary, but I usually prefer a small diaphragm condenser aimed at where the body meets the neck, and a large diaphragm a few feet off the lower part of the body, as I find the cumulative sound to be full, clear, and flexible when mixing.
Sometimes a vintage large diaphragm condenser microphone set to omnidirectional can do the trick as well — again, it all depends on how the guitar is meant to fit alongside the rest of the arrangement. I find the chosen preamplifier to be an integral component to a recorded guitar sound as well. When I decided I was going to invest in recording equipment, one of the first purchases I made was a high-quality tube preamp, and upon tracking an acoustic through it for the first time, I was taken aback at the three-dimensionality, warmth, and detail. I can’t strongly enough recommend using at least decent preamps when recording acoustic guitar (and everything else, for that matter.)
Because methods like Auto-Tune and/or sample replacement aren’t as effective on acoustic guitar as they are when used in other contexts, I find equalization to be a nearly indispensable tool when mixing acoustic guitar. Here are my recommendations for equalizing the instrument:
1. Context Is Everything
How is the guitar meant to sit along with the rest of the arrangement?
I’ve mixed plenty of tracks in which the acoustic guitar is intended to be in a place of sonic prominence. In these cases, I’ll try to preserve as much of the frequency spectrum as possible. Alternately, if it’s meant to be a subtle flavor used sparingly, I’ll apply a liberal amount of subtractive EQ or filtering to allow the other elements to command the listener’s attention. What those other elements are, of course, informs what area(s) of the frequency spectrum I’ll be attenuating. If the arrangement features rich, warm synth pads, I’ll consider making cuts in the midrange of the acoustic guitar. If it features intricate layers of percussion like tambourine and shaker, I’ll focus on removing some high end from the acoustic.
Mix Tip
Use the “Inverse Link” feature in iZotope Neutron to reveal and fix masking issues. Let’s use the example from before in which I’m tasked with mixing a song featuring both acoustic guitar and full-sounding synth pads. If these two elements are conflicting with each other from a frequency-based perspective, I’ll place an instance of the Neutron equalizer on each. Brilliantly, you can view both instances in a single plugin window, and if you enable the “Inverse Link” feature, a boost in the acoustic guitar will result in a cut in the synthesizer. This feature is practical and provides valuable insight into how multiple elements interact with one another.

2. How Was It Recorded?
Speaking of context, whichever recording method was used has a lot to do with how an acoustic guitar interacts with the other elements in an arrangement. The small diaphragm condenser that I typically use aimed at where the neck meets the body is usually responsible for a great deal of upper midrange and “stringyness”, whereas the large diaphragm aimed closer to the soundhole provides fullness and warmth. Sometimes, if a microphone is too close to the soundhole, the low end can become “boomy” and overwhelming, in that instance, I’ll usually use a high-pass filter.
This is a personal taste thing, but I will say that one of my most-despised sounds in the encyclopedia of recording methods is that of a direct input (DI) acoustic guitar. I would describe the sound as glassy, but not in a good way. Unless it’s done in an intentionally creative manner, the timbre of a DI acoustic guitar truly makes my skin crawl, and in the instances that I receive a track that has been recorded this way, I’ll resort to the Sound Machine Wood Works from UAD, which actually does an excellent job of emulating the sound of an acoustic guitar recorded with a microphone.

Recording Tip
I am all for making broad-stroke sonic decisions while recording. Creatively using equalization, compression, and other processing can be inspiring and provides an aural roadmap for how the instrument will sound in the final mix. However, with acoustic guitars, I generally try to capture the full frequency spectrum when recording, as I find that the timbre of an acoustic guitar is extremely sensitive to equalization and filtering. You can move the instrument forward or back in the space of a mix, dull the guitar to give it a vintage tone, or filter out low end so the listener only perceives the pickiness of it. Unless you are genuinely confident in how you want your acoustic guitar to sound in the final mix, it might be advisable to obtain the most accurate capture possible while tracking.
3. Use EQ to Fix Issues Before Other Methods
One of the most painstaking tasks I’ll ever undertake when mixing is dealing with string, pick or fret noise captured in an acoustic guitar recording. Regarding the sound of a players’ fingers generating unwanted squeaks as they slide across the strings, sometimes I’ll resort to a de-esser or even meticulously find and drag each and every instance of the noise onto its own track. I will often attempt to resolve or remedy this issue by first using subtractive EQ. Because the acoustic guitar is a somewhat quiet instrument, recordings of it tend to feature bleed from headphones or not completely isolated instruments that were tracked simultaneously, and the low-end rumble of air conditioning units. If I can reduce these issues with equalization without compromising what I like about the recording, I’ll do so before attempting more extreme methods.
Mix Tip
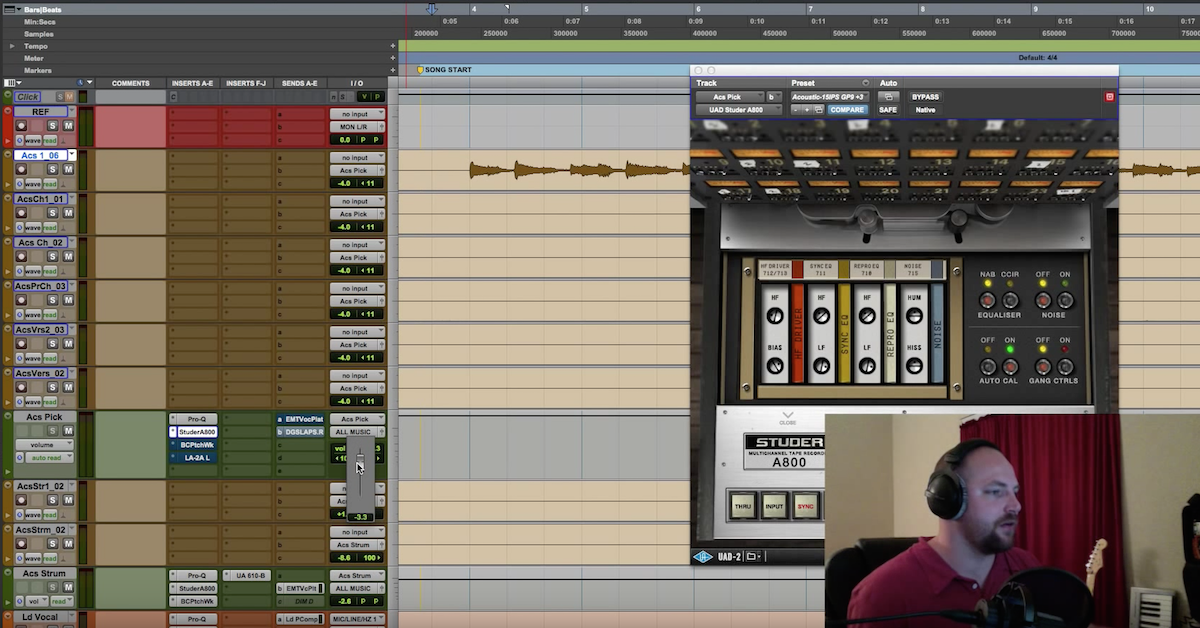
Use the spectrum analyzer on the FabFilter Pro-Q 3 to determine at which frequencies you have issues. Fortunately, most unwanted resonances, squeaks, and fret noise aren’t broadband problems, and I’ll often take a look at where in the frequency spectrum they occur using the stunning analyzer on the FabFilter Pro-Q 3.
Even if I don’t use the equalizer to fix those issues, it’s great to have a reliable source of visual feedback when mixing. I will mention that the dynamic equalizer mode on the Pro-Q 3 makes the latest iteration of FabFilter’s flagship equalizer a fantastic choice for removing these intermittent problems. If you set the plugin parameters correctly, it will only be working when the issues occur.

4. Add Some Analog Vibe
From The Beatles to Simon and Garfunkel, to Fleetwood Mac, artists that were popular amid the analog age featured acoustic guitars as crucial components to their arrangements. The analog process had a significant influence on the fidelity of those recordings, and while I’ll undoubtedly use compression and tape saturation to impart character onto acoustic guitars, sometimes a bit of equalization (with an emulator plugin or actual hardware) does the trick.
If I’m restricted to an in-the-box scenario, these are some of my favorite analog emulation EQ plugins:

Ready to elevate your ears?
It doesn’t have to take years to train your ears.
Get started today — and you’ll be amazed at how quickly using Quiztones for just a few minutes a day will improve your mixes, recordings, and productions!
UAD Manley Massive Passive & VOXBOX
While the Massive Passive is traditionally used for mastering duties, and the VOXBOX for tracking and mixing vocals, there’s something about the warmth, depth and silky high end on both of these that works perfectly if I need to feature an acoustic guitar prominently in a mix.
Waves V-EQ 4
For a vintage tone that cuts through, I’ll reach for the V-EQ 4. Try boosting at 8.2k for an acoustic guitar sound that makes a statement without becoming fatiguing.
Pultec EQP- 1A
There are plenty of excellent emulations of this classic tube equalizer on the market, so demo as many as possible to see which works best for you. Whether you’re adding rich lows, biting midrange, airy high end, or trying to remove unwanted frequency content, the Pultec can handle pretty much every (non-surgical) task you throw at it.
Eleveate Your Ears