5 Ways to Use a Gate for Synth and Vocal Effects
11/24/2014
Article Content
➥ The new e-book from Cristofer Odqvist is available now
Gates, also known as noise gates, were made to reduce or eliminate unwanted noise in a recording or live sound situation.
They do this by attenuating a signal once the amplitude falls below a certain threshold.
Like any tool, gates can be used creatively to make them do things they weren’t necessarily intended to do.
1. Reverb Sidechain — Dry Signal Opening Gate
For lead synths or pad sounds, gates can be used to great effect.
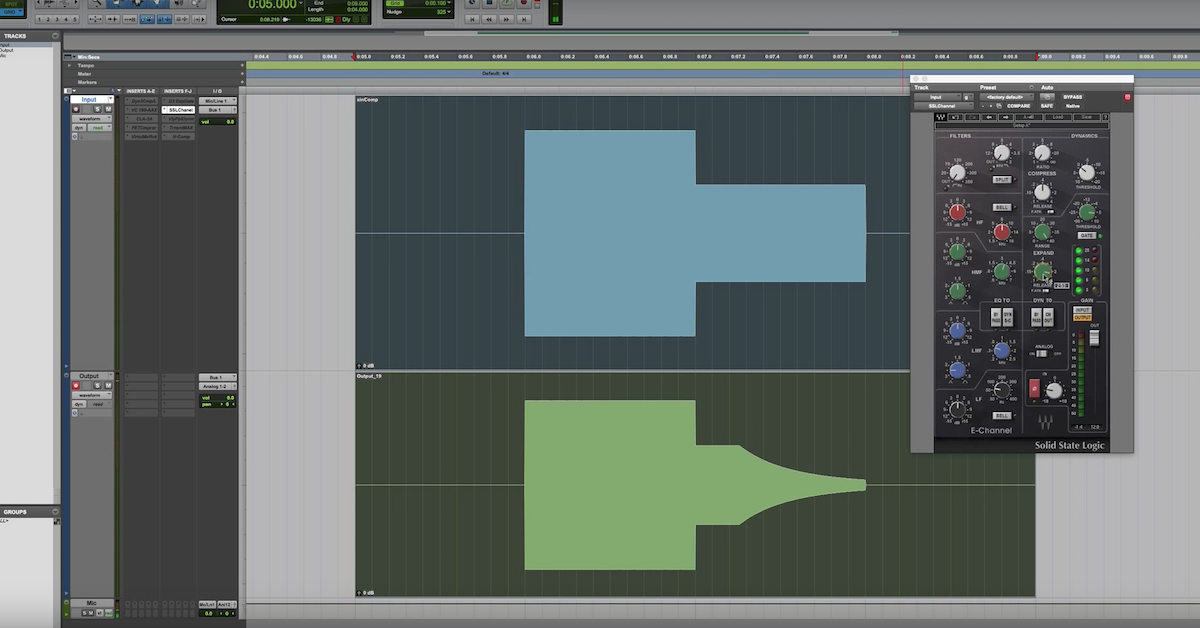
We’ll start by inserting a reverb on an aux channel and sending a generous amount of signal from your synth track to the reverb.
Put a gate after the reverb, activate the sidechain/key input and choose the synth track as the input. There are two main options.
The first one is to let the dry signal open the gate.
The gate should have a reasonably fast release that makes it close quickly after the synth stops sounding. This is a great way to make a lead synth sound bigger without pushing it back in the mix.
Since the tail of the reverb is being cut off by the gate, your ear won’t interpret the sound as coming from far away even though there is a big reverb coming at you. This can be a bit fancier of an alternative to using a short stereo delay on a sound.
2. Reverb Sidechain — Dry Signal Closing Gate
The other option is to flip the gate’s operation (some gates have a button called “flip”) to make the gate stay open until the sidechain receives the synth signal and then quickly close.
This will give you a more “in your face” synth sound with a reverb tail coming up in the gaps between the notes.
Adjust the attack and release of the gate until you hear the reverb pumping in time with the music.
This can be a very cool effect when you get it right.
3. R-h-y-t-h-m-i-c MIDI
A trick that works well on synths as an effect is to put a gate on your synth track and create a MIDI track with any rhythmic pattern you’d like (e.g. continuous 16th notes).
The MIDI notes can be played by any virtual instrument or samples — the actual sound of the samples doesn’t really matter since the output of the MIDI track will be muted. However, the length and envelope (attack, decay, release) will affect how the gate responds.
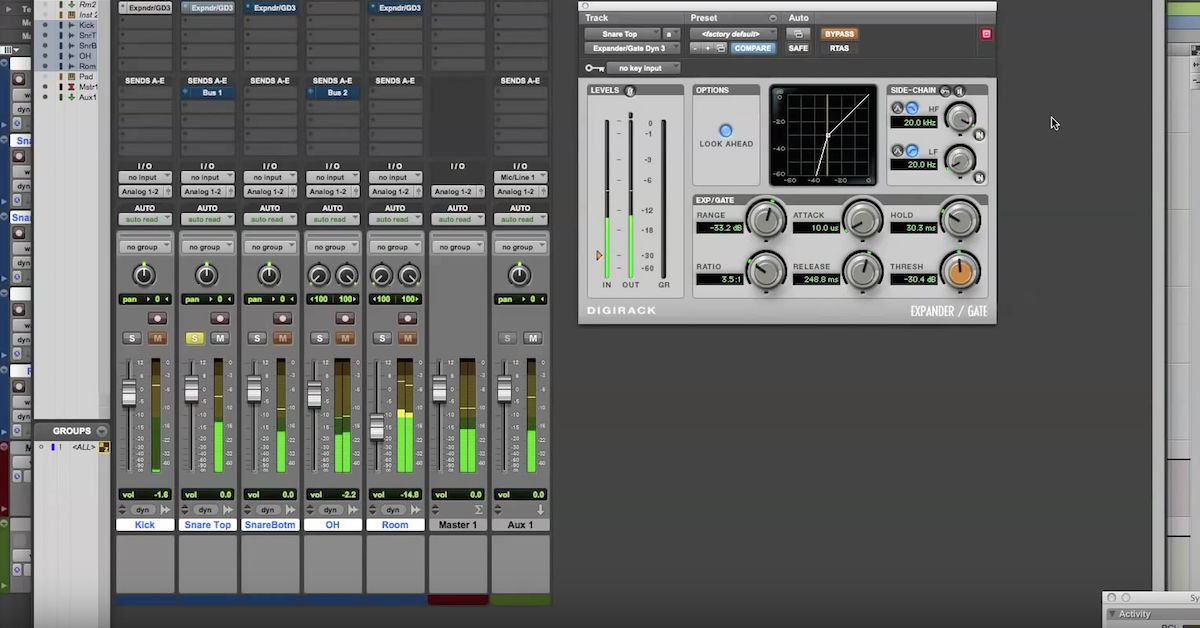
4. Vocal Stutter
For this example use a short sample with defined attack, like a dry snare drum or closed hi-hat.
Activate the sidechain on your gate and select the MIDI track as the input.
Lower the threshold until you can hear the vocal disappear every time a MIDI note is being played.

Ready to elevate your ears?
It doesn’t have to take years to train your ears.
Get started today — and you’ll be amazed at how quickly using Quiztones for just a few minutes a day will improve your mixes, recordings, and productions!
This rhythmic stuttery effect can be very cool in and of itself, but we’re gonna take it a step further and get creative.
5. Alternating Vocal Stutter Effects
Copy the vocal track with the gate inserted. It’s important that the gate on the second track has the exact same settings as the gate on the first track.
Now press “flip” on one of the gates. This is going to make the gate do the exact opposite as the other gate (i.e. closing when the other gate is opening and vice versa), thereby neutralizing the effect.
At this point we have divided the signal into two tracks, they each play back every other 16th note.
Let’s dig in. Insert a flanger on one of the tracks or send one of the tracks to a short reverb and listen to how it sounds.
The possibilities are endless if you start making up more complex rhythms and try out different effects.
This can work great as a fill before a chorus, with two different sounding phasers/EQ’s/other effects, whole panning the tracks hard left and right for half a bar.
More
You can also make a mono lead sound wide and add movement by sending each of the gated tracks to its own reverb, one panned left and one panned right.
The list goes on!
Take Your Music to the Next Level
Making Sound is available now, a new e-book filled with 15 chapters of practical techniques for sound design, production, mixing and more. Quickly gain new perspectives that will increase your inspiration and spark your creativity. Use the 75 additional tips to add new sparkle, polish and professionalism to your music.
Eleveate Your Ears