A Guide for Producers Preparing Files for Mix Engineers
02/5/2020
Article Content
You finally finished it — your song, your EP, your full length — and you decided this time around not to skimp on mixing. You hired a mix engineer to help you finish your project. Then, they start asking you for things. Stems? This is starting to sound like a pain-in-the-ass. Can’t you just send them your Ableton session?
For those who are unfamiliar, the term “stem” refers to an individual track or group of tracks that have been consolidated into a single file for the purpose of mixing. Printing stems can be kind of a chore, but handling it yourself is a relatively easy way to make the mixing process much smoother.
The most obvious reason for preparing stems is that your mix engineer may not be using the same software you do, so simply sharing the sessions with them won’t work.
Beyond that, though, sending stems helps your mix engineer build off of the choices you made, rather than second-guessing them or starting from scratch. Nobody likes getting a mix back that sounds like a totally different song — and no mix engineer likes spending six hours mixing something that their client totally hates. Baking in your production choices by making stems makes that sort of scenario much less likely.
Yes, you may end up having to do some menu diving to get it right, and you might end up having to sit there while your DAW renders track after track. Making stems can be tedious and boring, but it’s nothing to be scared of. Here’s what you need to know before you get your next song ready to mix.
Communication is Key
Before you even begin exporting stems, it’s crucial to communicate clearly with your mix engineer. Everyone has different ways of working, and it’s never safe to assume somebody understands your expectations — or vice versa — without actually talking about them.
How attached to your rough mix are you? What’s working, and what isn’t? What are the final deliverables for the project? Do you need instrumental or acapella mixes? These are all questions your mixer needs to know the answers to before they start working on your track.
Make sure you understand what they need from you, too — file formats, sample rate, and bit depth, number of stems, wet vs. dry stems — before you start preparing files for them. Do you know what sucks more than spending an hour watching your DAW slowly render files? Spending a second hour watching your DAW slowly rendering files because you screwed up the first time.
Finalize Your Session
By the time I finish production on a song and am preparing to mix, there’s usually a bit of a mess to clean up in the session. Here are ten common issues you can expect to deal with before you start bouncing stems:
1. Version Up
Before you start making changes to your session to make it stem-ready, save a “pre-mix” version. It’s always a good idea to have a backup option in case something goes wrong.
2. Delete Unused Tracks
If there are unused tracks in your session, it’s usually easiest to get rid of them before you start stemming. Abandoned ideas, empty or muted tracks — just delete them!
3. Name Unnamed Tracks
Most DAWs’ protocol for exporting stems will use the track name somewhere in the name of the bounced file. Please don’t send your mixer a folder full of files with names like “Audio1.02.”
4. Check Start & End Points
It’s important that all your stems are the same length, or at a minimum start in the same place. An easy way to make sure your stems will line up correctly is to set markers for the beginning and end of the song and to use those when you bounce stems. Double-check that those points don’t cut off any audio. You may even want to include a little silence at the beginning and end. h4>5. Clean Up Your Tracks
Make sure you’ve used smooth crossfades where clips are joined, with no pops or other artifacts. It’s also easy to forget about unwanted noise on tracks — the sound of a car passing by, lip smacks, amp buzz. Do your best to clean that sort of noise up so your mixer doesn’t have to spend their time (and your money) doing it.
6. Check Volume & Panning
By this point in your process, levels and panning should be feeling right. The stems you print will reflect the volume levels in your session. If anything in your mix is obviously too loud, too quiet, or panned incorrectly, now is the time to fix it.
7. Check Automation
Automation curves have a tendency to do weird things when we’re not looking. In most DAWs, copying and pasting audio clips will also copy and paste automation, and that can lead to some bizarre and unwanted automation curves. Go through tracks with automation and make sure everything looks good.
8. Are You Clipping the Master?
Clipping occurs pre-fader, so simply bringing down the master fader is not a real solution to clipping your 2-buss. If you are severely clipping the master, you may want to ask your mixer what they’d prefer you do. The good news is, just because your mix is clipping doesn’t mean theirs has to be.
If your DAW has a way to lower the volume on multiple tracks simultaneously, bringing the rest of the session down will fix the clipping. If any tracks are bussed, lower the aux track’s volume, rather than the audio tracks that feed into it.
If there are plugins on your master buss, you’ll have to dial in new settings on level-dependent effects like compression, saturation, etc. If the idea of making these sorts of tweaks is making you nervous, definitely check with the mix engineer before you do anything.
9. Can Anything Be Grouped?
Do you have layered backup vocal tracks? Any other doubled parts? Buss them together, and print the buss rather than the individual tracks. The same goes for multiple mics on one instrument. Multi-mic setups on guitar cabs, kick or snare drums, etc. can usually be grouped together and delivered as a single stem.
10. Is Anything Grouped That Shouldn’t Be?
Maybe you bussed your drum tracks together and used processing on that buss — but now you want your mixer to have the ability to adjust the individual parts of the kit. One solution might be to give them separate stems for the kit, while also sending a bounce of the drum buss for them to use as a reference.
Or give them a stem of the buss, plus a handful of individual stems to use as backups or for parallel processing. There are a number of ways to approach situations like this one, and you’ll want to talk to your mix engineer about what they’d prefer to have while they mix.
Print Stems
Now that your session is ready, you can start actually printing stems. Nearly every DAW offers some way to print multiple tracks simultaneously — GarageBand being a notable exception — so you don’t have to go through the tedious process of soloing tracks and printing them individually.
I’ll run you through my process for printing stems in Pro Tools as an example. The particulars will vary from one DAW to another, but the overall concept is the same.
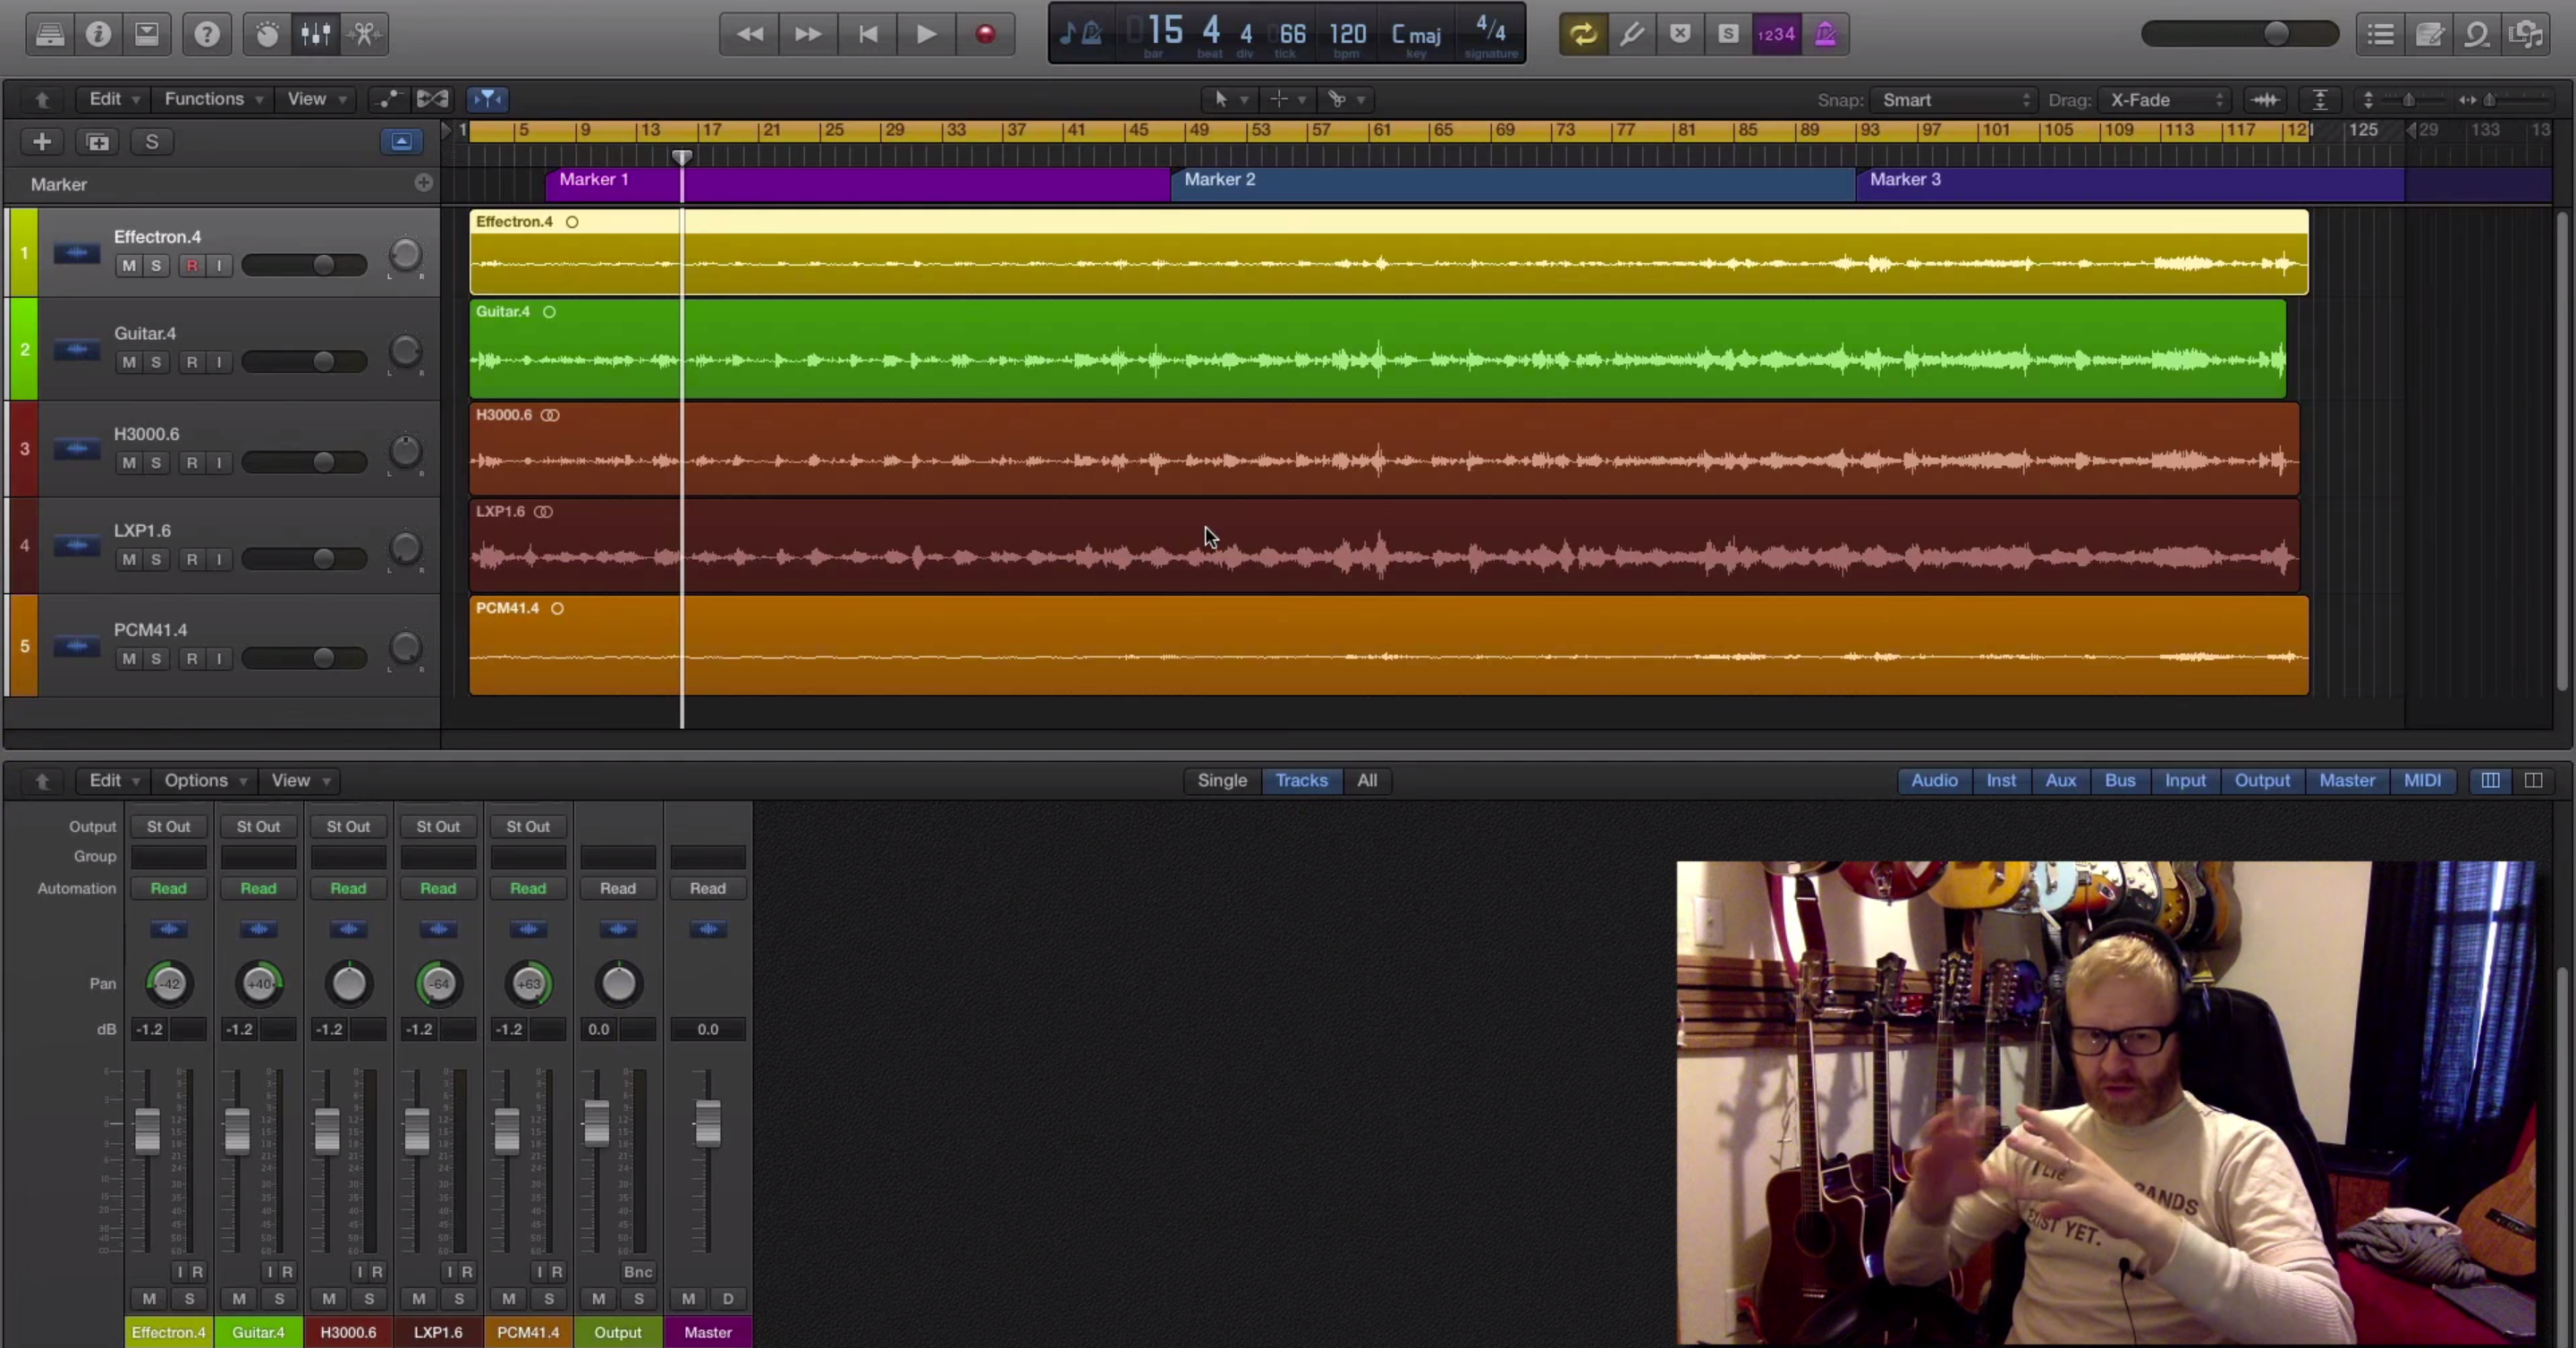
1. Highlight the full length of the song to be exported
An easy way to do this is by using markers — create markers for the start and end of the song. Click the start marker, then hold shift and click the end marker.
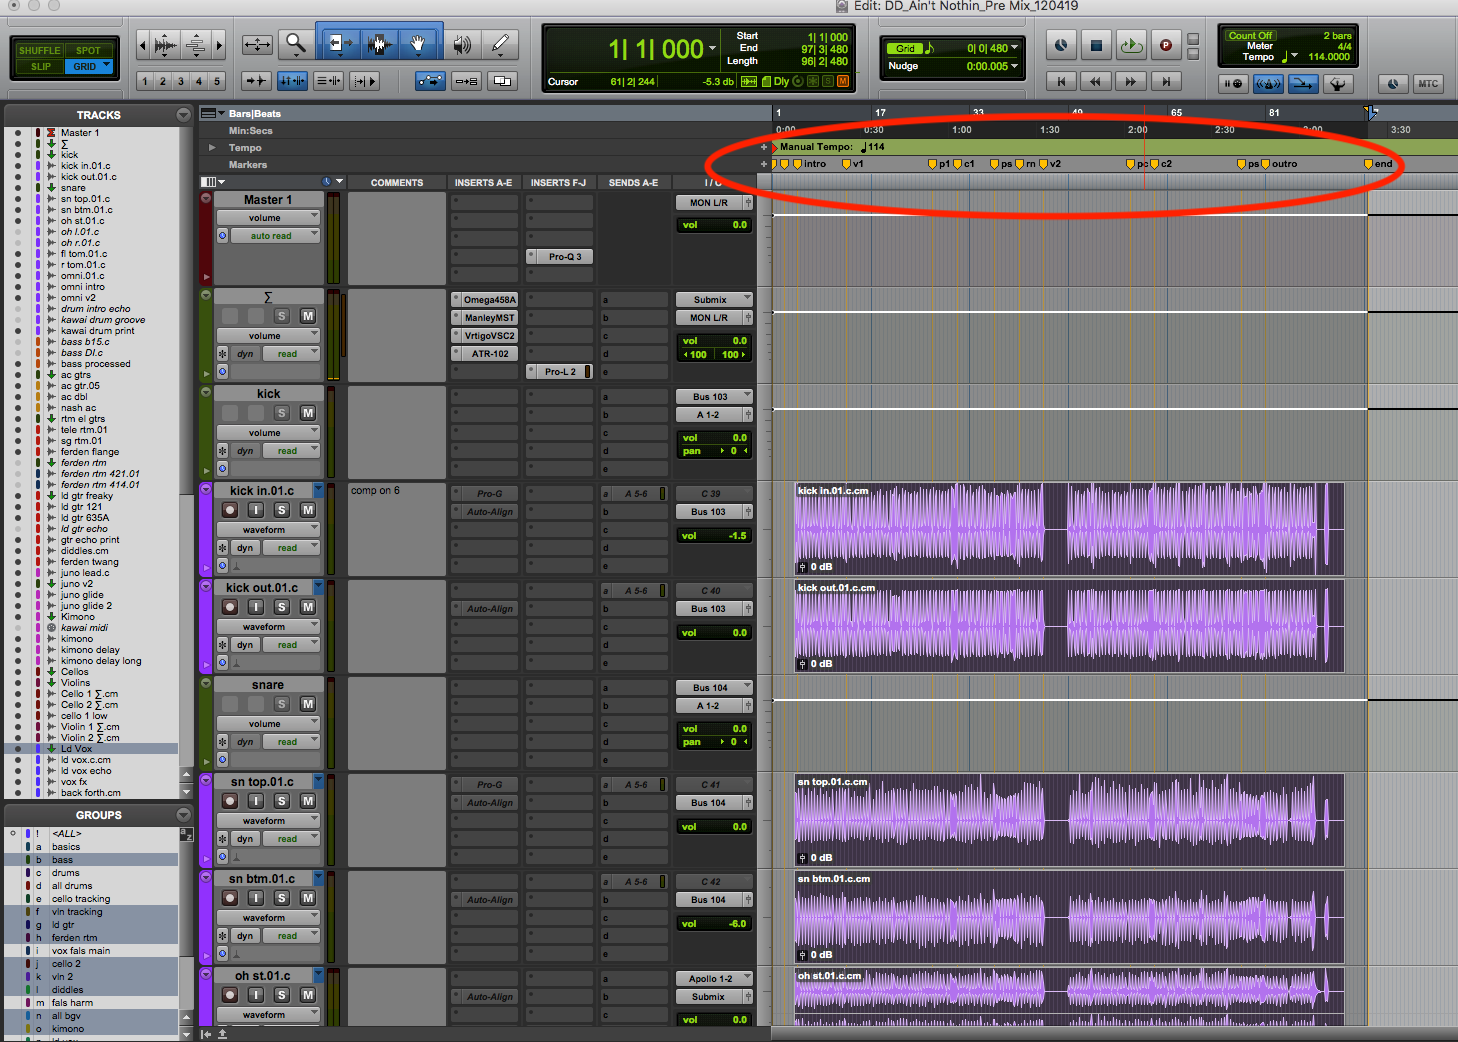
Use markers to set start and endpoints for your stems.
2. Select tracks to be bounced as stems
Begin highlighting tracks, holding command as you click on each additional name. If several audio tracks are meant to be stemmed together, highlight the aux track they’re routed to, not the individual audio tracks. Highlighting the master channel is an easy way to print a reference mix along with the rest of the stems.
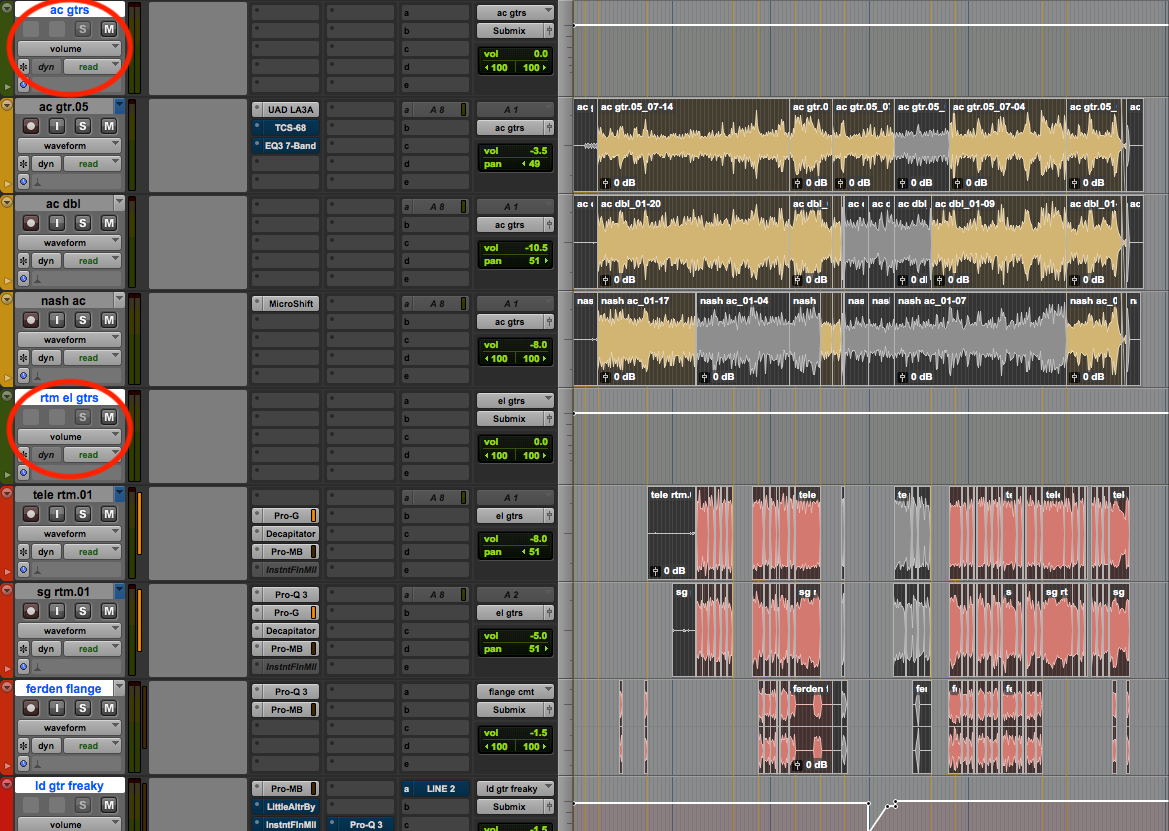
The aux tracks are selected, not the audio tracks routed into them.
3. Bounce tracks
Right-click any of the tracks you selected in the previous step and select “bounce” from the drop-down menu. Note that this is a different “bounce” command than the one you find in the “file” menu at the top of the screen.
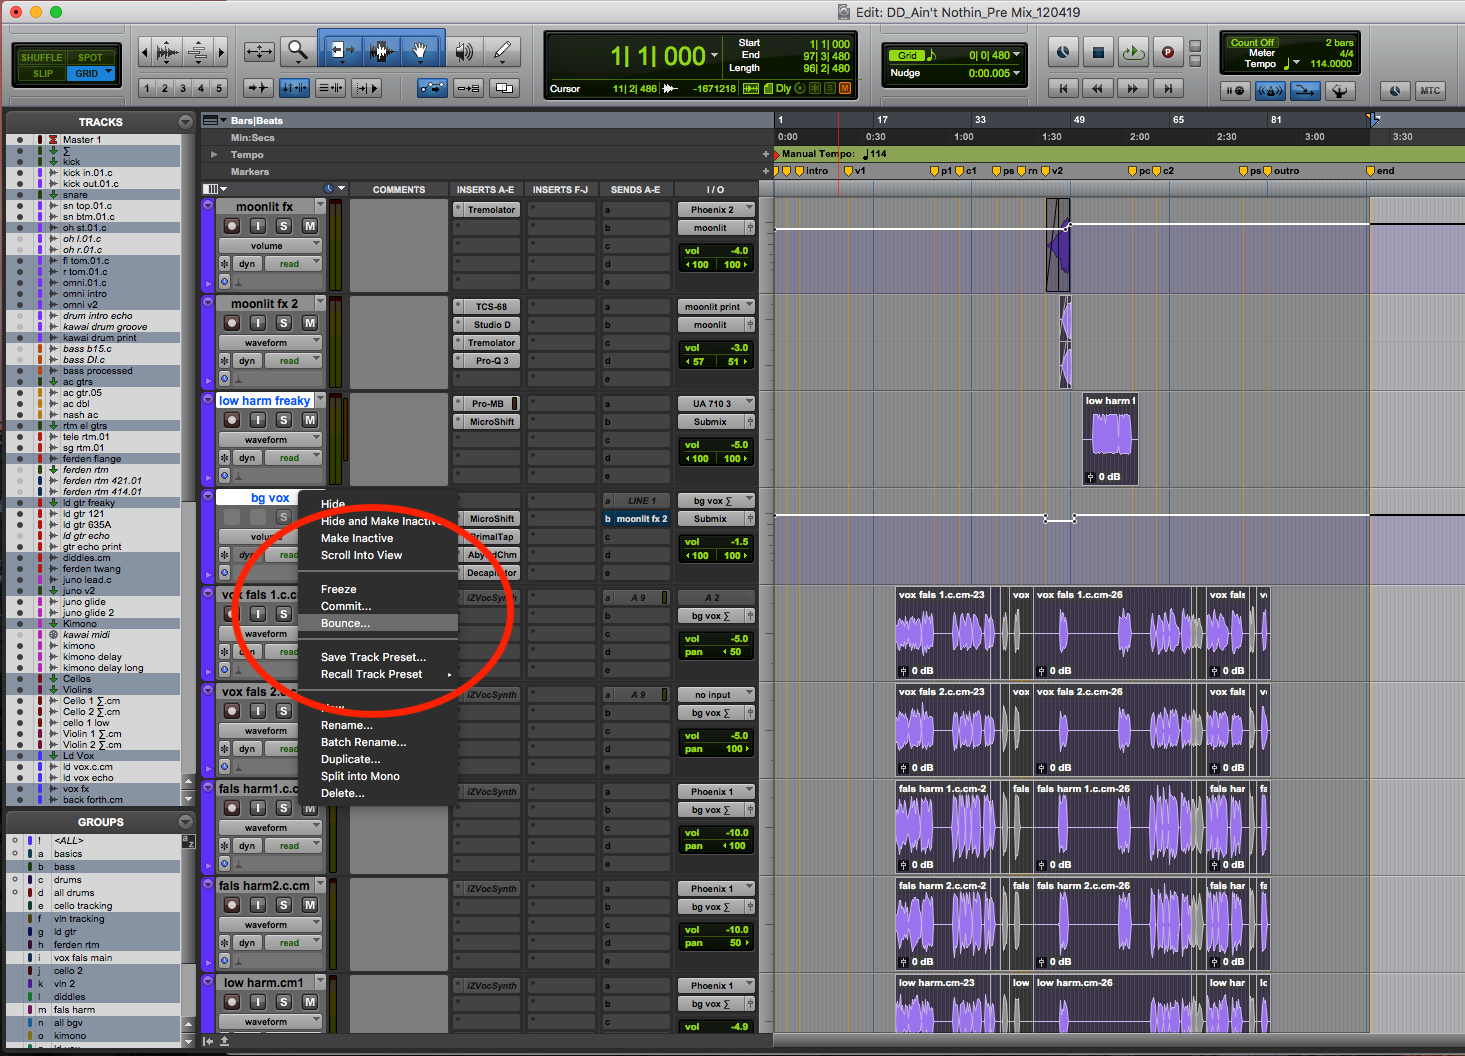
Shift+Option+Command+B does the same thing
4. Choose file format
In the menu box that opens, select the sample rate and bit depth your mix engineer has requested for your stems. Make sure the “volume” and “panning” boxes are checked to preserve your levels and left-right positions. Unchecking the “panning” box will give you mono and unpanned stereo files, depending on the source material.
5. Make a file name header
In the box where you would ordinarily name your bounce, enter the header you’d like each file name to have. A practical format for this might look something like “artist_track name_120 BPM_STEM.” When the stems are bounced, each file name will begin with that header and then have the name of the source track used to create the stem. If you are printing wet and dry stems, be sure to include that information in the file name header.
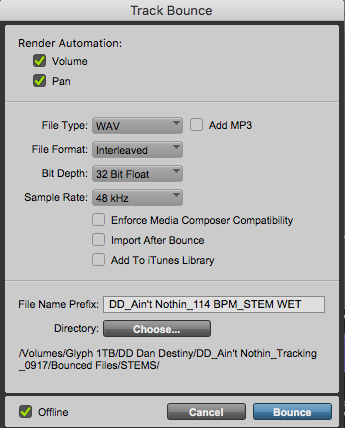
Render Automation, File Type, Header Naming Structure.
If you don’t use Pro Tools, a quick google search will turn up plenty of resources to guide you through bouncing stems in your DAW of choice. If you really can’t be bothered to do your own googling, don’t worry — I did it for you for a few of the most popular DAWs:
Bear in mind that as software gets updated over the years, commands for functions like bouncing stems can change. Make sure you’re working with the most current information for your DAW.
I’m sure by now you’re just itching to hit send and get those files mixed, but there are a couple more considerations before you’re ready to roll.

Ready to elevate your ears?
It doesn’t have to take years to train your ears.
Get started today — and you’ll be amazed at how quickly using Quiztones for just a few minutes a day will improve your mixes, recordings, and productions!
Wet & Dry Stems
Talk with your mixer about whether they’d like you to provide dry options for any stems. To print dry stems, simply disable any effects you’d like to remove and follow the same steps you used to print wet stems, making sure to clearly label the dry stems. It can also be helpful to have separate folders for wet and dry stems.
Reference Mix
If you followed my steps for stemming in Pro Tools, that process already left you with a reference mix. If not, make sure you send your mix engineer a bounce of your song in its most “finished” state. This mix should represent your best attempt to get the track sounding right.
Leave on any processing you used, including on the master buss. The mix engineer is going to be trying to “beat” this mix — in terms of loudness, clarity, punch, depth, etc. — so it’s important to give them a clear idea of what target they’re trying to hit.
Bonus: Load Stems into an Empty Session
Try importing your stems into an empty session in your DAW. Does everything line up correctly? Do your combined stems sound like your reference mix (minus 2-buss processing)? If not, now’s your time to fix any problems.
Conclusion
The ins-and-outs of mundane functions of a DAW like rendering stems can be somewhat intimidating for those of us who are more focused on the creative aspects of music production. Hopefully, bouncing stems will seem a little easier, even if it’s still just as boring.
It’s pretty boring.
The bottom line, though, is that you’re hiring a mixer because of their ears, their knowledge, and their gear — not their mastery of file organization. Taking this sort of work off your mixer’s plate will free them up to focus on making your music sound great. They’ll appreciate that you took the time to make their lives easier, and you’ll get better sounding mixes.
Eleveate Your Ears