15 Best Compressor Plugins for Mixing (+ Mix Tips)
01/15/2022
Article Content
Perhaps aside from equalization, there is no type of processor more essential to the audio engineer than the compressor. Originally used in the broadcast industry to prevent the over-modulation of radio waves, music engineers gradually realized that compression could be used for other purposes. Compressors can even out the dynamic range of signals, making them easier to balance against one another. They can also manipulate transients so that the attack of kick or snare drums are more or less pronounced. Additionally, because many early hardware compressor units were tube (valve) based, engineers utilized the fact that they had a rich tonality to them, making them great for adding harmonic content to recordings.
Over the years technology advanced and so did the capability of compressors. They are now far more feature-laden than they were in the early days. As with equalizers, you’re not likely to be able to find a major music release over the past 60 years that didn’t utilize compression at some point in the production process, whether it be during recording, mixing and/or mastering.
Here are some of my favorite compressors to use when mixing music, and tips on how I use them.
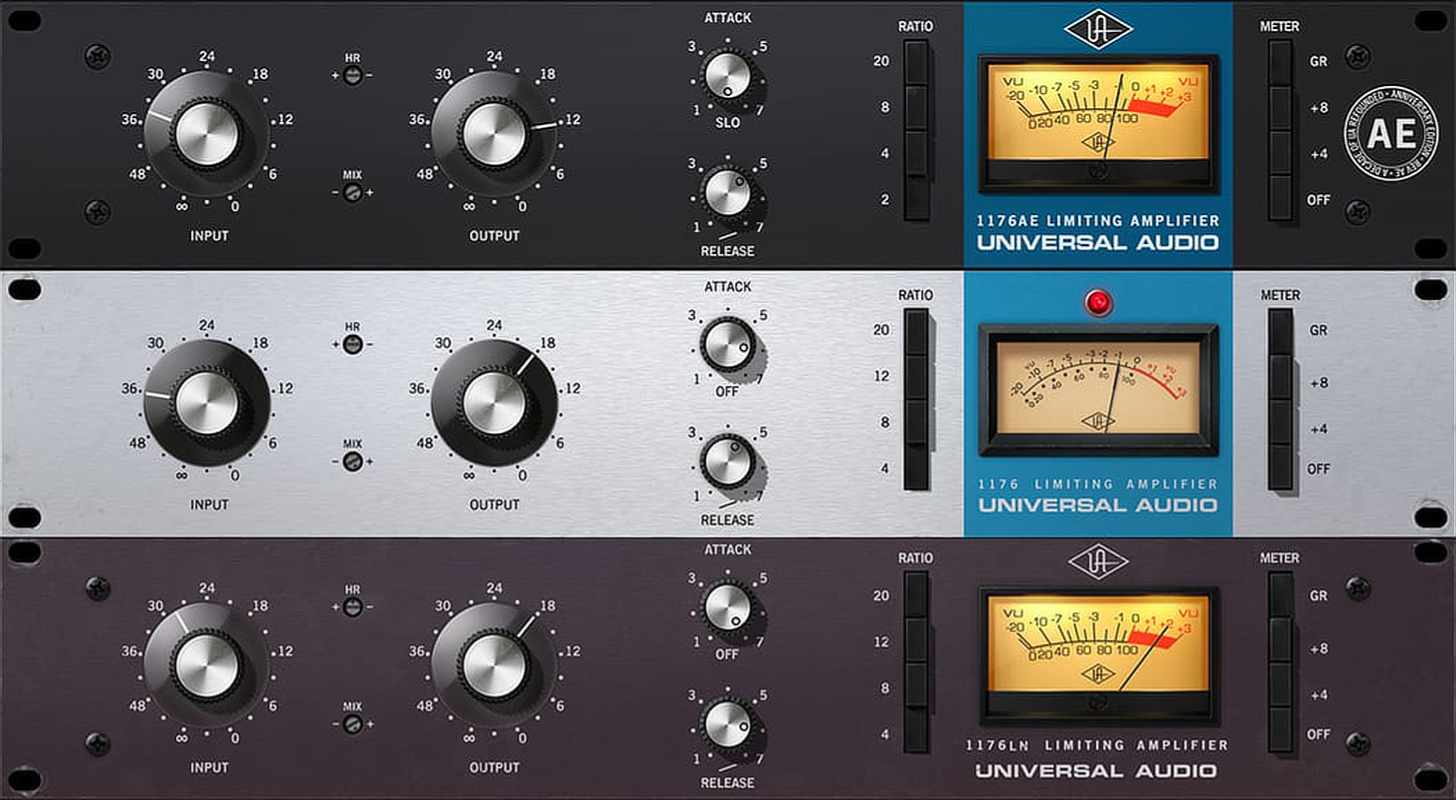
1. UAD 1176 Classic Limiter Collection
Bill Putnam of Universal Audio designed the original 1176, which went on to become the most popular compressor of all time. It’s known for its character and aggression. It’s no surprise that the Universal Audio plugin emulation of the classic hardware unit is a standout. The Classic Limiter Collection comes with three revisions of the 1176, each of which have their own unique sonic characteristics.
Mix Tips
Revision A: sometimes referred to as the “Bluestripe” due to its faceplate, Rev. A is based on Putnam’s original design, and became known for its distortion characteristics and its ability to “slam” drums aggressively. I use it all over the place when mixing: for emphasizing the tails in drum room tracks, giving a more “in your face” quality to vocals and even adding energy to an entire mix by using it in parallel.
Revision E: Also referred to LN for “low noise,” the Rev. E is slightly tamer than its blue-faced counterpart, and I use it when I want a more transparent gain reduction solution.
AE (Anniversary Edition): this version features lower compression ratios (down to 2.1) than the others, making it great for subtle gain reduction tasks.
2. FabFilter Pro-C 2
If you’re looking for a hyper-flexible, clean-sounding compressor not based on a classic hardware unit, it’s hard to argue against the Pro-C 2. It’s jam-packed with modern features, a beautiful graphical user interface and 5 different compression styles that emulate different compressor types. The types are as follows:
Vocal: designed to bring vocals to the front of your mix. This style has automatic knee and ratio settings, so compressing your lead vocal is fast and easy.
Mastering: designed to be as clean and transparent as possible, introducing little to no harmonic content, which keeps the integrity of the mix intact.
Bus: designed to work well with combined sources like drums. Adds a pleasant and subtle glue to tracks.
Punch: traditional, well-rounded, analog-like compression behavior.
Pumping: this style was designed to introduce over-the-top pumping artifacts. while this obviously doesn’t work on everything, it often suits harder hitting musical genres like EDM quite well.
It’s important to utilize the compressor type that best suits your program material, but don’t let the recommended types prevent you from experimenting with all that this compressor has to offer. You might find situations in which the punch compressor type works on a vocal, bus works on an individual track, etc.
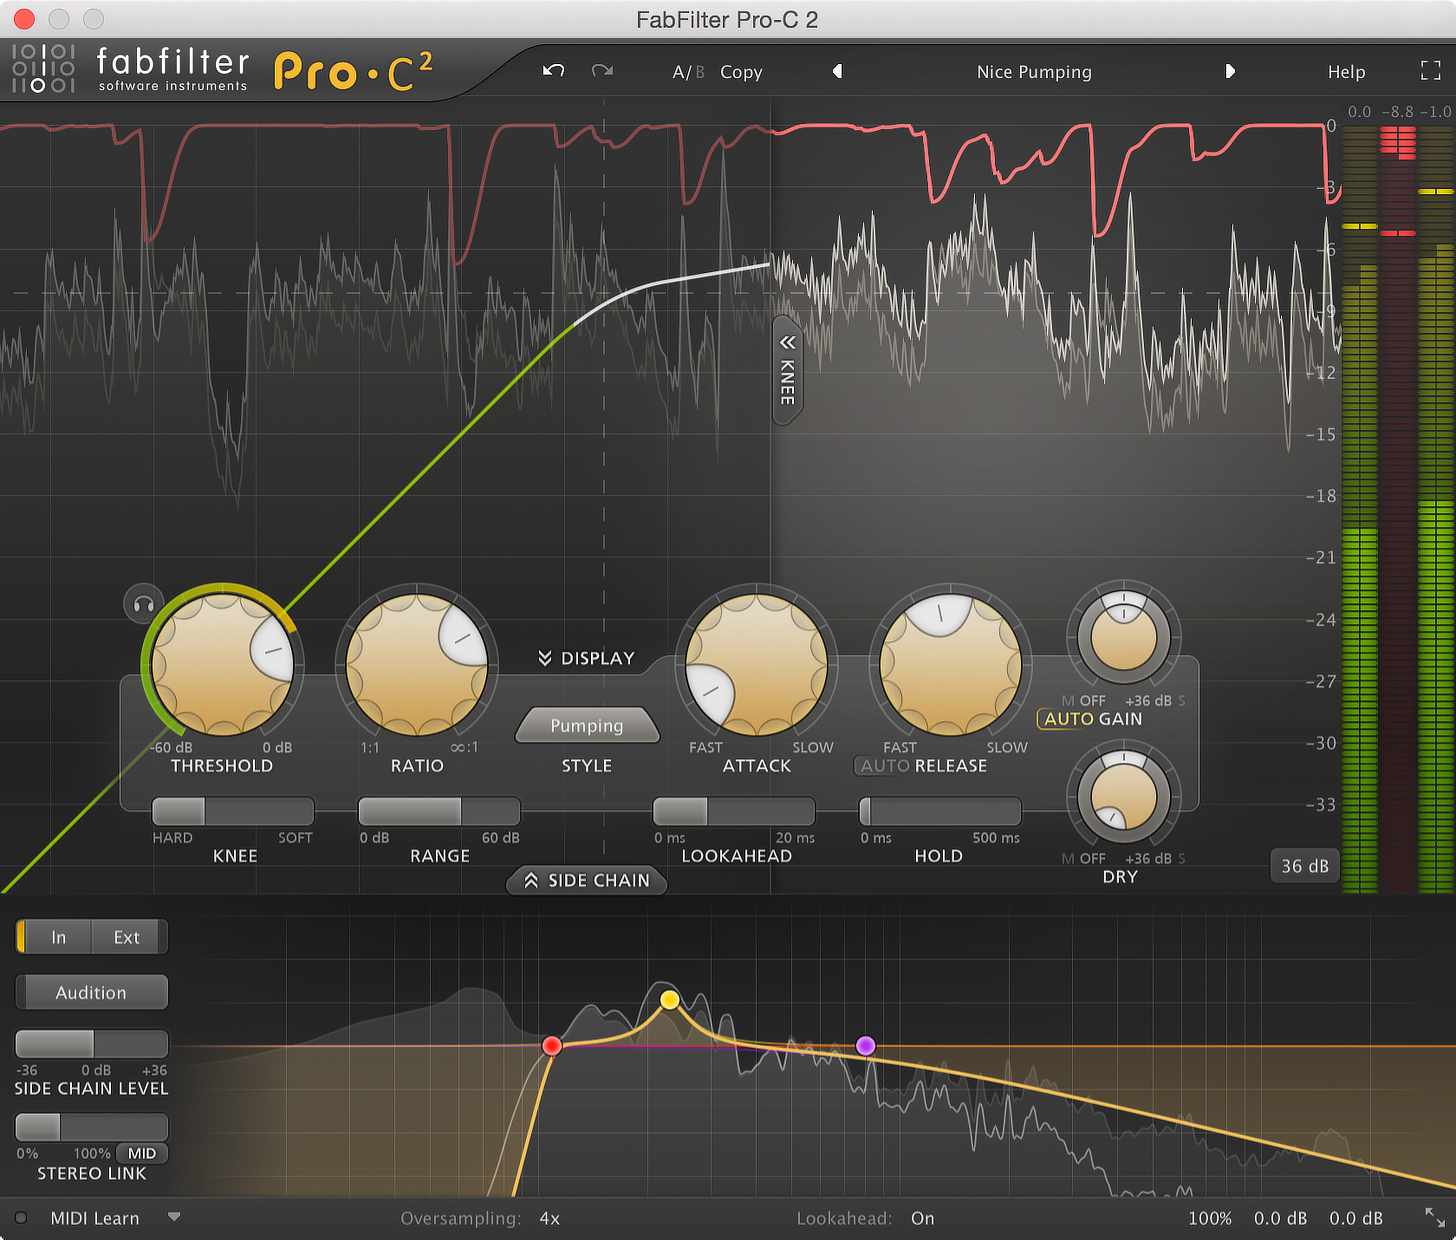
Mix Tip
Use M/S mode to fine tune the dynamics of subgroups and your stereo buss. I find the Mid-Side capabilities to be incredibly useful when you want to alter the dynamics of the information in the middle or panned to the sides separately. For example, you can compress the information in the sides to add liveliness and excitement to them without altering the dynamic range of the kick, snare, bass and lead vocals, which are generally panned center.
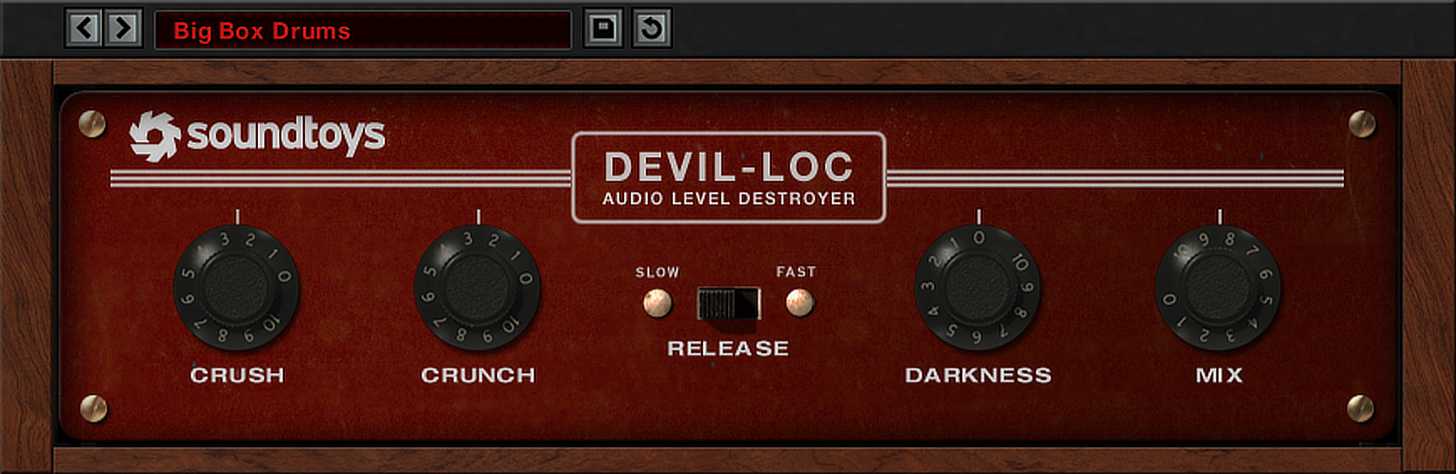
3. Soundtoys Devil-Loc Deluxe
Continuing in the Soundtoys tradition of emulating vibey vintage gear while adding a few helpful modern twists, this compressor plugin is a take on the Shure Level-Loc from the 1960s which was originally designed to be used for public address systems. The original Level Loc only had three controls: an input level knob, a distance selector and a bypass switch. Fortunately, Soundtoys upgraded the Level Loc’s capabilities, and the Devil-Loc Deluxe features crush (compression level), crunch (which is an unwieldy saturation effect), slow or fast release settings, darkness (which is for tone-shaping) and a mix knob.
Mix Tip
Place Devil-Loc on your track(s) of choice, dial in a sound, assign the mix parameter to a knob or fader on your MIDI controller and automate to taste. The Devil-Loc is not subtle, but can be dialed back by turning down the mix blend. By assigning this control to a knob or fader, you can add a performative element to your mix. Try this on bass, vocals, subgroups or even the master buss if you’re feeling adventurous.
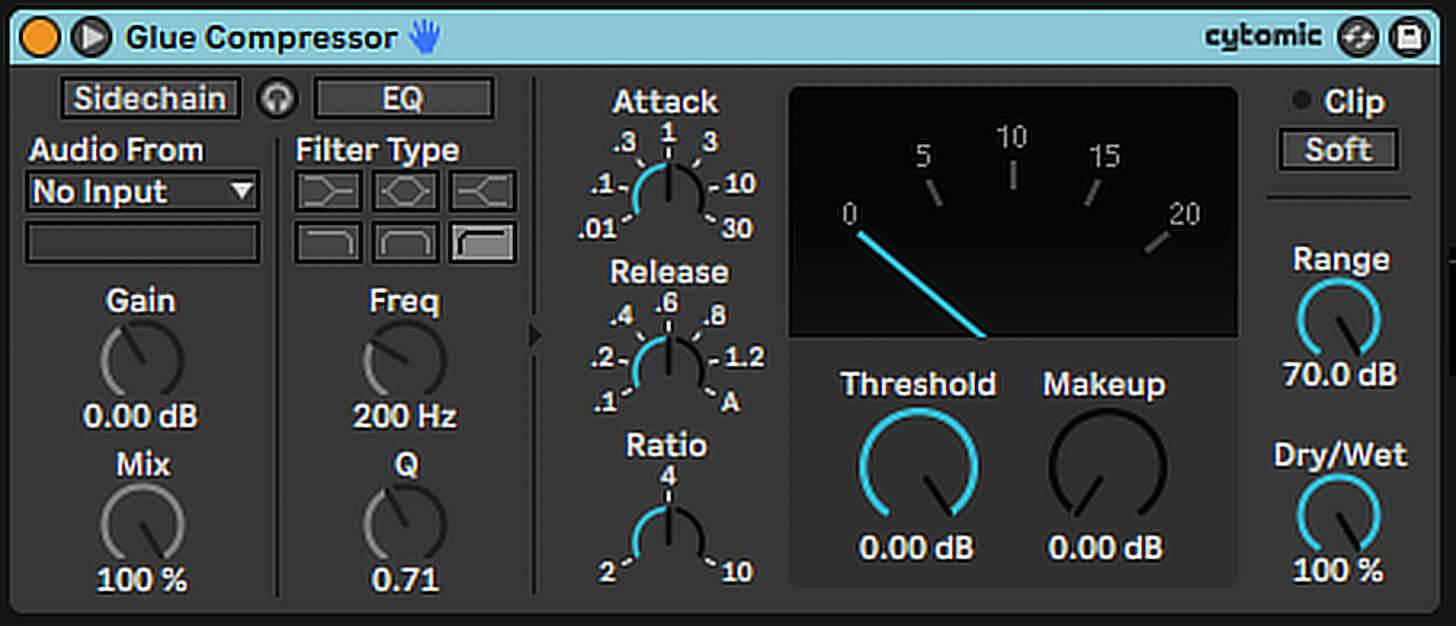
4. Whichever SSL Bus Compressor Emulation You Can Get Your Hands On
The original SSL Bus Compressor became known for its punchy, energetic sound and was often used for adding “glue” to entire mixes. There are tons of great plugin version offerings from companies including SSL itself, Waves, IK Multimedia, Slate Digital, Universal Audio, Cytomic, Native Instruments, PSP, and more. If you own Ableton Live, a free version comes included in the form of the Glue Compressor. No two of these are exactly the same, but each provide superb sound quality if you’re looking to add a final cohesive polish to your tracks. The real difference you’ll find is in the functionality, as some of the aforementioned plugins offer more features than others. I suggest demoing as many as possible and finding the one that works for you.
Mix Tip
Start with a slow attack, fast (or auto) release, 2:1 ratio, and set the threshold so that only about 1-2 dB of gain reduction is taking place. Then tweak to your liking. To me, the SSL sounds a bit ‘mushy’ when not used subtly, so I suggest starting with these conservative settings, and then alter them based on your own needs.
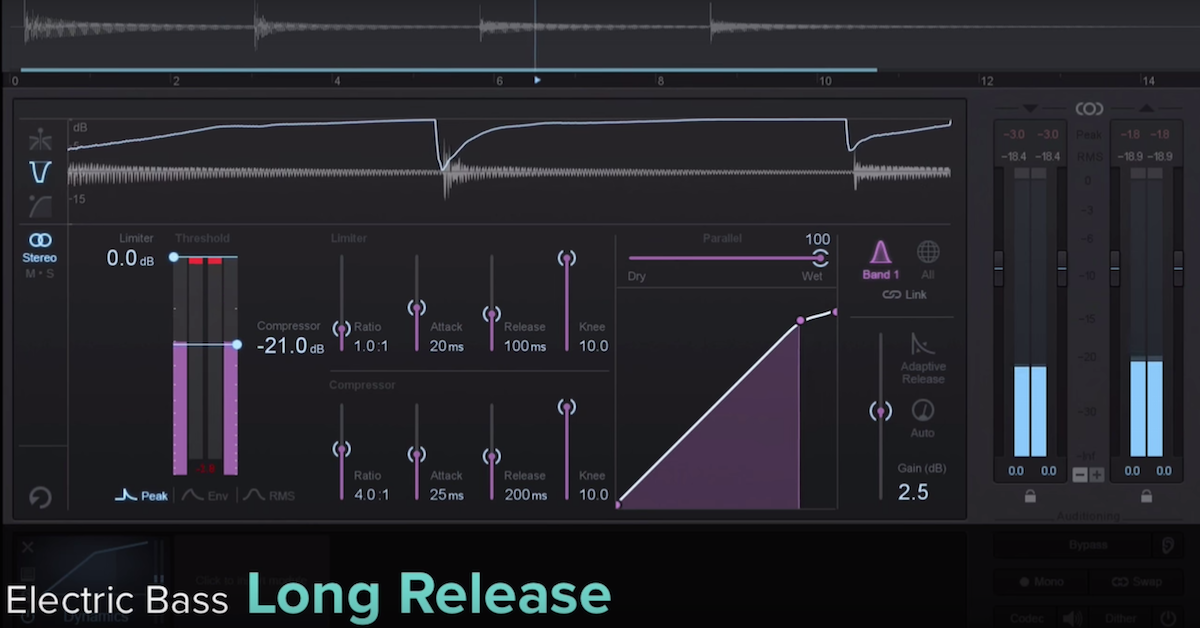
5. Universal Audio Empirical Labs Distressor
UAD partnered with Dave Derr of Empirical Labs when meticulously designing this end-to-end emulation of the legendary EL8 Distressor. Made commercially available in 1993, the Distressor gained popularity among engineers for its lightning-fast attack, ability to aggressively shape transients and its harmonic characteristics. Derr strongly endorsed Universal Audio’s take on his beloved hardware compressor, stating “It’s the best Distressor emulation in the world and will stand the test of time as the definitive Distressor emulation.”
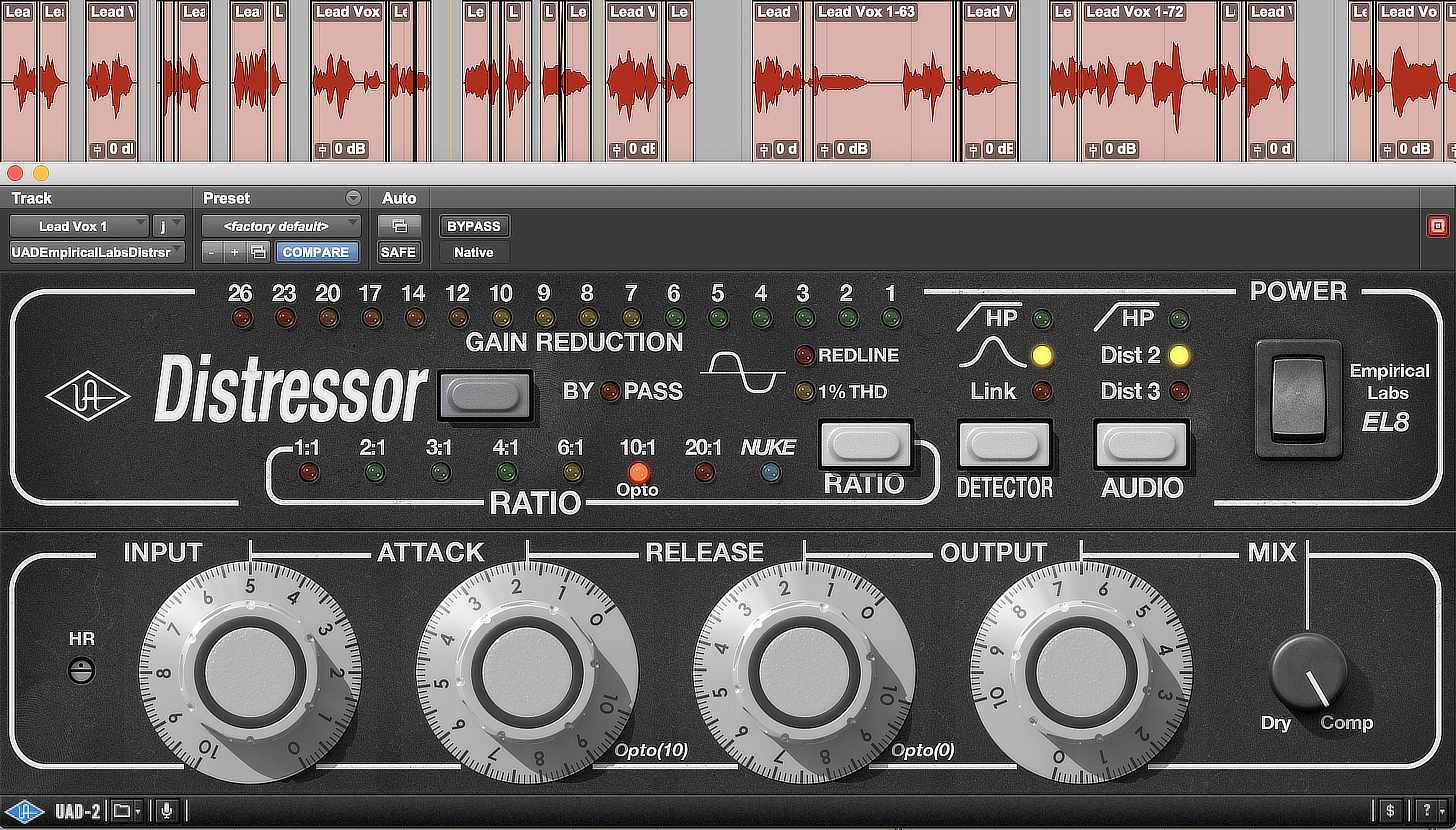
Distressor settings used on a vocal during a recent mix.
Mix Tip
While I definitely recommend using the Distressor on drum recordings (whether they be kick, snare or rooms) for its abilities to shape transients, I also love using the EL8 in parallel on lead vocals. Depending on the mix, I might send my lead vocal track through several auxiliary tracks, each with their own unique processing chain to bring out certain qualities in the vocal. One such aux will be “warm” with processing placed strategically to bring out chest tones and fullness. Another will be “intense,” with an up-front, energetic quality. For the “intense” vocal aux, I’ll usually use the Distressor with a moderately fast attack and release and a 10 to 1 ratio. I’ll utilize the band emphasis feature found within the detector section. This will influence the compressor to tame harsh upper midrange frequencies. For extra grit, I’ll use either the “Dist 2” or “Dist 3” features found within the audio section, which introduces saturation onto the signal. I’ll tweak the input until I have achieved the desired amount of gain reduction. I’m left with a powerful, exciting vocal sound that can be blended with the others.
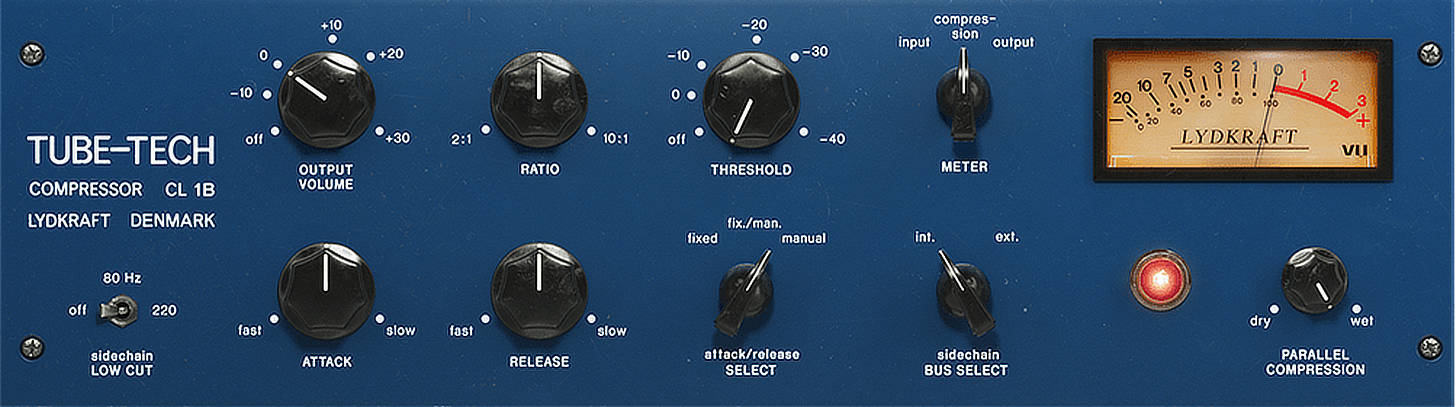
6. Softube Tube-Tech CL 1B
Based on the award-winning optical compressor from Tube-Tech and founder John G. Peterson, the plugin version of the CL 1B is silky smooth and a nice mellower alternative to the numerous in-your-face dynamics processors listed previously. When I’m looking for a warm, somewhat subtle and musical compressor, I’ll very often reach for the CL 1B. Most refreshing about this plugin is that it usually takes very little time to dial in the exact sound I’m going for. With a few quick turns of the chunky, black (graphical) threshold, attack, release and ratio knobs I can dial in a transparent and forgiving compression sound.
Mix Tip
There’s a reason the CL 1B is regarded as one of the greatest compressors for lead vocals. Once dialed in, it almost feels like someone is riding a fader for you. The volume of the louder passages is smoothly reduced, and with the release set correctly the quieter parts are brought up without any of the pumping artifacts that certain compressors are known for.
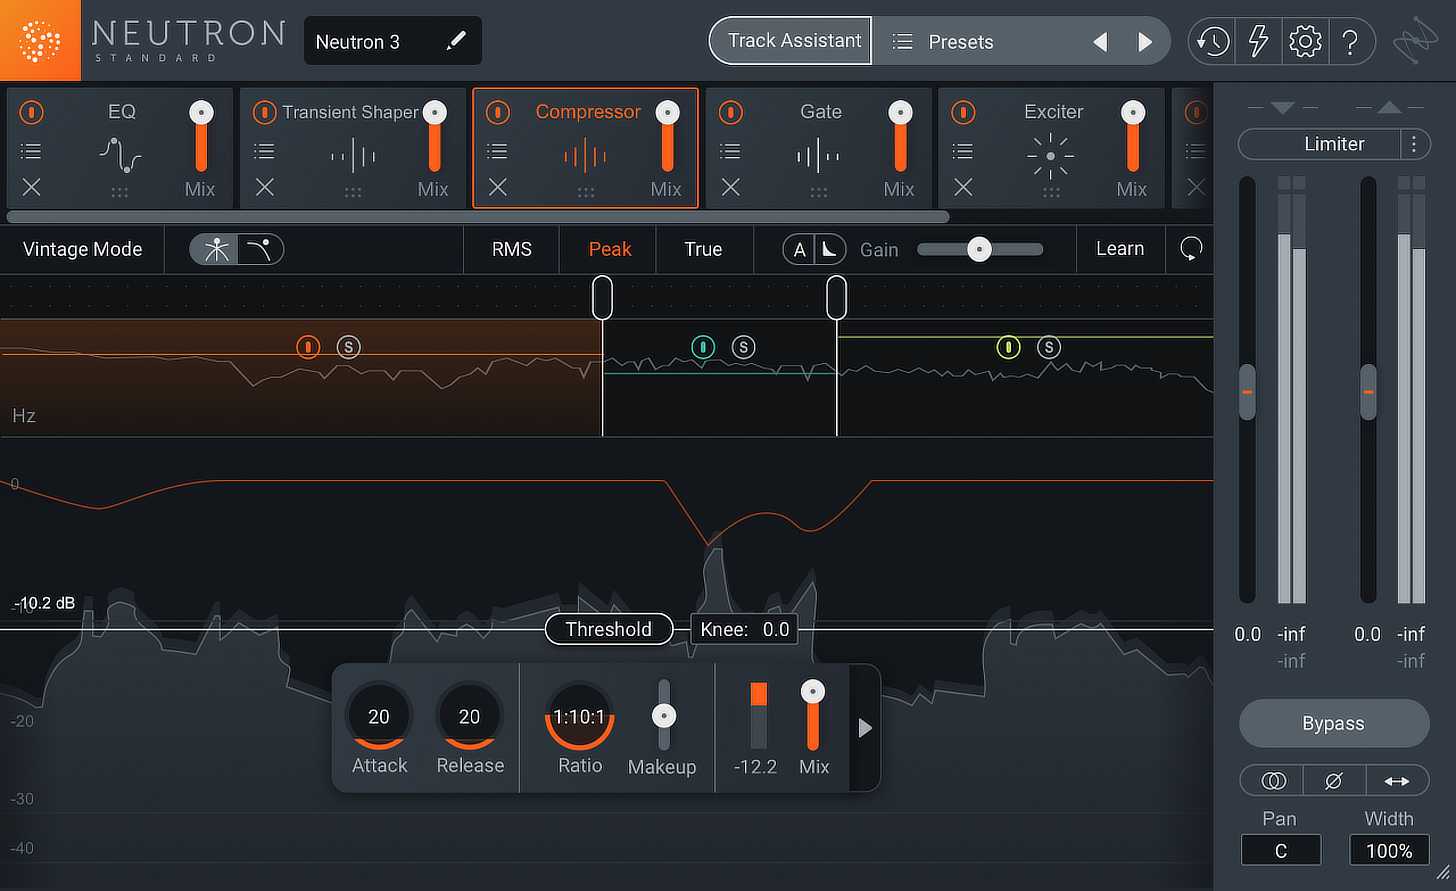
7. iZotope Neutron 3 Compressor
This versatile compressor from iZotope can do a bit of everything. It can be surgical and transparent, but it also features a “vintage mode” if you’re looking to add color and character to your signal. The depth of this compressor can’t be summarized in a couple of paragraphs, as it is loaded with state of the art capabilities. Because of this, the learning curve is a tad steep if you want to fully utilize the Neutron 3 Compressor, but it’s worth it to put in the work.
Mix Tip
I enjoy using the multiband capabilities found within the Neutron 3 Compressor. If I’m working on a sound source that has too much dynamic range at one specific frequency area (for example a kick drum that has a nice upper midrange punch but is a bit “boomy” in the 150-400 Hz range), I’ll compress only at that frequency range. The ability to focus in on specific area of the frequency spectrum is a helpful one, and not something that many other compressors can offer.
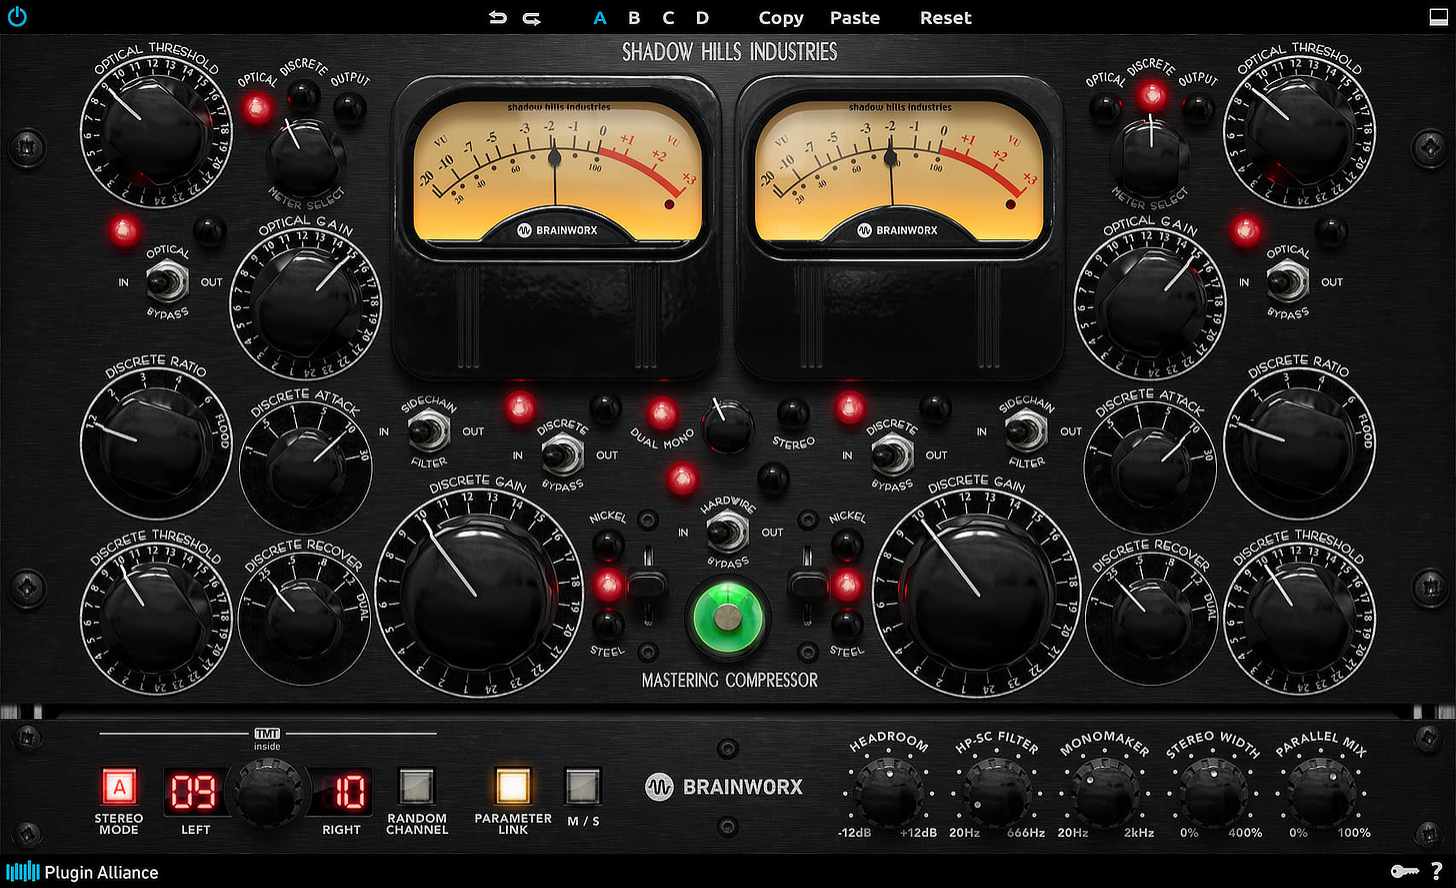
8. Brainworx/Plugin Alliance Shadow Hills Mastering Compressor Class A
I’ve been using the original Shadow Hills Mastering Compressor plugin from Brainworx/Universal Audio for years now as a mainstay on my stereo buss and for in the box mastering duties, so needless to say, I was thrilled when I heard that Brainworx was modeling the Class A version that was released by Vintage King in 2012. As with the original SHMC, the Class A features both discrete and optical compressor sections, with the latter having been upgraded with Lundahl input transformers and hand-wired using Mogami Cable. The result is a smoother, punchier sound with more depth and clarity. The switchable output transformer control allows you to add three distinct types of coloration (iron for a smooth top end, nickle for a boost in the midrange, and steel for a touch of harmonic distortion) to your signal.
Mix Tip
As with any mastering compressor, I would recommend starting with a conservative approach — moderate to slow attack, moderately fast release (if possible, timed with the “groove” of the song) and then set the threshold for both the optical and discrete sections so that you have only about 1-2 dB of gain reduction. In non-mastering settings, feel free to push this plugin harder by using faster attack times and higher ratios, being sure to take advantage of the parallel mix blend knob. I’ll often use this approach on subgroups, applying upwards of 10 dB of gain reduction when I’m feeling adventurous, and then dialing back the effect with the mix blend knob.
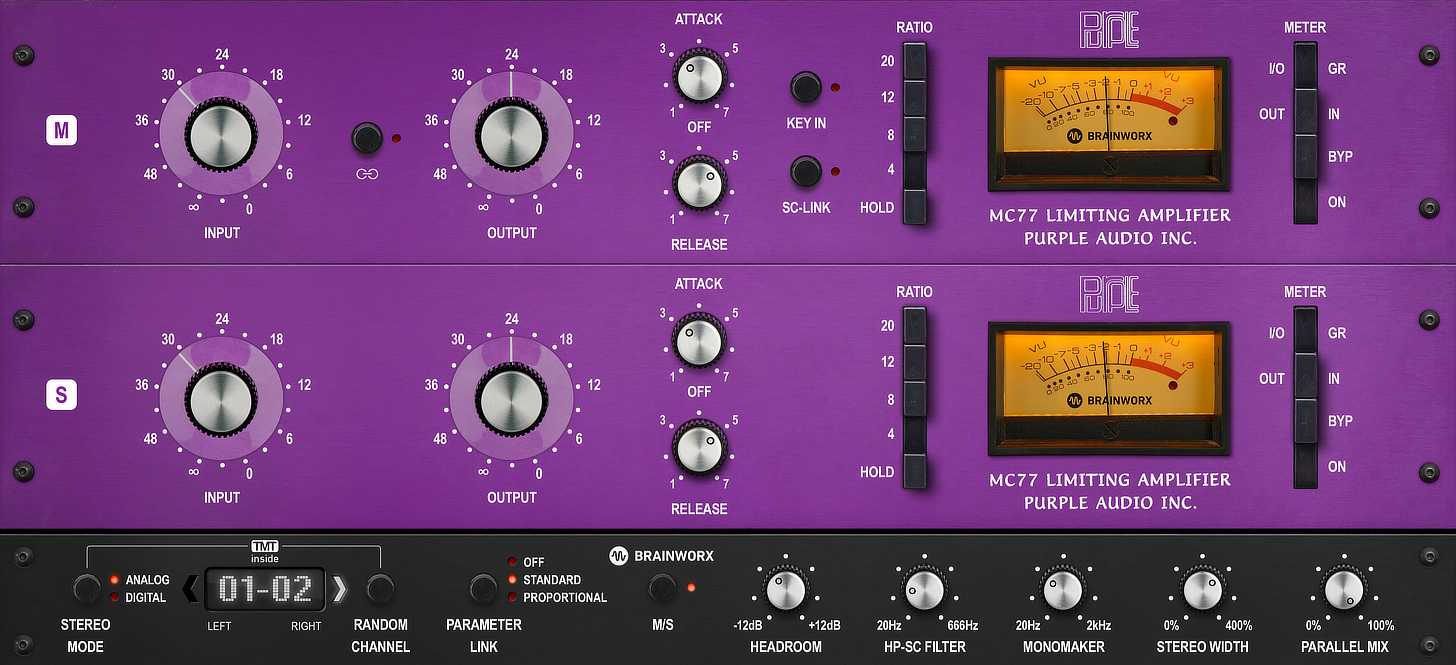
9. Brainworx/Plugin Alliance Purple Audio MC 77 Limiter
It’s no secret that the 1176 compressor, originally manufactured by Universal Audio, is a studio legend. You’ll find plenty of hardware and software emulations of the original, and many of them are fantastic. The 1176 and its predecessors are known for their lightning-quick transient response, allowing users to manipulate transients with precision. They are also highly regarded for their colorful sonic character when driven hard. Purple Audio released their version, known as the MC 77 (MC is 1100 in Roman numerals), in 1997 and it has become used in studios the world over for its impeccable build and sound quality. The Brainworx emulation features added flexibility including M/S (Mid-Side) capabilities, a high-pass sidechain, stereo width control, a dry/wet blend knob and more.
Mix Tip
Similar to the original 1176, I love using the MC 77 on vocals placed before an LA2A to grab and tame louder passages. This allows the slower, smoother LA2A to work in a more transparent fashion. Truthfully though, the MC 77 works splendidly on anything you’d use an 1176 on. It’s fun to use it to smash individual drums or room mics, it can give a gritty, vintage saturation to a bass guitar and it can help acoustic guitars sit evenly in a mix.
10. Brainworx bx_Townhouse Compressor
In 1978, engineers at Townhouse studios in London custom built a compressor made from components supplied by Solid State Logic. This punchy, character rich buss compression unit proved essential during a time when similar hardware was not commonplace, and it has been used on records for artists including Sting, Muse, Queen and many more. If you’re looking to add liveliness and energy to a rock mix, this “glue” compressor is a great option.
Mix Tip
I go through phases with plugins, and there will be times when the Townhouse lives on my stereo buss. I love the sense of cohesion and excitement it adds to entire mixes, and it’s made even more useful by having a mix blend knob (as most Brainworx plugins are equipped with). I find that this compressor works best when used similarly to how I employ an SSL master buss compressor, which is subtly. Usually a 10 or 30 millisecond attack time is advisable, as it allows the transients through, and the fast or auto release settings sound the most appropriate. Once I have these set, I’ll alter the threshold so that the Townhouse is only doing about 1-3 dB of compression. Because this plugin features a mix blend knob though, sometimes I’ll use more extreme settings with greater amounts of gain reduction and then dial back the mix, essentially employing parallel compression.

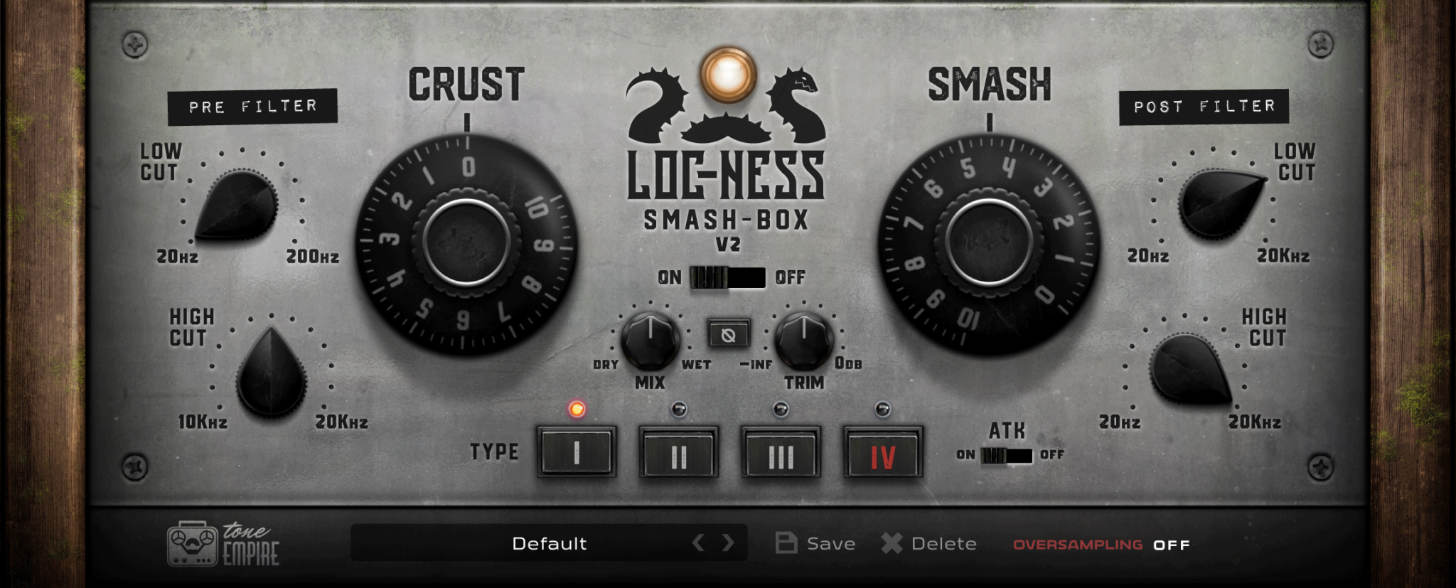
11. Tone Empire Loc-Ness v2
The name suggests that this plugin from Tone Empire is paying homage to the Shure level loc, but Loc-Ness takes the concept of Shure’s classic public address compressor and runs with it, adding features that make this plugin useful for filtering and saturation in addition to mangling the dynamic range of your signals. Loc-Ness features a hilariously named “crust” knob (which is essentially a saturation control), plus “smash” (which is heavy limiting and great for adding sustain to tracks) and both pre and post filter sections. It also comes with four unique saturation types and an attack control that allows your initial transients to survive this absolutely abusive compressor. Lastly, the helpful wet/dry blend knob allows you to dial back the overall effect for a more subtle application of the effect. Altogether, Loc-Ness is a fantastic transient and tone shaping tool.
Mix Tip
According to the Tone Empire website, Loc-Ness is geared towards anyone interested in smashing their drum tracks, whether they be close-miked signals, overheads or rooms. And while this plugin certainly works wonderfully for that application, I’ve found it useful for anything that needs a bit of grit. In my mixes, Loc-Ness has found its way onto piano tracks, strings, guitars and even subgroup tracks. Don’t be afraid to use Loc-Ness on any track or group that is perhaps lacking in size and character.
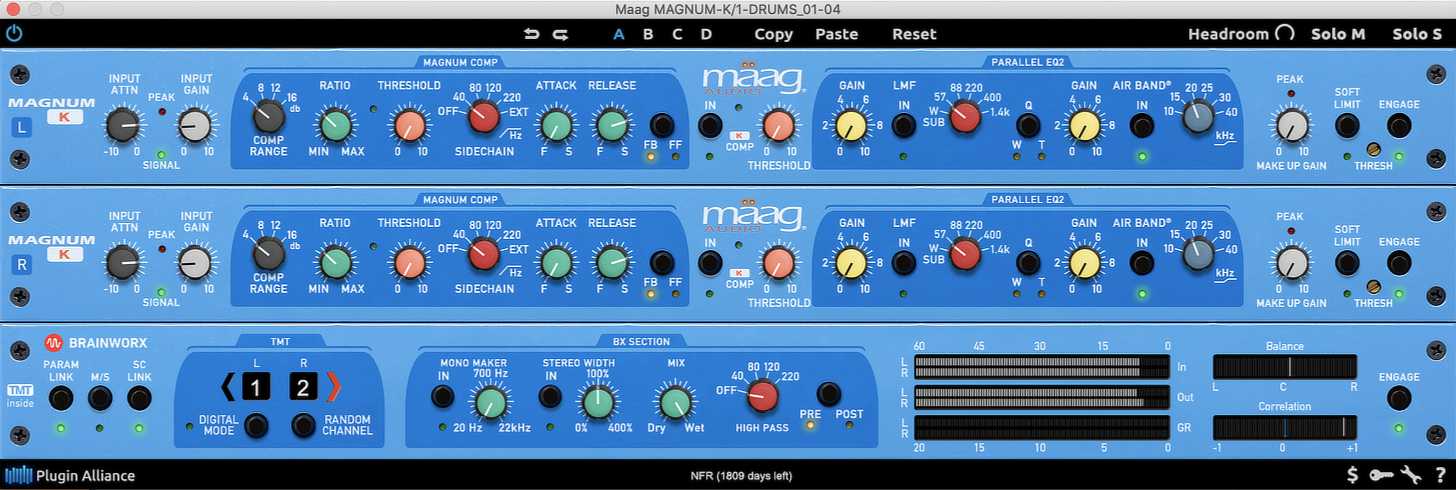
12. Maag Audio Magnum-K Compressor
Mix Tip
Similar to the EQ4, this compressor features Maag’s famous AIR BAND within the parallel EQ section. Users can boost at one of several low mid frequency ranges with the LMF control, as well as all the way up to 40k using the AIR BAND. Embrace this silky smooth feature to brighten individual elements or add a sparkly shine to an entire mix.
13. SPL Iron
Mix Tip
While Iron excels at stereo buss and mastering duties, don’t hesitate to use it on drum and instrument busses. I experimented with Iron on an acoustic guitar bus, and it instantly sounded powerful & upfront, but still very musical.

14. Goodhertz Vulf Compressor
Mix Tip
Go under the hood for even more tweakability — check out advanced controls for compression attack, release, stereo link, wow & flutter mix, phase speed, as well as lo-fi noise gain, crunch and type.

15. Your Stock DAW Compressor
You don’t need to drop hundreds or even thousands of dollars on third-party software to get your tracks sounding punchy, full and exciting. While I’d rather bring any of the aforementioned plugins to a desert island than what comes pre-loaded into all of the top digital audio workstations, it’s more important to understand compression as a concept than it is to own the latest and greatest plugin compressors. Logic especially has flexible dynamics processing capabilities right out of the box, as its stock compressor comes with emulations of VCA (Voltage Controlled Amplifier), FET (Field Effect Transistor), Opto (Optical), and Digital compressor types built in.
So as you can tell, compressors come in several varieties, and can impart myriad qualities to your program material. While I love using different compressors for different utilities, most essential is learning the basics of gain reduction. For this reason, you might want to get comfortable with the concept by putting your stock DAW compressor through its paces before investing in third-party plugins.

Ready to elevate your ears?
It doesn’t have to take years to train your ears.
Get started today — and you’ll be amazed at how quickly using Quiztones for just a few minutes a day will improve your mixes, recordings, and productions!
Eleveate Your Ears