How to Handle Harshness in a Mix (+ 4 Great Plugins)
05/15/2020
Article Content
When engineering music, I listen in a variety of environments, out of different sets of monitors, and at low, moderate, and high volume levels. When listening loudly, often what I am searching for is harshness, which can be defined as a general unpleasantness in the mid to high frequencies (that’s a wide range, I know).
Harshness can be introduced by an individual track, or by a buildup of multiple sources together. This can cause ear fatigue and ultimately detract from the listening experience.
I find that there are a few usual suspects that introduce harshness to a production:
Vocals
The incredibly complex human voice can be quite challenging to record and mix and can introduce issues involving harshness all the way to the mastering stage. In most genres — especially pop — a bright, clear, prominent, and powerful vocal is generally preferred, and it can be difficult to achieve these qualities without the vocal becoming grating to the ear.
My method of mixing vocals usually involves using clip gain to even out the dynamic range of the performance to a certain extent, so that the signal doesn’t overload any compressors or saturators that I may insert on the vocal. One of the most common harshness culprits is sibilance — the ‘sss’, ‘ch’, and other similar sounds generated by the human voice.
I hunt down sibilant passages, and use clip gain to ensure that they are at a comfortable level — audible and natural-sounding, but not too loud as to drive any inline compression or saturation wild. There are several types of processors that I often use to tame sibilance, which I will detail below, but I find that the extra bit of work in leveling your tracks using clip gain before the vocals hit compression or saturation goes a long way in ensuring a vocal that is bright, yet not fatiguing.
Additionally, de-essers are one of the most widely used types of processors to fix harshness in vocals, so be sure to check out my article on de-essing, and how I use it.
Drums (especially snare)
Much like vocals, in modern music productions, the snare is usually balanced in a place of prominence amongst the rest of the arrangement. Sometimes, in order to get a snare drum to cut through, whether the drum is acoustic or synthesized, drastic measures need to be taken in terms of processing.
There’s a fine line between a snare that serves as a driving rhythmic component, with the proper tone and sitting perfectly within the context of the entirety of the mix, and one that sounds like, well, you’ve seen the memes.
Compression can help dial in the appropriate transient and attitude, but don’t downplay drum augmentation and even replacement if your snare isn’t quite cutting through. Rather than boosting excessively in the mid-to-high frequencies to force the snare to be heard, laying in a sample that cuts through, and tucking it in perfectly beneath the original snare might do just the trick, and shouldn’t introduce the harshness that gobs of additive equalization will.
In addition to the snare drum, cymbals and high-hats can be problematic, introducing brittle resonances and ringing, and subsequently dominating the listener’s attention. Once correct volume levels are set, I’ll sometimes employ sidechain compression (otherwise known as ducking), using the lead vocals and/or kick and snare as the “key input” to gently reduce the volume of overheads during particularly raucous passages. Some engineers swear by using de-essers on cymbals, and while I can certainly see the potential benefits, (a de-esser is simply a compressor that targets a specific frequency range, generally high frequencies) it’s not a technique that I myself usually resort to.
Guitars
Guitars, both acoustic and electric, are designed to emanate a sound that cuts through dense arrangements, and because of that, it can introduce unwanted harshness if not recorded and then mixed properly. A cheap acoustic guitar recorded in an unforgiving room can really cause unfixable headaches when it comes to the mix.
One of the many tried and true methods for recording acoustic guitar involves using a small diaphragm condenser microphone aimed at where the neck meets the body, as well as a large-diaphragm condenser a few feet off, aimed closer to the lower part of the body. In this configuration, a good portion of the brightness comes from the neck microphone, so if you’re delivered a two-mic recording such as this, pay attention to the balance of these two mics, and tastefully bring up the volume of that neck mic as a sort of high-end EQ (assuming it was recorded properly).
Electric guitars present their own unique issues. Heavily distorted electric guitars are actually somewhat easy to mix, because generally speaking, they are not dynamic in nature. The rounding off of the waveform resulted in a “distorted” sound that many listeners have come to enjoy. Take a look at the screenshot beneath to see what I mean.
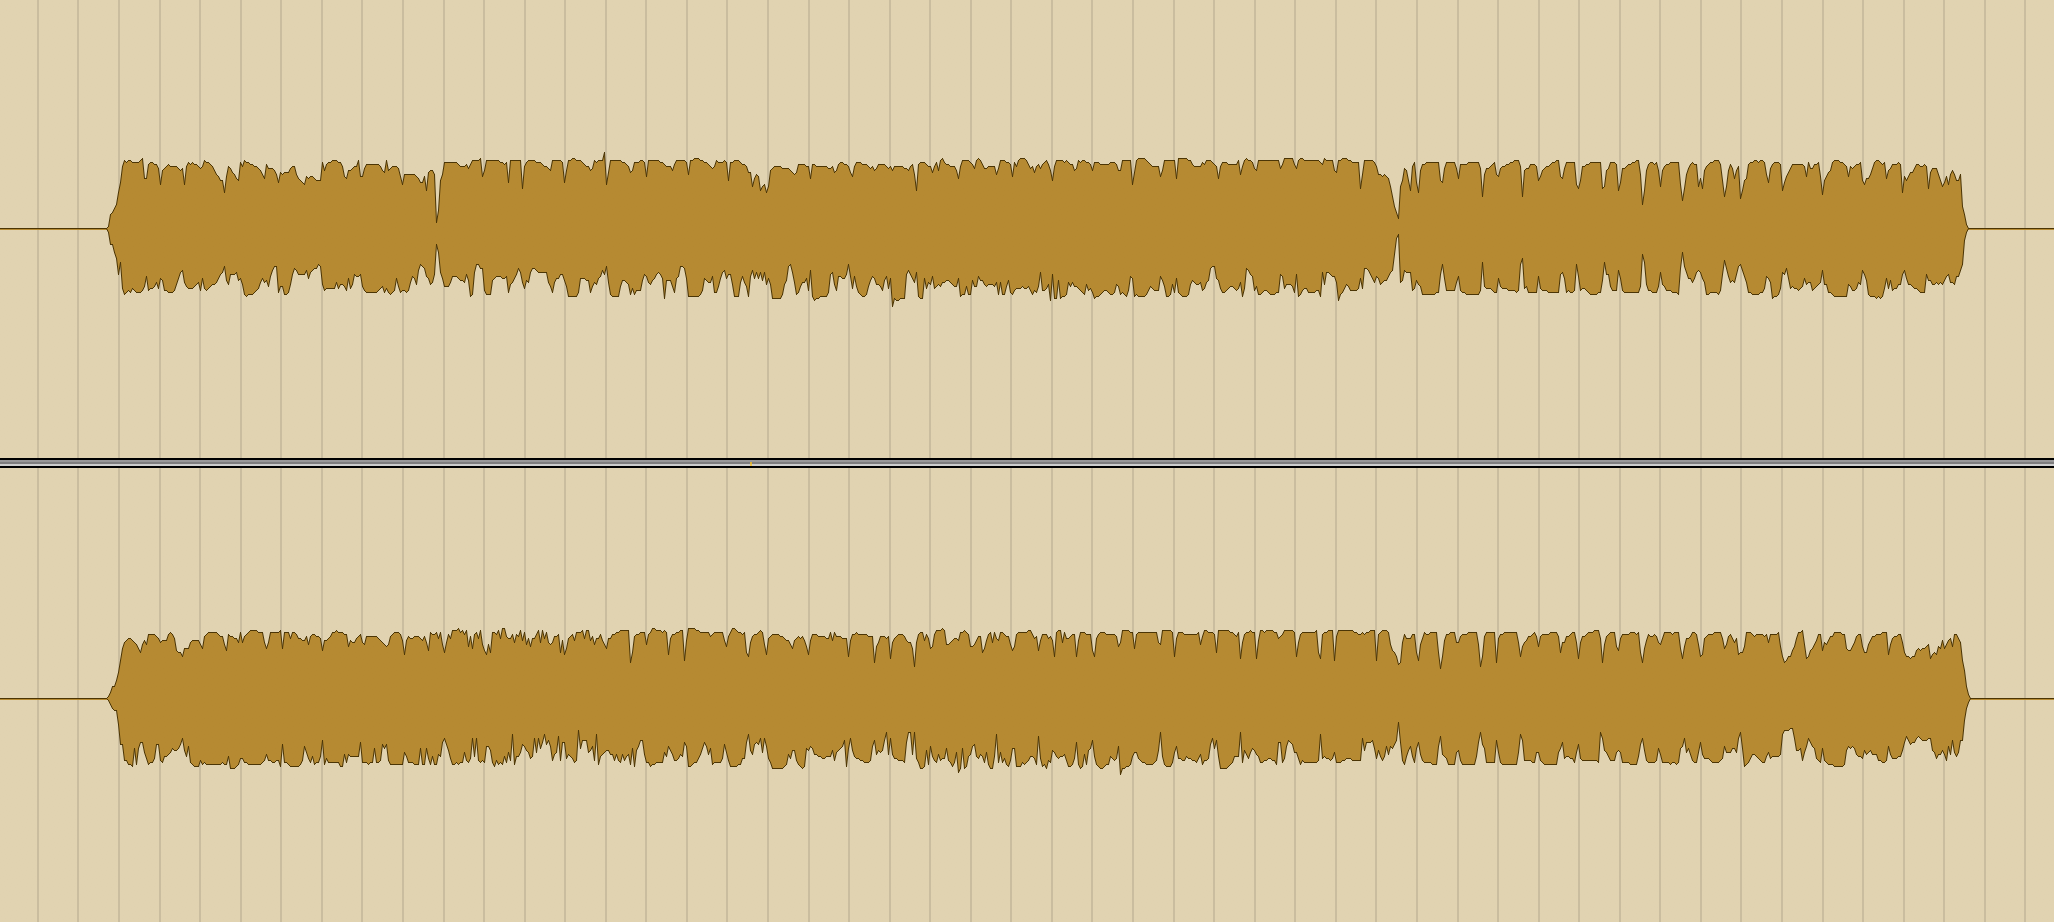
Distorted electric guitars within Pro Tools. Notice the lack of dynamics as a result of distortion (the good kind).
Cleaner electric guitars can be challenging because if there’s no compression while tracking (either via a pedal or outboard guitar), they tend to be pretty dynamic and somewhat brittle. I own a Vox AC30, and while I absolutely love it, it has some serious bite that needs taming either via compression, equalization, or other means.
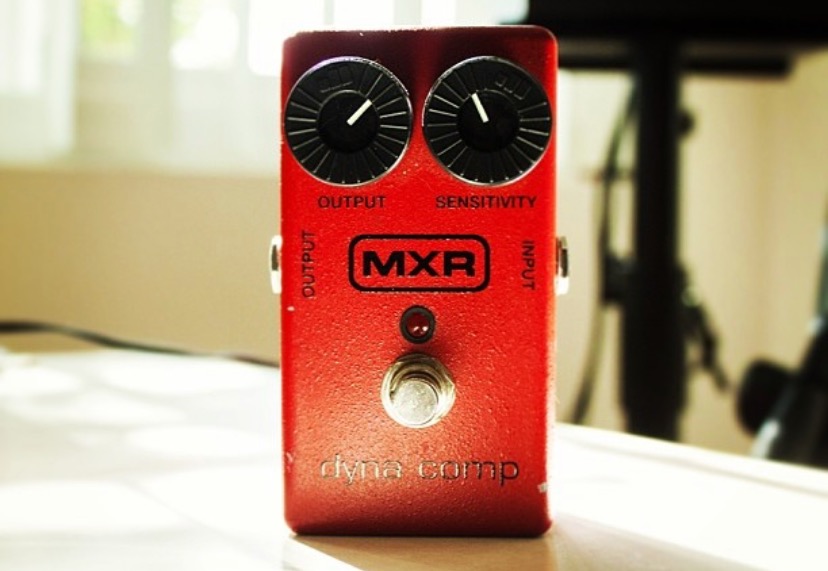
The MXR dyna comp, one of my favorite guitar compressor pedals
Synthesizers
I could write a book on mixing synthesizers due to how complex the process of synthesis is, the resulting recordings basically run the gamut of every possible sound imaginable. Synthesizers can be simultaneously thick and percussive, bright and gentle, muffled and overpowering, and other combinations of sonic qualities that you don’t often find inherent to organic instruments.
In some cases, you can’t really trust that what a synthesizer is doing is going to stay consistent throughout the course of a song, and because of this, volume automation can be especially important. I have also found plugins that adapt to program material (certain compressors, dynamic equalizers, etc.) to be effective when mixing synths. More on those later.
All this being said, there’s no substituting getting it right at the source. Generally, this has to do with choosing the correct microphone for the source and placing it correctly on that source, factoring in how it interacts with the environment/recording space. One can, of course, argue that using inline processing like equalization or compression will help prevent harshness, but those should be used to enhance a sound, not as band-aids on a wound.
Microphone choice and placement are your first line of defense, make no mistake. If that ship has sailed, however, and harsh source material is what you’ve been delivered, here’s a breakdown of the plugins that I typically use for remedying harshness in a mix.
Oeksound soothe2
Soothe2 and its predecessor soothe were designed specifically to address harshness in audio tracks. Oeksound refers to soothe2 as a ‘dynamic resonance suppressor’ and the basic idea is that it behaves like a compressor, in that it responds dynamically to the source material, but affects the frequency spectrum like an equalizer.
To put it simply, soothe keeps what you like about a recording, and removes what you don’t.
If there’s one plugin on this roundup that I’d recommend for all-purpose unpleasantness and taming duties, it would be soothe2. I use it on individual tracks (especially lead vocals, and generally as the last insert in the chain), sub-groups (soothe2 works wonders on drum buss if the performance has an abundance of cymbals), and even on the mix buss and during mastering (check the ‘ear-friendly on top master’ preset for a great starting point).

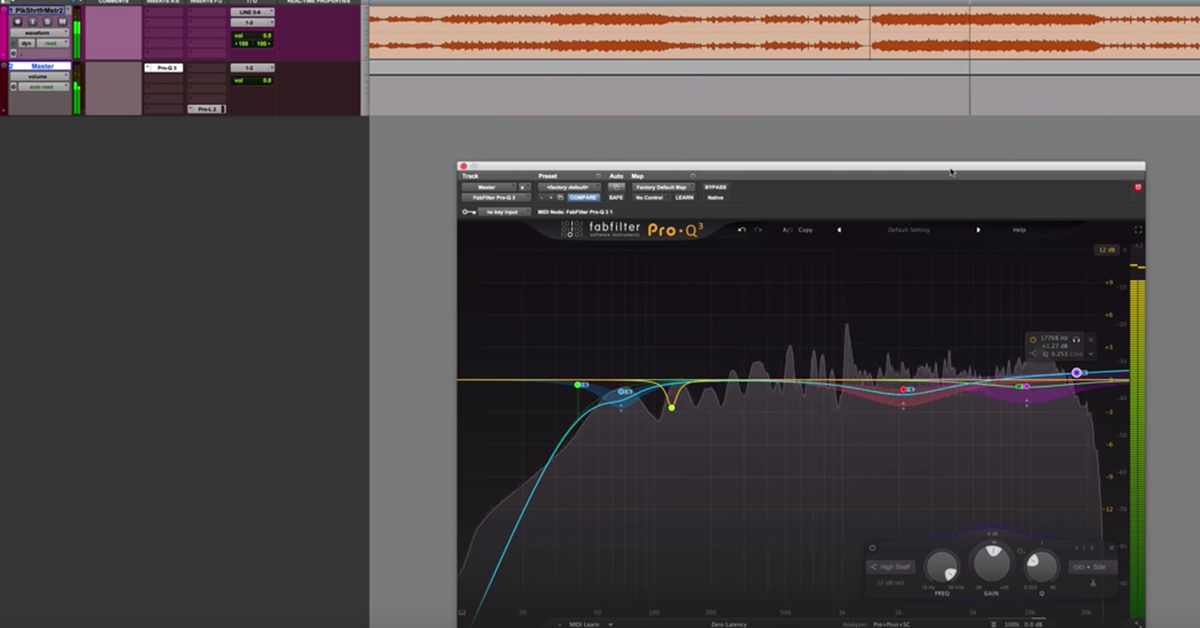
FabFilter Pro-MB and Pro-Q 3
FabFilter plugins are known for beautifully-designed user interfaces, transparent sound quality, and tons of useful features. I use both of these plugins for a wide variety of tasks, and removing unwanted harshness is a utility that they handle well.
The Pro-Q 3 now has a dynamic EQ mode, which makes it much more effective at this. I’ll use the spectral analysis tool to reveal where there’s an overabundance of content for any given frequency range, and then create a band at that frequency. I really like using the Pro-Q 3 as the first insert on brittle, overly bright sources, removing fatiguing frequencies before hitting any saturation or compression.
The Pro-MB is a top-of-the-line multiband compressor and is incredibly useful for treating sources that have mostly good things happening, frequency-wise, but need some attenuation in a specific range. It gets regular use on individual tracks, sub-groups, and occasionally on the mix bus.

UAD Empirical Labs Distressor
This emulation of the highly sought-after compressor from Empirical Labs does a great job of capturing the attitude, aggression, and response of the original hardware unit. The Distressor is great at a few things in particular — it’s a mainstay on percussive sources. Once dialed in on snare drum, the sound is unmistakably snappy and cutting. I also use it regularly on kick drum, rooms, overheads, bass guitar, and vocals.
As I mentioned, the Distressor has a pretty aggressive tone, so how does it end up within a roundup of plugins used to fix harshness? Well, the Distressor comes with a ‘band emphasis function’ which essentially adds an equalizer into the circuitry which makes the unit more sensitive to harsh, mid-range frequencies. For this reason, the Distressor excels at taming anything that is a bit mid-forward, which just so happens to be snare drum, overheads, and vocals.

Your Favorite Compressor (used correctly)
I use compressors for a variety of reasons. The most common application is to lessen the dynamic range of individual tracks.

Ready to elevate your ears?
It doesn’t have to take years to train your ears.
Get started today — and you’ll be amazed at how quickly using Quiztones for just a few minutes a day will improve your mixes, recordings, and productions!
On a recent mix, the vocalist delivered an incredibly dynamic performance. Certain moments were nearly whisper-quiet, and others were practically screaming. While I did begin with using clip gain to somewhat even out the different passages of the performance, most of the heavy lifting came from the compressor(s). Sometimes, tracks such as this one, that are overly dynamic, tend to ‘poke out’ and cause an unpleasant listening experience. Before reaching for an equalizer and changing the timbre of a signal entirely, consider that a bit of subtle (or extreme) leveling might do the trick.
Additionally, certain compressors are wonderful ‘tone boxes’ and many lend their own unique characteristics to whatever is running through them. Some of my favorite ‘warming’ compressors are the Fairchild 660/770, Tube-Tech CL 1B, and the Teletronix LA-2A, which are available in plugin emulation form from companies including Universal Audio and Waves. More important than any particular brand is knowing how compressors behave, and even your stock DAW compressor can work wonders to smooth out your tracks, as long as you’re applying compression appropriately within context.
Your Favorite Equalizer (used correctly)
Perhaps no type of processing is more effective at removing harshness in audio than the trusty equalizer. For years, I used the stock Pro Tools EQ3 7-band for most subtractive equalization duties, and have very few complaints about its functionality and sound. When I produce music in Ableton Live, I have no qualms about using the stock equalizer on the fly. Logic comes with many great equalization plugins right out of the box, including ones that emulate renowned hardware and do it well.
My point is similar to the point I made about compression — while there are some really vibrant, silky-sounding plugin EQs on the market, the best one for the job is the one you’re the most comfortable with, and it’s more important to understand the concept and function of equalization than it is owning the latest and greatest software.
To know how to use an equalizer, having a trained ear is essential. Understanding how musical elements behave across the entire frequency spectrum, but especially the range between 1-15 kHz can go a long way in ensuring that you’re making the appropriate decisions with an equalizer.
There are plenty of resources and exercises for taking your listening skills to the next level, including Quiztones.
iZotope Ozone 9
While I’d certainly recommend handling harshness at the track level before you do anything to the mix buss/master fader, the flagship mastering suite from iZotope comes with a variety of ‘modules’ that can sculpt the tone of entire mixes to be more pleasing.
The Dynamic Equalizer is great for attenuating a jarring build up in the upper mid- frequency range, which is pretty common on mixes with high track counts. Additionally, the ‘Spectral Shaper’ module was designed to alter the frequency-specific dynamics of material, so if a mix is suffering from harsh transients, say those of a snare drum, high hats, or acoustic guitar, the spectral shaper can remedy that.
One of my favorite uses for Ozone is to run the master assistant and see what it thinks of my mixes. If it suggests a substantial bump or dip at any particular frequency range, I’ll go back into the mix and attempt to fix it at the track level. If it says I have way too much happening between 60-120 Hz, chances are I can go back to my kick drum and bass and make necessary alterations at the track level.

Summary
One of the most common traits of low budget recordings and mixes is harshness, and there are few things I focus on more than getting my productions to have a clear, but never unpleasant tone. One could argue that digital audio is inherently more brittle than analog, and I find that introducing some analog flavor to my work using hardware and plugins that emulate outboard gear goes a long way in ensuring a warm, punchy, but never harsh final product.
Eleveate Your Ears