11 Tips For Recording Drums
03/29/2022
Article Content
Ok, you’re struggling with drum recording, right? Why else would you have clicked through to this article? Look, I get it — recording drums is hard. Or it can be, anyway. You may have already found recipes for drum recording, followed directions, carefully placed mics and still come up short. I’ve been there!
Here’s the thing: the mic placement part is actually not that complicated. The most basic two, three, and four-mic setups for drum recording — which you have probably read about or tried — actually work great much of the time. But they’re not the only variables to consider.
Before you give up and reach for drum triggers (which, for the record, is not a crime!), here are a few tips, roughly in order, for nailing drum recording in studios big and small:
1. Have a Vision
It’s so much easier to reach a goal when you actually have a goal. That’s why it’s important to have a sense of the type of drum sound you want before you start recording.
Listen to some music with drum sounds you like and take notes. Are the drums tight and close or big and roomy? Are they heavily processed and beefed up with samples or more natural? Are they recorded in stereo or mono?
The sound you’ll ultimately get is at least as much a product of the drummer, the performance they give and the kit they play as it is of mics, preamps or other studio gear used. Having a sense of where you’re trying to go will make it clear what it might take to get there.
2. Choose the Right Kit
The drums you use to record are going to have an enormous impact on the sound you get. That includes shells as well as cymbals.
Drum & cymbal sizes and the materials used to make them have a big impact on the way they sound. The same goes for drum heads, by the way. A 14” floor tom is not going to sound the same as an 18” floor tom — though don’t assume that larger dimensions or a larger sound on stage are necessarily going to equate to a larger sound under mics in a studio.
The internet is, depending on your perspective, either a paradise or a hell of infinite hot takes on which drum and cymbal brands, sizes and materials excel in different situations. A bit of research is likely to yield plenty of ideas about what drums you might use for a session. As always, your ears are going to be the ultimate judge of whether a kit makes the cut.
3. Tuning is Huge
The way a drum kit is tuned can have a night & day impact on the way the recording ultimately comes out. It can be the difference between drums that seem to vanish in a mix and drums that are large and in charge, even with very little processing.
There are many, many better guides to tuning a drum kit out there than I can give you in the space of this article. But for those of you (ahem, guitarists) who are just now learning that you can tune a drum, here’s the basic idea:
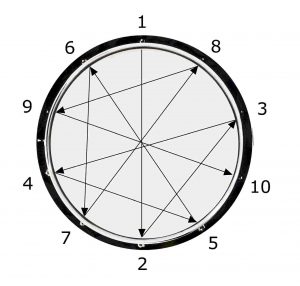
The goal of drum tuning is consistent tension across the entire head. Tightening the lugs around each head evenly (usually bouncing between them in a star pattern, rather than moving in a circle around to each one) will result in a consistent tone that can “sing” more clearly. The relationships between batter and resonant (top and bottom) heads will absolutely affect the sound of the drum being tuned, and there are different schools of thought about what combinations work best.
If you record drums often and are not a drummer yourself, you might consider investing in a drum tuner. Hearing the difference in tuning around each lug can be tricky, especially if it’s not something you practice all the time.
Bonus Tip: Tighten Drums With Additional Treatment
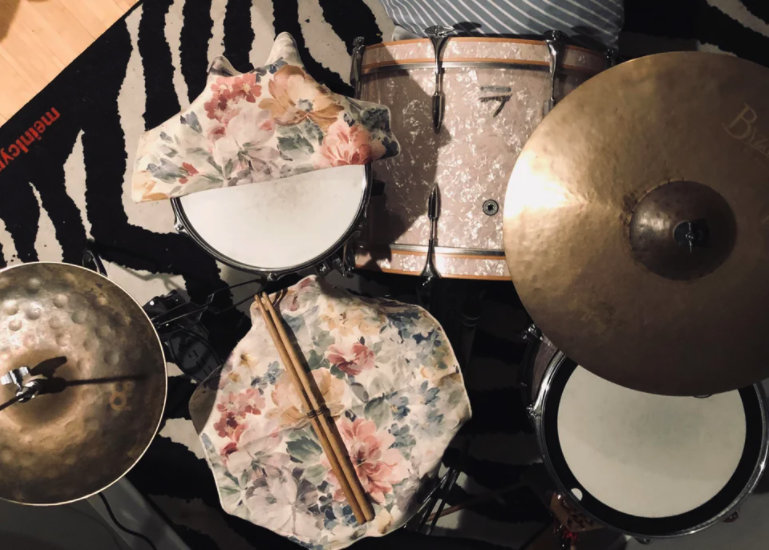
If you’ve tuned a kit as best you can and still don’t like the resonant qualities of the drums, it might be time to dampen the heads a bit.
There are great, ready-made options for drum dampening like Moongels and Big Fat Snare Drum mats. These products basically streamline more improvised tricks like tea towels, wallets and gaffer tape. These are all methods of deadening drums in a way that can sound more controlled, especially in a recording session.
Putting damping material closer to the center will yield a more extreme result than putting it near the rim, and these sorts of treatments can be used on both batter and resonant heads as needed.
4. Use the Room, and Understand Its Limitations
Fact: the room you record drums in — and the kit’s placement within the room — can dramatically affect the final product.
This can be a frustrating revelation if you’re recording drums in a bedroom or small practice space. That said, having a less-than-ideal recording environment doesn’t mean you have to give up hope. Whatever your room looks like, putting the kit in different spots is going to result in different types of sounds.
There’s no way for me to know what your room sounds like, but some basic concepts most likely apply: the dead center of the room is typically best avoided as a place to put a drum kit, and so is a spot too close to a wall. Corners can be good for “focusing” the sound of a drum kit, but be careful for reflections from side walls. Placing the drums along a longer wall, with nothing close on the sides, will give a more open and spacious sound. If your room sounds too live, gobos and baffles can be used to make the kit sound tighter and more intimate.
Small spaces are not going to be particularly friendly to room mics — look into room-modeling reverb plugins as an alternative. Low ceilings tend to create problems as well. In short rooms, try “underhead” and front-of-kit placements as an alternative to traditional overheads — they can yield quirky-but-usable results.
5. Build the Sound off Overhead or Room Mics
Before we talk mic placements, let’s get something clear: a drum kit is one instrument. Keeping that in mind, in most cases it makes sense to build the sound of recorded drums mainly from mics that will capture the entire kit — usually either overheads or room mics.
It’s a common misconception to think of overheads as “cymbal mics.” Soloing overheads in a drum recording will reveal how misguided this idea is after a couple seconds. Overhead mics capture everything. They should give a mostly complete picture of the whole kit. Room mics can function similarly, sounding “bigger” but often more unwieldy, with a less focused stereo image. A more controlled but still aggressive approach might be to build your drum sound off a combination of the two — using overheads to establish a clear stereo picture of the kit and bringing in room mics to add power and depth.
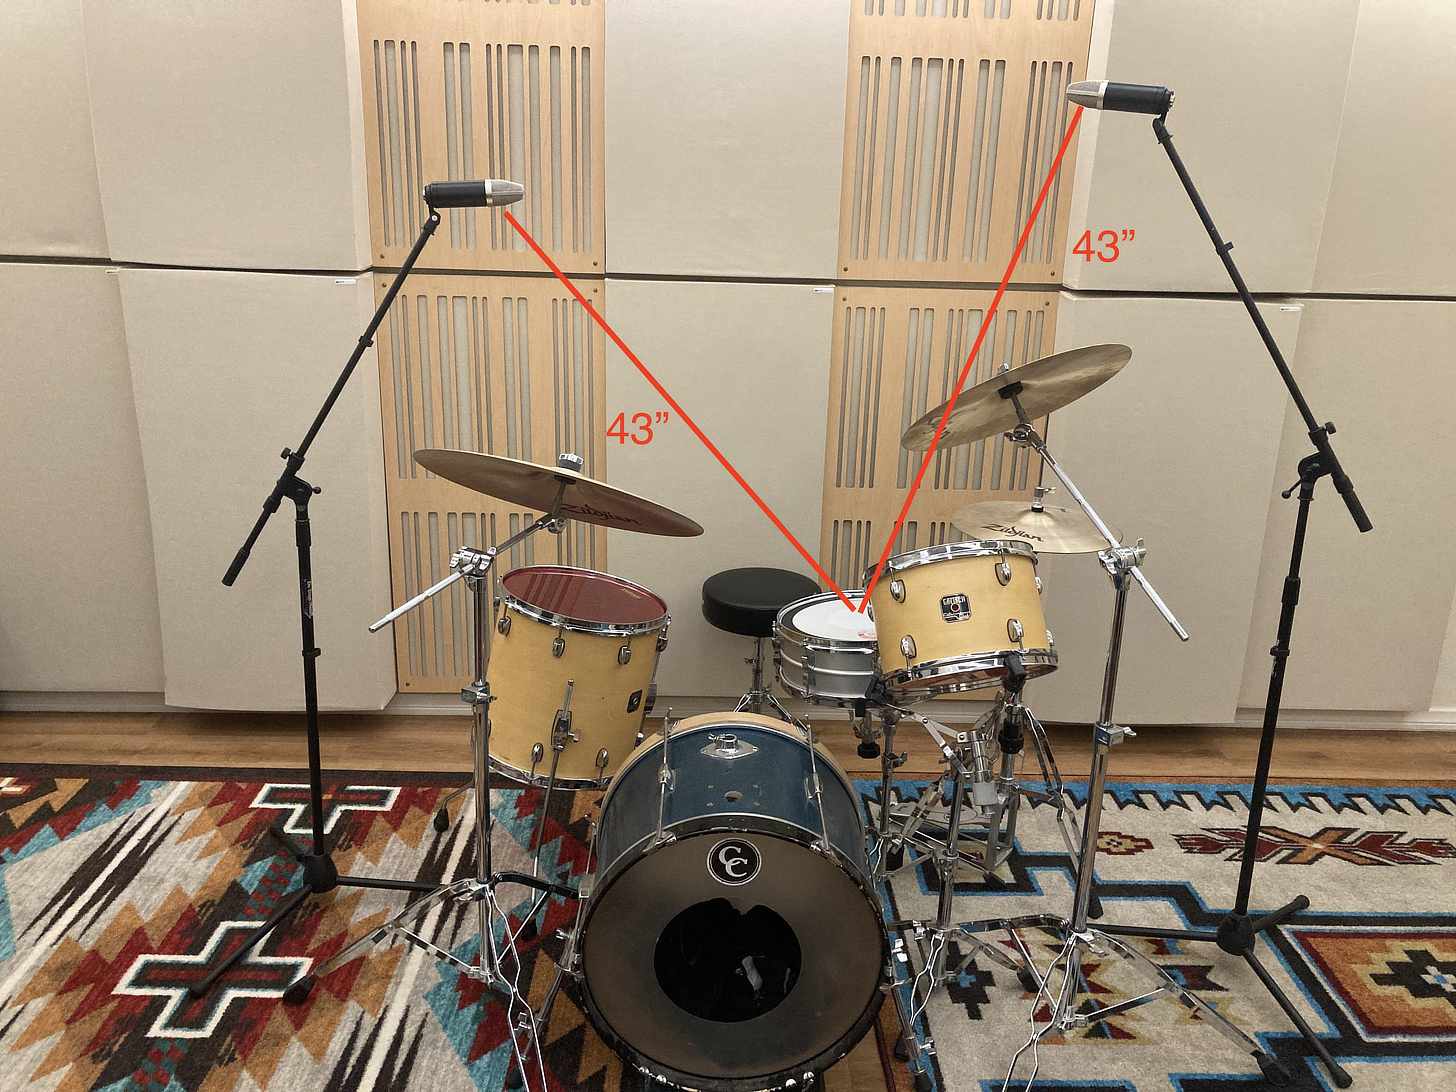
6. Place Spaced Overheads Equidistant From the Snare Drum
The most common stereo overhead mic configuration for drums is probably the spaced pair — two (usually identical) mics placed above the left and right sides of the kit. The spaced pair is a great way to get a wide and clear stereo image of a drum kit, but it comes with one potential pitfall: carelessly placed mics will result in a snare drum that feels thin or leans a bit to one side.
Fortunately, there’s an easy solution. When placing spaced overheads, measure their distance to the center of the snare drum. Place one overhead so it’s looking down on the ride and floor tom, the other so it’s looking at the crash, rack tom and hi hat, then adjust both until they are the same distance from the snare. Using this technique, the snare will come through centered and strong.
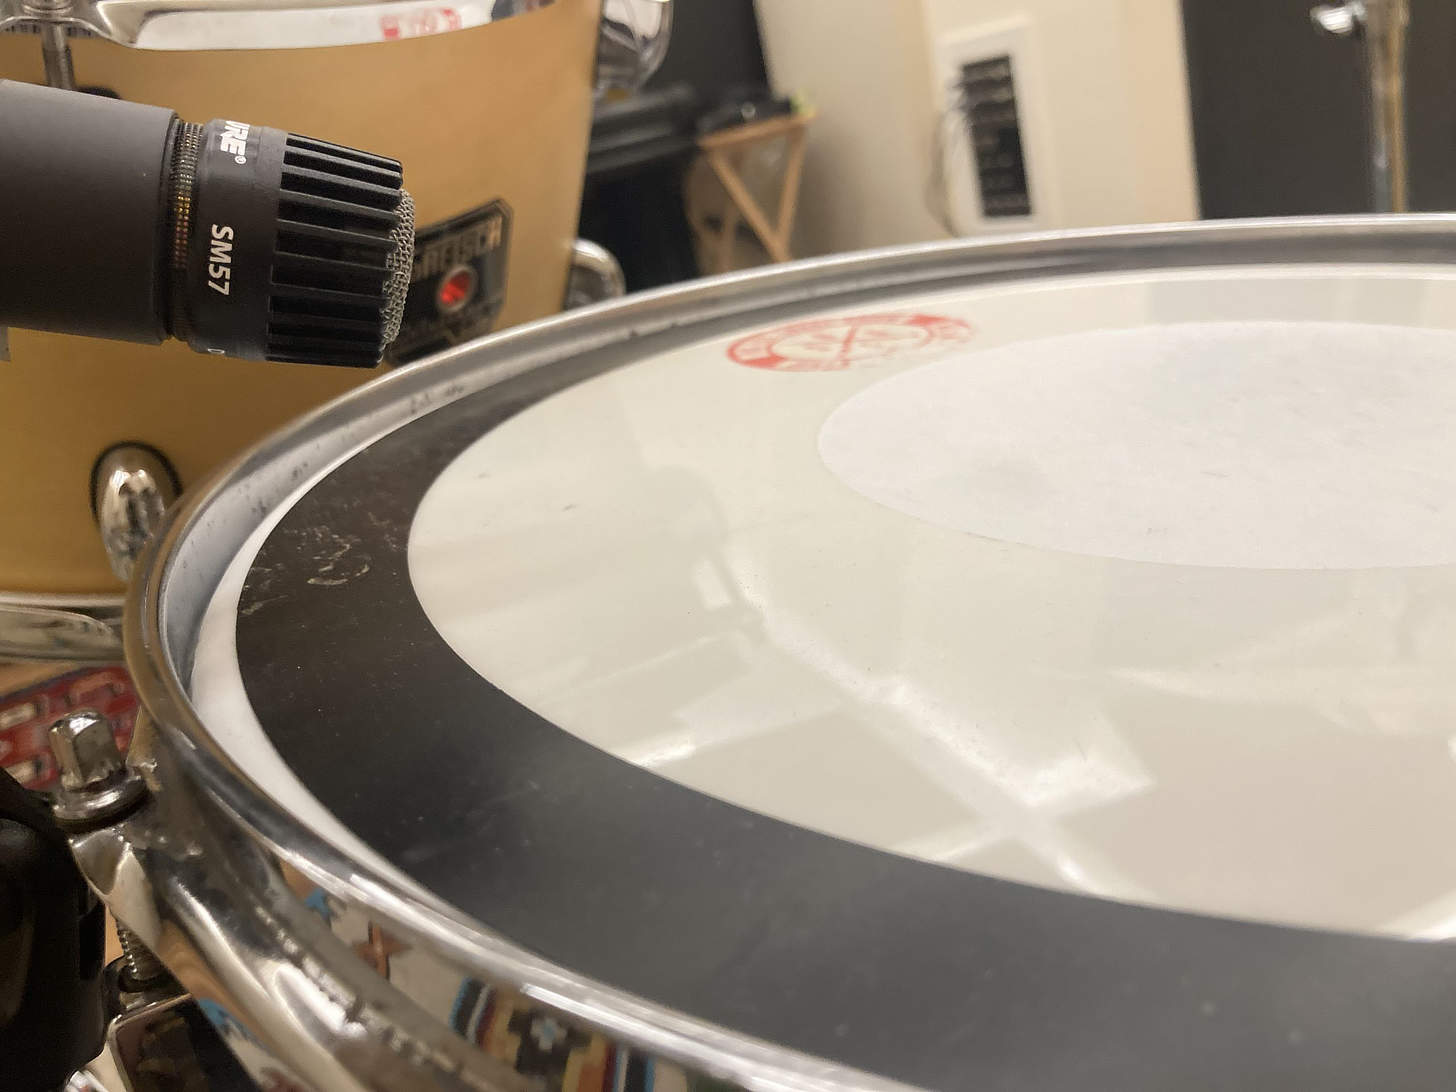
7. Use Close Mics for Clarity and Control
It can be tempting to think of, say, a snare mic as the basis of your snare sound. And to a degree it might be, but try this: solo your overheads and listen to the snare. Now solo the snare mic. Which one actually sounds like a snare drum? The snare close mic likely sounds kind of weird out of context, while the overhead(s) probably sound much more natural.
That said, close mics are crucial to getting a drum recording that hits hard and gives you flexibility during mixing. They help capture the snap of the sticks on the head and real low end & low midrange meat. They will also give you more precision in your stereo image when panned properly, and they’ll give you the ability to “turn up” individual drums in the mix.
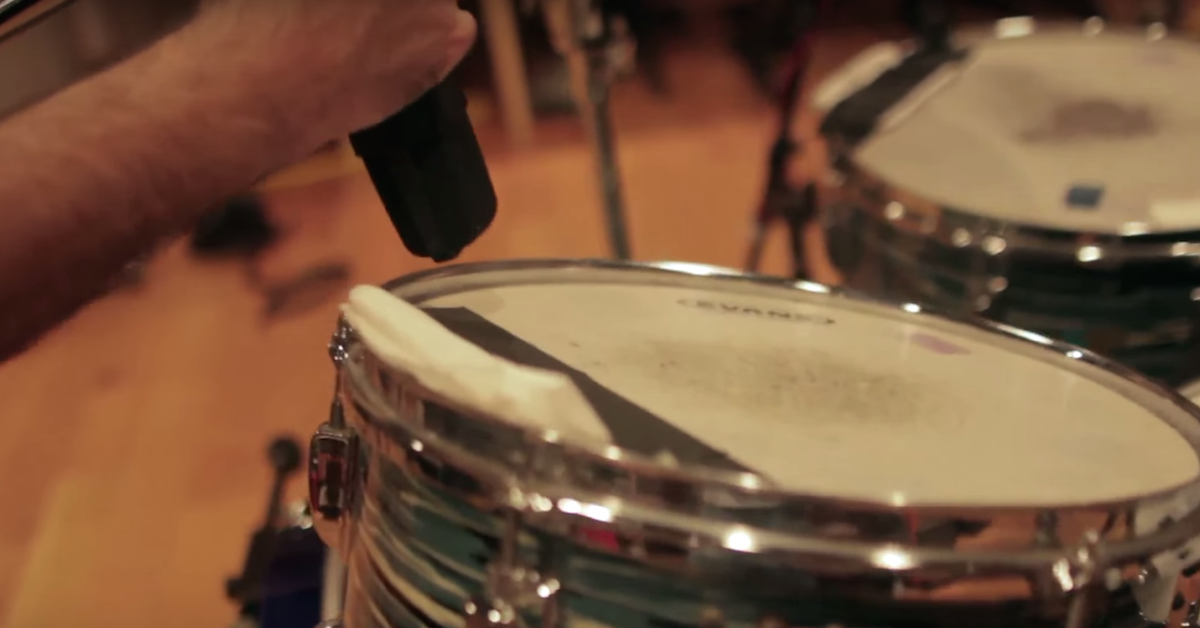
Close mic placements might include both top and bottom mics for snare and toms (point the top mic where the stick hits the head) and inside and outside kick mics. Find the combination that does the most to reinforce your overall drum sound.
8. “Character” Mic Placements Are Your Secret Weapon
Many people’s drum recording recipes include mic placements that can sound kind of awful when soloed, but add vibe and character when mixed in with a more traditional setup. Common placements include “front-of-kit” mics, “underheads” and my personal favorite: the “wurst” or “knee” mic.
These sorts of placements can sound weird or ugly on their own, but that ugliness can be a great way to add power and a unique sound to an otherwise sterile drum recording. They will often be the best place to find grit and sustain for snares and toms.
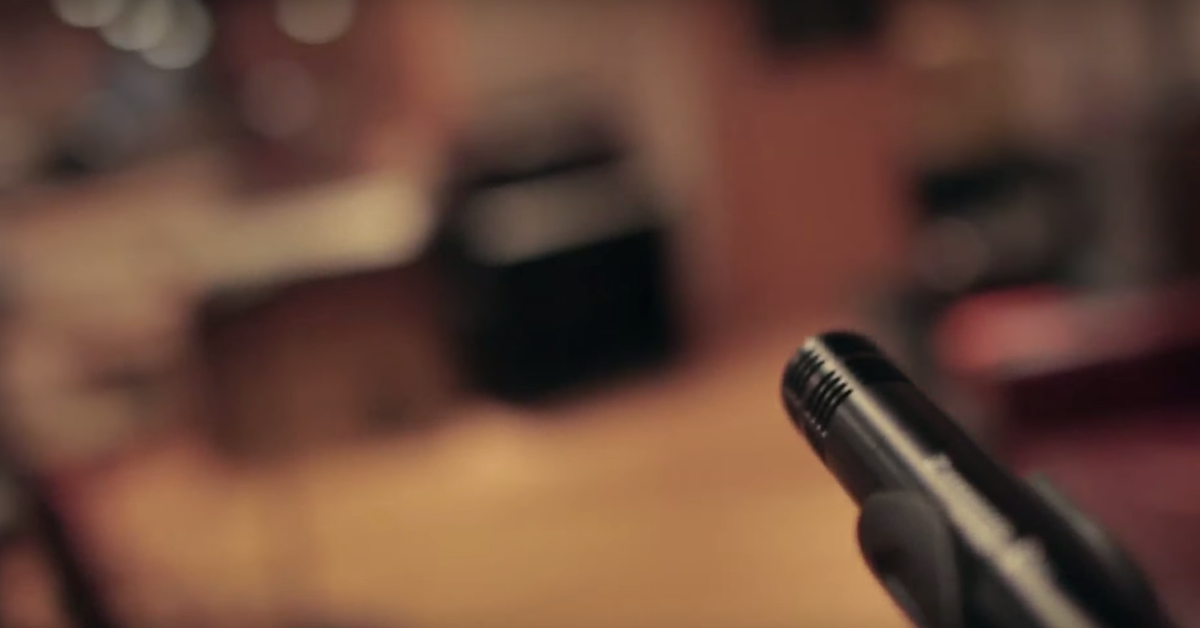
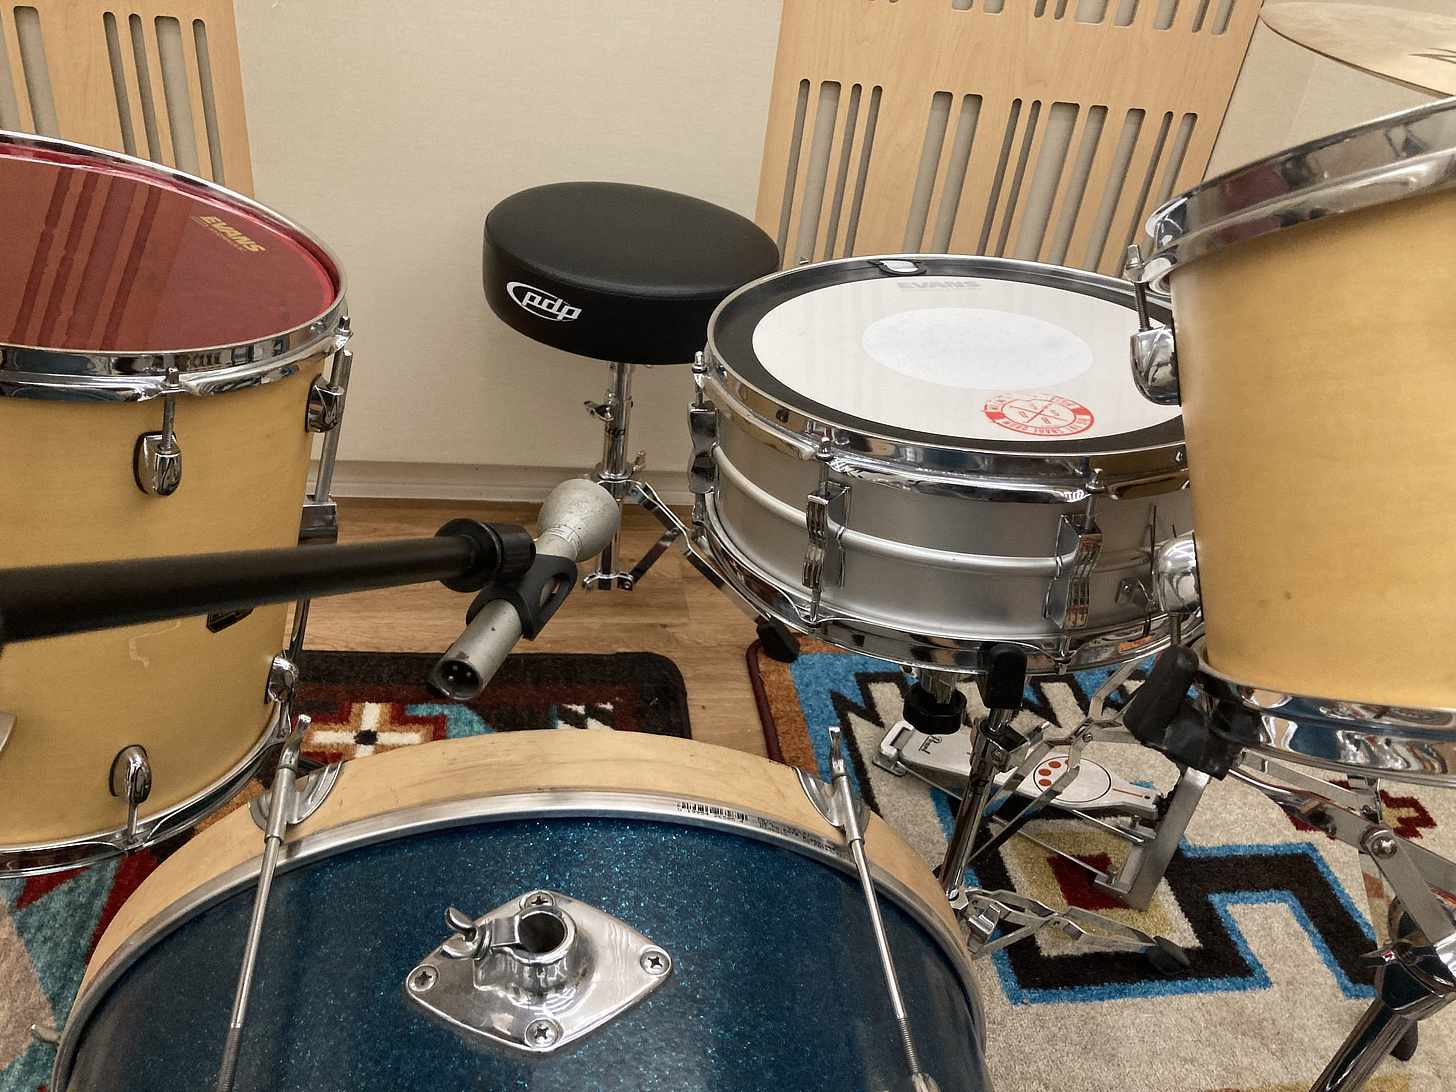
Wurst Mic: The Best Mic???
If you’re new to this sort of “character” placement, the “knee mic” can be an easy starting point. Place a mic above the batter side of the kick drum, “looking at” the snare drum from the side (in front of the drummer’s knee, hence knee mic). I find it helps to measure so that it is equidistant from the place where the batter strikes the kick and the center of the snare top head.
My favorite for this placement is the Electro Voice 635A — an omnidirectional dynamic mic that will capture the shells all equally well. Other engineers might prefer cardioid or figure-8 mics in this position.
This placement can be great for aggressive treatment, especially heavy compression — try an 1176 in “all in” mode. You might also find that it offers a good mix of snap and sustain, with a balanced picture of the whole kit, even with minimal treatment.

Ready to elevate your ears?
It doesn’t have to take years to train your ears.
Get started today — and you’ll be amazed at how quickly using Quiztones for just a few minutes a day will improve your mixes, recordings, and productions!
9. Check Phase Relationships Between Mics
Once you’ve got all your mics set up, it’s crucial to make sure there aren’t problematic phase relationships between any of them. Having lots of mics on one source can cause issues when those mics pick up waves that interact destructively with one another.
The “phase invert” button on channel strips (or your DAW’s utility plugin) is one tool you can use to solve phase issues. Generally, a multitrack drum recording will need a mic or two to have its phase flipped — especially when using top and bottom mics on snares and toms. Out of phase mics will sound hollow when combined, often causing drums to disappear into a mix. Correcting the issue will restore body in the low end and midrange.
Flipping phase on preamps can only do so much, though, and sometimes problematic phase interactions between mics means it’s time to adjust your placements. Don’t sweat it too hard, though — moving a mic a few inches is often enough to get things back in phase.
Looking at waveforms of recorded drums can offer some insight that might help you understand phase problems better. Does your snare mic track look like a mirror image of the same snare hit in the overheads? That might be a sign that you’ve got a phase issue to deal with.

Kick and wurst mic inverted-looking waveforms — that kick might be a candidate for a phase flip
10. More Mics, More Problems
I know, photos of drum sessions that use a zillion mics look pretty damn cool. Like, wow man — they must be recording some sick sounding drums with all those mics.
But let’s be real here: you’re not Steve Albini. (If you are in fact Steve Albini, yo — hit me up! I love the way you record drums.) If you’re reading this article, you’re probably having issues with tracking drums, or are new to it entirely. You’re probably tracking in a less-than-ideal drum room and have a limited mic locker.
Do yourself a favor, and make things easy while you’re still learning about this stuff. For now, stick to the basics: get an overhead sound you like, add in kick and snare mics & tom mics if necessary. Maybe try a room or “character” mic placement like I described above — see how it works out.
Then, when you’re done tracking and it’s time to mix…
11. Throw Out Tracks You Don’t Like
Ok, so this is more of a drum mixing tip than a recording tip, but it’s worth including here. Whether you were the one who tracked drums, or you’re working with a recording that was made by someone else, there is no law compelling you to keep mics in the mix if you don’t like what they’re doing.
Sometimes placements work for one song but not another. Sometimes the engineer wanted to try a placement that just didn’t work out. The reason doesn’t matter — if a mic in a multitrack drum recording doesn’t sound good, then just don’t use it.
Hi hat mics are usually the first track to get scrapped. They can be a helpful visual guide for editing drum takes, but often hurt the sound of the rest of the kit. Once in a blue moon, you actually need them to hear the hi hat clearly. Sure, it happens. Cymbal spot mics are in the same category — use them if you need them, dump them if you don’t.
Room and “front of kit” mics, as cool as they can be, might also be candidates to end up in the trash. This is where that “having a vision” thing really comes in handy. When you know what you want your drums to sound like, it’s much easier to make calls about which mics are going to get you there.
The Stuff I’m Not Saying
Though I did sneak in a few of my favorite specific techniques for drum recording over the course of this article, you might have noticed a conspicuous lack of certain details: what sort of kick inside/outside mic pairings work well? Are ribbons or condensers better as overheads?
The reason for that is simple. I wanted this article to be something that makes drum recording noobs feel empowered to get to work with the tools they already have — not to make them spend hours searching eBay for deals on tube mics. Maybe more importantly — I’ve heard more recordings of drums where the toms sounded bad because nobody tuned them than because the close mic was off by an inch; more recordings where the drums sounded like garbage because the kit was in a weird part of the room than because small diaphragm condensers were used instead of large diaphragm.
Conclusion
Hopefully now, at the end of this article, you’re feeling a little more ready to press record on the drums of your dreams. No? Ok, here’s the 30-second version:
Find a drum kit you don’t hate.
Tune it.
Use a mono overhead (stereo overheads if you must), a kick mic and a snare mic.
Check the phase.
Rock & roll.
Eleveate Your Ears