5 Tips for Getting Huge Drum Sounds
09/5/2016
Article Content
Before even getting started, I probably need to qualify what I’m going to be talking about in this article.
When I say the word “Huge,” I’m specifically talking about a sense of space.
I think the desire for big drums is pretty ubiquitous, but the concept of size in the Hip-Hop world is different than it is in Rock.
When a Hip Hop cat asks for the drums to be “huge”, I equate that with words like “very forward,” “loud,” “punchy,” “tight,” “full spectrum.”
When a Rock person asks for “huge,” I think “big sense of space,” “bombastic feeling,” “full but open.” They are contextually very different.
These words are all subjective, and I say all that to say this: If you’re a Hip-Hop artist or an EDM producer, this article isn’t really going to apply to your genre norms.
This article is for the Rock guys, and the Pop people who are using acoustic drums or going for a live drum feel.
That said, even if this doesn’t directly apply to what you’re doing, there’s nothing wrong with taking in a bit of info aimed at someone else because it may inform your own music in other ways.
So, ok, let’s get to it … five tips for getting huge sounding drums.
1. Embrace The Space
When it comes to tracking vocals, give me a properly designed iso any day of the week — or a really balanced live room and some gobos. Guitars, I can get away with a closet and an SM57. Piano, we can go under the hood. But drums — I need space.
Even if that space isn’t acoustic perfection. I’d rather have a concrete basement than a large iso. I want to engage the room and embrace its personality.
It’s actually easier to balance a weird space with EQ than it is to create a sense of character and energy to a very controlled space.
2. Fake It If You Can’t Make It
But if you don’t have a basement, church or warehouse at your disposal, that’s ok. There’s a few tricks to liven up your drum room.
The first is: compression.
Compression can be used to effectively bring up the sustain of your room capture and overheads.
This has two effects: one being that it makes the room appear larger because the room tail is lasting longer, and the other being that the inherent character of the room becomes more present. Your sterile sounding living room might actually have a lot of personality hiding in the depths of the reverb tail.
The second is: distortion.
No character? Fine, let’s crunch it up and brute force some character in there.
A little Decapitator or Sansamp can take the blandest room and make it unique. Fear not the grunge my friends.
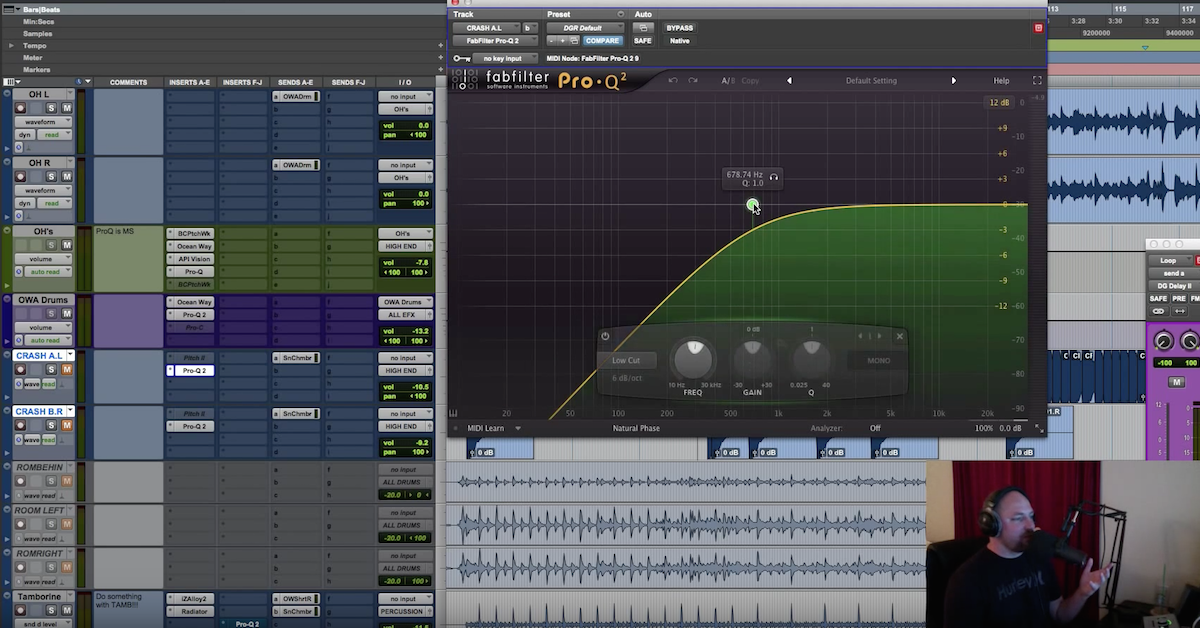
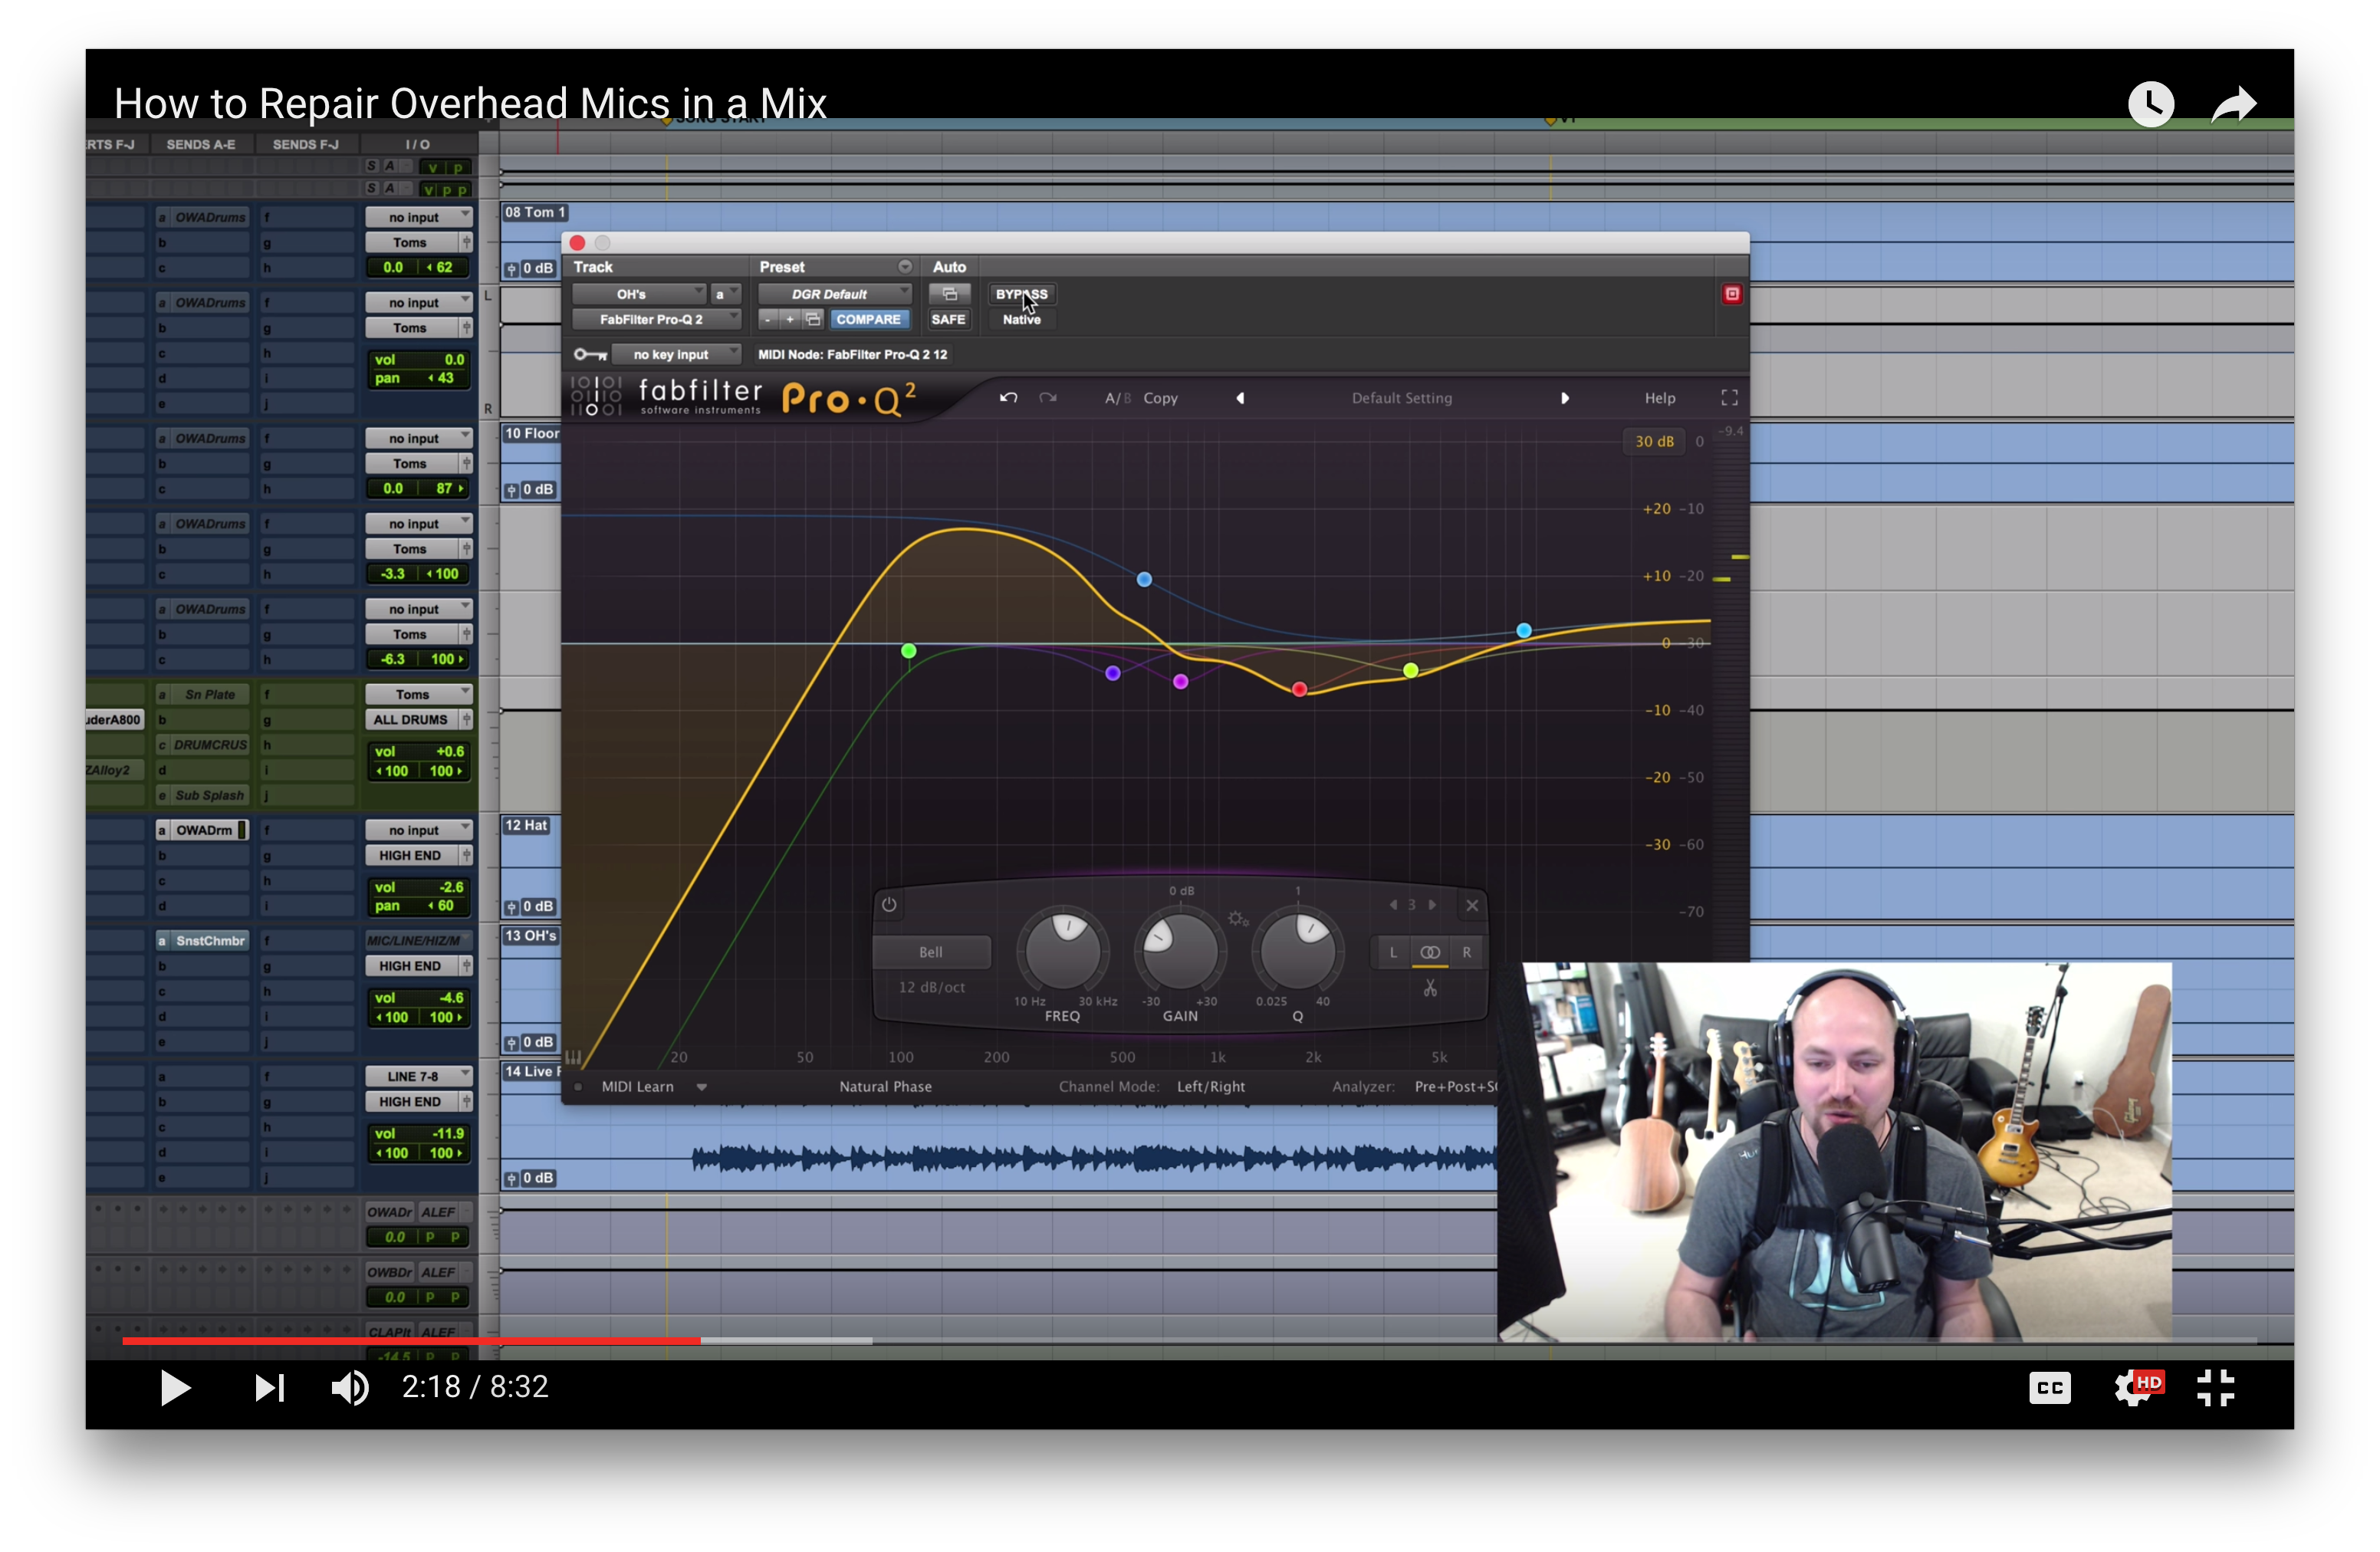
3. Focus On The Rooms And Overheads
This might be a bit tautological, but I think in 2016 there’s so much emphasis on the close mic drum captures that we can easily forget that the size of the drums are really inherent to the room mics and overheads.

Ready to elevate your ears?
It doesn’t have to take years to train your ears.
Get started today — and you’ll be amazed at how quickly using Quiztones for just a few minutes a day will improve your mixes, recordings, and productions!
Frankly, close mics can be sample replaced with a pass — but rooms and overheads, not so much. I would spend the majority of my tracking time getting these things right, and the majority of the mix getting them right as well.
From just the overheads and rooms alone we should have a full picture of the kit — including the kick! I would save hi-passing the rooms and overheads for the end of the drum balancing. If I can keep the low end in there and make the kick still feel punchy, I’m going to get a bigger sound than if I chop the soul out of the low end with filters. Sometimes it’s a must, but I want to wait until I need to do it before I start actually doing it.
4. Contrasting Dynamics
This is a bit speculative so no dogma here, just experiment with this advice in mind.
If I’m really compressing my overheads and bringing out the sustain/rounding out the attack, I want to bring my attack back with the close mics. Conversely if I’m making the overheads really punchy I want to bring the fatness back with the close mics.
Part of “bigness” is fullness, and these contrasting dynamics are a great way to have that cake and eat it too. If I’m using a fast attack and medium release compression on the overheads, I’m going to get that splashy rounded sound. I gain a sense of fullness and density, but I inherently lose a bit of punch.
By slowing down my compression attack and getting that “hard rock” sound on my snare/kick, all that punch immediately comes back when I blend the close mics in. And vice versa.
5. Watch The Low-Mids
There’s a strong temptation to take out a ton of tone in that 300-700 Hz range. That’s where the mud tends to show up. But let’s think about where that mud is coming from.
Some of it might be overtones hopping off the drums themselves, but a good portion of it is: room tone. And you’ve probably picked up at this point the biggest part of “big” is the room!
If I want a really big drum sound, I need the room to exist in the mix. Cutting out all that room tone in the name of clarity seems like a good idea when we’re in solo mode or if we’re trying to make the drum kit sound an inch away from our faces. But once the full arrangement is in, the drums are going to feel smaller. And the benefits of cutting out those mud tones might not be nearly as noticeable.
Obviously if things are really dank down there, some attenuation may be necessary, but it’s easy to lose sight of the big picture and make our drums too tight and dry in the process. Fear not the mud my friends.
So those are my big tips on big drums — in the live drum kit context.
Premium Mix Training