What Is a Noise Gate? (+ 3 of the Best Gate Plugins)
05/3/2021
Article Content
Although they often don’t get the attention they deserve, one of the most useful tools in mixing are Noise Gates.
Today, we are going to be taking a detailed look at the various controls and usages of this awesome and under-appreciated tool, as well as some of the best plugin options available on the market. Let’s dive right in.
What Is a Gate?
As the name suggests, a noise gate (often referred to simply as a Gate) is a processing tool which allows you to essentially “gate out” (or mute) audio which falls below a specified volume level.
While gates can be used to clean up pretty much any sound source (to a certain extent), where they really shine is with drums and percussion.
When recording live acoustic drums for example: depending on the musical context and setup you’re working with, you may end up with a dozen (or more) individual microphones being used to capture every single element of the kit in maximum detail. This is especially true when you’re dealing with complex genres such as progressive heavy metal, where it’s common for drummers to turn up to the recording session with 2 kicks, 3 snares, 15 toms and 500 cymbals. Ok… I may be exaggerating just a tad… but not by much!
The thing is, when you place a microphone directly on a snare, that’s not the only thing it’s going to pick up. It’s also going to capture a significant amount of tom, kick, hi-hat and cymbal leakage, more commonly known as “bleed.”
While bleed isn’t always a bad thing, and can even be left totally intact in certain genres of music for the sake of preserving realism (in jazz, blues and indie for example), in musical contexts which rely heavily on precision (such as heavy metal, gospel and modern radio rock/pop) it’s often best minimized for the sake of absolute sonic clarity.
Cleaning out unwanted noise on sustained instruments such as vocals or guitars by hand is fairly simple and speedy, as the gaps which contain said noise are few and far apart. When it comes to drums, we’re potentially talking about hundreds (or even thousands) of hits for each piece of the kit throughout the duration of the song.
While it’s technically possible to go through and manually eliminate all of the unwanted bleed from each channel in a full drum kit recording, it would just take far too long. By the time you’ve gone through it once, you’ll probably walk away with too much PTSD to ever consider submitting yourself to the same ordeal ever again.
Anyway, this is where gating comes into play. Long story short, a gate essentially allows you to automate the noise/bleed-removal process.
Now that we know what they’re used for, let’s take a look at how you can go about setting them up:
Audio Gating 101
The main controls you’ll find on a standard, basic gate are threshold, attack, release and sometimes hold. When additional controls such as range and ratio are introduced into the picture, gating becomes expansion.
Essentially, gates and expanders are both just a variation on the same thing. Think of a gate as an expander with a high ratio, and an expander as a gate with a low ratio. This is similar to the difference between a limiter and a compressor. In fact, a limiter is basically the exact opposite of a gate, while an expander is basically the opposite of a compressor.
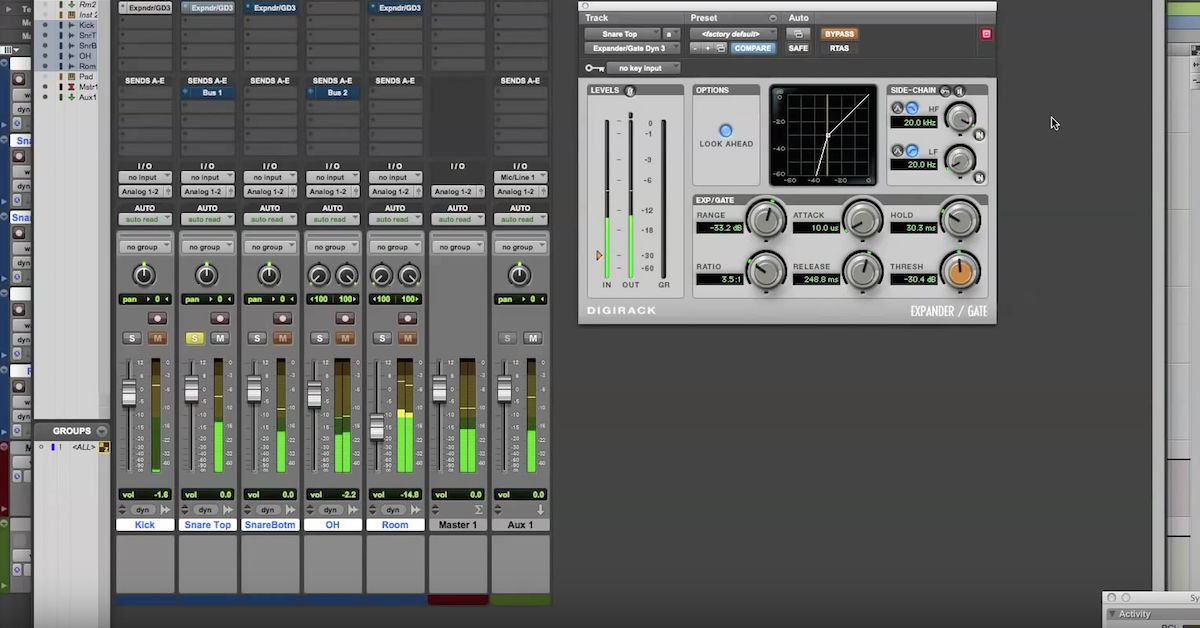
Noise Gate Controls
So in practice, the controls on a gate/expander all operate similarly to the controls on a compressor/limiter, albeit dynamically reversed.
The threshold control determines the minimum volume level at which audio will be allowed to pass through and be audible. Any audio which falls below the minimum threshold won’t be allowed through, essentially being muted.
The attack control determines how quickly the gate will open once audio has surpassed the threshold. A fast attack will open the gate quickly, allowing most of the transient of a sound to pass through untouched, while a slower attack will open the gate slowly, chopping off some of the initial transient on the way through.
The release control determines how long the gate will stay open after the signal which originally opened it has gone back below the minimum volume determined by the threshold.
With some gates, you’ll also be given a hold control, which determines how long the gate is “forced” to stay open after it has been triggered. This takes place between the attack and release cycles. Once the attack and then the hold cycles have been completed, the gate/expander will move on to the release cycle.
The range and ratio controls allow you to control the severity of the reduction which is being applied to the signal.
Range, also often called “floor,” determines the maximum amount of volume reduction which can occur. For example, you might not want to totally get rid of the bleed, but simply to reduce it by a flat 10 dB. The range control is the way.
The ratio control adjusts the severity of the gain reduction which occurs after a signal has gone below the specified threshold. Gates typically operate at a ratio of 100:1 or higher. For example, at a 100:1 ratio, any audio which goes below the threshold is turned down to 1% of what it previously was, essentially being muted. As another example, if an Expander is set to a 2:1 ratio, any signal going below the threshold is halved in volume.
Noise Gates in Practice
While all of this technical info can seem a little overwhelming, setting up a gate in reality on something like a live snare drum recording is extremely simple:
Step 1 – Start by dialing in the fastest attack and release times possible so that the gate is opening and closing at lightning-fast speeds.
Step 2 – Raise the threshold to where only the transient snare hits are audible and most of the unwanted bleed is being muted.

Ready to elevate your ears?
It doesn’t have to take years to train your ears.
Get started today — and you’ll be amazed at how quickly using Quiztones for just a few minutes a day will improve your mixes, recordings, and productions!
Step 3 – Slow down the release to where the body/sustain of the snare is allowed to ring out more naturally, finding a good balance between snare length and amount of bleed allowed through.
Step 4 (optional) – If available, experiment with the hold, ratio and range controls, reducing the severity and harshness of the processing being applied from gating to expansion. This could potentially result in a softer, more musical reduction effect.
Step 5 (optional) – Depending on the particular plugin you’re using, you may also have access to sidechaining functionality. In the context of gating, side-chaining the gate’s input externally to a midi signal or “key spike” trigger track or internally to the fundamental frequency of the particular sound you’re working on can really help towards improving the accuracy of the processing by preventing the bleed from triggering the gate/expander. This allows you to pull down the threshold control much lower, preserving more of the snare’s original attack as a result.
Awesome! Now that you have a better idea of how to actually go about setting these things up, let’s take a look at 3 awesome gate/expander plugin options you should check out.
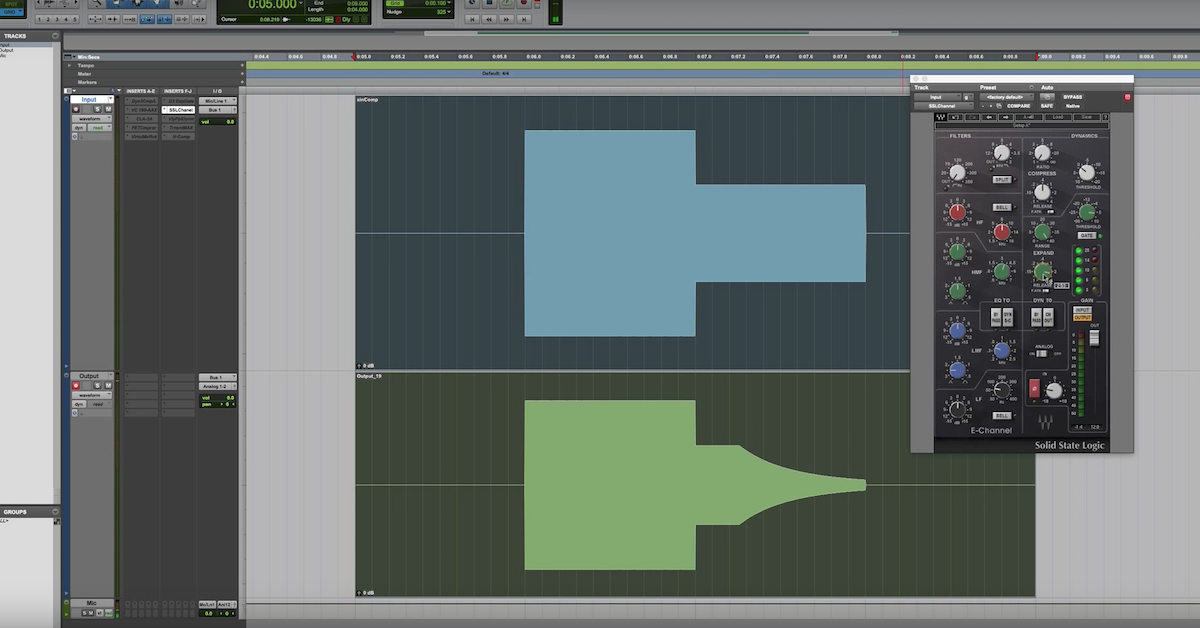
1. Basic Gating – Waves SSL E-Channel
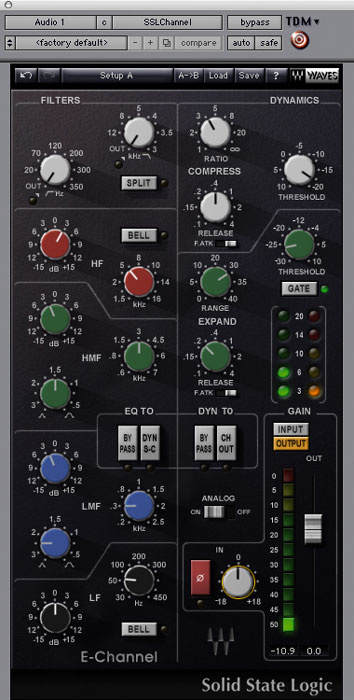
The gate/expander sections built into the SSL mixing consoles are classics, and have been used for the purposes described above on countless platinum records since the 80s. In the digital realm, we’re given access to this amazing tool via plugin emulations such as Waves’ awesome SSL E-Channel plugin.
While offering fairly basic gating/expansion functionality, the fact that this plugin is a fully functional all-in-one mixing channel strip means that this is a no-brainer, great bang-for-buck option. It includes a fantastic compressor/limiter section and one of the most acclaimed equalization sections in the whole of mixing.
2. Intermediate Gating – FabFilter Pro-G
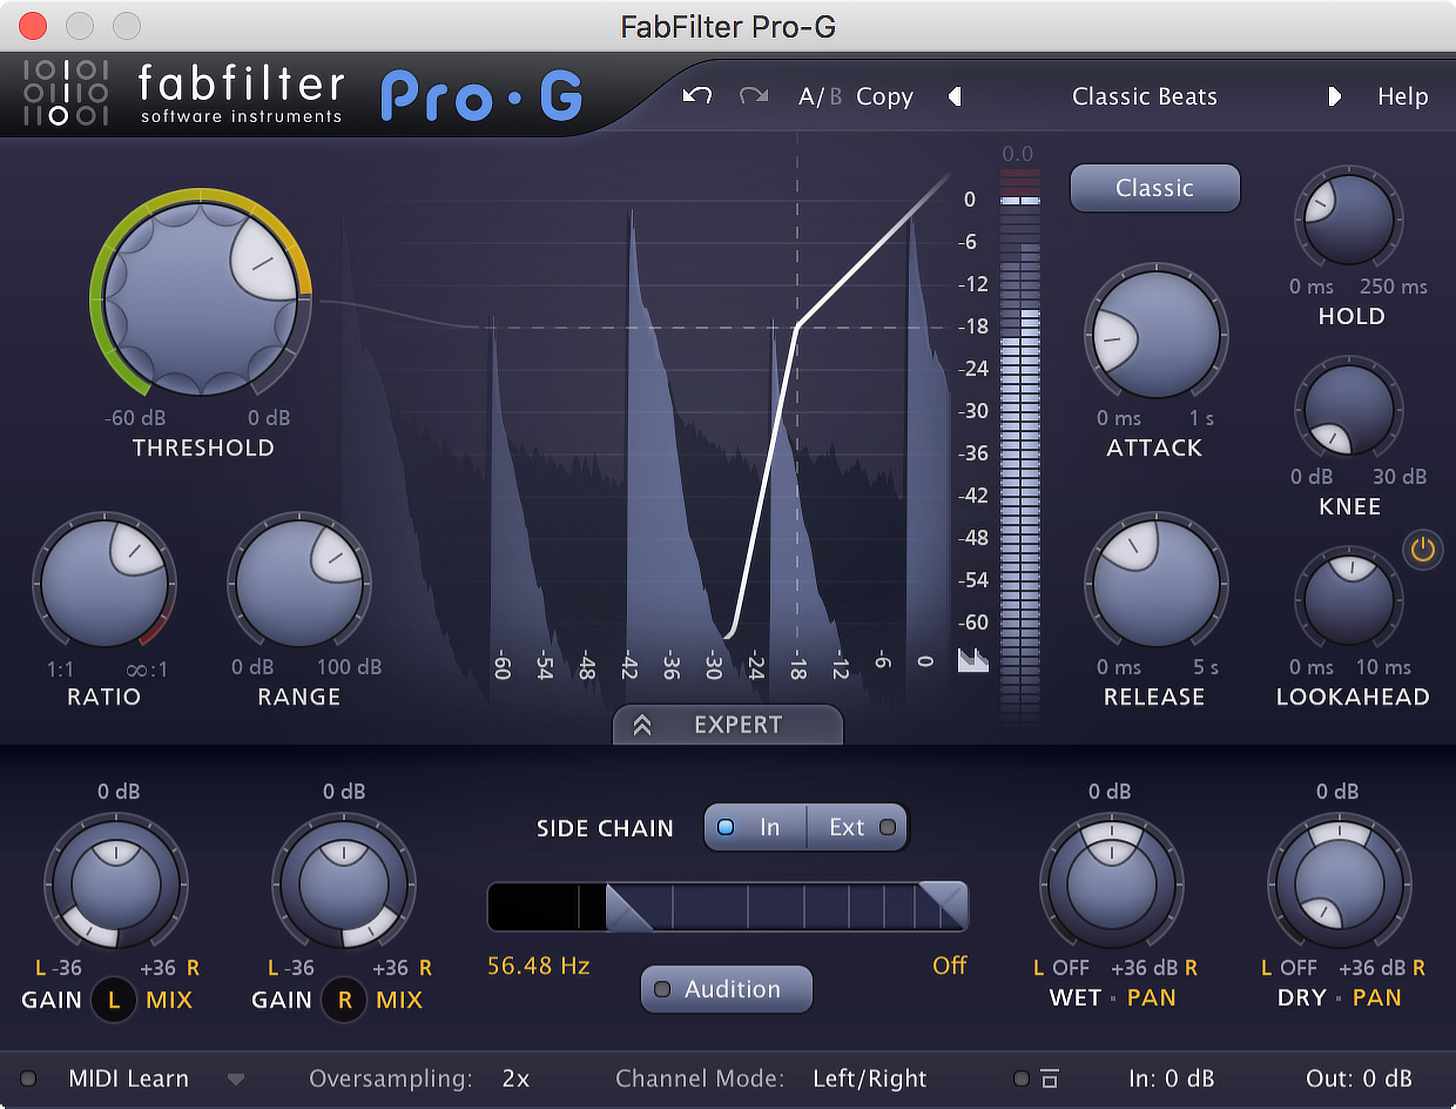
If you’re looking for a more advanced, dedicated tool to cover all of your gating and expansion needs, look no further than FabFilter’s Pro-G.
Pro-G comes with all of the bells and whistles we’ve talked about in this article and more. Being able to dial in lookahead times, which essentially allows the gate to “look ahead” into the future and foresee incoming transients with the goal of better preserving them, is worth the price of admission alone. Add on to that a great built-in sidechaining section which allows you to really hone in on the input signal you’re looking to preserve, and you’ve got one of the best gating plugins available on the market.
3. Advanced Gating – FabFilter Pro-MB
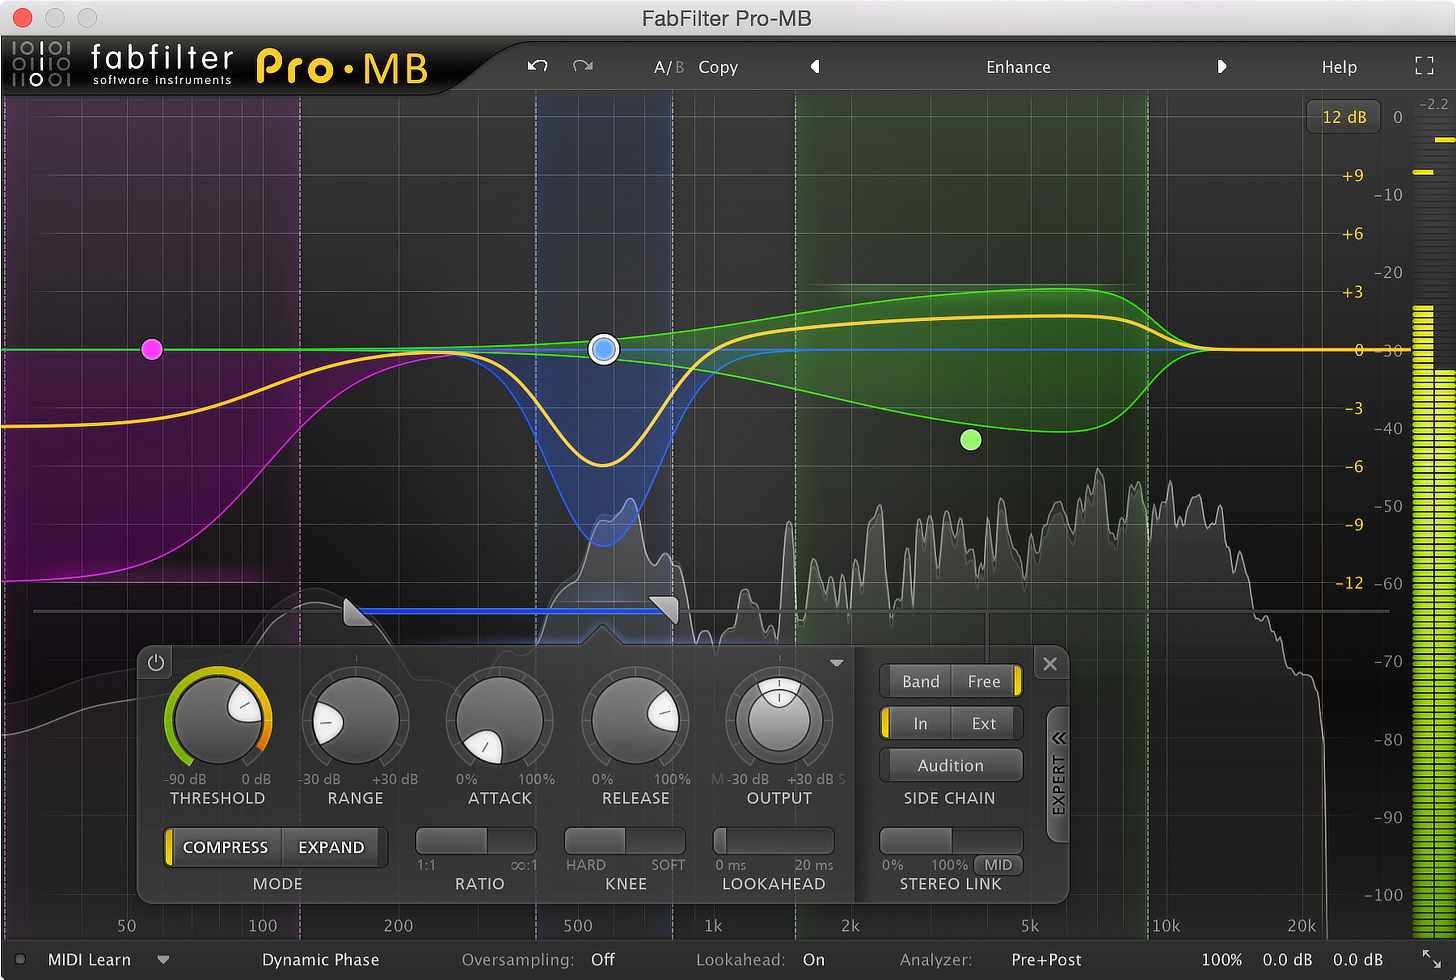
While not strictly a gate/expander plugin, FabFilter’s Pro-MB is a fantastic all-in-one mixing tool which allows you to do pretty much anything imaginable, including everything that Pro-G can do, on a multiband basis.
Seriously, if you can only have one plugin for the rest of your life, make it this one. EQ, compression, expansion, sidechaining, a spectrum analyser, multiband functionality… Pro-MB has it all!
Conclusion
I’ll admit that I was late to discover the full potential of gating and expansion, only really using these processors in their most basic form for the first few years of my mixing career. But when I finally gave them a fair chance… Man!
Nowadays, I’ll use several instances of Pro-MB all across my mixes to solve otherwise impossible problems in unique and often mind blowing ways.
For more insight into these amazing tools, and some great examples of how you can put them to use in your mixes, I highly recommend checking out my full Mixing With Gates video course on The Pro Audio Files On Demand. Cheers!
Premium Mix Training